

Goodness, I am just so excited to share this little project! I’m a storage and organization junkie, and of course I love fabric, so combining the two just puts me in a happy place. Making sure my surroundings are pretty and make me feel happy and inspired is on the top on my list (what list, no idea, but it’s important).
When I got my hands on this bundle of the new line Westwood by Monaluna, I knew I needed all these little critters hanging out with me everyday so I decided to make some storage baskets.
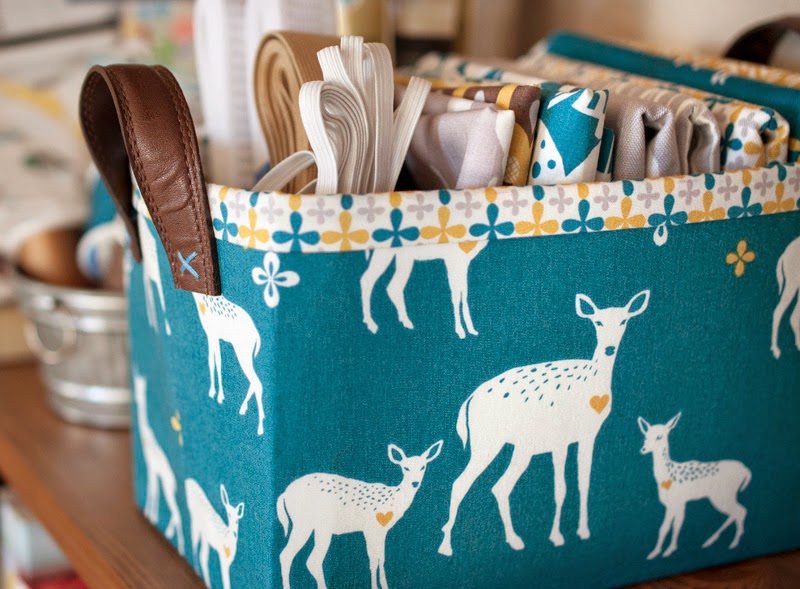
These baskets are really quick and easy to make and are fat quarter friendly (the largest piece you need is 17×15 so pull out those big scraps)! They are made sturdy with a layer of Peltex, but can also be made soft using fusible fleece or batting. You could even very easily sew this entire project by hand with no problem.
The handles shown here are made from a thrift shop leather belt I bought for 50¢ but you can also use scraps of leather (or pleather!). I love to deconstruct old bags, pouches, wallets and other various things I find for cheap to use on other projects. The handles can also be left off if you prefer.
I already have one hundred and one uses for these baskets in every room of my house, but right now I plan to make a bunch to fill with goodies and give as gifts! Aside from the holidays, you can fill one with food items and take to the host of a dinner party, baby items for a shower, fabric for ME… errr… I mean a friend. Shall I go on?
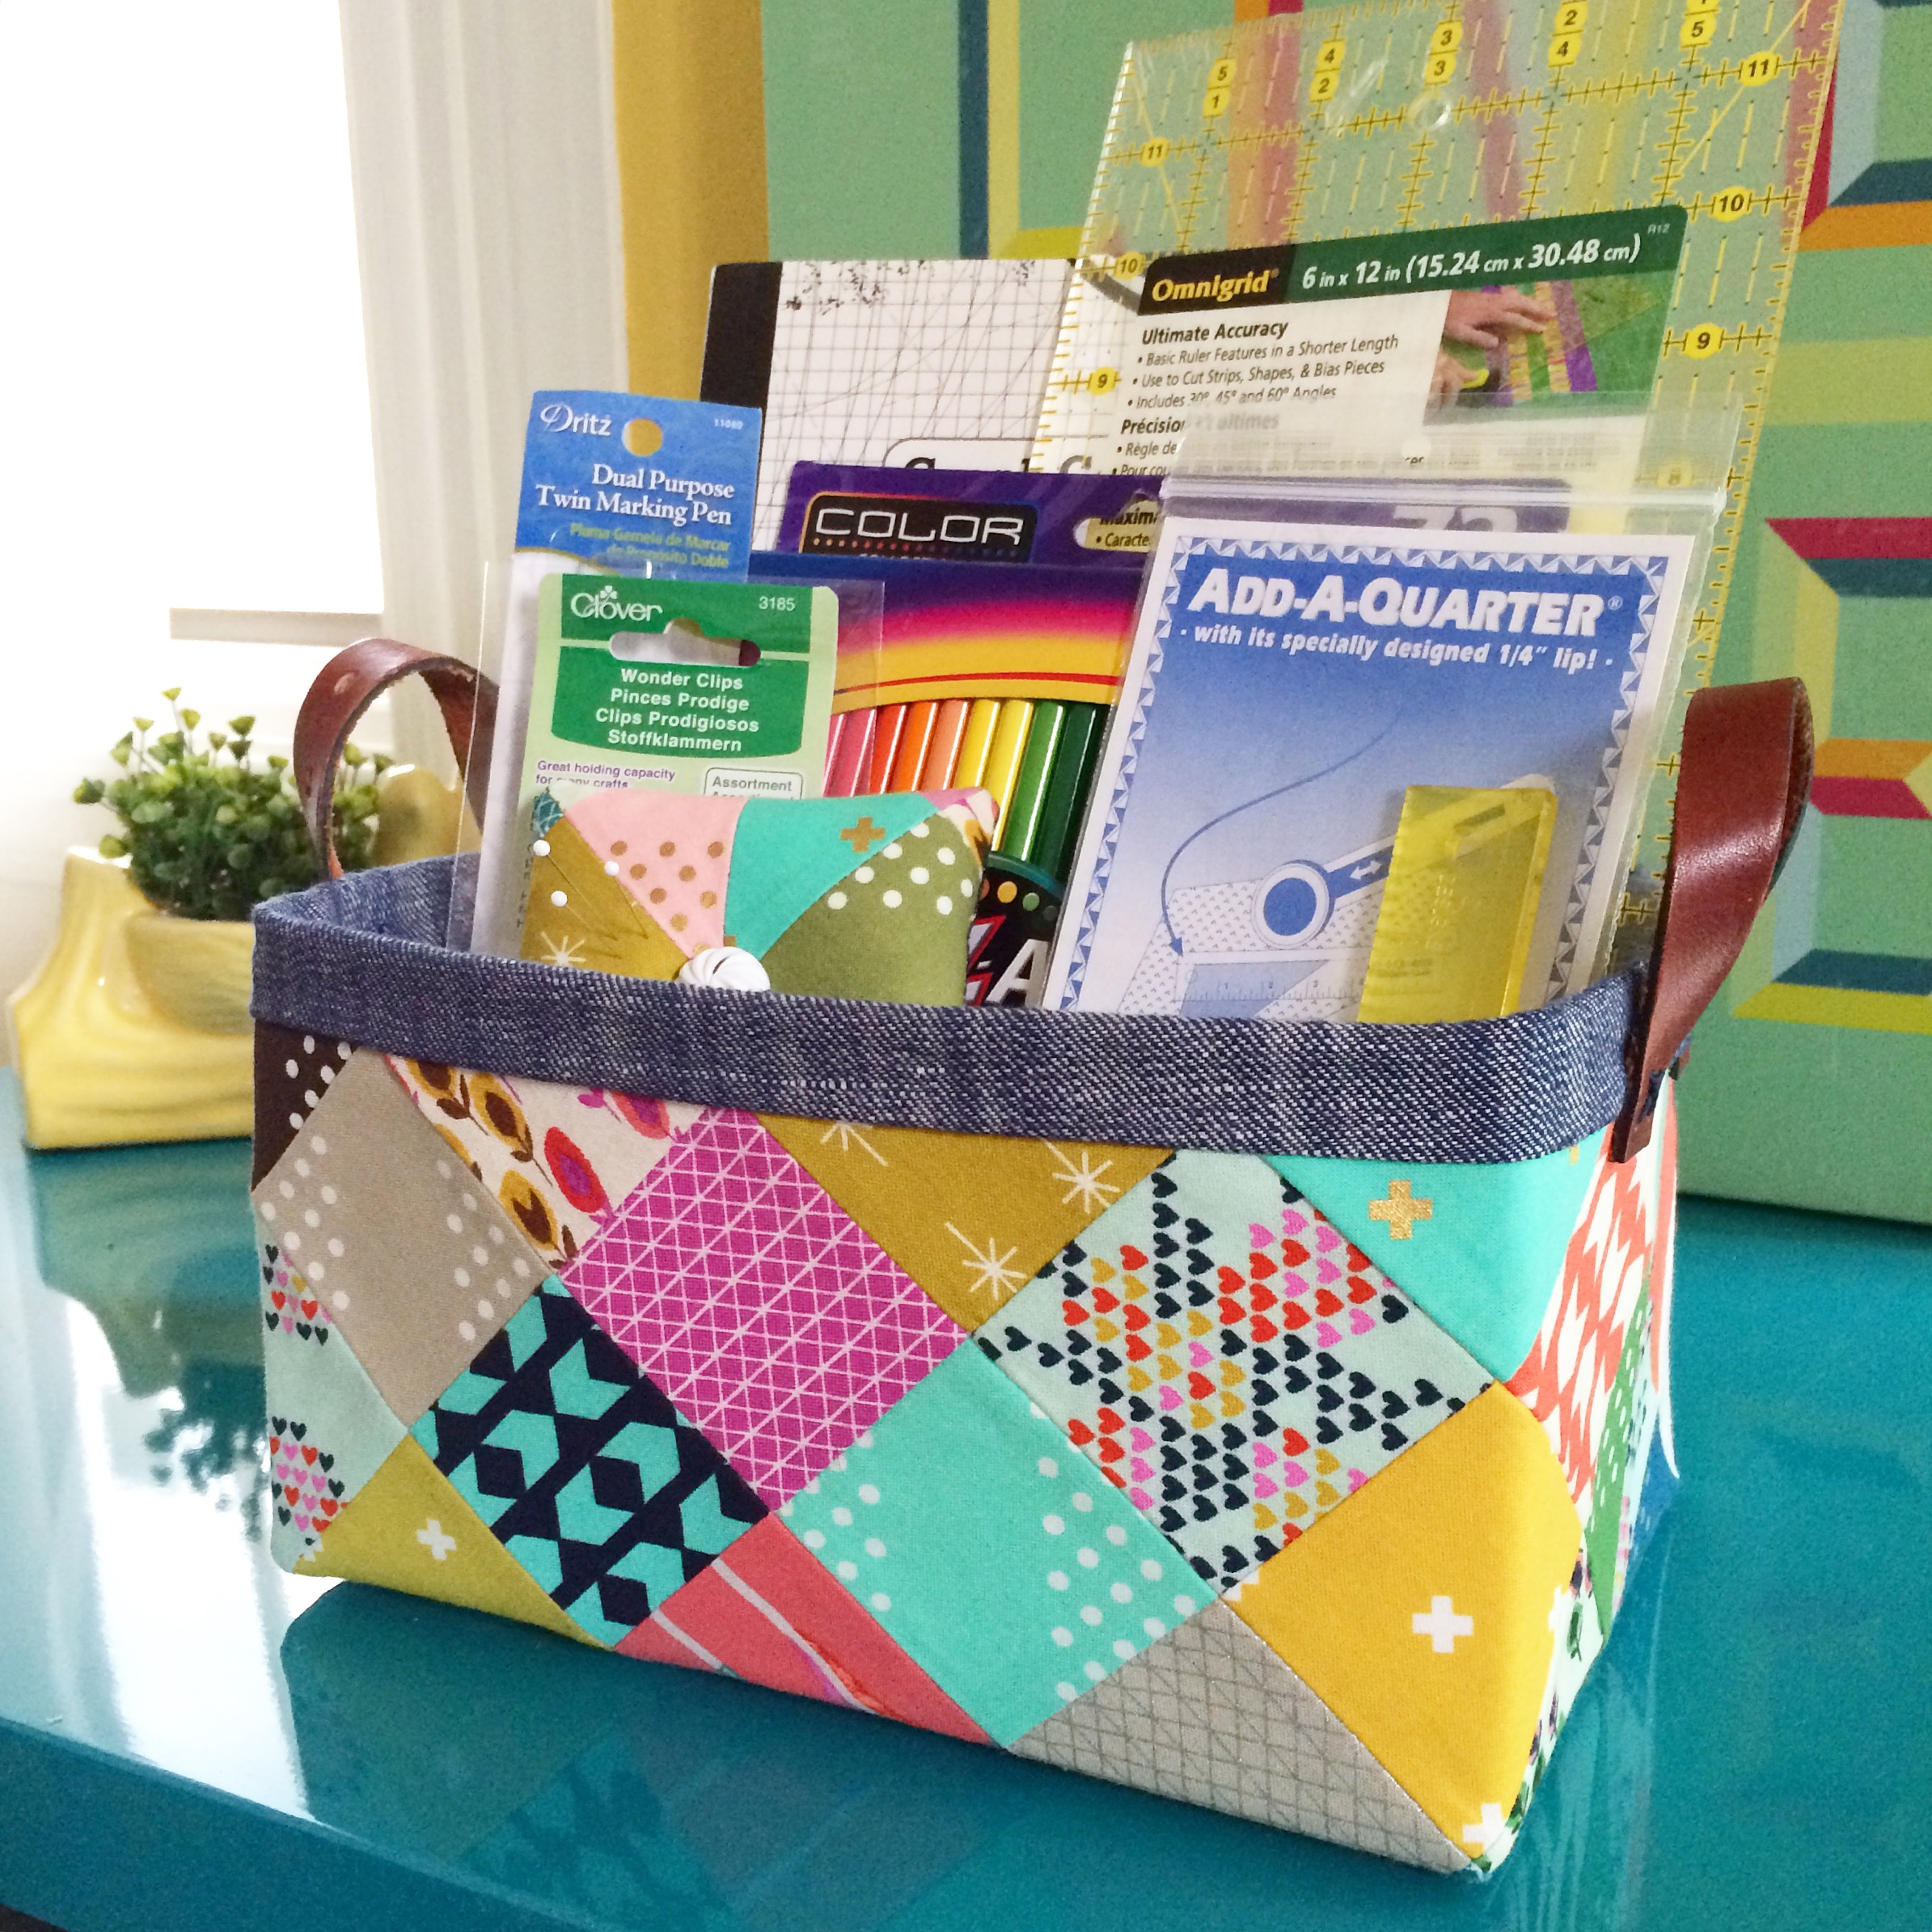
The pattern has been updated to include this super fun patchwork variation, too, AND instructions on how to make ANY SIZE basket you wish, from one inch to 1000 inches!
You can download a PDF of the pattern by clicking HERE or the image below >


I hope you enjoy this pattern! If you have any questions, feel free to comment below or email me anytime. I’m on instagram as lillyellasworld – please tag me if you make one, I’d love to see it! You can also use the hashtag #sturdyfabricbasket.
And because I’m just curious I have to know, which do you like the better, the owls or the deer?!
Happy sewing, friends! ~nicole


hi there! Yes, the Pellon interfacing specified is ultra thick and sturdy and creates the structure of the basket. You can find it by name at stores like Joanns Fabrics, Hobby Lobby and some Walmarts with a fabric section.
LikeLike
Animals don’t really matter as much as color for me. I love the teal fabric most of all!
LikeLike
I have been sewing for 50 years but i don’t understand … Does the fusible interfacing make the sides stiff enough without cardboard or something like that inside?
LikeLike
The Peltex is very stiff, almost like cardboard
LikeLike
This is totally going to be my next project. It’s something small that I can do in between those big (awesome, time consuming) quilt blankets. These baskets will be great gifts, and hey, Mother’s Day is a month away!
LikeLike
When I printed the instructions on letter size paper, the pattern pieces don’t measure the dimensions printed on them. For example, Pattern Piece A measures 3 13/16″ X 2 3/8″ when I print it but it says it should be 4″ X 2 1/2″. Should I be altering the pattern to 4″ X 2 1/2″ as specified or can I use the pattern pieces as they printed? Thank you!
LikeLike
Hi Tammy! If your pattern pieces are not the correct size, your printer is probably reducing the file when printing. Often times Adobe will default to a ‘fit to page’ or ‘fit to printable area’ setting, which will reduce the file just a bit when printing. You need to make sure this box is unchecked in your print settings when printing the files. Alternatively, you can just cut a pattern piece to the dimensions specified.
LikeLiked by 1 person
Hello Nicole, Thanks for the tutorial. I want to make a slightly bigger basket probably 10″ wide. Can you please suggest me the dimensions for the main/lining fabrics & interfacing .
Thanks,
Priyanka,
LikeLike
Hi! Thank you for your pattern. I’m excited to try these out. Would you be able to tell me how you adjust dimensions for different sized bins? I am trying to make 2 larger bins with dimensions of 15″ Wide x 24″ Length x 12″ high and 15″ wide, 24″ length and 26″ high. I would love to know how to adjust all the measurements because I love the look of these bins. Thank you for your help!
LikeLike
Hi Tori! You are very welcome. Unfortunately there is no easy way for me to explain how I do all the math. I basically just draw it all out on paper based on the finished dimensions and add a 1/2″ on all seam edges. Once I finish a few pending projects, I’ll see if I can figure out a way to do a tutorial on modifying the size. Sorry I can’t be on more assistance right now! ~ Nicole
LikeLike
Thanks for your pattern.
Isa (from France)
LikeLike
I tried to make this basket in the size of 23″ W by 9 1/2 “H and 9” deep. I followed your directions for the math and my husband confirmed there were correct. (We have 10 years of post graduate education between us- just saying this so you know we can do simple math!) When trying to sew the side to the bottom, it comes out with “dog ears”. I m guessing the cut outs are wrong and do NOT work for every size. I have wasted $30 in quilt fabric and Peltex thus far. Can you advise me please as to an answer to make this work? Thank you
LikeLike
Hey Claudie,
I’m sorry to hear you are having issues with the basket. If you can please email me directly (nicole@lillyella.com) or through the “contact” button on my site, or give me your email address, I’m happy to help you. Thanks! Nicole
LikeLike
Hello, I have tried to get a copy of the pattern with no luck.
LikeLike
Hi! I have modified this pattern before; the body and the cutouts. I can only recommend to you, and anyone else making modifications, that you test your altered pattern with paper or paperboard. This helped me to ensure that the outcome would be accurate before committing the fabrics. Good luck!
LikeLike
Thank you so much Nicole. You really stuck with me ( on a private pm) with advice, diagrams, and lots of help. (As a helpful hint to others, make sure you keep your cut out width and cut out height straight. I didn t and caused ” Santa s shop” to be a little behind!) Thank you again- I will watch your blog for other cute projects!
LikeLike
Hi I made the basket and was happy with it. I wanted to make a slightly bigger basket. I didn’t see how to adjust the peltex measurements. My cut out was too small. How do I adjust this. Thanks!
LikeLike
Hi Mary!
All the directions for customizing the basket are on page 7 of the pattern.
LikeLike
Hi! I’m very excited to try making this basket. I’d like to make one 13″wx13″hx15″d and your adjustment instructions (thanks for them!) indicate that the peltex would need to be w: 13+15=28″, h: 13*2+15 = 41″. The peltex is only 20″ wide, so this is bigger than I can get out of one piece. Any thoughts? Should I just divide into two pieces and add a few stitches on either side of the join to hold in place before fusing as is recommended for the sides? I don’t imagine seaming them is a great idea due to the bulk.
Any advice appreciated! Thanks!
LikeLike
Hey Beth! You can seam the pieces together butting up flat ends and using a zig zag stitch. The same way you join batting for quilts, if you’ve ever done or seen this. Depending on what you’ll be using the basket for, you can decide where to put these seams to avoid stress. They can be attaching the sides, or along the bottom somewhere etc. I hope this helps!
LikeLiked by 1 person
thank you so much for your pattern
LikeLike
This fabric basket tutorial is an absolute gem! Your enthusiasm for both storage and organization shines through, and it’s infectious. The Westwood by Monaluna fabric adds such a delightful touch, especially with those adorable critters. Your commitment to creating a happy and inspiring space is truly admirable. I can’t wait to try making these storage baskets myself; they seem like the perfect blend of practicality and aesthetics. Thanks for sharing your creative journey with us!
LikeLike
Hi, I tried to get a copy of your pattern and nothing happens! Will there be a link?
LikeLike