
![]()
Howdy, friends, I’m back! And I hope you’re ready to get crafty…
As I mentioned in my previous post, my (belated) stop on the Hawthorne Threads Oh, What Fun Blog Hop is all about easy-to-sew (and easy to customize!) projects that are perfect for holding holiday gifts. Ditch that wrapping paper! I’ll be talking about how modify my free Sturdy Fabric Basket pattern to create ANY SIZE finished piece and sharing an adorable fabric sack pattern that I think you’ll love.
This new in-house fabric line by Hawthorne Threads could not possibly be any cuter. I’m pretty sure I squealed a little when I first saw it. Some of the prints are perfectly holiday, but what I really love is that some of them are more neutral – winter themed, or just geometric – and can be used for a a variety of occasions, which I’ll talk about more later. So, let’s get to it!

These Sturdy Fabric Baskets are one of my favorite things to make. They’re quick and easy, and useful for so many things (plus, totally adorable!). I initially created the pattern a couple years ago to make baskets for holding fat quarters, scraps, trims, and notions in my sewing room, and then made one for holding remotes in the living room, another for hair accessories in the bathroom, and one for next to the door to catch my husbands wallet, sunglasses and all the miscellaneous junk that lives in his pockets!
You can showcase a fun focal print or create any patchwork design you like (there are patchwork directions in the pattern). The original pattern size (shown above and below) finishes at 8″ wide by 5″ high and 5″ deep, and is perfect for mixed gift baskets of items such as bath & body products or edible treats, just to name a couple ideas. I love these baskets so much, I want to gift them to myself! I can do that, right? I mean, I DID make them.
Another great feature of this basket size is that it’s perfect for holding Christmas cards, so your recipient can repurpose it after it’s emptied. You can also give a bag of potpourri along with it and it can be used a cute holiday decoration!
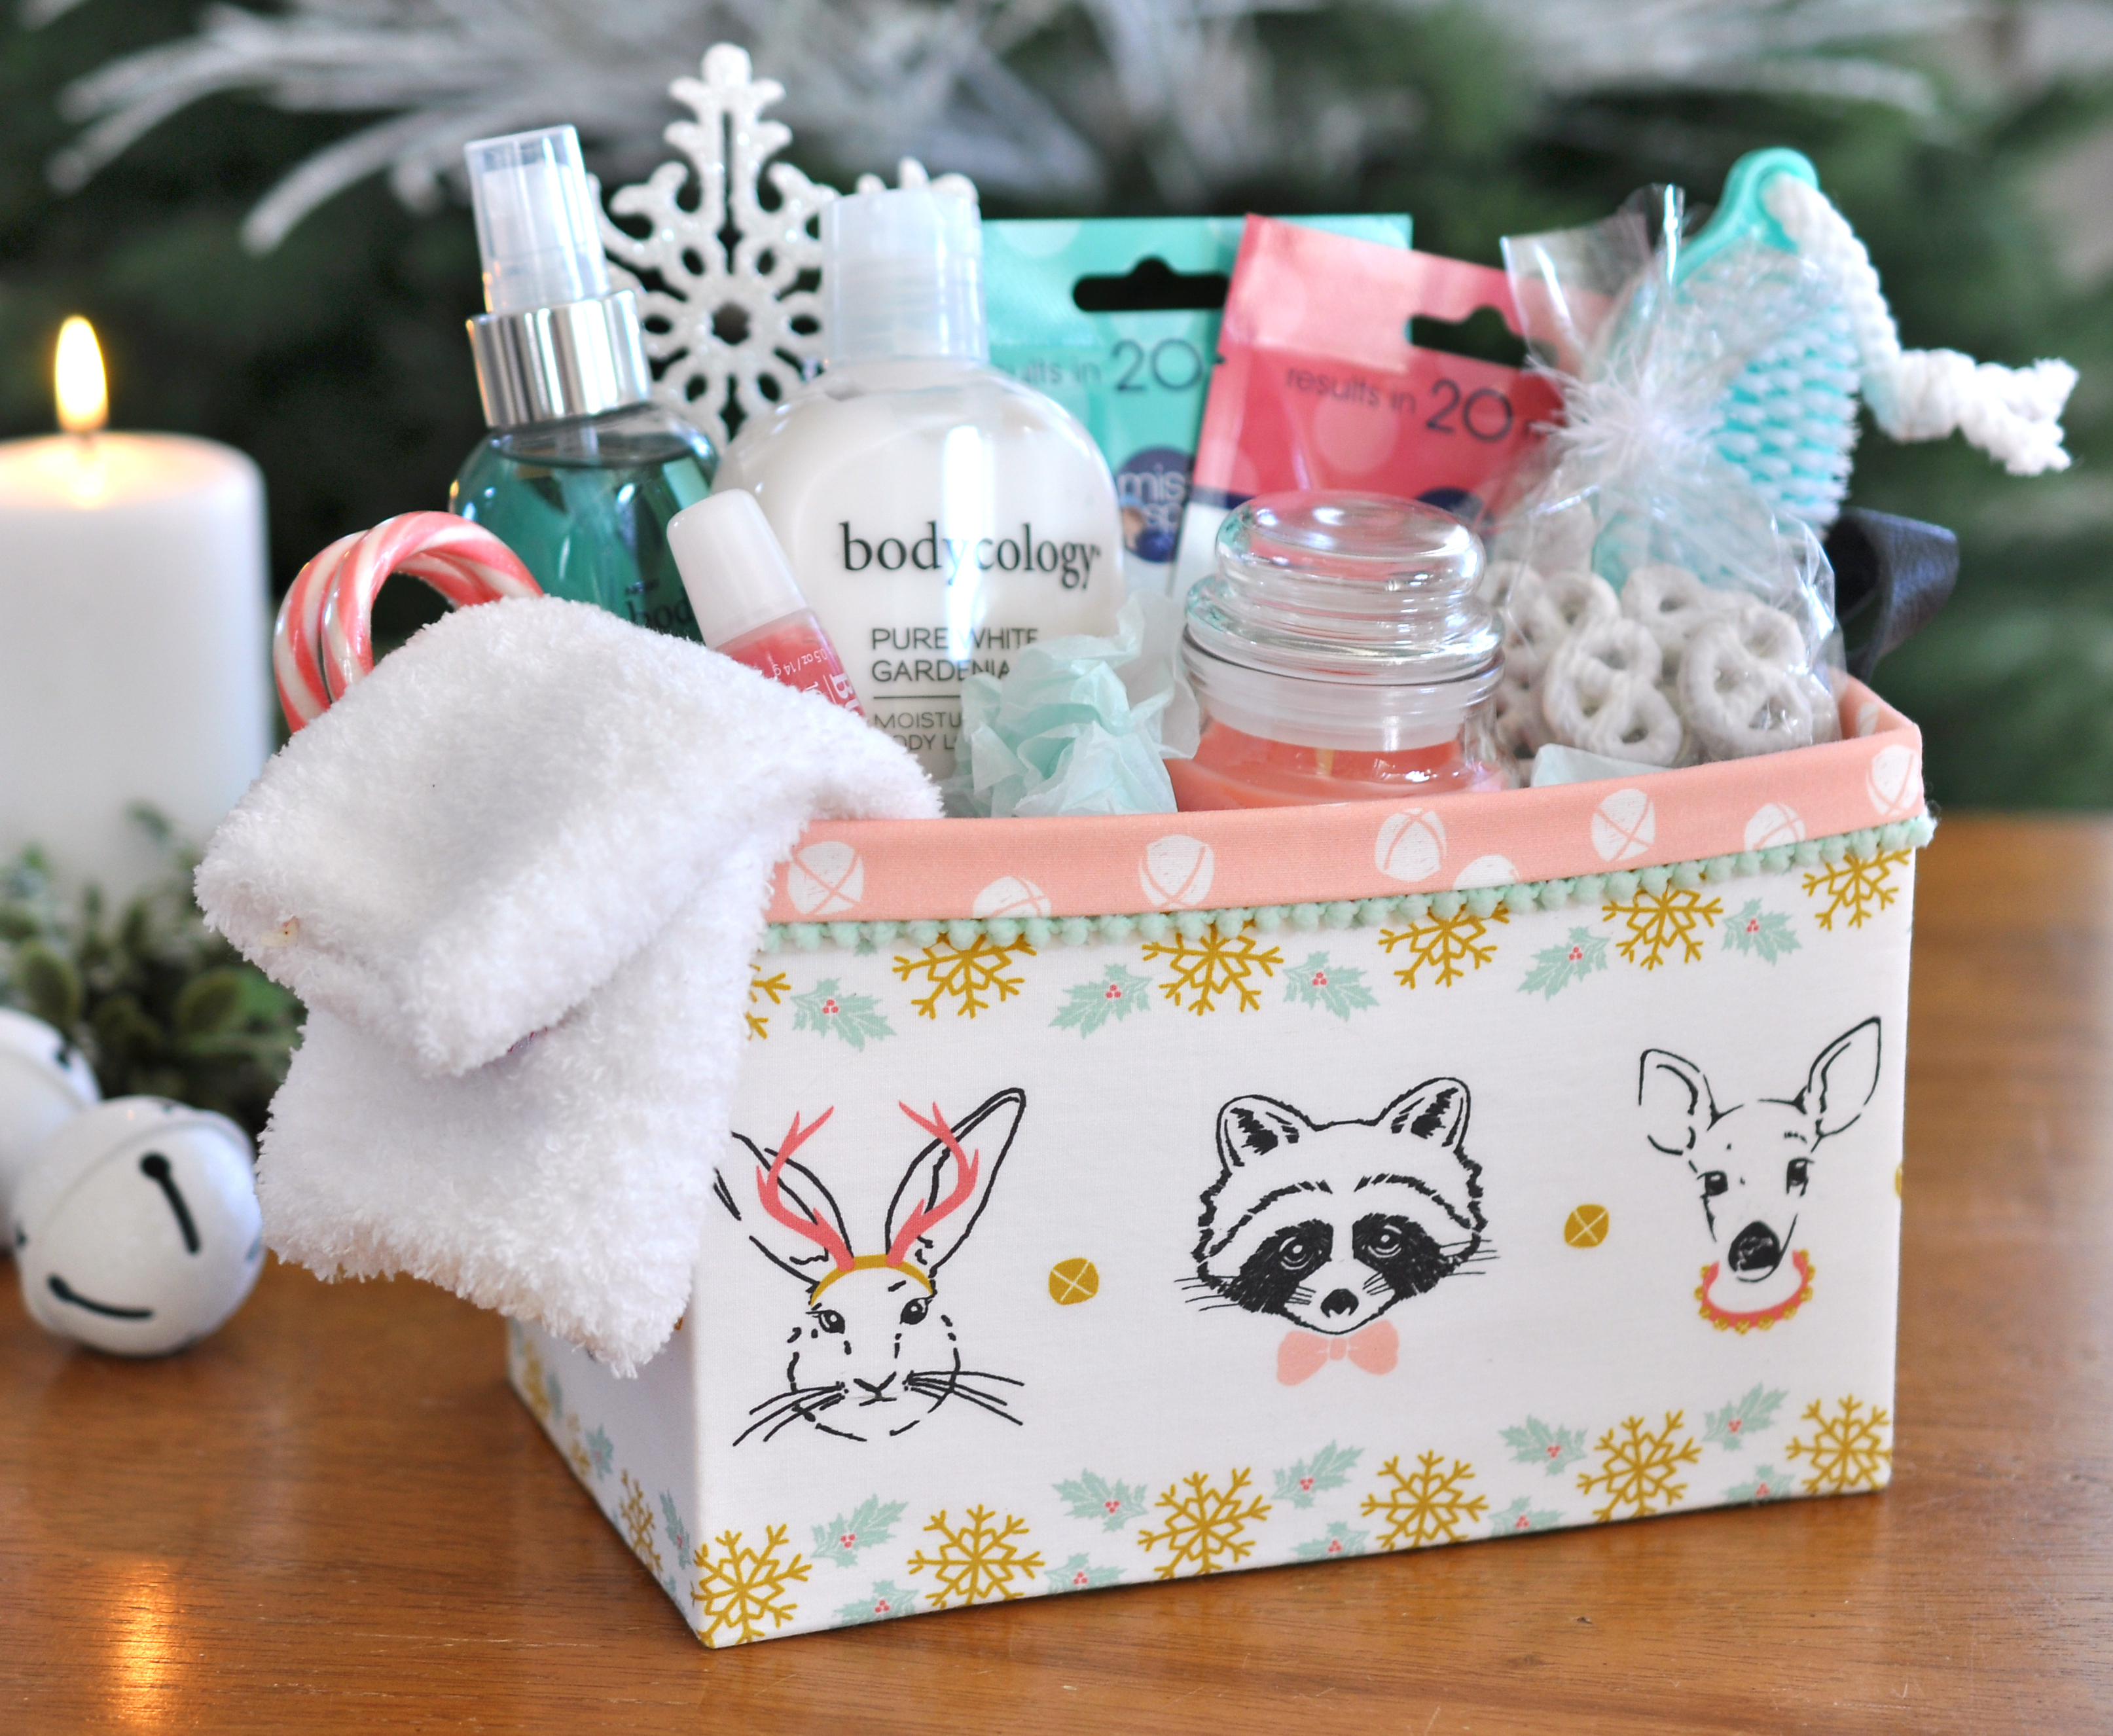
I used my favorite prints from Oh, What Fun on these two. The row of faces is cut from the border panel print and was the perfect size, and then I used the center of that panel (the cute confetti) to make the lining of the other basket. The ornament print is called Baubles and I also used it to make some cute gift tags which you’ll see later in the post. I added tiny pom pom trim to the basket shown above and I love the look! I tucked it under the lining foldover and glued it in place – super easy!

In the pattern file, I talk about using old belts or scraps of leather for the basket handles (which are optional.) I used scraps on both of these baskets. The gold was cut from a pouch I found at the thrift shop and the black is from a leather scrap pack I found at Hobby Lobby. I used embroidery floss to stitch them in place.
Thinner, lighter weight materials work best for the handles so they can bend easily. If your leather is too thick or sturdy, it can bow the sides of the basket out. You can also use ribbon, bias tape, or fabric in place of the leather.

———-
CUSTOMIZING YOUR BASKET
I receive emails quite often asking if I can resize the basket pattern cutting directions to create a specific sized piece that someone wants to make, so updating the pattern on how you can do this yourself has been on my to-do list for awhile, and this seemed like the perfect time! With a little math (don’t worry, it wont hurt too bad!), you can create any size basket you wish.
I’ve updated the original Study Fabric Basket PDF pattern file to include these directions and you can download it here.
Now I’ll show you a couple different sized baskets I created to get your creative juices flowing!
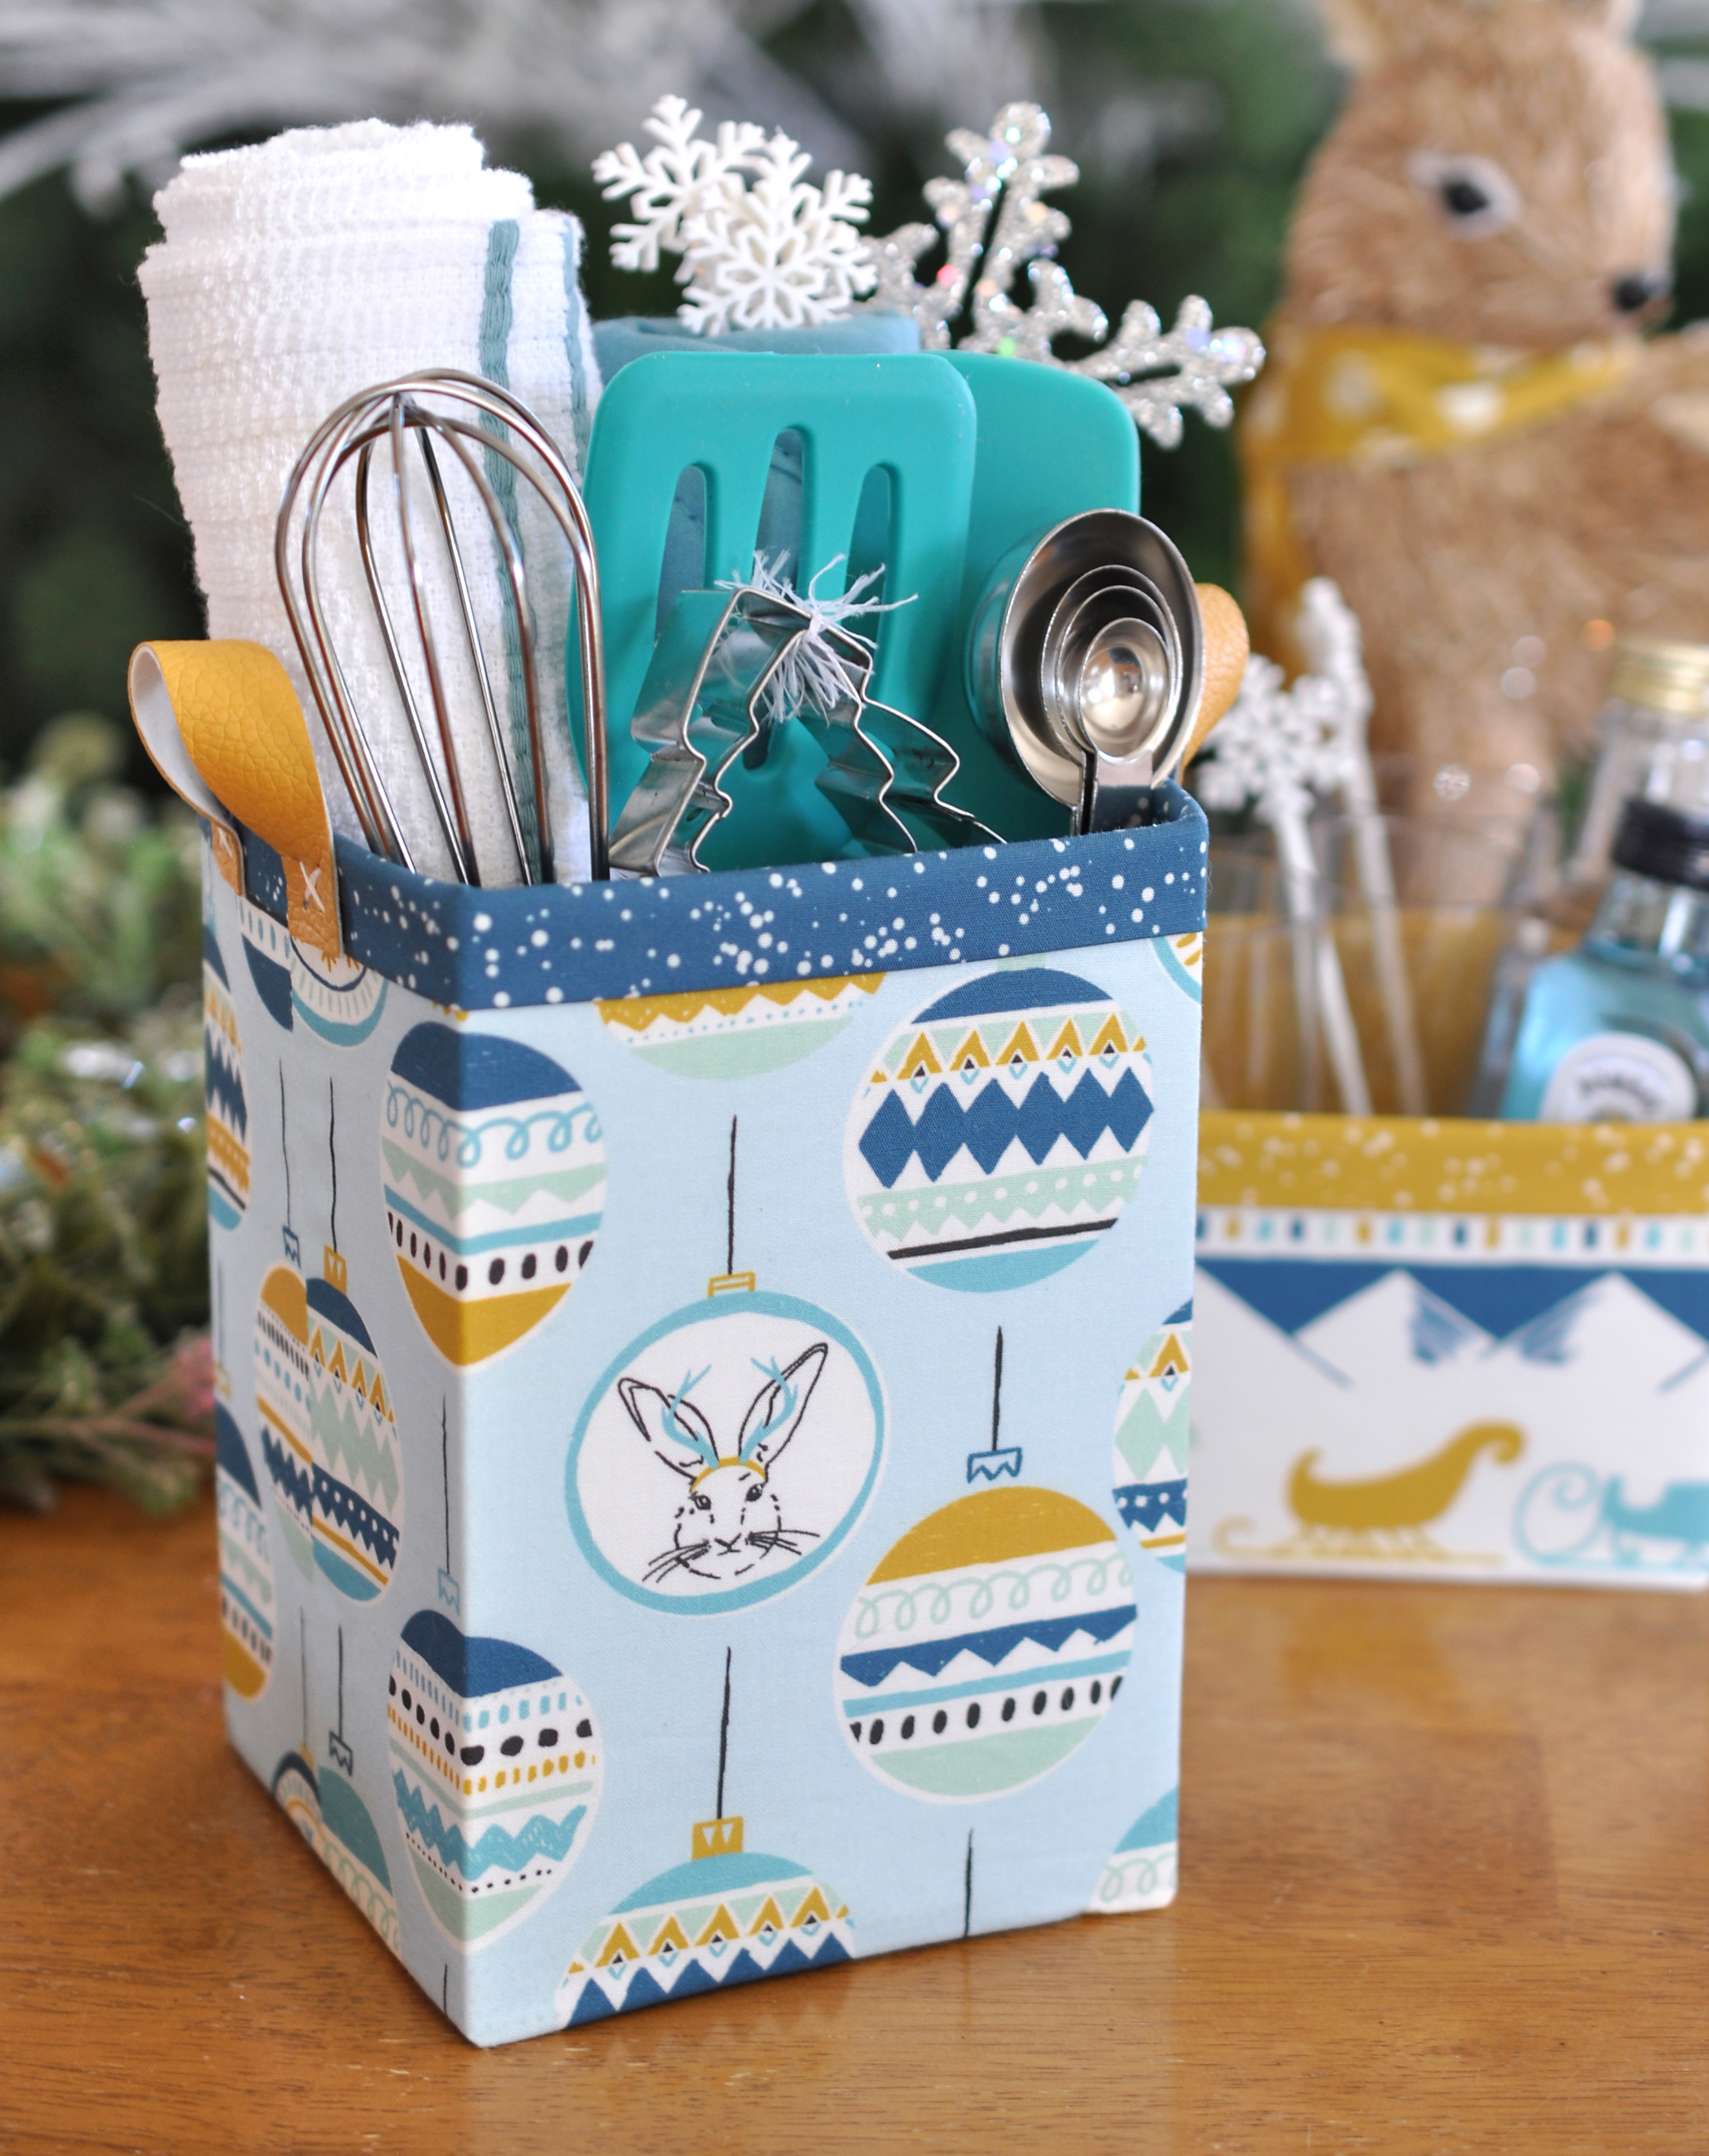
I wanted to make a piece that was sized for kitchen utensils and accessories, because that is another favorite set of mine to gift (perfect for housewarmings and showers, too!). This basket measures 4″ wide by 4″ deep and 6″ tall and I filled it with a dish towel, pot holder, whisk, spoon, spatula, measuring spoons and cookie cutters.
I used my favorite Baubles print in the Glacier Blue colorway and the lining is from Hawthorne’s Stardust basics line, which comes in 54 colors and coordinates so nicely with Oh, What Fun because it looks like snow!
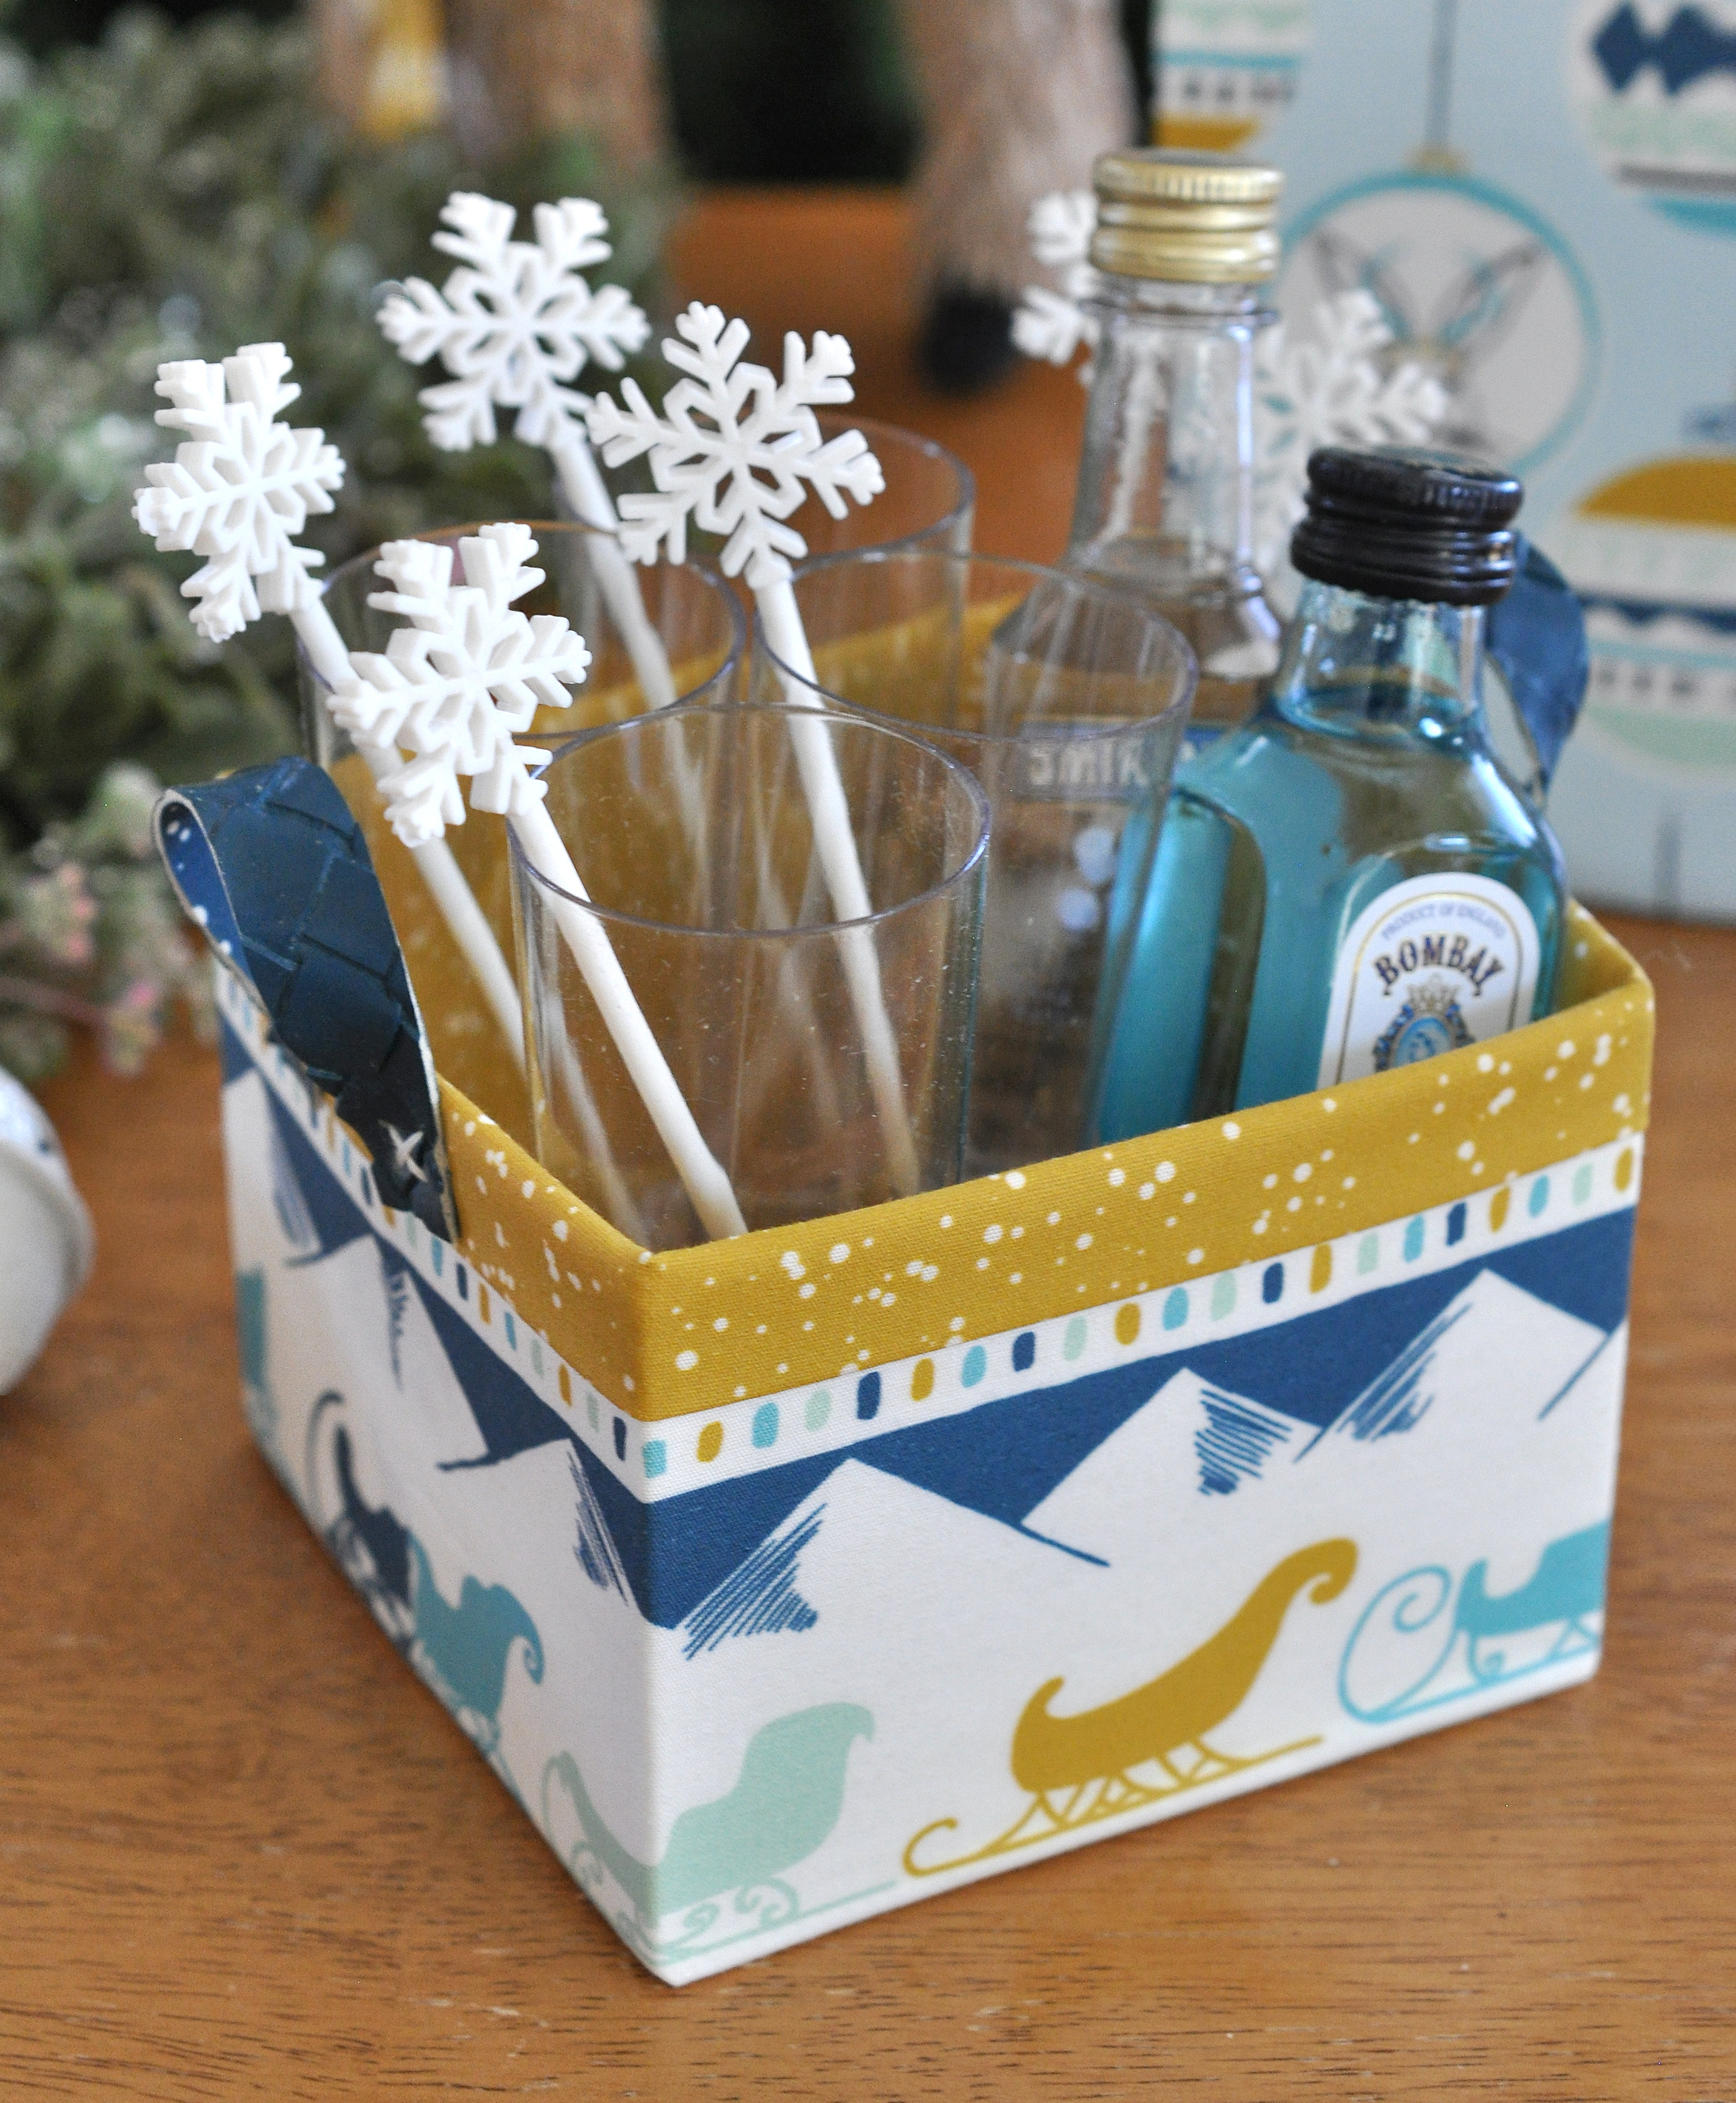
And let’s not forget the guys or hard-to-shop-for friends and family on our lists! This basket measures 4″ wide by 4″ deep and 3″ high and holds four shot glasses with stir sticks and two mini bottles of liquor. It would also make a fun and inexpensive secret santa gift. Plus, this small basket is a nice size for later holding keys, jewelry, sewing notions or many other things. It also fits a pillar candle or mug.

The handles on both of these baskets were also cut from old thrift shop pouches. Both are vinyl, so they had white backings. I left the white showing on the yellow handles and for the blue handles on the short basket, I glued a piece of the dark blue stardust to the backside before trimming them down. It worked out so well! I also did this to the gold handles on the treats basket shown at the beginning of the post.

———-
BUTTON LUNCH BAGS & GIFT TAGS
I have one more fun pattern to share, because it’s just perfect for gifting homemade treats (or a million other things) and then your recipient also has an adorable and useful little sack! I’ve had this Button Lunch Bag pattern from Purl Soho bookmarked forever and made a few modifications to dress them up and make them quilting cotton friendly.

The pattern calls for a sturdy cotton (such as a canvas), uses one solid fabric, and has a rolled hem, so I made a few easy changes to make them work with my materials and the look I was going for.
I wanted my bags to have a bottom accent fabric, so I pieced together the full panel before assembling the bag and then added some cute trim along the seam line. Also, since a rolled top hem wouldn’t look as nice with a printed quilting cotton, I instead used binding around the top of the bag. I added it last after assembling the bags. I used Pellon Shapeflex (SF101) to give the bags some extra bulk and I love the feel of them. I added the interfacing after piecing my full panel, before assembling the bag.

The original pattern uses binding to hide the inner seams, but I just used a wide, tight zig zag stitch which was quick and easy, but gives the seams a clean look and prevents fraying. Alternatively, if using binding around the top, you could make a full lining for the bag. Simply make a second bag, but with right sides in instead of out, slide it inside your assembled outer bag, and then stitch the top binding down through both, holding them together.
For these bags, I used two of the prints from Oh, What Fun that are not holiday specific. They are definitely festive enough for holiday gifting (especially with some metallic trim!), but keep the bags neutral enough to be reused all year long.
I used the Baubles print that I love so much to make the little tag on the cookies. I fussy cut the ornament circles from the print and used embroidery floss to hand stitch them onto felt cut with pinking shears. I then stitched down a small, folded piece of felt onto the top to make the hanger. You can use a light print or solid cotton on the reverse side to write or stamp a name.
I had so much fun with these, I couldn’t stop! They’re going on all my gifts this year, and I think I’ll hang a few from my tree, too!

———-
I truly hope you have found this post useful and inspiring! All of these projects are easy and satisfying because they sew up quick and look totally adorable when done. This year I challenge you to ditch the wrapping paper and make some “gift wrap” instead!
As always, if you have any questions about the pattern along the way, you can contact me here anytime. Please be specific, so I can best assist you.

———-

TIME FOR GIVEAWAY! (GIVEAWAY CLOSED – THANKS TO ALL WHO ENTERED!)
Who loves this Oh, What Fun fabric as much as I do? Would you like to win THREE YARDS for yourself?! To enter, please leave a comment on this post telling me what you would make with it and I will pick a winner at random on Friday! (Giveaway closed – congrats to @kgmcfall and thank you to all who entered!)
Now before you go, be sure to check out the other stops on the Blog Hop and see all the fabulous makes!
Monday 11/14 – Sew Sophie Lynn
Tuesday 11/15 – Hawthorne Threads
Wednesday 11/16 – Olivia Jane Handcrafted
Thursday 11/17 – Holly Gets Quilty
Monday 11/21 – Violette Field Threads
Happy Stitching!
~ nicole


Love to make some baskets for our 1st Granddaughter’s nursery.
Thanks for sharing!
Happy Holidays.
LikeLike
I would love to make your Baskets too!! And probably some Pillows!! Definitely will find great & special project!! Thank you for chance to win your Give-a-way!! This has been a fun Hop! 🙂
LikeLike
I have a handmade Christmas every year, I either buy handmade items or make them myself. This year you have inspired me to get myself into gear, it is not too late (yikes!) those boxes are so cute, the lunch bags are divine and would make great wrapping for biscuits and treats. We have had lots of babies this year in our family so I would like to make some fun bibs for the bubs for the christmas table and matching hats for the parents.
LikeLike
I really love your baskets and would like to make some for myself and as gifts for my Christmas friends, thanks for the project!
LikeLike
I would definitely make those lunch bags with the 3 yards if I won – in fact, I’m pulling out some of my own stash right now to make a few for teacher gifts this year!
LikeLike