In the Kitchen: Pumpkin Bread Pudding with Bourbon Caramel Sauce

Tired of traditional pumpkin pie or looking to shake things up this Thanksgiving? Then I have just the recipe for you. Best part is you could practically make it with your eyes closed, though I wouldn’t necessarily recommend it. I’m just sayin’, it’s really easy! My mom described it as ‘orgasmic’, so I guess that means it’s also pretty darn tasty, and I’ll second that.
Ingredients
10 oz bread*
15 oz pumpkin puree (canned or fresh)
1 1/4 cup whole milk
1/2 cup heavy cream
2 large eggs
1/4 cup light brown sugar**
1/4 tsp salt
3/4 tsp pure vanilla extract
1 1/2 tsp cinnamon
1/2 tsp fresh grated nutmeg
1/4 tsp ground allspice
1/2 cup pecans, optional
Bourbon Caramel Sauce
3 cups whole milk
3/4 cup sugar
1/8 tsp salt
3/8 tsp baking soda
2 Tbsp Bourbon, optional

*When it comes to bread just about any will work and you want it to be a little stale, so whatever kind you use, let it sit out uncovered for about a day. I first tried this recipe with sourdough, then with whole wheat and italian, and all three were delicious. A brioche or french would also work nicely or you can get extra fancy by using croissants or cinnamon raisin bread.
You shouldn’t need more than 10 oz of bread, maybe less depending on what kind and the shape you use, you’ll just want to fill your pan nicely. You can either use 1/2″ slices as shown on the left (quick and easy!) or you can cut or tear 1″ cubes from an unsliced loaf and scatter them in your pan.
When you’re ready to make the dish, preheat the oven to 350° and place the bread in a buttered 2qt baking dish.

To make the custard, whisk all the wet ingredients and spices together in a large bowl then pour the custard over the bread in the baking dish. Be sure to stir it around or lift the slices to spread it in between and under, making sure all the bread is thoroughly coated.
**If you’re not planning on serving this dish with any kind of sweet sauce, I recommend doubling the light brown sugar in the custard to 1/2 cup total.

Next, toss the pecans in a bowl or plastic bag with 1 Tbsp brown sugar and 1/2 tsp cinnamon then spread them evenly over the pudding, if desired.
Bake until set, about 40 – 45 minutes. You’ll need to cut into the middle to check the doneness as the top will set faster.
In the meantime you can make the sauce.

In a large saucepan, whisk together the milk, sugar and salt and heat to a simmer over medium heat.
When it begins to bubble, remove from heat and stir in the baking soda. It will foam up a bit.

Return to simmer and cook over medium heat, stirring occasionally and skimming off foam as needed. Sauce will begin to thicken and turn golden brown within 30 – 45 minutes.

Continue cooking until sauce is thick enough to lightly coat a spoon. When the sauce is almost finished, add the Bourbon if desired, and continue cooking until it reaches the desired consistency. If you’re concerned about liking the flavor, start by adding one Tablespoon, then add the second if desired.

Serve scoops or slices of warm pudding topped with warm sauce and enjoy! The pudding and sauce can both be stored, covered, in the fridge for up to two weeks and you can definitely make this ahead of time for Thanksgiving dinner. Just reheat it in a low stove or microwave before serving and fill your gravy boat with the warm caramel sauce!

I’d love to hear what you think about this one and if it graces your dinner table this Thanksgiving.
p.s. It’s also really good for breakfast!
And find more easy and delicious recipes here.

In the Kitchen: Maple Pecan Muffins

I have a goal. That goal is to share recipes at a time when it makes sense to share them. For example, strawberry recipes when strawberries are ready for picking, and so on. This, however, doesn’t always work out due to my lack of planning, or in this case, my lack of patience.
I first made these muffins back in March when the maple syrup was flowing in Pancake Town, USA, and while I missed the boat on sharing them then, I knew I couldn’t wait an entire year and figured they’d be perfect for the Fall. This is where my impatience comes in, as you can see it’s August and here they are. Close enough, right?
Ingredients
1/2 cup butter, softened
2/3 cup superfine sugar
2 Tbsp ground almonds
2 eggs, lightly beaten
2/3 cup pecans, coarse chopped
1 cup whole wheat pastry flour*
1 cup unbleached flour*
1 1/2 tsp baking powder
2 tsp baking soda
pinch salt
3/4 cup buttermilk
9 Tbsp pure maple syrup
12 pecan halves
*You can also sub 2 cups whole wheat pastry flour or 2 cups all-purpose flour in place of the flours specified.

Preheat the oven to 375°. Line 12 muffin cups with paper liners or grease and flour.
Beat the butter and sugar together until light and fluffy. Stir in the ground almonds then slowly beat in the eggs. Next stir in the chopped pecans.
Sift the flour, baking powder, baking soda and salt into the butter mixture.
In a small bowl, blend the buttermilk with 6 tablespoons of the maple syrup. Pour it into the butter and flour mixture and blend gently until just combined, be sure to not overmix or your muffins will be tough.
Divide the batter into prepared cups, filling about 2/3 full. These muffins will rise quite a bit, so be sure not to overfill. Top each muffin with a pecan half and bake for 20 minutes, or until risen and firm to the touch.
Cool in the pan for about 5 minutes then transfer to a wire rack. Brush the remaining 3 tablespoons of maple syrup on top of the hot muffins until it is all gone.
These muffins are delicious served warm or cold — morning, noon or night. I also find them especially delicious with my Sweet Potato Chili, which I will be waiting ’til the Fall to share, maybe…
And find more easy and delicious recipes here.

In the Kitchen: Blackberry Corn Muffins

There are so many good things about these muffins, I’m not sure where to start. I guess I’ll start by telling you how delicious they are, because that is most important when baking, right? So aside from that (and being really easy to make) you can also substitute any berry you like in place of the blackberries — blueberries, raspberries, strawberries, cranberries, even cherries or yummy tart currants. These muffins are sweet enough for a light dessert but not too indulgent to accompany a fresh salad, a bowl of chili or a hotdog cook-out for lunch or dinner. You’ll find a printable recipe card at the end of the post.

Ingredients:
1 1/4 cups unbleached flour
1/2 cup fine-ground cornmeal
2 tsp baking powder
1 tsp salt
1 cup sugar (can reduce to 3/4 cup)
1/2 cup buttermilk, room temp
2 large eggs, room temp
7 Tbsp unsalted butter, melted & cooled
8 ounces fresh blackberries (or other berry)
2 Tbsp raw sugar
Preheat oven to 375° and line 14 standard size muffin tins with paper liners.

If your blackberries are monster sized like mine usually are, cut them in smaller pieces.
In a medium large bowl, whisk together the first five ingredients, set aside.

In another bowl, whisk together the buttermilk, eggs and melted butter. Add to the dry ingredients and whisk until combined. Batter will be thick.
Fill each cup with two slight mounded tablespoons of batter. I use a tablespoon sized cookie scooper (like a mini ice cream scooper), two scoops, it works great. The cups will only be about half full, but you need room to add the berries and they will rise when baking, too.
Next add the berries on top of the batter, pushing in slightly, but not too much. Sprinkle the tops with the raw sugar, you can also use regular granulated sugar if you like but I love the rich flavor of the natural raw sugar (I also use it in the batter).
Bake for 10 minutes, rotate tins and bake another 10 – 12 minutes until light golden brown. Cool completely in tins on a wire rack before removing.

The tops will brown lightly giving them a sweet crunch with the slightly carmelized raw sugar, while the insides stay super moist and delicious. They are best enjoyed soon after baking but will store in an airtight container at room temperature for a couple days, though chances are they won’t last that long.
I recently made a batch with some fresh picked sour cherries and they were amazing! So get creative, this batter is the perfect base for almost anything and you can also adjust the amount of sugar you add to it to suit your taste or health requirements. Enjoy!
And find more easy and delicious recipes here.

In the Kitchen: Two Fruity Muffins

Am I the only one in total shock that the Fourth of July is less than two weeks away? If I had a dime for every time I’ve said ‘time flies’, I could buy the $1500 desk I fell in love with yesterday…

Now I know July 4th is just another Sunday to you international friends, but for us here in the states it’s quite a meaningful day. Though really, it’s mostly just become a great excuse to have a picnic and play with firecrackers, sparklers and boom sticks — all of which I’m totally on board with, by the way. It happens to be my favorite holiday, because in addition to peanut butter, rocking chairs and kaleidoscopes, fireworks are one of my favorite things.
Oh, and muffins. Did I mention that I love muffins? And cupcakes. I know they are kinda trendy these days but they have always been my favorite. They are just so cute, portable and perfectly proportioned. Nine years ago, everyone I knew ditched me on my birthday so I baked myself some cupcakes. But don’t feel sorry for me, it just meant I got to eat them all myself.
You may be starting to wonder why I’m so talkative today, I know I am, and I have no idea, so I’ll get back on track! Today I have two delicious muffins for you that are fruity and festive in red, white and blue and are a lighter addition to any holiday picnic (or just great for breakfast or a snack!), whole wheat strawberry banana and blueberry orange buttermilk. Read on for the recipes and printable recipe cards.

Whole Wheat Strawberry Banana

Ingredients:
1 1/4 cup whole wheat pastry flour
1 cup unbleached flour
1 1/2 tsp baking powder
1/4 teaspoon baking soda
1 tsp cinnamon
1/8 teaspoon salt
1 cup fresh strawberries, coarsely chopped
3/4 cup brown sugar
2 large eggs, lightly beaten
1 tsp pure vanilla extract
2 large very ripe bananas
1/2 cup butter, melted and cooled slightly
The key to baking anything with bananas is making sure they are very ripe, and I mean very. When you think they couldn’t possibly get any mushier, leave them for another 4 days. The skins should be nearly black and if you see fruit flies starting to buzz around your kitchen, they’re ready.
Also, when it comes to the flour in this recipe, if you don’t have whole wheat pastry flour or don’t like it, you can use 2 1/4 cups unbleached or all purpose flour.
Preheat the oven to 350° and line a 12 cup muffin pan with paper liners or grease and flour cups.

In a large bowl combine the flours, baking powder, baking soda, cinnamon and salt. Gently stir in the strawberries being careful not to smash them but making sure they are coated. Depending on their size, about 6-8 strawberries equals one cup chopped.

In a medium bowl thoroughly mash the bananas. Whisk in the sugar, eggs and vanilla and then add the melted butter.

Add the wet ingredients to the dry ingredients and stir until just combined, careful not to over mix. Batter will be thick. Divide the batter evenly among the tins and bake for 20 minutes at 350° or until a toothpick inserted in the center comes out clean. Cool in tins on a wire rack for 15 minutes before removing and allowing to cool completely.

These muffins rise quite a bit during baking, but always go straight up rather than ballooning over the edges. They also work quite nicely when baked without liners, which I prefer when I’m just baking for myself.
Aside from the pretty, patriotic liners (which I’ll get to later in this post), I decorated half my muffins with red, white and blue nonpareils which I sprinkled on top of the batter before baking. I found they looked better on the blueberry muffins because that cake was whiter without any wheat flour, but they were still fun and festive!
· · · · · · · · · · · · · · · · · · · · · · · · · · · · · · · · · · · · · · · · · · · · ·
Blueberry Orange Buttermilk
Ingredients:
1 cup fresh blueberries
2 Tbsp powdered sugar
2 cups unbleached flour
2 tsp baking powder
1/8 tsp salt
3/4 cup light brown sugar
1 large egg, lightly beaten
1 cup buttermilk
2 Tbsp milk
1/4 cup butter, melted
Grated zest of 1/2 large orange
Preheat the oven to 400° and line a 12 cup muffin pan with paper liners or grease and flour cups.
Put the blueberries in a large bowl and add the powdered sugar, tossing gently to coat. Add the flour, baking powder, salt and sugar and mix gently until combined. You can also use frozen blueberries in this recipe, just make sure they are thoroughly thawed, drained and patter dry before tossing with the powdered sugar.
In a separate bowl, mix together the egg, buttermilk, milk, melted butter and orange zest. Add the wet mixture to the dry mixture and fold together just until combined. As a general rule, you never want to overmix muffins or they will become tough.

Divide the batter evenly among the 12 cups and bake for 18-20 minutes until golden and risen. (By the way, and ice cream scoop like this is the *perfect* tool for scooping muffin or cupcake batter. Seriously, it’s totally worth the investment and drawer space it will take up.)

Cool in tins on a wire rack for 15 minutes before removing and allowing to cool completely.

The hint of orange in this recipe really brings the flavors to life and adds the slightest orange hue to the batter which is just so pretty. The buttermilk also makes them rich and moist. This recipe really is a delicious twist on a classic favorite.
I also decorated half of these with the nonpareils, which looked awesome. So, speaking of decorations – let’s talk liners!
When I bake muffins for my own personal munching, I generally skip the liners. Not only do you have less waste, but I personally feel the muffins are easier to eat (and a little bigger!). But when it comes to a party or sharing muffins with others, I always go with liners, and the more festive the better.
There is an amazing selection on Etsy of all different colors and patterns, I tend to go a little crazy. I order most of mine from Sweet Estelle because her shop is just so darn cute and she is super sweet to boot! I used a combination of stripes and retro swirls at my recent Memorial Day picnic and they looked awesome.
Little Monster Hugs also has a great selection of stars and stripes themed liners that would be perfect for for the Fourth of July!
Now if you don’t have time to order liners (or don’t want to spend the money), you can also make wrappers out of scrapbook paper or you can customize them for any occasion by printing words or image before cutting them out. It’s also fun to make toppers for your muffins or cupcakes and tomorrow I’ll have an easy how-to and some templates for you, so I hope you stop back!

In the Kitchen: It’s Strawberry Season!

For me, nothing says summer like strawberries! Here in Northeast Ohio, they’re the first fruit ready for picking and since they aren’t available (even in stores) for most of the year, I tend to go a little crazy when I see the juicy red berries come to life.
Aside from my standbys of strawberry lemon marmalade and cheesecake with strawberry sauce, I try to make different treats each year. I’m not always successful with my kitchen endeavors but today I have three delicious recipes to share that I couldn’t be happier with – strawberry cupcakes with strawberry cream cheese frosting, strawberry crumble pie and strawberry scones.
My initial pick of about five quarts got me through these three recipes, two failed frosting attempts, a batch of cheesecake sauce and plenty of daily eating. Just in time to head back out and pick the second batch of bloomers. Get your buckets ready and read on for the recipes, how-to’s and printable recipe cards. Happy Picking!
· · · · · · · · · · · · · · · · · · · · · · · · · · · · · · · · · · · · · · · · · · · · ·
Strawberry Cupcakes with Cream Cheese Frosting

If you aren’t tempted to lick your computer screen right now, you better check your pulse. These cupcakes are like heaven in a little fluted liner. Perfectly moist, soft and fluffy with a zen like balance of fresh and sweet. Plus they’re pink, which automatically kicks up the awesomeness a few notches. They’re also pretty easy to make, so what are you waiting for?


Ingredients yields about 16 cupcakes
1 1/3 cup unbleached flour
1/4 cup cake flour
1 1/2 tsp baking powder
1/4 tsp salt
1 stick butter, room temperature
1 1/8 cup sugar
3/4 tsp vanilla
2 eggs
1/2 cup milk
1 cup finely chopped fresh strawberries
Frosting
8 oz cream cheese, room temperature
1 stick butter, room temperature
2 cup powdered sugar
1 Tbsp + 1 tsp strawberry puree

Preheat the oven to 350° and line muffin tins with paper liners. I often bake muffins (and some cupcakes) without liners but I find these cupcakes work better in liners.
If you have trouble finding cake flour, look by the cake mixes rather than the bags of flour. It’s in a box and looks like a cake mix so it’s hard to spot if you haven’t seen it before. Pillsbury Softasilk is the most common brand but there are others, too. It does make a difference in this recipe, so do use it.
Sift together the flours, baking powder and salt, set aside.


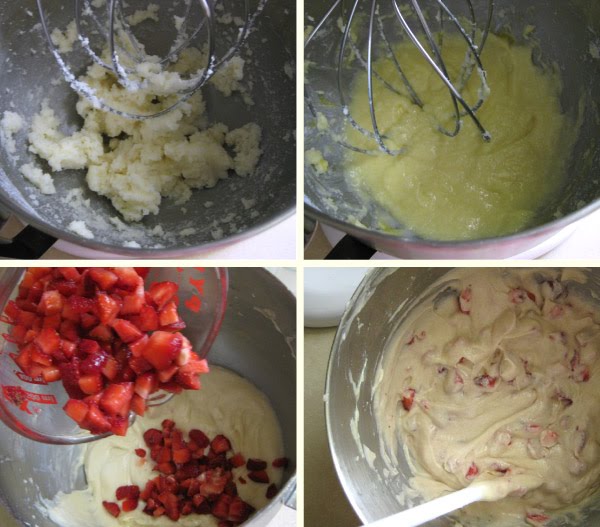
With an electric mixer (stand or hand), cream together the butter, sugar and vanilla on medium high speed. Add the eggs one at a time and beat until just mixed.
On low speed, beat in half the flour mixture, then half the milk, then the remaining flour and lastly the remaining milk, beating until well mixed. Gently stir in the strawberries by hand.

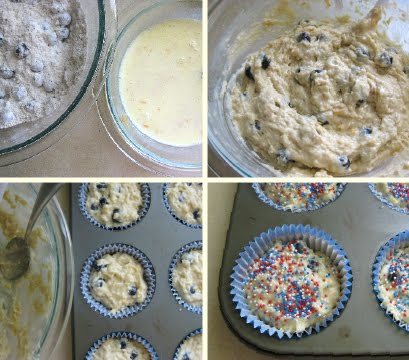
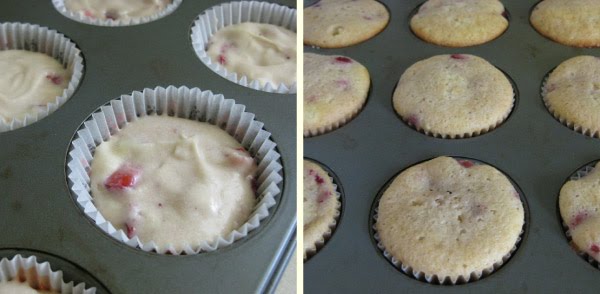
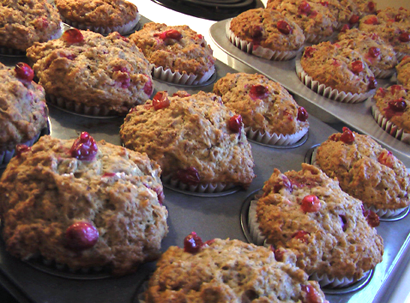
Spoon batter into prepared liners, filling about 3/4 full. I have one 12-cup muffin pan and two 6-cup muffins pans for recipes that make more than 12 cupcakes. Having the smaller 6-cup tins allows for better baking when you have 3-4 extra cupcakes and having two of them allows for two full 12-cup batches.
Bake for 15 minutes and rotate tins in oven. Bake for another 10 – 15 minutes until the tops are lightly golden and a toothpick inserted in the center comes out clean. Cool the tins on a wire rack for 15 minutes then remove the cupcakes from the tins and allow to cool completely before frosting.
To make the frosting, you’ll first need a little strawberry puree. Finely chop about 5 – 8 strawberries (depending on size) and mash them in a bowl with a fork or masher until pureed.
Next, cream together the butter and cream cheese with a electric mixer. Beat in the strawberry puree followed by the powdered sugar, one cup at a time. Beat until well blended and thick. Add additional powdered sugar as needed to taste or for thickness. Do note, this frosting will be a little thinner than a standard cream cheese or buttercream frosting because of the strawberries. Chill it in the refrigerator for 30 – 60 min before piping and it will work nicely.
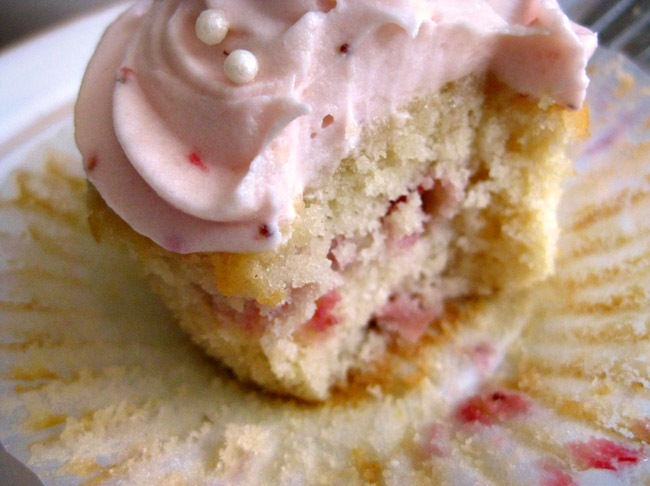
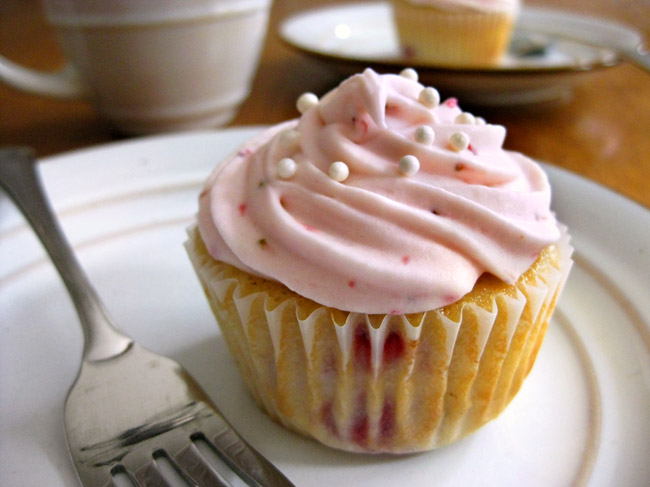
My piping is a little sloppy because I was impatient (and running out of daylight), so I piped my cupcakes before the frosting chilled enough. It still works just fine and wont run off the cupcakes, but will look much prettier and stay put a bit better if chilled.

All that’s left now is to enjoy! If these don’t make it into someone’s belly the first day, store them in an airtight container in the fridge for up to a week. Allow them to sit for at least 30 minutes (or longer) and warm to room temperature before eating. Trust me on that one, they’re too hard when cold but just as good as fresh baked after they warm up, even a week later. Fat chance if they make it past day two.
· · · · · · · · · · · · · · · · · · · · · · · · · · · · · · · · · · · · · · · · · · · · ·
Strawberry Crumble Pie
If pie is more your thing, listen up. Chances are you are used to cold strawberry pies, topped with piles of whipped cream or made chiffon style. And while there’s nothing wrong with those classics (trust me, I’ll throw back a piece or seven), you don’t often see a warm, gooey baked strawberry pie. Topped with a sweet crunchy crumble, sitting atop a chewy cream cheese crust you say? Yes, please.
It’s not a very sweet pie, it lets the simple strawberry filling speak for itself, but the crumble topping adds a sweet crunch and the buttery cream cheese crust has the perfect bite. I don’t even like fruit pie, let alone warm fruit pie, but I’ve been on this one like a duck on a slug.

Ingredients
Crust
1 stick butter, slightly softened
3 ounces cream cheese, slightly softened
1 1/4 cups unbleached flour
1/8 tsp salt
Crumble
1/3 cup sugar (I use raw turbinado sugar)
1/2 cup unbleached flour
3/4 cup old fashioned or quick-cook oats
4 Tbsp melted butter, cooled
Filling
5 generous cups quartered strawberries
1/2 cup sugar (if you like a sweeter pie, use 2/3 cup)
2 tsp fresh squeezed lemon juice
2 Tbsp cornstarch
2 Tbsp flour
1/4 tsp grated orange zest

To make the crust, beat together the butter and cream cheese until combined. If you have a food processor, you can make the crust in there, otherwise, you can use a hand mixer and a spoon!
Add the flour and salt and mix until blended. Dough will start to come together but still be in pieces. Remove the dough from the bowl and shape into a disk. Wrap in plastic and refrigerate for 45 minutes.

While the dough is chilling, you can make the crumble topping. Combine the sugar, flour and oatmeal in a small bowl, stir until blended. Add the melted butter (cooled slightly) and stir until incorporated. Refrigerate until ready to use.

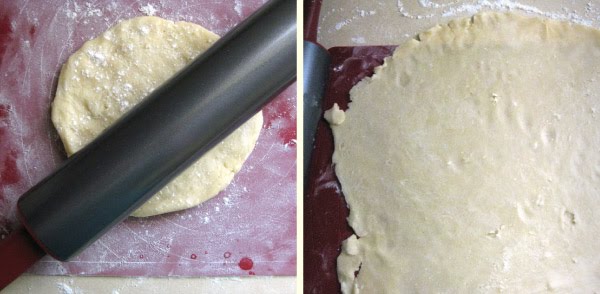
Back to the dough! Once chilled, remove from the fridge and on a lightly floured surface, roll to about 1/8″ thick and large enough to fill a 9″ pie pan.

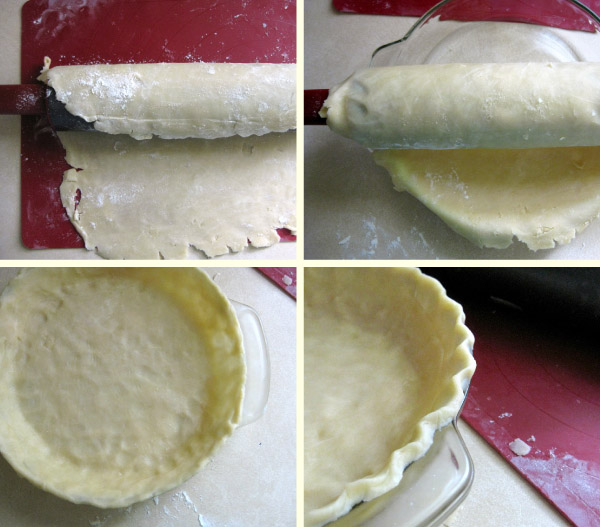
I find the easiest way to transfer dough to a pie dish is to roll it around the rolling pin (add a little flour as you go so it doesn’t stick to itself). Hold the rolling pin over the pie dish and unroll over the pan.
Press to fit as needed, trim edges about 1/4 above rim of pan and shape as desired.
Now, I’ll tell you, I’ve never been all that fond of rolling pie dough. It really is a fine art but I do ok after years of practice. However, this dough is a different story. It’s soft, it’s hard to work with, it will probably tear and make you go crazy. But don’t worry! Just smoosh it back together and move on. It won’t look pretty, but it doesn’t have to. The deliciousness will far outweigh a less than perfect fluted edge and everyone will be so impressed that you even made the dough, they won’t care what it looks like.
Place the crust back in the fridge for 15 minutes and preheat the oven to 350°. Once chilled, prick the bottom of the dough with a fork and bake the empty crust for 15-20 minutes until lightly golden. Place on a wire rack to cool while you prepare the filling.

Increase the oven temperature to 375°.
Add the lemon juice and orange zest to the strawberries and toss gently to combine. Next add the sugar, cornstarch and flour, stirring gently until thoroughly mixed.

Spoon the strawberries into the crust and top with the chilled crumble mixture.
Bake for 50 minutes until topping is golden brown and filling starts to bubble. Place on a wire rack and let cool slightly before serving.
As I mentioned earlier, I find this pie best served warm, slightly gooey and syrupy and just cool enough to not burn your mouth. You certainly can eat it cold, which is how I usually like my pie, but I think you lose the sweetness of the strawberries and pick up more of the flour taste in the filling when it’s cold.
Store any leftovers in airtight container in the fridge and heat slices in the microwave for about 30 – 45 seconds before serving.
I’ll end by simply saying, look at that crust…
· · · · · · · · · · · · · · · · · · · · · · · · · · · · · · · · · · · · · · · · · · · · ·
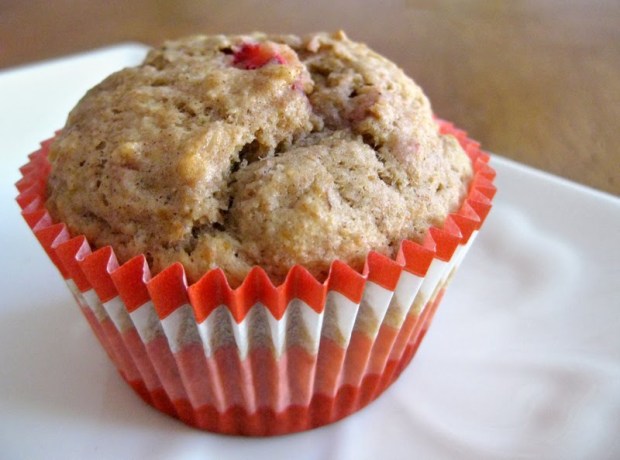
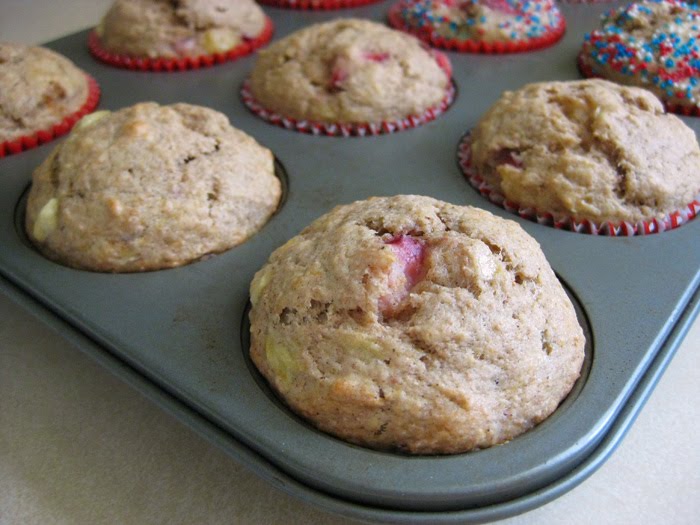
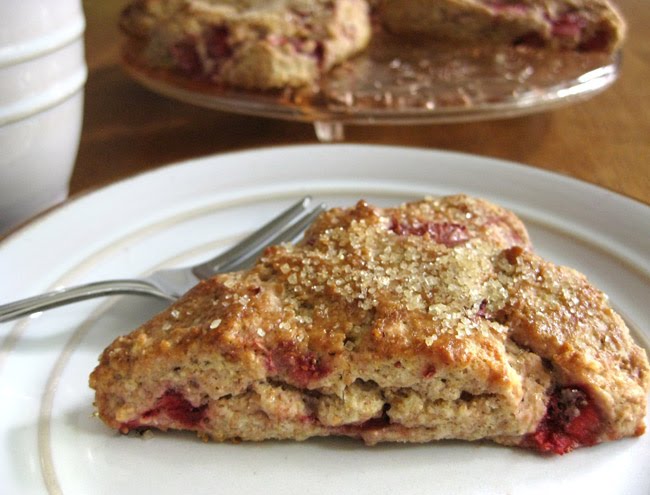
Whole Wheat Strawberry Scones
Scones – you either like ’em biscuity (like me), like ’em sweet (like my parents) or you don’t really know what they are (like my husband). Essentially a scone is a small british quickbread of scottish origin. It was originally round, flat and baked on a griddle but the invention of baking powder took this treat to a new level and the common triangle or wedge shape took popularity to minimize dough wastage.
Most scones in the US these days are sweeter than their foregin counterparts and often topped with icing, but I prefer mine less sweet with a sprinkling of coarse sugar and made with whole wheat flour for extra nutrition. You could equate my recipe below to a slightly sweetened fresh strawberry biscuit and for me, it doesn’t get much better than that on a rainy Sunday morning.
Ingredients
1 cup whole wheat flour*
1 cup unbleached flour
1/3 cup sugar
2 tsp baking powder
1/8 tsp salt
6 Tbsp butter, slightly softened
2/3 cup cream
1 1/2 cup fresh strawberries
Topping
1 egg + 1 Tbsp cold water
Coarse sugar
*You can omit the whole wheat flour and use 2 cups total white flour if you prefer.

Preheat the oven to 400°.
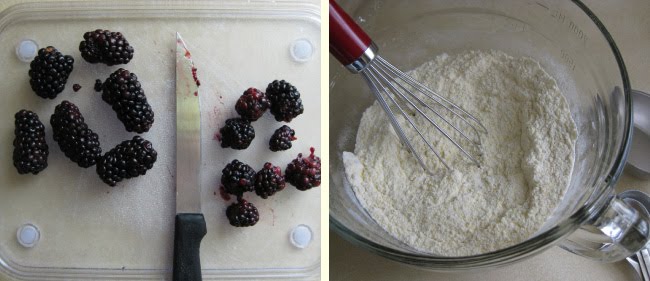
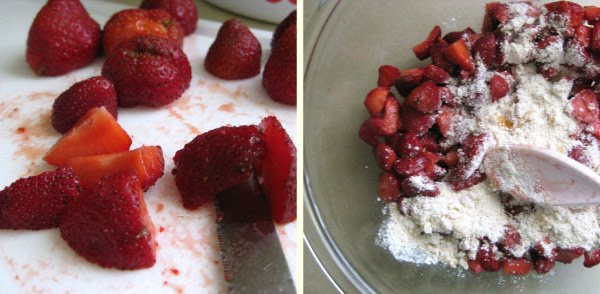
Coarsely chop the strawberries and let sit in a colander for about 5 -10 minutes to drain any excess liquid. Toss with about 1 Tbsp sugar and set aside.
Mix flours, sugar, baking powder and salt in a large bowl. Cut the butter into cubes and cut it into the flour mixture using a pastry blender, fork or two knifes until it resembles coarse, pea sized crumbles.
Stir in the strawberries and then add the cream, stirring gently until combined and dough starts to hold together.

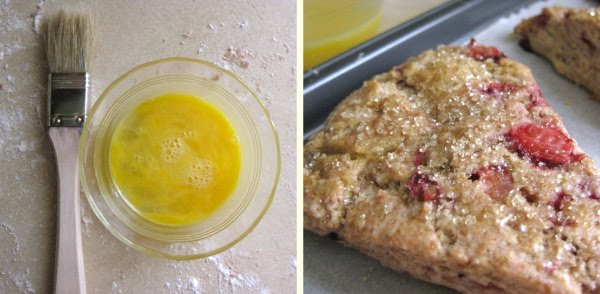
Transfer the dough to a lightly floured surface (it will be a little sticky, add a little flour as needed) and shape into a disc about 1″ thick. Cut into 6-8 wedges and transfer to a parchment lined baking sheet. Alternatively you can shape the dough into a rectangle, cut two squares and then cut each square in half forming 8 triangle scones.
Bake at 400° for 15 minutes.
In a small bowl, whisk together one egg and one tablespoon of water (alternatively you can use milk). Remove the scones from the oven, brush with the egg wash and generously top with coarse sugar. I use raw turbinado. You can skip this step if you prefer and top with a powdered sugar icing if you like a sweeter treat but I find them perfect with the sparkly, crunchy raw sugar topping.
Return to the oven and bake an additional 5 – 10 minutes until tops start to brown. Mine took an additional 7 minutes. Be careful to not overbake or they will get dry.
Let cool on pan or a wire rack about 10 minutes before munching. I find these most delicious when served fresh out of the oven and slightly warm, topped with a little butter and fresh fruit spread (like homemade peach butter!).
You can store any leftovers in an airtight container in the fridge for a few days and allow them to warm to room temperature or pop them in the microwave for a few seconds before enjoying.
You can also substitute a variety of fresh fruit for the strawberries in this recipe, such as blueberries, raspberries or peaches – yum!

I hope you’ve enjoyed today’s strawberry celebration! I’d love to hear what you think if you give these recipes a try and I’d also love to see you’re favorite strawberry recipes. Feel free to share in the comments below and happy picking!

In the Kitchen: Zucchini Bread

It’s that time of year again when we’re all harvesting our gardens, scratching our heads wondering what to do with all those tomatoes and all that zucchini, wondering why we grew so much again. Am I right? Chances are most of you will make some bread with it and out of all the recipes I’ve tried, this one is my favorite. It’s basic, simple and easy – just the way I like it! You will find a printable recipe card toward the end of this post.

Prep Time: 15 min | Bake Time: 50 min | Serves 16
Ingredients:
1 1/2 cups all-purpose flour (also good with whole wheat flour!)
1 teaspoon ground cinnamon
1/2 teaspoon baking soda
1/2 teaspoon salt
1/4 teaspoon baking powder
1/4 teaspoon ground nutmeg
1 egg, beaten
1 cup sugar (I use Splenda, and a little less than 1 cup)
1 cup finely shredded, unpeeled zucchini
1/4 cup cooking oil
1/2 chopped walnuts or pecans (optional)

Since I’ve been so busy this week, I do not have step by step photos for you today, but here are the directions:
Preheat oven to 350°. Grease the bottom and 1/2″ up the sides of an 8″ loaf pan, set aside.
In a medium bowl combine the flour, cinnamon, baking soda, salt, baking powder and nutmeg. Make a well in the center of the flour mixture, set aside.
In another medium bowl combine egg, sugar, zucchini and oil. Add this mixture to the flour mixture and stir until just moistened (batter should be lumpy). Fold in nuts. Spoon into pan and bake for 50 to 55 minutes or until toothpick inserted in center comes out clean.
Cool in the pan on a wire rack for about 10 minutes, remove from pan and cool completely. Wrap and store overnight before slicing.


This recipe also works for apple bread, substitute 1 1/2 cups shredded, peeled apple for the zucchini. Great for using those apples from fall apple picking! (Ill be sharing a delicious apple cake recipe soon, too).

If you still have plenty of zucchini left even after making 5 loafs of bread, try this salad for another yummy way to use it up!

You can find more easy and delicious recipes here.

In the Kitchen: Easy Fiesta Breadsticks

Welcome to a new series for 2009 all about the one thing I love more than making jewelry – eating! Well… and cooking, but mostly eating. Every other Tuesday, opposite my featured artists, I will feature a new recipe with how-to photos or fun kitchen related finds. You can easily access these posts anytime with the links under In the Kitchen Series in the right sidebar.
This week, easy Fiesta Breadsticks – they’re a yummy appetizer & snack or perfect with any spicy dish.
Prep time: 5 min  |  Cook time: 11 min |  Makes 4 breadsticks

What you’ll need:
• 1 package refrigerated crescent rolls
• taco seasoning
• shredded monterey jack cheese

On a small cookie sheet, unroll the crescent roll dough, keeping two wedges together as shown above. You will get 4 breadsticks from a standard package of 8 rolls. You may need to flatten or reshape the sections after unrolling. Also make sure the two wedges are connected well, you don’t want any gaps. You can overlap the two wedges a little and press them together along the seam if needed. 
Sprinkle with the desired amount of taco seasoning.
Next, add the shredded cheese down the center. I prefer monterey jack but these would be equally delicious with other types of cheeses as well. I like a good amount of cheese but if you use too much they are hard to close and break open when cooking. 
Fold each side of the dough up and press the seam closed. Be sure to also press the top and bottom closed or the cheese will leak out. Sprinkle a bit more taco seasoning on top.

Bake at 375° for 11 min. or until the dough begins to brown.
Serve warm and enjoy! These breadsticks have quickly become a favorite in my house. I always serve them with my Santa Fe Chicken, which I will feature next time on February 3. Be sure to stop back!