In the Kitchen: Gingerbread Cake with Lemon Yogurt Frosting

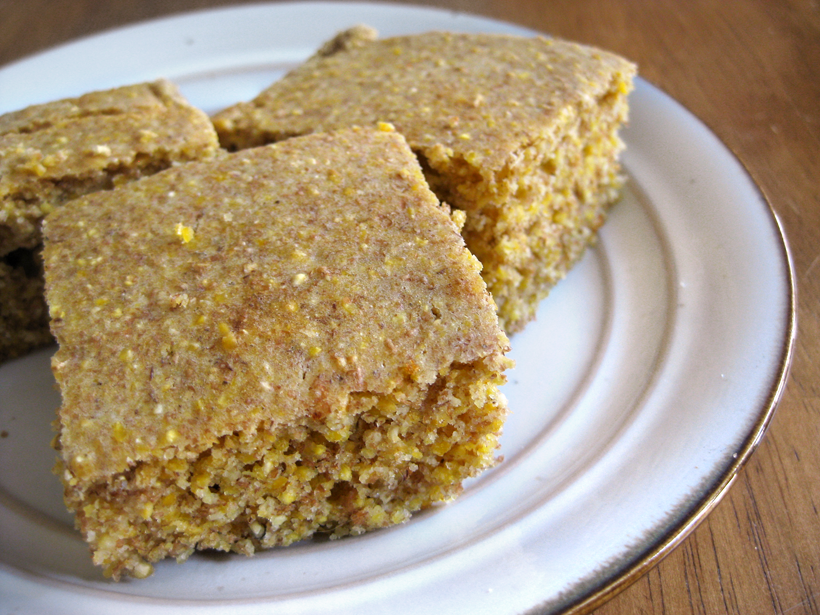
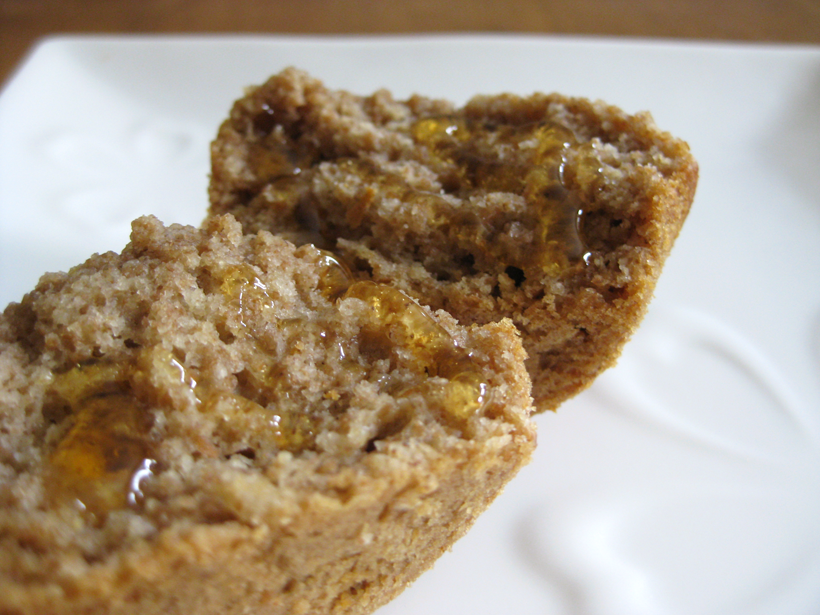
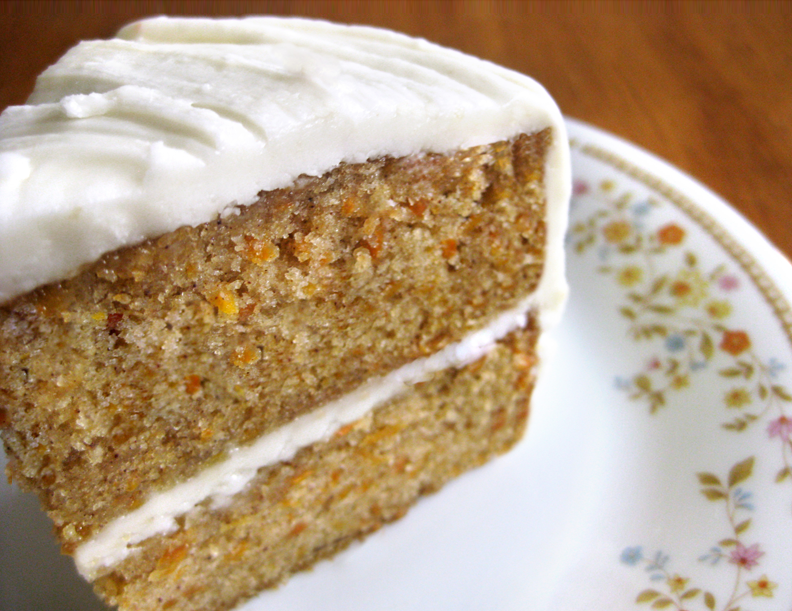
I can hear it now, gingerbread in May? Well trust me, it’s not just for Christmas. Chances are many of you have never made it, or have only made the popular cookie form, but this healthy, often all natural, dessert option can be baked up many different ways and may just become a new year-round favorite in your house. Yeah, I said healthy and all natural again! Sweetened with honey and molasses and made with whole wheat flour, today’s recipe is for a light and moist cake version of gingerbread which is delicious all by itself any time of day or dressed up with a springy, lemon yogurt frosting for a unique dessert that will wow. You’ll find printable recipe cards at the end of this post.

GINGERBREAD CAKE
Ingredients
1/2 cup butter, very soft
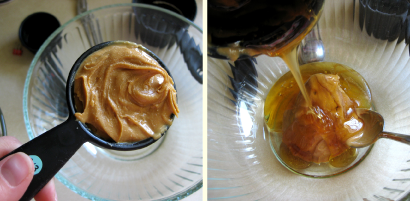
1/2 cup honey
1 egg, beaten
1 cup unsulphured molasses
1 1/2 cups unbleached white flour
1 cup whole wheat pastry flour
1/2 tsp ground cloves
1 1/2 tsp cinnamon
1 1/2 tsp ground ginger
1 cup hot water
1 1/2 tsp baking soda
A note on spices: If you like a milder cake, use 1/4 tsp cloves, 1 tsp cinnamon and 1 tsp ginger. If you’d like a spicier cake, use 3/4 tsp cloves, 2 tsp cinnamon and 2 tsp ginger.

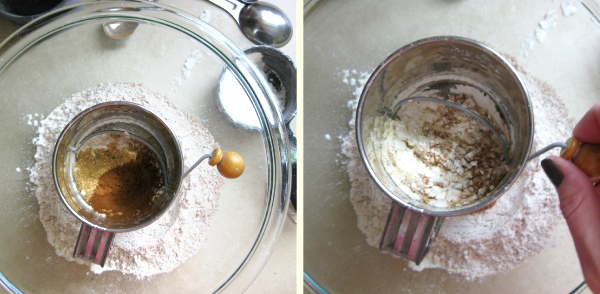
In a large bowl, sift together the flours, spices and baking soda. Set aside.
In a medium bowl, mix the butter, honey, egg and molasses, first with a spoon, then with an electric mixer on low until well blended.

Heat the water in the microwave for about 1 1/2 to 2 minutes until very hot but not boiling.
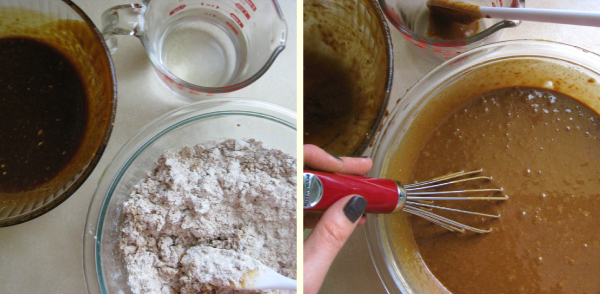
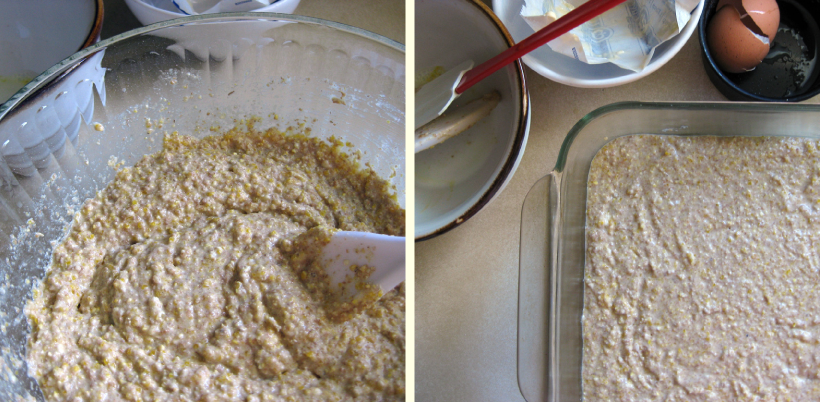
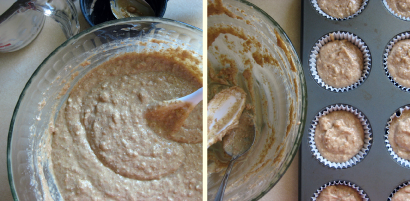
Add about 1/3 of the water to the flour mixture and stir well, next add half the molasses mixture, then another 1/3 of water, the remainder of the molasses and the last 1/3 of the water, stirring well after each addition. Once blended, whisk to ensure all lumps are out. Batter will be very soupy.

Pour the batter into a well greased and lightly floured 13×9 baking pan.
Bake at 350° for 30 minutes or until a toothpick inserted in the center comes out clean.
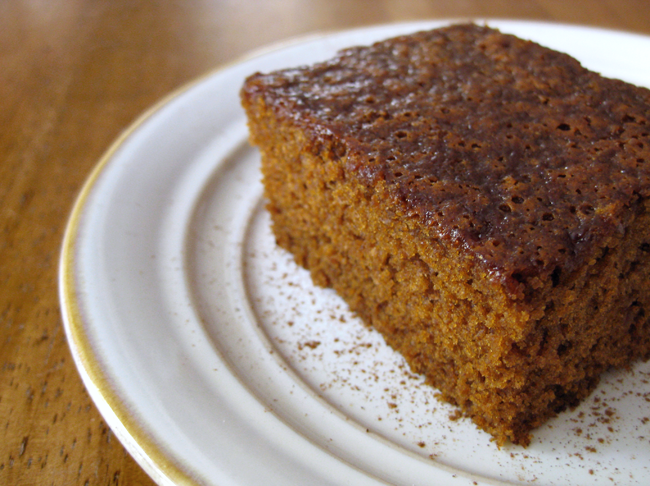
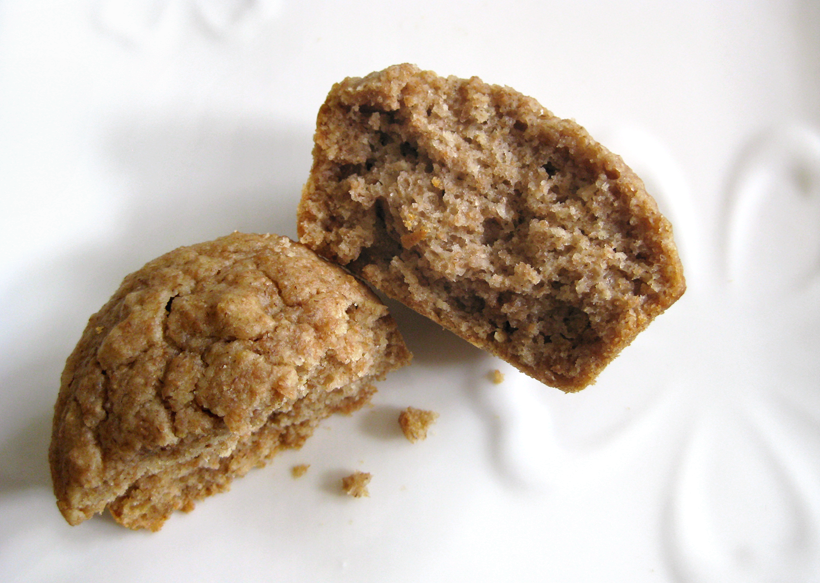
This cake is lightly rich, super moist and uber delicious when served all by its lonesome, but if you’d like to add a unique, refreshing zing, try this healthy frosting alternative…
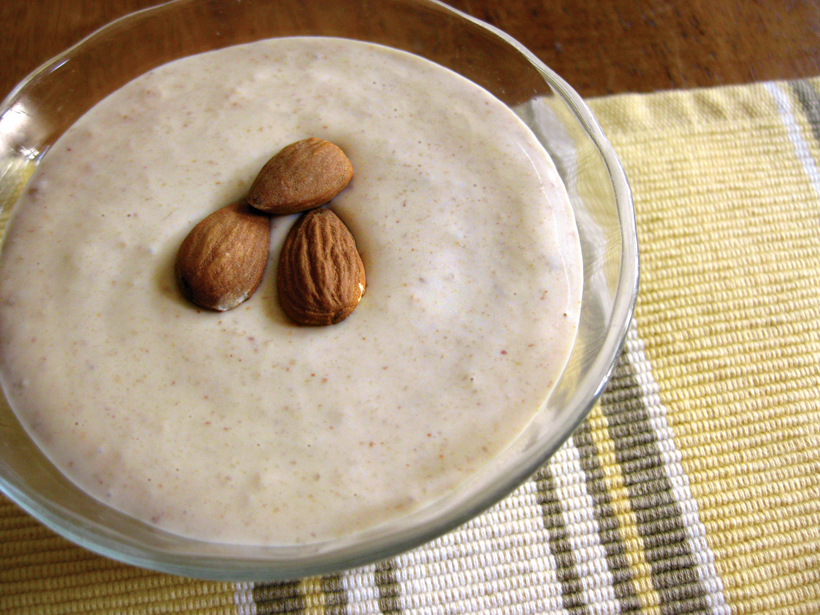
LEMON YOGURT FROSTING
Ingredients
3 cups Dannon lemon yogurt
1/2 tsp pure vanilla extract
powdered sugar
cornstarch

You have some options with the ingredients when whipping up this frosting, but first you have to drain the yogurt.
Dannon brand works best for draining because it is made with pectin and contains no gums or additives. You’ll want to start with three cups (four 6 oz containers).

You’ll need a colander or wire strainer and cheesecloth or coffee filters. Line the colander with the cloth or filters, place it over a deep bowl and spoon in the yogurt. The bowl doesn’t have to be large but make sure it’s tall enough so that the bottom of the strainer doesn’t sit in the draining liquid. You’ll end up with about 1 1/2 cups of yogurt and 1 cup liquid after it drains, but you will only be using the yogurt.

Place it in the refrigerator for at least 16 hours (longer is ok!) until the yogurt drains and resembles the consistency of light cream cheese.
You are now you are ready to make the frosting. If you’d like to keep it as simple and healthy as possible, add 1/2 tsp vanilla and whip it up with an electric mixer. It will be on the thinner side, but not overly runny and will have a yogurt like flavor.
If you’d like a thicker, sweeter frosting with less of a yogurt taste, whip the 1 1/2 cups drained yogurt with 1/2 tsp vanilla, 6 Tbsp powdered sugar and 3 Tbsp cornstarch. You can then add additional powdered sugar, 1 Tbsp at a time, until it reaches your preferred level of sweetness.
You can also meet in the middle of the two recipes – it’s pretty flexible! Don’t expect it to spread like a thick buttercream or cream cheese frosting, but it’s definitely thicker than an icing and a refreshing, healthy alternative. You can store it covered in the fridge for about a week, and if you’re anything like me, you’re already thinking of all the other treats that this frosting would be good slathered on…
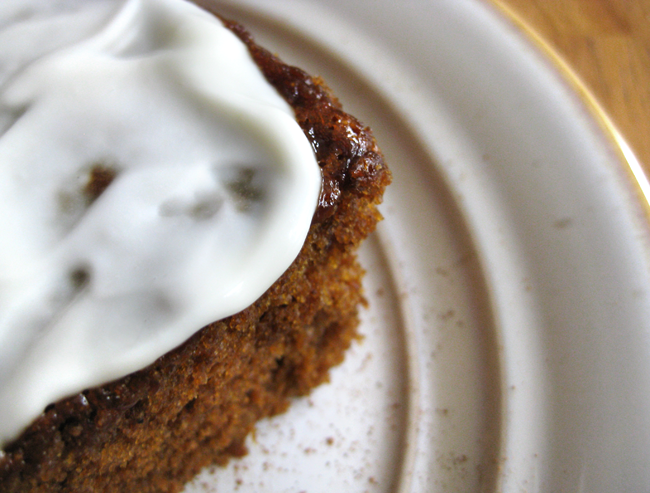
A little bit of frosting goes a long way and you don’t want to overpower the flavor of the cake, so keep it light. I also don’t recommend storing the cake frosted, as it will make it a little soggy.
I find this cake most delicious when served slightly warm, so if you are not serving it right after baking, keep it stored in airtight container. Heat individual servings for about 15 – 20 seconds in the microwave and then spread a little frosting on top or serve a dollop on the side. Enjoy!

In the Kitchen: All Natural Brown Rice Pudding

As I start to share more all natural, sugar free and healthy recipes, I want to make a few points and distinctions about terms and ingredients. When I say something is all natural, it means that it’s made of only whole, natural ingredients containing nothing processed or refined.

When it comes to sugar free, the lines blur a bit depending on who you are talking to. I personally call a recipe sugar free if it contains no refined sugars such as white granulated sugar, brown sugar or powdered sugar. However, most of those recipes do contain honey, rice syrup, molasses or fruit which are natural sugars, therefore technically not completely sugar free. Take it as you will.
Which leads me to my final topic of ‘healthy’. If I say a dessert is healthy, I don’t mean healthy like a bowl of broccoli so eat as much as you want, I mean healthy as in healthier than a piece of mile high mudd pie brimming with chocolate, trans fats, high fructose corn syrup and refined sugars. A dessert made with natural sweeteners and whole grains can still be high in calories and carbs, so always practice moderation when it comes to sweets, but at least you’ll be eating natural, wholesome ingredients with some nutrients and proteins to balance out the natural sugars.
So now onto today’s all natural healthy dessert! It’s not called Brown Rice Pudding because it’s brown, but because it’s made with brown rice. For some ridiculous reason some day back in history, it was decided that we as a society prefer foods that are bright white and clean – white rice, white bread, white pasta. Why? Who knows. ‘White’ foods are simply overly processed, nutrient stripped and sometimes bleaches versions of their natural brown counterparts.
When it comes to rice, brown rice contains about four times more fiber, dozens more nutrients and also takes less energy to produce, therefore making it a healthier and more eco-friendly choice. If you’re not used to eating it (plain), it may taste a little different at first, but when used in a recipe like this one, you won’t even know the difference.
If you’re a fan of rice pudding, please do give this healthy version a try, I was amazed at it’s deliciousness and it’s very easy to make. You’ll find a printable recipe card at the end of the post.
Ingredients:
2 eggs
1 3/4 cups milk
1/3 cup brown rice syrup
1 tsp pure vanilla extract
1 tsp cinnamon
1 1/2 cups cooked short grain brown rice
1/2 cup raisins (optional)
Using 2% milk makes a creamer pudding than nonfat milk, but you can also substitute plain or vanilla soy, rice or almond milk.
I’m not usually a fan of raisins in my food, but I love them in this. You can leave them out, however, if they make you think you’re eating bugs, or you can sub in another dried fruit such as cranberries.

You may have just read the list of ingredients and thought, what is rice syrup? Can I find that here? It’s a delicious natural sweetener, similar to honey, and you can read all about it here. You probably won’t find it in your average grocery store but you can find it at any Whole Foods Market or similar health food grocer and you can also order it online. If you can’t find it or don’t have the time, you can also use honey in this recipe, it works just as well though I prefer the flavor of the rice syrup for this dish.
Now when a recipe calls for vanilla, use the pure stuff. It’s important, trust me. Not only because pure vanilla is natural (rather than being synthesized from sapwood or coal extracts) but because it has a pure, spicy, delicate flavor that cannot be achieved with imitation vanilla, which can often leave a bitter aftertaste. I’ll warn you now, you may be surprised to see the pricetag of a bottle of pure vanilla compared to imitation vanilla, but it is the second most expensive spice in the world, next to saffron, we just never realize because we’re used to buying imitation.

Ok, ok, I’ll get to the recipe now…
Begin by cooking the brown rice. You’ll need 1 1/2 cups of cooked rice so check your package to see how much dry rice to make and for full cooking instructions. This recipe is also a great way to use up leftover rice you may have from a dinner or other recipe.
In a large mixing bowl, blend the the eggs, milk, rice syrup and vanilla until well mixed. Stir in the rice, raisins and cinnamon and mix well.
Spoon into a one quart casserole dish. Don’t worry if it seems the rice and raisins are settling to the bottom and the cinnamon is floating to the top, it’ll happen.
Bake at 350° for one hour, take it out of the oven, give it a good stir and sprinkle some additional cinnamon on top. Return it to the oven and bake for another 20 – 40 minutes until center is set and a knife inserted in the middle comes out clean.
It’s delicious served warm or cold, plain or with a garnish of whip cream or ice cream. Makes about 8 – 10 servings depending on who’s dishing the serving size. Give it a try and let me know what you think!
And stop back this afternoon for another new recipe – Gingerbread Cake with Lemon Yogurt Frosting!

In the Kitchen: Slow Cooker Tex Mex Chili and Whole Wheat Cornbread

With the official arrival of Spring, we may be on the tail end of chili season for some, but I love a good hearty bowl anytime of year. It’s easy to make and always leaves you feeling full and satisfied. You can’t go wrong adding a side of cornbread and this nutritious, whole wheat version is a tasty, and far healthier, alternative to box mixes but is just about as quick and easy to make. Read on for directions and printable recipe cards.

SLOW COOKER TEX MEX CHILI

Ingredients:

Two 16oz cans kidney beans, drained and rinsed
28oz diced, stewed or whole tomatoes, chop large pieces
1 lb ground beef or turkey, browned and drained
1 onion, chopped
1 green pepper, chopped
1 red pepper, chopped
2 Tbsp minced garlic
3 Tbsp chili powder
1 tsp black pepper
1 tsp cumin
6 oz sliced jalapenos with juice

If you use canned beans, look for low sodium or no salt added varieties. It’s always healthier to add salt to taste after cooking then to add a bunch in with all your ingredients. You use far less in the end. You can also use dried beans, 32 oz soaked and rinsed.

You can use ground beef or ground turkey in this dish, I use half of each and freeze the other halves for later use. You can also make it meatless and add more peppers and beans.
Lastly, if you don’t want it really spicy, use a can of diced green chilies in place of the jalapenos. Or if you want extra spice, add 2 Tbsp of Tabasco sauce.

Mix all ingredients in a slow cooked and heat on low for 7 – 8 hours.
To make it on the stovetop, simmer in a stockpot or dutch oven for 45 minutes to an hour.

Garnish with a dollop of sour cream and cheese, if desired, and enjoy!

If you’re a chili fan, in a few weeks I’ll have a delicious sweet potato chicken chili for you, so stay tuned!
· · · · · · · · · · · · · · · · · · · · · · · · · · · · · · · · · · · · · · · · · · · · ·
WHOLE WHEAT CORNBREAD

Ingredients:
1 cup coarse stone ground cornmeal
1 cup whole wheat pastry flour
4 tsp baking powder
1 Tbsp sugar*
1 egg
1 cup milk
1/4 cup butter or margarine, softened
*The sugar in this recipe is optional, but it’s a small amount and adds a nice flavor. If you like a slightly sweeter cornbread (such as Jiffy Mix), use 2 Tbsp + 1 1/2 tsp sugar.
If you’d like a slightly healthier alternative to refined white sugar, try using Turbinado sugar in your recipes. Also known as Sugar in the Raw, Turbinado sugar is all natural, unrefined and has less calories than granulated sugar. It also contains some nutrients lost during the processing of white sugar. It does still have the same basic effects on blood sugar levels as white sugar, but it’s less processed and has a slightly richer taste to it.

Sift together dry ingredients in a bowl. I prefer to use coarse ground cornmeal for plain old cornbread like this, but the regular or fine ground cornmeal works, too.

Mix the egg, milk and butter in a small bowl until just blended.

Add wet mixture to the dry ingredients and beat with a spoon until smooth, about one minute, but do not overbreat. The mixture will be a little lumpy.
Bake in a greased 8-inch square pan at 425° for 20 minutes or until golden brown on top.

Cut into squares and serve warm, plain or topped with a little butter. Delicious!
And find more easy and delicious recipes here.

In the Kitchen: Cinco de Mayo!

It’s Cinco de Mayo! Well, actually it’s cuatro de mayo, but this way you’ll have time to hit up the market and be ready to prepare some delicious treats for tomorrows celebration! Today I have three easy and tasty appetizers or side dishes that you can enjoy not only on Cinco de Mayo, but all year long.
Today’s recipes use three types of peppers, so I’ll begin with a little lesson on chilies. You can find these varieties at most grocery stores with a decent produce section and can certainly find them, plus many many more, at any local market, but if they aren’t labeled properly, it can be hard to tell what you’re buying. Poblanos are large, often bigger than your hand, and have a dark green coloring to them. They rate mildly on the Scoville scale, falling just below jalapenos.

Anaheim peppers are long and skinny, often the length of your hand or so, and have a bright, yellowy green color. Most rate equal to poblanos on the scoville scale, though some rate above, and I find them to be spicier than most poblanos.
Jalapenos are small and have a dark green color to them. They still fall pretty low on the scoville scale in spiciness, under cayenne and serrano, but will add a good amount of kick to any dish. Later in the post I’ll show you how to roast and peel peppers, which is a common step needed for many recipes of all kinds.
· · · · · · · · · · · · · · · · · · · · · · · · · · · · · · · · · · · · · · · · · · · · ·
FRESH MANGO SALSA

First up in our fiesta is a delicious Mango Salsa. I’ll admit, I’ve never been into the fruit salsa kick, but I’m growing by leaps and bounds in my culinary adventures and found this to be exceptionally delicious. It has the perfect blend of sweet and savory and tastes remarkably refreshing. While mango is a very common ingredient for salsa, you can substitute other fruits for the base of this recipe including papaya, pineapple, peaches or plums.
Ingredients
1-1/2 cups chopped, peeled mango (or fruit of choice)
3/4 cup chopped red sweet pepper
1/4 cup thinly sliced green onions (about 2 stalks)
1/4 cup chopped fresh cilantro
2 tablespoons lime juice
2 tablespoons finely chopped fresh Anaheim pepper (can also substitute jalapeno or serrano, use 1-2 peppers)

In a medium mixing bowl stir together all ingredients. Cover and chill at least 2 hours before serving to let the flavors infuse!

This salsa is great with chips or fresh vegetables and can also be used as a condiment for tacos, quesadillas, burgers, steaks, chicken, or fish.
· · · · · · · · · · · · · · · · · · · · · · · · · · · · · · · · · · · · · · · · · · · · ·
STRAWBERRY AVOCADO SALSA

Here’s another fruit salsa that has a slightly sweeter taste to it accented with the richness of avocado, the crunch of cucumber and the spice of jalapeno.
Ingredients
1 cup strawberries, coarsely chopped
1/2 cup avocado, seeded, peeled, chopped
1/2 cup cucumber, coarsely chopped, seeded
2 – 3 teaspoons honey (start with 2 tsp, add more if desired)
1/2 teaspoon lime peel, finely shredded
1 tablespoon lime juice
1 tablespoon jalapeno pepper, seeded, finely chopped
1/4 teaspoon coarse black pepper

I’ll start by showing you the easiest way to cut and peel an avocado. If you’re not used to working with them, they can be confusing and slippery at first, or maybe it was just me…
Using a sharp knife, carefully cut lengthwise around the avocado until you hit the pit. Using two hands, twist the two halfs of the avocado in opposite directions and separate. Using a spoon, separate the meat for the skin, it peels away very easily leaving you with a nice piece that you can then chop up.
To make the salsa, combine all ingredients in a medium bowl. Cover and chill for 2 to 24 hours. Serve with chips or as a condiment for grilled chicken, fish or pork.
Lotus bowl and lilypad plate by Whitney Smith
Before I move onto the last recipe, let’s talk chips. There are about 12 million varieties available these days and everyone has their favorites. Whether you like them white, gold or blue or flavored with lime and salt, many people believe they are healthier than your standard potato chip, but you have to be careful with your choices if you’re trying to be health conscious. Read the labels and look for products made with natural ingredients that have a low sodium content or are salt free. A little salt or flavor won’t kill you, of course, but when you make delicious, flavorful salsas like the two above, keep the delivery vehicle simple.
Here are my recommendations for the two recipes above. I love the Frontera Lime + Sea Salt with the Strawberry Salsa and the Garden of Eatin’ Black Bean with the Mango Salsa. They each accent the flavors nicely and happen to be healthy choices while still tasting great. I’m a big fan of both of these brands in general, all flavors.

The Garden of Eatin’ no salt added Blue Chips are my tortilla chip staple. Some may find them bland, but I think they are quite yummy for being salt free. They don’t work well with everything but I especially love them on homemade guacamole.

· · · · · · · · · · · · · · · · · · · · · · · · · · · · · · · · · · · · · · · · · · · · ·
QUESO FUNDIDO WITH CORNBREAD DIPPERS

Last but not least I have a delicious, hot Queso Fundido that is sure to please everyone. Who doesn’t love dipping things in hot cheese? As with salsa, there are a million and one ways to make Queso Fundido, but this is how I like it – without sausage, with crunchy jicama and just the right amount of spice.

Ingredients
2 fresh roasted poblano peppers
1 small fresh roasted red sweet pepper
12 ounces Monterey Jack or Pepper Jack cheese
2 tablespoons flour
1/3 cup finely chopped onion
1 tablespoon butter or margarine
3/4 cup half-and-half or light cream
1/3 cup finely chopped jicama
When a recipe calls for fresh roasted peppers or says to roast, skin and peel peppers, this is how you do it. It’s really quick and easy and makes the peppers smell and taste just delicious.

Start by quartering the peppers, discarding the seeds and cutting away any membrane inside. Lay them flat, skin side up, on a foil lined baking sheet. Broil on low for about 5 minutes until all the skin blisters and browns.

Remove them from the oven and wrap them in the foil. Let stand for about 15 minutes then open the foil and let them cool for a couple minutes.

You’ll now be able to easily peel away the skin and chop up your peppers! For this recipe, you will do the same thing with the sweet red pepper. You can do them all at the same time or separately, then chop them coarsely.
If you read the ingredients for this recipe and said, what the heck is jicama? You’re probably not alone. This mystery ingredient is actually in the legume family and can also be referred to as the mexican potato, yam bean or chinese turnip. It’s increasing in popularity and if you’re a big veggie or salad eater, it’s about to become your best friend.
I would personally describe it as a cross between a potato and an apple. There is no pit or core, so you can use the whole thing and the meat has the same texture and consistency of an apple. It is delicious eaten raw alone or in salads and has a semi-sweet flavor and light crunch to it. It’s high in vitamin C, low in sodium and has no fat, and one cup has only 45 calories.
You can find it at more and more grocery stores and usually at any farmers market.

For this recipe, you will chop it semi coarsely. You’ll want some chew in your dip, but not huge chunks. Next chop the onion finely, you will saute it later.

I use a mix of monterey jack and pepper jack cheese, just for a little extra kick. Shred it and toss with the flour in a bowl.

Saute the onions in a medium saucepan with butter until tender. Stir in the half and half or cream and then begin adding the cheese, a little at a time, stirring until melted over medium-low heat.
Once all the cheese is melted, add the chopped peppers and jicama and stir until heated through. Serve immediately or transfer to a fondue pot and keep warm for up to 2 hours.
If you’re a meat eater, add 1/4 lb cooked, crumbled chorizo when you add the peppers.
This recipe is delicious with tortilla chips, cubes of bread, even veggies or meat, but I especially love it with crunchy sticks of cornbread.
To make the cornbread dippers, prepare a batch of your favorite cornbread and cook it in a 8″ or 9″ square pan according to the directions. I always recommend making cornbread from scratch, it’s amazing what they sneak in those mixes. It’s easy and you can control the flavor by adding your preferred amount of salt or sugar, but I find a less sweet cornbread is best for this recipe. I usually use a coarse, stone ground cornmeal but for this I recommend a finely ground cornmeal, or it will be too crumbly.
When the cornbread is done cooking, place on a wire rack and cool completely. Using a long serrated knife, cut the bread into 1/2 lengths, then into halves or thirds to create the dippers. Yes, it will crumble a bit and they won’t be perfect, but it doesn’t matter!
Place them in a single layer on a large, ungreased baking sheet and cook for 5 minutes at 400°. Flip them over and cook for another 5 minutes. Let them cool and store in an airtight container for up to 4 days. Great part is you can make these ahead of time!
You can store any leftover dip in an airtight container in the fridge and reheat on the stove or in the microwave as needed, but it’s much creamier and delicious when enjoyed fresh.

I hope you give one of these recipes a try and let me know what you think – Feliz Cinco de Mayo!

In the Kitchen: Sugar Free Peanut Butter Muffins and Pudding

Today’s recipes are the first of many sugar-free and naturally sweetened desserts and snacks that I’ll be sharing with you here on the blog. With many sugar free recipes, there are often variations and substitutions you can make in the type of natural sweetener you use, as well as other ingredients, that will affect the flavor and sweetness of the dish, so in addition to the basic ingredients, you will see these substitutions listed along with notes on how to sweeten the dish even more with ingredients that may add sugar, for those who are trying to cut back or eat healthy but aren’t ready to entirely cut out sugar.

If you’re not used to eating sugar free treats, even at their sweetest these recipes may take some getting used to, but the more you cut excess sugar out of your diet, the sweeter natural foods will taste.
I especially love these muffins. I call them my power muffins! Packed with peanut butter, whole wheat and a touch of honey for sweetness, they are perfect for a grab and go breakfast, mid day snack or served with soup or salad for lunch or dinner. Drizzle on a bit on honey or natural fruit jam for a healthy dessert alternative. If peanut butter isn’t your thing, try using almond or cashew butter. There are many ways to customize these muffins to suit your tastes and dietary needs.

SUGAR FREE PEANUT BUTTER MUFFINS
Ingredients
2 cups whole wheat pastry flour
1 tbsp baking powder
1/3 cup natural peanut butter
1/3 cup honey
1/4 cup oil
1 1/4 cups original or vanilla* soy, almond or rice milk

*Note that some vanilla milks have a form of sugar in them. If you use a plain milk you can try adding 1/4 – 1/2 tsp pure vanilla extract to the muffins for a little extra flavor.

Substitutions
You can use any kind of natural nut butter in these muffins such as almond, cashew or hazelnut in place of the peanut butter for a different taste or in case of allergies. You can also use any type of molasses in place of the honey. Try blackstrap molasses for an extra boost of iron!

Stir flour and baking powder in a bowl, set aside. Mix peanut butter, oil, honey and milk in a separate large bowl until smooth.

The peanut butter tends to clump in the middle, so I find a whisk especially useful. A glass bowl also lets you look at the bottom to see if it’s mixed thoroughly.
Add the dry mixture to the liquid mixture and stir with minimal strokes, do not beat.
Batter will be a little lumpy looking. Line 12 muffin tins with paper (or grease and flour) and fill about two thirds full.
Bake in a preheated 350° F oven for 20 – 25 minutes, until toothpick inserted in center comes out clean.

· · · · · · · · · · · · · · · · · · · · · · · · · · · · · · · · · · · · · · · · · · · · ·
Continuing with the peanut butter (yes, it’s my favorite!), here is a super quick and easy recipe to create a healthy, sugar free pudding. This recipe can also be made using different nut butters such as almond or hazelnut.

SUGAR FREE PEANUT BUTTER PUDDING
Ingredients
1 small ripe banana
1/2 cup plain or vanilla* nonfat yogurt
1/2 cup natural peanut butter (or any nut butter)
1/4 teaspoon pure vanilla extract
*I prefer to use vanilla yogurt as it adds a little extra flavor and sweetness but do note that there may be sugar in it. If you’re going for totally sugar free, use the plain. Otherwise, look for a vanilla yogurt that contains natural rather than artificial sweeteners, or learn how to make your own here!
Combine all ingredients in a blender or food processor. Process first on low speed, then on high speed until smooth. Refrigerate and store for up to 4 days. Serves 4.

And find more easy and delicious recipes here.

In the Kitchen: Bow Tie Chicken and Spinach

I’ve been cooking up so many desserts, snacks and side dishes lately and I realized it’s been quite some time since I shared an entree. So before I get into all the sugar-free and natural recipes I’ve been working on and talking about, I have one of my favorite dinner dishes to share with you. This one-skillet wonder is easy to make combining a unique blend of flavors that is equally delicious served vegetarian without the meat. You’ll find a link to a printable recipe card at the end of this post.

Ingredients:
1/2 – 1 lb chicken (optional)
1/4 lb bacon (optional)
1 cup sliced mushrooms
1 Tbsp minced garlic
2 Tbsp flour
2 tsp onion powder

1 tsp garlic powder
1 tsp pepper
salt to taste
14 oz low sodium chicken broth
6 oz fresh spinach
10 oz fresh or frozen corn kernels
16 oz sour cream
1/2 cup sliced green onions (optional)
crushed croutons (optional)
8 oz bow tie pasta

Healthy alternatives:
Omit bacon, flour for coating chicken, salt and croutons.
Use low sodium or no salt added broth, fat free or light sour cream and whole wheat pasta.

Saute bacon, mushrooms and minced garlic until all are cooked. Crumble bacon (or chop before cooking) and set mixture aside.

Cut chicken into bite sized pieces and coat with 2 Tbsp flour. Saute in a deep skillet until cooked through and slightly browned.

Add chicken broth, mushroom mixture, onion powder, garlic powder and pepper to skillet. Cover and simmer for 10 minutes.

Stir in sour cream, corn and spinach, cover and simmer 5 – 10 minutes until corn is cooked through, spinach cooks down and sauce begins to thicken. If you’d like a thicker sauce, add flour, one tablespoon at a time, until it reaches desired consistency.
You can also give it a taste at this point, you may want to add more seasonings to the sauce sauce as onion, garlic powder, pepper or a little salt.

Serve over cooked pasta and top with crushed croutons and green onions if desired. Add a side of fresh fruit and you have a meal that is sure to please!

And find more easy and delicious recipes here.

In the Kitchen: Homemade Carrot Cake with Cream Cheese Frosting

I’ve been promising this recipe for at a least a month and now that I’m sharing it – I couldn’t find my darn photos! At least I have the finished product, that’s what really matters, because this completely from scratch recipe (frosting and all) is as easy to make as it is delicious.

On a side note, those of you who chat with me on Twitter and Facebook may have noticed me talking recently about my concerns with eating too much sugar and too many artificial and processed foods. I’ve begun making some changes in the items I buy and the way I cook and am ‘perfecting’ some all-natural, sugar-free and wholesome recipes that I hope to share with you soon. These include a sugar free carrot cake and brown rice pudding, just to name a couple desserts. I’ll also be sharing what I learn about substituting whole grain and natural ingredients in your favorite recipes (and my previous recipes posted), so if you, too, are trying to make these changes in your diet – stay tuned!
But first, here’s my favorite recipe for simple, good old fashioned, bare bones homemade carrot cake with rich cream cheese frosting. While it does call for all-purpose flour and refined and powdered sugar, making anything from scratch is better for you (and better tasting) than any box mix you’ll find, or at least I think so, so start here and work your way up to the whole wheat, sugar free version I’ll be sharing soon. You’ll find a printable recipe card at the end of this post.
Ingredients
Cake:
4 eggs, beaten
2 cups all-purpose flour
2 cups sugar
2 teaspoons baking powder
1 teaspoon ground cinnamon (optional – but I use 2!)
1/2 teaspoon salt
3 cups finely shredded carrot (lightly packed)
3/4 cup oil
Frosting:
8 oz cream cheese, softened
1/2 cup butter, softened
2 teaspoons vanilla
5 to 6 cups powdered sugar
Allow eggs to stand at room temperature for 30 minutes. Meanwhile, grease two 8″ or 9″ round cake pans. Line the pans with wax paper, then grease the wax paper. You don’t have to use the wax paper but it makes it so much easier! For greasing, I use Pam with Flour spray, I love the stuff.
Preheat oven to 350°. In a large bowl stir flour, sugar, baking powder, cinnamon, salt and baking soda. In another bowl mix eggs, grated carrot* and oil. Add the egg mixture to the flour mixture and stir until blended. Divide the batter between the two pans.
*Baking Tip: If your carrots are not shredded fine enough, they may sink to the bottom of your cake when baking.
Bake at 350° for 3o – 35 minutes or until a toothpick inserted near the center comes out clean. Cool the cakes in the pans on wire racks for about 10 minutes then remove the cakes and cool completely on the wire racks.
To make the frosting, beat the cream cheese, butter and vanilla in a large bowl on medium speed until light and fluffy. Begin adding the powdered sugar, beating as you go, a little at a time until you reach your desired consistency. It will be thick and hard to mix as you go, but it’ll get there! This recipe yields enough to frost the top and sides of two round cakes, along with some for in between the layers. (You can half the recipe if you’re frosting a 13×9 cake.)
To frost the cake, make sure it is completely cooled. Lay the first cake rounded top down on a plate and brush any loose crumbs away from the surface and edges with your hands or a pastry brush. Spread about 1/2 cup frosting on top and smooth. Next place the second cake on top with the rounded side facing up and begin frosting the sides, going about 1/4″ above the cake. Last frost the top. You can sprinkle the top and sides with chopped nuts if desired, but I prefer it plain and simple. Enjoy!

And find more easy and delicious recipes here.

p.s. After finishing this post, cousin Valorie reminded me that we didn’t take any photos while baking this cake, so now I don’t feel as bad about ‘misplacing’ them!

In the Kitchen: Lemon Bars

This classic dessert is always a crowd favorite and surprisingly easy to make from scratch. The refreshing blend of sweet and tart makes it a perfect treat for the warm Spring days ahead. Chances are you have most of the ingredients in your cupboards, so pick up a lemon and get to it! You’ll find a printable recipe card at the end of the post.

Ingredients
Crust:
2 cups flour
2/3 cup powdered sugar
2 tbsp cornstarch
1/4 teaspoon salt
3/4 cup butter

Filling:
4 eggs
1 1/2 cups granulated sugar
3 tbsp flour
1 tsp finely grated lemon peel
3/4 cup juice of lemon
1/4 cup half & half, light cream or milk
powdered sugar for garnish

Heat oven to 350°. In a large bowl mix flour, powdered sugar, cornstarch and salt. Cut in butter using a pastry blender until it looks like coarse crumbs.

Grease a 13×9 baking dish (or what I do for easier removal when making any kind of bars is line the pan with foil, then grease the foil – I use Pam with flour spray, works awesome!)

Press the dough mixture firmly into the pan and bake 18 minutes (don’t overcook).

For the filling, you’ll need grated lemon peel. Using a fine grater, grate just the yellow skin of the lemon until you start to see the white rind inside. You’ll grate most of the skin of a palm sized lemon to get one teaspoon.

In a medium bowl, lightly beat eggs, mix in sugar, flour, cream, lemon peel and lemon juice (I squeeze what I can out of the lemon after grating the peel then use bottled juice for the rest).

Pour filling over hot crust and bake 15-18 minutes until center is set. It won’t look much different but will turn from a liquid to solid consistency.

Cool completely on a wire rack. Cover and chill in the fridge until cold, sift powdered sugar on top before serving. Enjoy!

You can store leftovers covered in the fridge but the powdered sugar will dissolve, so you may want to cut smaller portions to sift with sugar and serve if you don’t expect the entire pan to disappear in one sitting. (fat chance, right? 🙂


And find more easy and delicious recipes here.

p.s. That beautiful plate is made by the talented Whitney Smith.

In the Kitchen: Guacamole

Guacamole! I’ll admit I’ve never liked the stuff, but it sure is fun to say, don’t ya think? Say it again… guacamole! Ok, now that we’ve gotten that out the way, why am I making it if I don’t like it? Well, I’m all for second chances, when it comes to food at least, and guess what? I liked it! Turns out most things are much more delicious when you make them from scratch with yummy, fresh ingredients. Who knew? 😉
This recipe has minimal, basic ingredients and is really easy to make — doesn’t get much better than that, right? Read on for the how-to and find a printable recipe card at the end of the post.
Ingredients:
2 ripe avocados (they should be firm, but yield to gentle pressure)
juice of half a lime
3 tablespoons red onion, finely diced
3 tablespoons fresh cilantro, stemmed and chopped
1/2 teaspoon salt
dash freshly ground pepper

Peel, pit and coarsely chop the avocados.

Add the lime juice, diced red onions, cilantro, salt and pepper.
Mix gently with a fork and (about to get technical here) smush to your chunkiness liking. You can also puree in a food processor if you like it smooth. Optionally, add two tablespoons fresh chopped tomatoes.

Serve immediately or place in an airtight container and chill in the fridge. Delicious with chips or on your favorite entrees, like these Hawaiian Tacos. Enjoy!

And find more easy and delicious recipes here.

Valorie’s in my Kitchen: Hawaiian Tacos

I had the great pleasure of hanging out with my ‘cousin-in-law’, Valorie, last week when she came in for a visit from Colorado. You may have seen her In the Kitchen posts here over the last few months so what did we do during her trip? Cook, of course! First we made a delicious homemade carrot cake with cream cheese frosting, which I will be posting soon, and on Sunday night Valorie shared a favorite of hers, Hawaiian Tacos! I’ll let her take it from here…
Someone I knew once made me tacos with teriyaki-marinated chicken. Other than the teriyaki flavor, these were pretty standard tacos, but I remember the uniqueness of the Asian-style chicken in the Mexican dish and like it quite well. Maybe that’s what people mean by Asian Fusion? I’ve taken the idea of teriyaki-marinated chicken and blended it with pineapple, salsa, and cilantro. Yes, it sounds odd, but I’ve never met anyone who tried it and didn’t like it. You’ll find a link to a printable recipe card at the end of this post.

Prep time: 30 min | Serves about 4
Ingredients:

6-8 eight-inch corn tortillas
2-4 tablespoons canola oil
1 lb boneless, skinless chicken breasts, cut into pieces
8oz can of crushed pineapple or pineapple tidbits
1/4 cup thick teriyaki sauce or marinade
shredded cheddar cheese
roasted, diced green Chile peppers
fresh cilantro, finely chopped
fresh lime wedges
sour cream, salsa, guacamole

If you have time, marinate the chicken in the teriyaki sauce and pineapple juice for 2-6 hours. Alternatively, add uncooked chicken, teriyaki sauce and the can of pineapple (with juice) to a nonstick skillet. Simmer over medium heat until chicken is cooked, liquid is evaporated, and sauce is thick and slightly sticky, about 20 minutes.

To prepare the tortillas, heat canola oil in a skillet over medium flame. Well-seasoned cast iron or non-stick finish works best, as stainless steel tends to stick and require more oil. Heat tortillas in canola oil for about 30 seconds on each side, or just until the tortilla forms air bubbles inside. Set aside on a paper towel to catch any oil.
Assemble tacos with chicken and pineapple mixture, cheese, fresh cilantro, green chiles, salsa, guacamole, sour cream and a squeeze of fresh lime juice (this really adds to it!). We couldn’t find fresh, ripe avocados so had to pass on the guac this time, but I’ll share my homemade recipe here soon.
Delicious with a side of black beans jazzed up with fresh cilantro, diced tomatoes, chopped green chilies and your favorite seasonings.
Pile high, fold and enjoy!


And find more easy and delicious recipes here.