In the Kitchen: Creamy Chicken Enchiladas

This week I have an easy and delicious twist on chicken enchiladas. I’ve been eating these for as long as I can remember and they’ve never disappointed. This recipe makes four average sized enchiladas though the sauce can go farther. Simply increase the amount of chicken and tortillas to make more. You will find a link to a printable recipe card at the end of this post.

Prep time: 20 min | Cook time: 20 min | Makes 4 Enchiladas


What you’ll need:
skinless boneless chicken, 4 tenderloins or 2 breasts
4 burrito size flour tortillas
1 can (15 oz) cream of chicken soup
16 oz sour cream
1 small can diced green chilies
shredded cheese, cheddar and/or pepper jack

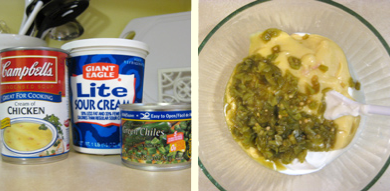
In a large bowl, mix the chicken soup, sour cream and green chilies until well blended. Heat the sauce in the microwave for one minute. This step is not necessary though cuts down on baking time a bit.

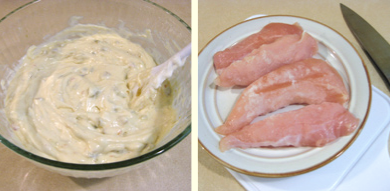
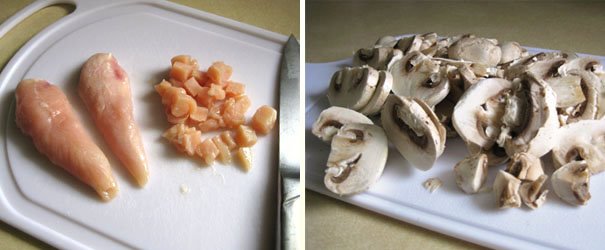
Cut thawed chicken into bite sized pieces and cook in a skillet until done. As I’ve mentioned before, I always cook with chicken tenderloins. We buy them in large bags and thaw them as needed. I use one tenderloin per enchilada though you can adjust this to suit your preference. 
Season the chicken while cooking with a few shakes each of onion powder, garlic powder, black and red pepper and cilantro, or the seasonings of your choice.
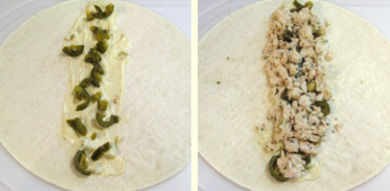
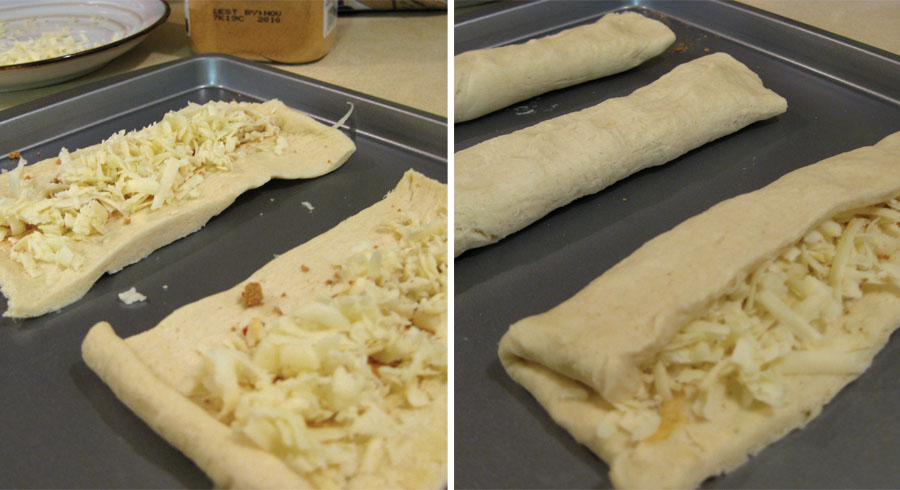
Lay a tortilla on a flat surface and spread a little sauce down the center. You can also add some chopped jalapenos if desired. Next add the chicken.
Top with shredded cheese, as much as you like. I use cheddar and sometimes also a little pepper jack. 
Begin rolling the tortilla tightly, one side at a time.
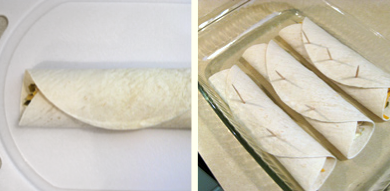
Roll the other side and lay them in a greased 13 x 9 baking dish. I use toothpicks to keep them closed while cooking. This also helps me indicate which have the jalapenos in them, because mine does not! 
As I mentioned, this recipe will make 4 average sized enchiladas. I only make three as you see above – two large ones for the man and one average size for me. A 13 x 9 pan will hold 4 side by side.
Pour the remaining sauce over the enchiladas and spread evenly. 
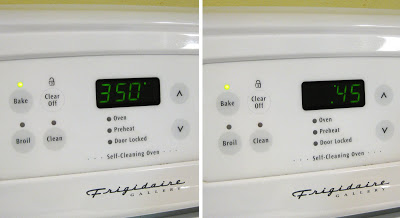
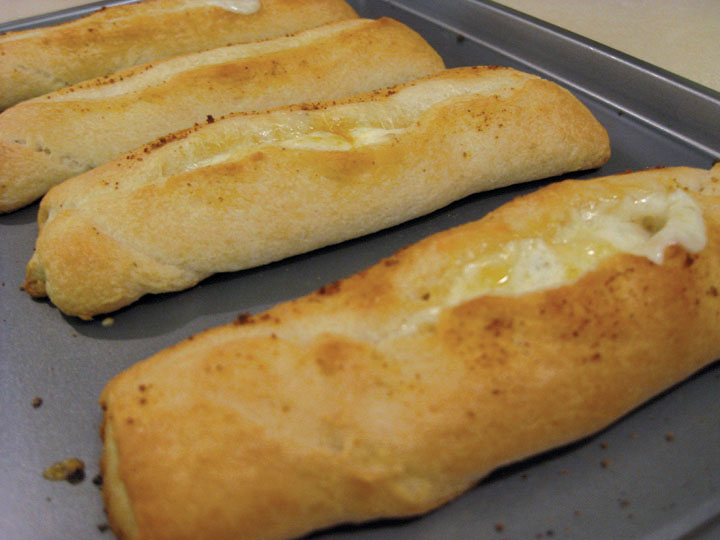
Bake at 375° for about 15 minutes or until sauce begins to bubble a bit. Remove from oven and add some shredded cheese on top, return to oven and cook for an additional 5 minutes.
I recommend an oversized spatula for removing them from the pan, as they are kind of floppy! Letting them sit for about 5 – 10 minutes after cooking also makes serving easier.

I like to serve them with spanish rice and black beans with a little sauce poured over the top – delicious!

If you make any of the recipes I post here, I’d love to hear about it!

In the Kitchen: Chocolate Cracker Toffee

After a week off for my Etsyversary giveaway, In the Kitchen is back with a new recipe and I thought it was time for a dessert! Since you’ve probably figured out I’m all about quick and easy, this week’s recipe is no exception. Some of you may have had this yummy treat or a variation of it, but I was first introduced to it only a couple years ago during an office cookie exchange – and it was love at first bite. You will find a link to a printable recipe card at the end of this post.

Prep time: 10 min | Cook time: 12 min | Makes about 36 pieces

What you’ll need:
1 sleeve rectangular buttery crackers
1 cup (2 sticks) butter (NO substitutes!)
1 cup brown sugar
2 cups chocolate chips

Preheat oven to 350°. Line a sturdy 10″ x 15″ baking sheet with aluminum foil and cover the surface with the crackers in a single layer, edges touching.
In a small saucepan, melt the butter, add the sugar and bring to a boil. Boil, stirring constantly with a wire whisk, for 2 minutes. The mixture will gradually combine and form a thick sauce. Be careful as it can burn very easily – keep whisking! This sauce is also delicious poured over plain popcorn to make homemade caramel corn.

Gently pour the sauce over the crackers and carefully spread it out with a spoon to cover all the crackers.
Bake the tray for 10-12 minutes or until the sauce bubbles all over
the surface.

Remove from the oven and immediately sprinkle with the chocolate chips. Return to the oven for 1 minute to melt the chips.
Remove from the oven again and, using the tip of a knife or spoon, spread the chocolate to cover the crackers.
Let cool completely (you can refrigerate) and cut or break into pieces. I find it easiest to lift the foil off the pan and peel it away from the toffee before breaking it into pieces. If you have any trouble with the foil sticking, you can spray it with non stick cooking spray before laying out the crackers, though I have never had a problem. It comes off pretty easy if you pull it slowly in one big piece.
I prefer to store this in the fridge to keep the chocolate from melting or getting too soft. Be warned, it’s highly addictive… but I’m weak.

In the Kitchen: Hashbrown Casserole

This week – Cheesy Hashbrown Casserole – if you like it at Cracker Barrel, you will like this! The hardest part about this recipe is finding a big enough bowl to mix it in. It’s delicious for breakfast but also makes a great side dish for dinner. This recipe could easily serve about 10 but it also stores well in the fridge. When I make a pan, we just heat up individual servings each morning for breakfast and it lasts through the week. You will find a link to a printable recipe card at the end of this post.
Prep time: 15 min  |  Cook time: 45 min  |  Serves: About 10
What you’ll need:
one bag frozen shredded hashbrowns
1/2 C margarine, melted
1 small can cream of chicken soup
8 oz colby cheese (cheddar works, too)
1 tsp salt
1/2 tsp pepper
1/4 C finely chopped onion (optional)

In a large bowl, mix the margarine, cream of chicken soup, cheese, onion (optional), salt and pepper until blended. I leave the onion out but use about 1/4 tsp onion powder instead.
Next add the hashbrowns and mix until coated. It helps to leave the hashbrowns out to thaw in the fridge about an hour before making this, or on the counter for about 30 min. If frozen, beat the bag on the edge of the counter before mixing in to help break them up.
Grease a 9×13 baking pan with cooking spray or butter and spread mixture evenly into the pan.
Cook at 350° for about 45 minutes or until top begins to bubble and brown. The potatoes will still look the same as they did when frozen, so you can taste it to make sure they are soft and cooked through. 
It’s also hard to over cook this, so it’s great to make for a party or potluck – just throw it back in the oven to warm it up before serving. It also reheats well in the microwave.
One bite and you will surely be addicted.

In the Kitchen: Roasted Red Pepper Alfredo

The base sauce for this meal is easy and versatile. I make it with chicken, mushrooms and spinach but it is also delicious without or you can add any vegetables you like. I serve it over cheese tortellini but it is good on any pasta or even grilled chicken or fish. This recipe will easily serve 4 people or 2 people twice and you will find a link to a printable recipe card at the end of the post.
Prep time: 15 min  |  Cook time: 15 min  | Serves 4

What you’ll need:
16 oz jar roasted red peppers in oil (1/4 cup used in recipe)
skinless boneless chicken, 3-4 tenderloins or 1-2 breasts
6-10 mushrooms
2/3 cup spinach, fresh or frozen
16 oz jar alfredo sauce
grated parmesan cheese (in a shaker is fine)
onion powder, garlic powder, salt & pepper
1 package cheese tortellini

The first step is to prepare the red peppers. Drain the oil from the 
jar and puree the peppers in a food processor or blender.
Once pureed, pour back into the jar for storing. You will only use a small amount each time you make this sauce so one jar will last for several meals (which also makes it easier next time!). It stores well in the refrigerator.
I always cook with chicken tenderloins which we buy in bulk – they are inexpensive and easy to use. You can also use breasts. I use 3-4 tenderloins for this meal but you can use as much or as little as you wish depending on how many you are feeding. I also like a lot of mushrooms.
Cut the chicken into bite size pieces and saute in a deep skillet. Season with onion and garlic powder and a little salt and pepper. 
For the amount of chicken I use, about 1/8 to 1/4 tsp is good. 
When the chicken is almost done, add the mushrooms and saute until cooked through.
Next, push the mixture to the sides and add a bit of margarine to the center of the pan. Add the spinach and saute until cooked through. I use frozen spinach but fresh works as well. 
Pour in the alfredo sauce and mix well. We like a little more sauce so I add 1/4 cup milk to the empty alfredo jar, shake well and pour into pan along with a few shakes of parmesan cheese.
Next add about 1/4 cup of the pureed red peppers to the sauce. You can use more or less depending on taste. Mix well and heat through.
Serve over cheese tortellini with garlic bread and enjoy!

> Click here for a printable recipe card.

In the Kitchen: Santa Fe Chicken

This week, Santa Fe Chicken – quick and yummy, this meal couldn’t get much easier! It makes enough to easily serve four or you can save the leftovers for another meal or a quick lunch.

Total time:  About 20 min  |  Serves 4

What you’ll need:
• skinless boneless chicken, 3-4 tenderloins or 1-2 breasts
• 15 oz can black beans
• 15 oz can sweet corn with peppers (or Mexicorn)
• 15 oz can diced tomatoes with chilies
• 4 oz can chopped green chilies
• 1/3 cup shredded pepper jack cheese (more if desired)
Cut thawed chicken into small cubes and cook in a deep skillet. 
Season chicken with about 1/4 tsp each of garlic powder, onion powder, black and red pepper mix, cilantro and a few shakes of red pepper flakes. It may seem like a lot of seasoning for the chicken but it gets watered down once you add the other ingredients. 
Once the chicken is almost done, add the green chilies, undrained, and heat until the chicken is cooked through. Next add the diced tomatoes and black beans, undrained, and the corn, which needs to be drained. Simmer until heated throughout. 
Give it a taste and you may want to add a few shakes of salt or more seasoning depending on preference. 
Add shredded cheese to pan and stir until melted. I use pepper jack but cheddar would work well also.
Serve over hot white rice with a dollop of sour cream, if desired, and Fiesta Breadsticks – yum! 

In the Kitchen: Easy Fiesta Breadsticks

Welcome to a new series for 2009 all about the one thing I love more than making jewelry – eating! Well… and cooking, but mostly eating. Every other Tuesday, opposite my featured artists, I will feature a new recipe with how-to photos or fun kitchen related finds. You can easily access these posts anytime with the links under In the Kitchen Series in the right sidebar.
This week, easy Fiesta Breadsticks – they’re a yummy appetizer & snack or perfect with any spicy dish.
Prep time: 5 min  |  Cook time: 11 min |  Makes 4 breadsticks

What you’ll need:
• 1 package refrigerated crescent rolls
• taco seasoning
• shredded monterey jack cheese

On a small cookie sheet, unroll the crescent roll dough, keeping two wedges together as shown above. You will get 4 breadsticks from a standard package of 8 rolls. You may need to flatten or reshape the sections after unrolling. Also make sure the two wedges are connected well, you don’t want any gaps. You can overlap the two wedges a little and press them together along the seam if needed. 
Sprinkle with the desired amount of taco seasoning.
Next, add the shredded cheese down the center. I prefer monterey jack but these would be equally delicious with other types of cheeses as well. I like a good amount of cheese but if you use too much they are hard to close and break open when cooking. 
Fold each side of the dough up and press the seam closed. Be sure to also press the top and bottom closed or the cheese will leak out. Sprinkle a bit more taco seasoning on top.

Bake at 375° for 11 min. or until the dough begins to brown.
Serve warm and enjoy! These breadsticks have quickly become a favorite in my house. I always serve them with my Santa Fe Chicken, which I will feature next time on February 3. Be sure to stop back!