In the Kitchen: Crockpot Tikka Masala

I’m a HUGE fan of indian food. Especially in the form a buffet when I can consume copious quantities of a variety of dishes. This recipe is one of my favorites, but even if you haven’t tried much indian cuisine or think everything is overly seasoned with curry, be adventurous and give this a try. Trust me, it’s different! The longer my husband and I are together, the more adventurous he gets with his eating, but even he, who would never willingly go to an indian restaurant, has this recipe close to the top of his favorites list.

The ingredient list may look daunting, but this recipe is easy and I love the flexibility. When the husband is around, I make it with chicken, vegetables and potatoes and that is how I have shared the recipe below. When it’s just me, I typically leave out the meat. You can also make it with just the chicken alone and no vegetables.

Ingredients

1 medium yellow onion, diced
4 – 6 cloves of garlic, minced
2 T fresh ginger, minced
1 (29 oz) can of tomato puree
1 1/2 C plain yogurt
2 T olive oil
2 T garam masala spice mic
1 T (slightly heaped) cumin
1.5 t paprika
2 t salt
1/2 t cinnamon
1 t black pepper
1 t cayenne pepper
~
6 skinless chicken tenderloins, cut into large chunks* (optional)
2 -3 potatoes, diced (optional)
2 bay leaves
~
1 cup frozen peas (optional)
1 cup chickpeas (drained and rinsed, optional)
~
1 cup heavy cream
2 T cornstarch
~
chopped fresh cilantro, for topping

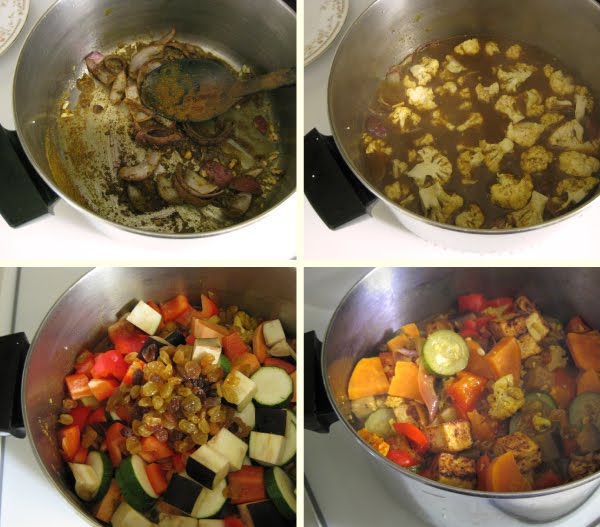
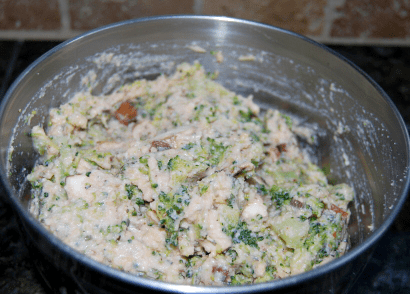
Place the first twelve ingredients (thru the spices) into your crockpot and stir to combine. If making with chicken and/or potatoes, add them now (raw) and stir gently to mix in. Add the bay leaves and push down into mixture.

*The chicken will get very soft while cooking and start to shred apart, keeping the raw pieces a bit large than ‘bite sized’ helps keep them together better. 

Cover and cook for 8 hours on low (or 4 hours on high).

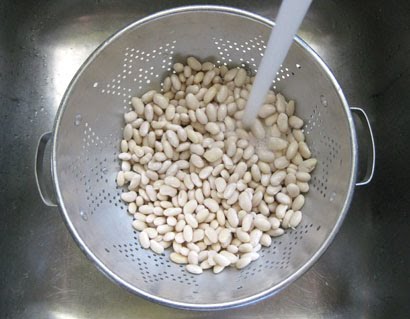
When done, whisk together the cream and corn starch and pour into the crockpot along with the peas and chickpeas and gently stir. Cook on low for an additional 30 minutes.

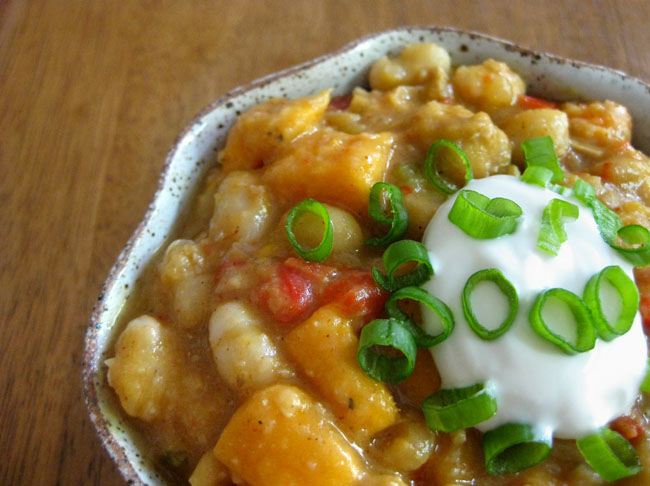
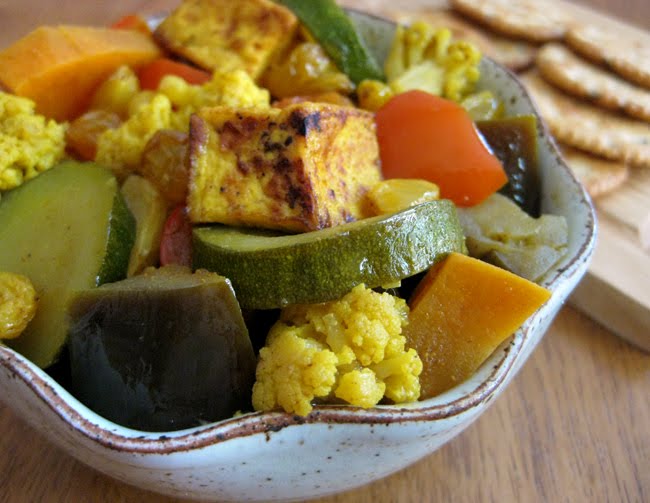
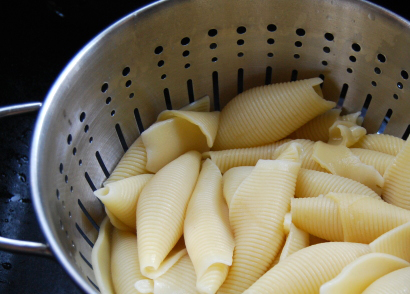
Serve over basmati rice with fresh cilantro and a side of naan and enjoy!

This meal makes a ton of food, but we eat it two or three times over a couple weeks and I freeze the rest. The consistency is a little different after freezing and reheating, but it doesn’t affect the taste at all.

> Click here for a printable recipe card

In the Kitchen: Stuffed Poblanos


Yeah, they’re kinda messy, but that means they’re good, right? I’ve made these three times now (so am finally confident that the recipe is ready to be shared), but have never had a chance to take good photos of them. They just get eaten too fast! Seriously. They are best right out of the oven, bubbly and hot. No time to find good light, pose my pepper and shoot. So, this is what you get. Take it or leave it.
I suggest you take it.
Ingredients
6-8 poblano peppers, depending on size
3 large or 4 medium tomatoes
1/2 medium white onion
2 large garlic cloves
2 tsp dried oregano
2 1/2 tsp cumin
1/4 tsp cinnamon
1/2 tsp salt
15 oz corn, fresh (cooked) frozen or canned (drained)
4 boneless, skinless chicken tenderloins or equivalent
1 cup cooked brown rice
2 cups shredded cheddar cheese
1/3 cup chopped fresh cilantro
Juice of 1/2 lime
To prepare the filling, in a food processor puree the tomatoes, onion, garlic, oregano, cumin, cinnamon and salt. Bring to a simmer in a large, deep skillet and cook for about 15 minutes over medium heat until some of the liquid evaporates and the mixture is thick and pulpy.
In the meantime, cook and shred the chicken, cook the rice and prepare the corn. If using fresh, boil the cob and cut off the kernels. If using canned, drain well. If using frozen, no need to thaw.
Once the mixture has thickened, add the corn, rice and chicken and cook until heated through. Remove from heat and stir in the cilantro, lime juice and 1 cup of the shredded cheddar.
To prepare the peppers, place them on a foil lined baking sheet and broil them on high, turning every few minutes, until they begin to blacken and the skins begin to bubble all over. Remove them from the oven and wrap them in the foil. Let them sit for a few minutes and then unwrap and let them cool.
Now you can easily peel off the skins. Be sure to handle the peppers carefully though, as they will be soft and can tear apart easily. Cut a slit up the middle of one side and cut out the seed core, scooping out any excess seeds, leaving the stem in place. I often rinse my peppers under light running water, I find it’s the easiest way to get all the seeds out!
Now you’re ready to stuff the peppers. Be generous! Don’t worry if it’s mounding up and over a little bit. Top with the remaining shredded cheese and bake at 350° for about 8 – 10 minutes. Broil for 2 -3 minutes to brown the cheese, serve with a side of black beans and enjoy!
This dish makes quite a hearty helping. Since it’s just my husband and I, I usually make the filling and then prepare, stuff and bake half the peppers, using half the filling. Then we’ll have it again later in the week or early the next. I reheat the filling a bit, prepare the peppers and pop them in the oven!
If you’d like to see step-by-step photos of this recipe, just leave me a comment below and I’ll be sure to take some next time I make it. You can see some pics of broiling and skinning peppers in my previous Cinco de Mayo recipe post from last year here. Only difference is you’re keeping the peppers whole, rather than cutting them into strips before broiling.
I’d love to hear what you think of this one, it’s a new favorite in our house!
p.s. I’m just too busy this week to get a recipe card done up for this right now, but I should have it up by early next!

In the Kitchen: Spicy Black Bean Pizza


Phew! It’s been a crazy few weeks. Don’t you hate when those paying jobs have to get in the way of the fun stuff, like blogging? Geez. I’ve been talking about this pizza for at least a week and here it finally is. Since I first made it about a month or so ago, it’s been on our menu three times and has become a household favorite. I’m just gonna simply say yummmmm. Yep, five m’s worth. Maybe even six.


Ingredients
Whole Wheat Crust:
1 envelope dry yeast
1 tsp sugar
1 cup warm water
3/4 tsp salt
2 Tbsp olive oil
1 cup whole wheat flour
2 – 2 1/2 cups unbleached white flour
Pizza:
15 oz black beans*
1 cup prepared salsa (homemade or store bought)
2 jalapenos or 1 serrano chile, cut rough chunks
2 large garlic cloves, smashed
1 cup diced bell pepper (red, green, yellow or mix)
1 cup fresh (cooked) or frozen (thawed) corn kernels
4 green onions, thinly sliced
1/4 cup chopped cilantro
1 cup shredded mozzarella
1 cup shredded cheddar
2 avocados, diced (optional)
Sour cream (optional)
*You can use dried or canned beans for this recipe. If using dried, soak about 200 grams and cook according to package directions (1 – 1.5 hours). If using canned, drain and rinse well before using.
To make the crust, combine yeast and sugar in water. Stir until dissolved. Add salt, oil, whole wheat flour and 1 1/2 cups unbleached flour. Stir well.
Add enough remaining flour to make a soft dough. Knead on a lightly floured surface until smooth and elastic, about 5 – 10 minutes. Place in a greased bowl, turning to coat top. Cover and let rise in a warm place until doubled, about 20 – 30 minutes.
If using a metal pizza pan, lightly grease it, or you can use a pizza stone. Stretch and pat or roll dough to a 15″ round. Bake at 400° for 5 minutes, until crust is dry and lightly browned. Set aside.
While the dough is rising and prebaking, you can prepare the pizza topping. In a blender or food processor, combine the beans, salsa, chile and garlic, and puree until smooth. Dice the peppers, green onion and cilantro and shred the cheeses.
Spread the bean puree over the prebaked crust and top with the diced peppers, corn, green onions, cilantro and cheeses.
Bake at 400° for 7 – 12 minutes until cheesy is bubbly and crust edges are browned. Allow pizza to cool for 5 minutes before cutting. I know, it’s very hard to wait…
Top with cubes of avocado and a dollop of sour cream, if desired, and dig in!
This pizza is perfect for the vegetarians in your life. It’s rich and hearty and the carnivores at the table won’t even miss the meat. However, chicken does pair perfectly with the other ingredients in this dish and gives this pizza a new life for the meat-eaters. Just add bite-sized chunks of cooked chicken on top of the bean puree with the other ingredients and bake as directed.
And find more delicious recipes here.

In the Kitchen: Hummus

Chances are you fall into one of three categories when it comes to hummus — you love it, you hate it or you’re too freaked out to try it. I know, the consistency can get to some people. That’s why I never loved guacamole, until I made it myself and left it chunky. But hummus, I dig me some hummus. I eat it almost everyday, in fact.

What’s so great about hummus anyway, you ask? I’ll give you three simple reasons, it’ll make you healthy, wealthy and wise. Really, it’s true! Let me break it down…

Healthy: The two main ingredients in hummus, chickpeas and tahini, are both good for you. Chickpeas do not contain any cholesterol or saturated fats and they are rich in protein, making hummus a favorite among vegetarians. Chickpeas are also known to be effective in preventing build up of cholesterol in the blood vessels. Tahini is also high in protein and is an excellent source of calcium.

Wealthy: Ok, so it won’t technically make you money, but it will save you money! Buying hummus at a grocery store can add up quickly, but if you make it yourself using dried beans and fresh ingredients, it’s insanely inexpensive!
Wise: Two more ingredients found in most hummus recipes are garlic and lemon juice. Both are filled with antioxidants that reduce stress in the body. They also work to improve immune functions and fight off bacteria and viruses. Hummus contains plenty of Omega 3 fatty acids, which are great for improving intelligence and maintaining a healthy heart. On top of that, it also has iron, vitamin B6, manganese, copper, folic acid and amino acids that can promote good quality sleep and uplift one’s mood.
Ready to give it a try? Here’s the recipe…
Ingredients
15 oz chickpeas (garbanzo beans), cooked & chilled*
1/3 cup tahini (ground sesame paste)**
4 Tbsp fresh lemon juice
3 large cloves of garlic, peeled
1/2 tsp salt
1/2 tsp ground cayenne pepper
1/2 cup water
2 Tbsp extra virgin olive oil (soybean or canola will work, too)
You’ll also need a large food processor to make this. And by large I don’t mean gigantic, I just mean bigger than those mini cuisinart choppers. I imagine you can also use an immersion blender or Vitamix, if you have one. In fact, the Vitamix would probably work best of all!
*I generally always cook with dried beans. Aside from being super cheap, I like that they are naked — no added salt or any other funny business. You can find dried chickpeas at most grocery stores and will pay about $1 for a one pound bag, which will make you about two batches of hummus.
**You may be wondering what tahini is and where the heck you can find it. This is the only ingredient you may have trouble locating. You probably won’t find it at most local grocery stores, though you should be able to find it at any whole foods or natural grocer. You can also find it at a mediterranean market, which is where I purchase mine. It looks like natural peanut butter, with the separated oil sitting on top. Just be sure to stir up it really well before using it.

If you are using dried beans, soak and cook them according to the package directions, then weigh out 15 oz. I’m kind of a nut about weighing food and a little kitchen scale is really a very useful tool. When I’m trying a new recipe or baking something precise, weighing helps you get exact amounts or help you judge amounts that you can later eyeball. I meant to measure 15 oz chickpeas in cups for those without a scale, but I forgot, so I’m sorry! I’ll update the post next time I make a batch (which will be soon, Im sure).
If you are in a hurry, just can’t deal with dried beans or can’t find them, you can use canned beans. Just be sure to drain and rinse them well before using. I’ve never weighed a 15 oz can after it was drained and rinsed, but it should be close enough to 15 oz to do the trick.
A couple things to note for those using dried beans. I always soak them overnight, as opposed to a quick soak method, and I also add a little baking soda to both the soaking and the cooking water. It allows the water to penetrate the chickpeas more easily, which reduces the cooking time and produces a better hummus. I also find that chilling the cooked beans, as opposed to pureeing them warm, makes a big difference in the creaminess of the finished product.
Another element that affects this is the chickpea skins. Did you just imagine yourself sitting around peeling popping hundreds of chickpeas out of their skins just pop into your head? Yeah, that’s what I’m talking about. It takes a little time and patience, but the result is worth the effort. After cooking the soaked beans, chill them until cold and the skins will just pop right off most when you squeeze between your fingers. This is not a mandatory step, just one that creates a smoother, richer and better tasting hummus.
· · · · · · · · · · · · · · · · · · · · · · · · · · · · · · · · · · · · · · · · · · · · ·
I’ll continue now by saying this is one of those flexible recipes. Aside from the chickpeas and tahini, the other ingredients can be adjusted to suit your personal taste and texture preferences. And really, even the tahini is adjustable. A little more will give you a little creamier result, but also more of a sesame taste. Adding additional lemon juice will help balance this out.
I’ll tell you that I like my hummus pretty middle of the road when it comes to flavors. I’m not a huge fan of garlic, I don’t love it too lemony and I definitely don’t love spicy foods. Perfecting hummus to your taste preferences is kind of an art. The measurements I provided here are how I love it, but they can all be adjusted. If this is your first time making hummus, I suggest you stick with the recipe and then add more or less of any seasonings to suit your taste. Other spices you can include or swap out for the cayenne are cumin, coriander and paprika. There’s lots of flexibility!
Start by blending the chickpeas, tahini, lemon juice, oil, garlic, salt and cayenne pepper in the food processor until well mixed, but not entirely smooth.
Next add the water and blend until smooth. If you’d like it thinner, you can add more water. This is also when you can give it a taste and decide if you’d like more lemon or other spices.
· · · · · · · · · · · · · · · · · · · · · · · · · · · · · · · · · · · · · · · · · · · · ·
You can get creative and add other flavors when pureeing, such as hot sauce, green onions or fresh herbs like parsley. Pine nuts and pureed roasted red peppers are also popular additions to hummus. You can buy jars of roasted red peppers packed in oil at most grocery stores. Simply drain the oil, reserving it, and puree the peppers in a food processor or blender until smooth, adding oil as needed/desired. If you want to make your own (which I recommend!), quarter red peppers, discarding seeds and stems, and place them skin side up on a baking dish lined with foil. Place them under the broiler until the skins begin to blister and peel. Remove them from the oven and wrap them in the foil or seal them in a zip top bag. Once cool, the skins will peel off easily leaving you with roasted red pepper flesh which you can then puree (add your favorite oil when processing if needed).
However you like it, humus is a delicious and versatile snack that is loaded with nutrients. Serve it as a dip with pita, flatbread, crackers or veggies such as sliced cucumbers, carrots and baby romaine or bok choy leaves. It’s also delicious as a spread on sandwiches and wraps or for topping a salad.
If I’ve inspired you to try hummus for the first time, I’d love to hear about it! Alternatively, if I’ve inspired you to make it homemade for the first time, I’d love to hear about that, too. If you’re still scared of it, well, better luck next time.
And find more easy and delicious recipes here.

In the Kitchen: Spicy Sweet Potato Chili

Do you know that sweet potatoes are a better choice nutritionally than white potatoes because they are lower in calories and higher in vitamins, nutrients and fiber? They leave you feeling fuller longer and are a good choice for diabetics as the high soluble fiber content helps lower blood sugar as opposed to white potatoes, a.k.a. blood sugar bombs.

If you’ve never been a fan of sweet potatoes, don’t give up on them yet. Their expected taste is surprisingly transformed when cooked up with the other ingredients in this hearty autumn dish. Not a fan of the spice? You can leave out the jalapeno or substitute it with a mild poblano. You can also leave out the chicken and use vegetable stock to make this meal vegan friendly. You’ll find a printable recipe card at the end of this post.

Ingredients
1 medium onion, chopped
2 medium red peppers, seeded and chopped
2 large cloves of garlic, minced
1 pound boneless, skinless chicken, chopped
15 oz cannellini beans*
1 cup chicken stock
2 cups cold water
3 large or 4 medium sweet potatoes, peeled and diced
2 teaspoons cumin
1 Tablespoon chili powder
pinch red pepper flakes
1 jalapeno, minced or 6 oz can diced green chilies
Optional garnish
scallions
sour cream
crumbled bacon
cheddar cheese
*You can use dried or canned beans for this dish. If using canned, drain and rinse them. If using dried, soak, rinse and cook them until partially tender before adding.
In a large pot, heat 1 Tablespoon olive oil over medium heat and saute the onion, red pepper and garlic until slightly tender.
Add the chicken and saute until opaque. Add the beans, stock, water, potatoes, jalapeno and spices. Bring the mixture to a boil then reduce the heat and simmer uncovered for about 30 minutes or until the potatoes are tender.
Couldn’t get much easier!

I enjoy this dish topped with sour cream, fresh scallions, a little cheddar cheese and when I have it on hand, some crumbled bacon — all of which alone or together work really well with the flavor of the chili. Serve it up with some maple pecan muffins or whole wheat cornbread and you have a hearty dish that’ll warm you up through the winter months ahead!
And find more easy and delicious recipes here.

In the Kitchen: Parmesan Mushroom Stuffed Peppers

This is my healthy, vegetarian spin on a classic crowd pleaser. Made with brown rice, fresh veggies and a little cheese, you’ve got just about all your food groups stuffed into one yummy little package, or should I say pepper. This dish is easy to make and can even be whipped up the night before and then popped into the oven to bake when you get home from work. You’ll find a printable recipe card at the end of this post.
Ingredients serves 2
2 large bell peppers (any color, I use green and red)
3/4 cup cooked brown rice
2 large cloves garlic, minced
1/4 cup red onion, finely chopped
1 cup sliced fresh mushrooms
1/2 cup broccoli florets, chopped (fresh or thawed frozen work)
1/4 cup low sodium vegetable broth (can also use chicken)
1/4 tsp salt
1/4 tsp fresh ground pepper
2/3 cup salt free tomato sauce (just plain, not spaghetti sauce)
1/3 cup fresh parmesan cheese, grated, plus extra for topping
Preheat oven to 375°. Slice the tops off your peppers and clean out any seeds and membrane from inside. If desired, you can chop up the pepper top (discarding the stem) and add it to your stuffing mixture. Brush the outside of the peppers with a little olive oil and set aside.
Depending on what type of brown rice you are using, you’ll want to cook this ahead of time. I use Minute brown rice, which is easy and works well, so I start cooking it when I start making the filling, as it only takes about 5 minutes.
To prepare the filling, saute the minced garlic and red onion with a little olive oil over medium high in a large skillet until tender. Add the mushrooms, broccoli and chopped pepper tops (if desired). Once the veggies are almost cooked through and soft, reduce the heat to medium, add the rice, chicken broth, salt and pepper and simmer until most of the broth cooks away and is absorbed into the mixture.
Remove from heat and stir in the tomato sauce and parmesan cheese until thoroughly mixed and melted. I recommend tasting the filling at this point before you stuff the peppers in case you want to add any additional salt or seasonings.
Spoon the filling into the peppers, stuffing them tightly. I cook mine in a glass loaf pan so if they want to tip over they don’t have far to go, but any glass baking dish will do and you can always stabilize them with some foil around the bases.
Cover the dish with foil and bake for 40 – 45 minutes until the peppers start to get soft. I like my peppers slightly al dente, so to say, but you can cook them a bit longer if you’d like them really soft. Remove the foil and sprinkle a little shredded parmesan on the top of the peppers, return to the oven and bake or broil until melted. Serve and enjoy!

Don’t like parmesan? Try cheddar. Don’t like mushrooms or broccoli? This recipe is very versatile and you can substitute just about any veggies or cheese you wish. For a mexican spin, try using black beans and chopped roasted poblanos instead of the mushrooms and broccoli along with pepper jack cheese.
You can easily double this recipe to serve four or make it as is and stuff four small peppers instead of two. They also reheat well in the microwave or oven for a hearty lunch or second dinner. Enjoy!
And find more easy and delicious recipes here.

In the Kitchen: Vegetable Tofu Curry, Sweet or Savory


Yep, I said tofu again. But this time we’re frying it up into crisp little cubes of yumminess then mixing it with a heaping helping of curry and a plethora of robust vegetables. This colorful concoction can be made sweet or savory by using apple juice or broth and makes a hearty main entree when served over brown rice, cous-cous or quinoa. Any leftovers make a perfect portable lunch as this dish tastes just as good at room temperature or reheated in the microwave.

Base Ingredients
14 oz firm tofu, 1″ cubes pan fried
1 Tbsp canola oil
1 red onion, 1/2 dice
1 clove garlic, minced
2 cups cauliflower florets, 1″ pieces
1 carrot, 1/2″ slices
2 cups eggplant, 1″ cubes
1 red bell pepper, 1″ dice
1 sweet potato, 1/2″ slices then quartered
1 small zucchini, 1/2″ slices
1/2 cup raisins
Sweet Version
2 Tbsp curry powder
1/2 tsp cinnamon
2 cups unfiltered apple juice
1/2 tsp salt
fresh ground pepper
Savory Version
3 Tbsp curry powder
1/2 tsp turmeric
1/2 tsp cinnamon
2 cups low sodium chicken or vegetable broth
1 tsp salt
fresh ground pepper
The first step is to press, cube and pan fry the tofu. To press the tofu, halve the cake horizontally and set the two slabs on several layers of paper towels on a plate or cutting board. Top with additional paper towels and another plate or cutting board then weigh down with a heavy skillet or stock of books and let sit for about 20 minutes.
Once pressed, cut the tofu into 1″ cubes.
Coat a large skillet with cooking spray and fry the tofu on medium high heat until crisp and browned on all sides, about 2 – 5 minutes per side. Set aside.

While the tofu is pressing and cooking you can prep the other ingredients. You’ll start by cooking the onions and garlic, then add the cauliflower and carrots, so keep them separate. You can place the rest of the vegetables in a large bowl as you cut them, they will be added all at once.

Heat about one Tbsp of canola oil in a large pot or dutch oven. Add the garlic and red onion and saute until slightly softened.
Add the curry and cinnamon (and turmeric if making it savory) and cook until fragrant, about 1 minute. Add the liquid (apple juice or broth), the cauliflower and the carrots. Bring to a boil then reduce heat, cover and simmer for 10 minutes.
Next add the tofu, remaining vegetables, raisins, salt and pepper. Cover and simmer about 20 – 25 minutes, until the vegetables are tender but still hold their shape. Add additional seasonings to taste. You may find you like more salt than I call for, as I try to keep the salt fairly low in most of my dishes.

This dish is delicious served alone or atop a healthy grain like brown rice, cous cous or quinoa. Don’t like tofu? Just leave it out or add some chicken. You can also adjust the vegetables to suit your tastes but I find this combination hearty and delicious any time of year. Enjoy!
And find more easy and delicious recipes here.

In the Kitchen: Guacamole

Guacamole! I’ll admit I’ve never liked the stuff, but it sure is fun to say, don’t ya think? Say it again… guacamole! Ok, now that we’ve gotten that out the way, why am I making it if I don’t like it? Well, I’m all for second chances, when it comes to food at least, and guess what? I liked it! Turns out most things are much more delicious when you make them from scratch with yummy, fresh ingredients. Who knew? 😉
This recipe has minimal, basic ingredients and is really easy to make — doesn’t get much better than that, right? Read on for the how-to and find a printable recipe card at the end of the post.
Ingredients:
2 ripe avocados (they should be firm, but yield to gentle pressure)
juice of half a lime
3 tablespoons red onion, finely diced
3 tablespoons fresh cilantro, stemmed and chopped
1/2 teaspoon salt
dash freshly ground pepper

Peel, pit and coarsely chop the avocados.

Add the lime juice, diced red onions, cilantro, salt and pepper.
Mix gently with a fork and (about to get technical here) smush to your chunkiness liking. You can also puree in a food processor if you like it smooth. Optionally, add two tablespoons fresh chopped tomatoes.

Serve immediately or place in an airtight container and chill in the fridge. Delicious with chips or on your favorite entrees, like these Hawaiian Tacos. Enjoy!

And find more easy and delicious recipes here.

In the Kitchen: Havarti Cheesecake Appetizer

I’ve been doing a lot of cooking and not as much Crafting lately, but I promise that will change soon! With Superbowl Sunday coming up, I just had to share this delicious appetizer that I’ll be taking to the party we are attending. It’s easy, it makes a ton and it’s a crowd pleaser. You will find a link to a printable recipe card at the end of this post.

Ingredients

Cheesecake:
three 8 oz packages of cream cheese, softened
1/4 cup heavy whipping cream
3 eggs
6 oz Havarti cheese, shredded
1/2 cup sun dried tomatoes (packed in oil), sliced
1 tbsp liquid from sun dried tomatoes
8 green onions, sliced
Crust:
1 1/4 cup (about 28) crushed butter crackers (Ritz)
3 tbsp butter or margarine
To make the crust, mix crumbs and butter until well blended. Press evenly into the bottom of a 10″ spring form pan. Bake about 10 min at 375° until golden brown. Set aside and reduce oven heat to 325°.
In a large bowl, beat the cream cheese until smooth. Add whipping cream, eggs and tomato liquid. Beat until creamy. Add havarti cheese, tomatoes and onion and stir until blended.
Spoon evenly over crust and bake 40-45 minutes or until center is set. Run knife around edges to loosen cheesecake. Cool completely at room temperature, cover and refrigerate for at least 2 hours.
Serve with crackers and enjoy! By the way, when I said this makes a ton, I mean it! I made this for a party Christmas and had enough left for New Years plus more leftovers! But it stores well in the fridge and we ate it for over two weeks.

And find more easy and delicious recipes here.

In Valorie’s Kitchen: Broccoli Stuffed Shells

Pasta. It’s one of my favorite comfort foods and is so versatile. But being so full of calories in the ways I like to prepare it, I’m lucky if it makes the way to my dinner table more than once a week. I’m always looking for ways to make my pasta dishes more lean and/or more nutritious without serving a skimpy marinara over noodles because, hey, that gets old after a while.

One of my favorite pasta tricks is to use the Barilla Plus noodles which are made with whole wheat, omega-3 fatty acids, and egg protein for added nutritional benefits. The texture is way better than most of the other crumbly, whole-grain noodle varieties available, but it doesn’t come in one of my favorite shapes: jumbo shells!

So when I make my favorite stuffed pasta dish, I have to settle for a reduced-fat filling and regular shells, but it’s still full of good-for-you ingredients without a lengthy or complicated recipe.

Ingredients
15 ounce box of jumbo pasta shells
15 ounce carton of reduced-fat ricotta cheese
24 ounce jar of prepared marinara sauce
10 ounce package frozen, chopped broccoli (thawed)
4 ounces fresh cremini mushrooms, sliced
1 teaspoon each fresh basil and oregano leaves (or 1/2 teaspoon each dried), finely chopped
1/2 teaspoon salt
1/4 teaspoon ground black pepper
1 cup grated, reduced-fat mozarella cheese
3 tablespoons grated parmesan cheese

Preheat your oven to 400° and then prepare the pasta shells according to package directions.
While they’re boiling, combine the ricotta cheese, broccoli, mushrooms, seasonings, and 3 tablespoons of the marinara sauce in a bowl. Whisk these ingredients together until evenly mixed and set aside.

Spread about half of the remaining sauce evenly across the bottom of a shallow baking dish. This will give the shells a sauce to cook in and will also keep them from sticking to your dish.

Next, drain the cooked pasta shells and rinse them thoroughly with cool water and then shake off any excess moisture. They need to be cool enough to handle and not dripping wet.

Gently open each shell and spoon in 2-3 teaspoons of the filling. Do this carefully, as they are delicate and tend to rip easily.
Once filled, place each shell upright into your baking dish. Repeat until your dish is full.

Spread the remaining sauce over the shells. Cover evenly with the mozarella cheese and then sprinkle the Parmesan last. Bake uncovered at 400° for 25-30 minutes, or until the cheeses are melted and beginning to brown on top. Serve with your favorite salad.

Yields about 4 servings


> Click here for a printable recipe card.

I hope you enjoyed Valorie’s contribution to the lillyella kitchen this week! You can browse more of Valorie’s recipes on her site Kitchen Improv and find previous In The Kitchen posts here.
Stop back on December 22 for the last In The Kitchen post of 2009 where I’ll share some delicious holiday drink recipes!