Sonata Fabrics Showcase + Mini Maker Station

I first met Amy Sinibaldi right before her debut fabric line came out and I can’t believe she now has seven amazing collections under her belt! I always love playing with her new designs, so I was excited to join the Sonata Fabrics Showcase along with a handful of really really talented ladies!

Amy has always made THE cutest little, functional items for organization and storage, so I knew that this blog tour and her Sonata fabrics were perfect for the release of my Mini Maker Station pattern!

I had so much fun creating this pattern and am really proud of it. I can’t wait to see how you all customize your own maker stations! You can download the free pattern here. The hardware list is included in the pattern and kits are available in my Etsy shop here.

Shown above is the large 9″ version of the Maker Station using primarily the Ludwig color way of Sonata. That hot pink floral is TO DIE FOR!! The balance of lights, darks, focals, and blenders in this line is perfection. The touches of Navy and the red in the Beethoven color way make it so rich and striking.

If you’re seeing my Mini Maker Station pattern for the first time, it’s like an armchair caddy with a twist! There is a piece of thin sheet metal in the body and magnets sewn into the interchangeable accessories, including a small fabric basket and a pincushion, so that everything stays put! The optional scrap bag can also be used for additional storage. There is a smaller 7″ version of the maker station that will be included in the pattern.

I’ll be hosting a sew along starting in February and will post more details about that soon!

You can also use other magnetic accessories with the maker station, such as magnetic bowls, shown below. There is a lot of room for customization with this pattern and I hope you love it as much as I do! It’s perfect for any type of handcraft from sewing to cross stitch to embroidery and more.

I can’t wait for the sew along and to show you more beautiful Sonata fabrics as I sew up the smaller version of the pattern with you.

Stay tuned for more on the upcoming sew along and be sure to check out the rest of the Sonata Fabrics showcase with the hashtag #sonatashowcase on Instagram and in Amy’s feed!

p.s. Don’t miss the adorable Sonata strawberry pin collaboration that Amy did with Maker Pin Co. – check them out here!

I may be underdressed, but at least I’m not late.

Earlier this year, Art Gallery Fabrics asked if I wanted to play with any of their new collections, and when I first saw Lower the Volume, I immediately knew I had to make a quilt. I have been wanting to make a low volume quilt for some time and this was the perfect opportunity to finally do it. Shortly there after, Mister Domestic asked me to be a part of his sewing party showcasing the new AGF Capsules and Fusions lines, to which I replied, “of course!”, seeing as I already had this plan in the works, and who doesn’t want to party?! But then I went into panic mode…

I knew there was no way I could finish this quilt “on time”. My thought was that I should make something else so I would have a beautiful finished product to show off when it was my day on the tour. This is what I typically do and how I always think. The problem with this is that I never let myself do the “big projects” that I really WANT to do, because I never have enough time to complete them.

I am a slow sewer, and I mean SLOW. This is partly because I just physically move slow and meticulously when I create, partly because I’m always working on about 13 things at once, and partly because I just don’t have a lot of time to sew, especially when spring hits and it’s time to tend to the land, or when my husband gets extra busy at work because sh*t is hitting the fan somewhere in the world.

So, there you have my little chunk of a quilt top in progress. I have no idea when I will finish it (though I’m super excited to because I am LOVING it!), because I’m not even done typing this blog post and already stressing about the new deadlines I have ahead of me next week.

Showing off this unfinished top for my day on the blog tour is painful and embarrassing for me. I’ve been feeling disappointed in myself all week and I know that’s just ridiculous, right?! We are always striving for a picture of perfection, even though every one of us knows that is never what life is actually like behind the scenes of social media. But, despite these feelings, I’m really glad that I chose to continue with this selfish sewing project, to let myself make something that I really wanted to, and to try and be more comfortable with being “less than perfect”. I do hope you like what you see thus far, though, and help cheer me onto the finish line!

· · · · · · · · · · · · · · · · · · · ·

ABOUT THE FABRIC & PATTERN

Lower the Volume is one of four new Art Gallery Fabrics Capsules collections, and I think its awesomeness speaks for itself! We all use low volumes in nearly every project we make, but what I love about this line is how it’s interesting and lively enough to stand all on its own. I originally planned to use the line exclusively in the quilt, but decided that a small pop of color would be a really nice accent.

I chose the fantastic plaid shown above from the new Mad Plaid capsule collection for the backing (because it matches my living room perfectly!) and pulled the accent colors from there, which are Art Gallery Pure Elements and Solid Smooth denims (my favorites!). Aside from a single row of blue and yellow hexies, the rest of the quilt will be all low volume.

The pattern I’m using is Sari’s and my Sariella Deco Hex pattern that we created for the April Stash Builder Anniversary box. If you saw the mini we originally made, you’ll see I’ve rotated the pattern 90° counter-clockwise here for use in the quilt. I also enlarged the pattern a bit. If you missed the pattern in the Stash Builder box, it will be available from Sariella later this year, so stay tuned! I will also share more about my process in making this quilt when I finish it.

· · · · · · · · · · · · · · · · · · · ·

STOP by the party!

Today wraps up week one of Mister Domestic’s Sewing Party, but be sure to check out the other posts from this week (shown above, links below), and also the Fusions portions of the tour beginning next week. I’ve already seen a few of the projects and they are legen… wait for it… DARY!

Capsules (April 17 – 21):
Monday: Cristy Stuhldreher (@loveyousew_) http://www.iloveyousew.com/
Tuesday: Kitty Wilkin (@nightquilter) https://nightquilter.com/
Wednesday: Sharon McConnell (@colorgirlquilts) http://colorgirlquilts.com/
Thursday: Stephanie Palmer (@latenightquilter) http://latenightquilter.com/
Friday: Nicole Young (@lillyellasworld) That’s me!

Fusions (April 24th – 28th)
Monday: Nicole Daksiewicz (@modernhandcraft) http://modernhandcraft.com/
Tuesday: Tara Curtis (@t_jaye, @WEFTYneedle) http://www.tjaye.com/
Wednesday: Melissa LeRay (@ohhowsweetco) http://www.ohhowsweet.com/
Thursday: Sarah Thomas (@sariditty) http://www.sariditty.com/
Friday: Jennifer Rossotti (@jennrossotti) http://gingerpeachstudio.com/

Have a fabulous weekend, friends!
~nicole

p.s. bonus points if you can guess what show I’ve been binge watching this week!

Blithe Fabrics Blog Tour

main-b

I first got to play with Katarina Roccella’s newest line, Blithe,  when I made my Bias Weave pillow for the Lookbook last fall. It was love at first sight before I even had the fabric, but you just cannot help but fall head over heels in love once you start piecing it together. Something about the palette and the way it plays with the Art Gallery Fabrics denims just melts your soul. I had a few bits and pieces left from my first project and knew exactly what to make for my stop on the Blog Tour.

I see cathedral windows as a quilty bucket list item, you know? I’ve always loved them (even before I was quilting), and recently watched a friend make a Christmas pillow and it really sparked my fire. It was time. I spent hours looking at and trying various methods and tutorials and decided that the Faux Cathedral Window tutorial by Diary of a Quilt Maven was the way to go for me. The method is pretty much the same as the Missouri Star easy cathedral windows tutorial as well, in case you prefer it in video form.

strip1

What I liked most about this method was two things – first, it used small pieces of fabric, and that was all I had, and second, it felt very precise to me. Being a perfectionist, this is key. It’s also super easy to adjust the size of your windows to anything you wish and to create any shape piece you wish. I won’t walk you through the steps, because that is what the tutorial is for, but below are a few progress photos that may help demonstrate how I translated the tutorial into my finished pillow. Please excuse the bad lighting, it’s been a “work all night” kind of month! If you have any questions, please feel free to leave them in the comments below or send me an email anytime.

strip2

The solid fabric I used along with Blithe on my pillow is solid smooth Art Gallery Fabrics denim in Cool Foliage. It is absolutely perfect with this line and always a dream to work with. I made my window foundation pieces 3″ to start, versus 2.5″ as in the original tutorial, and I pieced 8 units across and four units down to create the window panel. I chose to use the text print inside the petals and the denim for the petal edges, but I also really love the look when these two elements are the same fabric.

owl-back

After the full window panel was complete, I pieced on the top and bottom strips that included a 1″ strip of the text print to help carry the design over, and then a 3″ strip of denim. I kept the back simple to showcase the beautiful owl print, but I think it would be really lovely to make a second window panel so the effect wraps all the way around the pillow. The finished pillow measures 20″ wide by about 18″ tall.

main2-b

The end result was exactly as I envisioned and there was nothing I did not like about the method I used to make it. l definitely be using it again and may actually have a cathedral window obsession after this experience. I already have two more projects planned!

Now that I have these two gorgeous pillows, I guess it’s time to make a bed quilt! It won’t be cathedral windows. I love them, but not that much 🙂

Be sure to check out all the other *amazing* projects in the blog tour by visiting Katarina’s Instagram feed and through the hashtag #blithefabricsblogtour!

two-pillows

Beautiful Blithe (and a new pattern)

pillow-backblogtight

Happy December, friends! Gosh, has this year flown by. I always have such big plans at the start of each year and then beat myself up at the end when I’ve barely touch my grand to-do list. But, life happens and I’m trying to teach myself to not stress about the things I don’t accomplish, but rather enjoy the time I spend on the things I do!

Easier said than done though, right?

I drew up my Bias Weave quilt pattern at least six months ago, probably longer. I designed it specifically for my Stash Fabrics Design Star Bundle and got as far as cutting everything and piecing a few rows, when things got really out of control around here, so on the back burner it went. But, when Katarina Roccella asked if I’d like to create a piece for her Blithe fabrics lookbook, I just could not say no because I love her and her fabrics!

I decided that an oversized pillow version of the pattern would be a great way to showcase the fabrics and get me motivated to keep working on the full quilt.

pillowfrontblog1

I created this a couple months ago and the Blithe Lookbook is now out so I’m excited to share it with you! The pillow measures about 26″ x 23″ and is living on my bed right now. It’s a really nice sham size and it’s perfect for propping myself up to read. I’ve also used it on the floor when I’m crafting.

My husband put it best though, I have to say, “This is like a fancy person pillow. Like someone buys it out of a fancy magazine to put on a fancy couch that no one sits on. It’s all high class and sh*t.”. I’ll take that as a compliment, I think. (Disclaimer: My husband doesn’t always speak like a redneck. The first part was serious, then he started being a smart ass 🙂

detail

———-

ABOUT THE FABRICS

Katarina has done it yet again, she is a true artist! Blithe is so dreamy and gorgeous. Deer, owls, birds, butterflies, tall trees, soft blenders, it feels like your taking a trip into a majestic winter wonderland. In addition to quilting cottons, the line includes canvas, knits, voile, ANNNNDDDDD Art Gallery Fabrics first printed linen – it is amazing! (It’s the antler print on the right below.)

pillowbackblog1

The line also pairs beautifully with the Art Gallery Denim Studio collection. I used the vanilla mist yarn dye and wicked sky smooth solid denims for the border strips on the front and incorporated the nectarine sunrise smooth solid into the back. The cool foliage is a perfect match, as well.

Click here or the pic below to check out the entire fabric line and all the amazing projects in the Blithe Lookbook >

lookbookcover

———-

tallblog

ABOUT THE PATTERN

My Bias Weave pattern will be for a full quilt and include a few sizes, but like the pillow I created, you can make a variety of pieces using the “block”. I wanted to create the full quilt sample before releasing the pattern, but I’m considering releasing it with just a diagram and the directions before I finish the quilt. I will (unfortunately!) be having surgery soon and I will have a lot of down time where I can work on the computer, but won’t be able to cut and sew for a bit. What do you think? I know this isn’t uncommon, but it’s just not something I’ve done myself. Give me your feedback, please!

closeupfront2

The pattern isn’t technically difficult to sew, but does require precision in cutting and piecing, so I’ll call it a skill builder! I did, however, build a little overage into the blocks to allow for trimming, which makes that precision pretty easy to accomplish.

There’s so many fun ways to play with color and fabric placement, I’m really excited to get this pattern out to testers and see what everyone comes up with!

I hope you’ve enjoyed a peek at this amazing new line, Blithe, and please take a second to leave me some feedback on the pattern release!

dsc_0524-blog

Life, love and the pursuit of denim.

dsc_0301-edit2

I’m pretty sure I can attribute my love of denim to the Levi’s jacket that my father wore for as much of my childhood as I can remember, and that I still wear today. The fact that there are amazing new, modern denims being made now is a sewer’s dream come true!

Art Gallery Fabrics is definitely blazing this modern denim trail and I could not pass up the opportunity to contribute to their Denim 2.0 Blog Tour and show you some of the newest additions to their already amazing collection of denims.

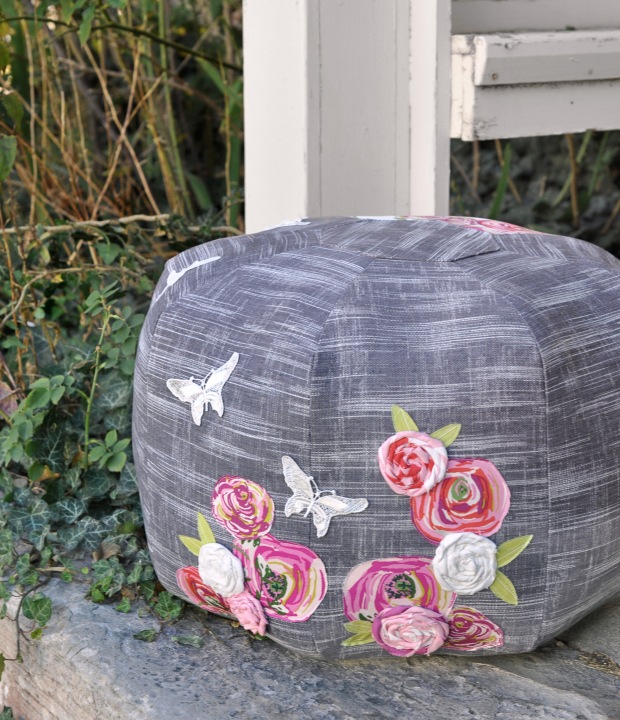
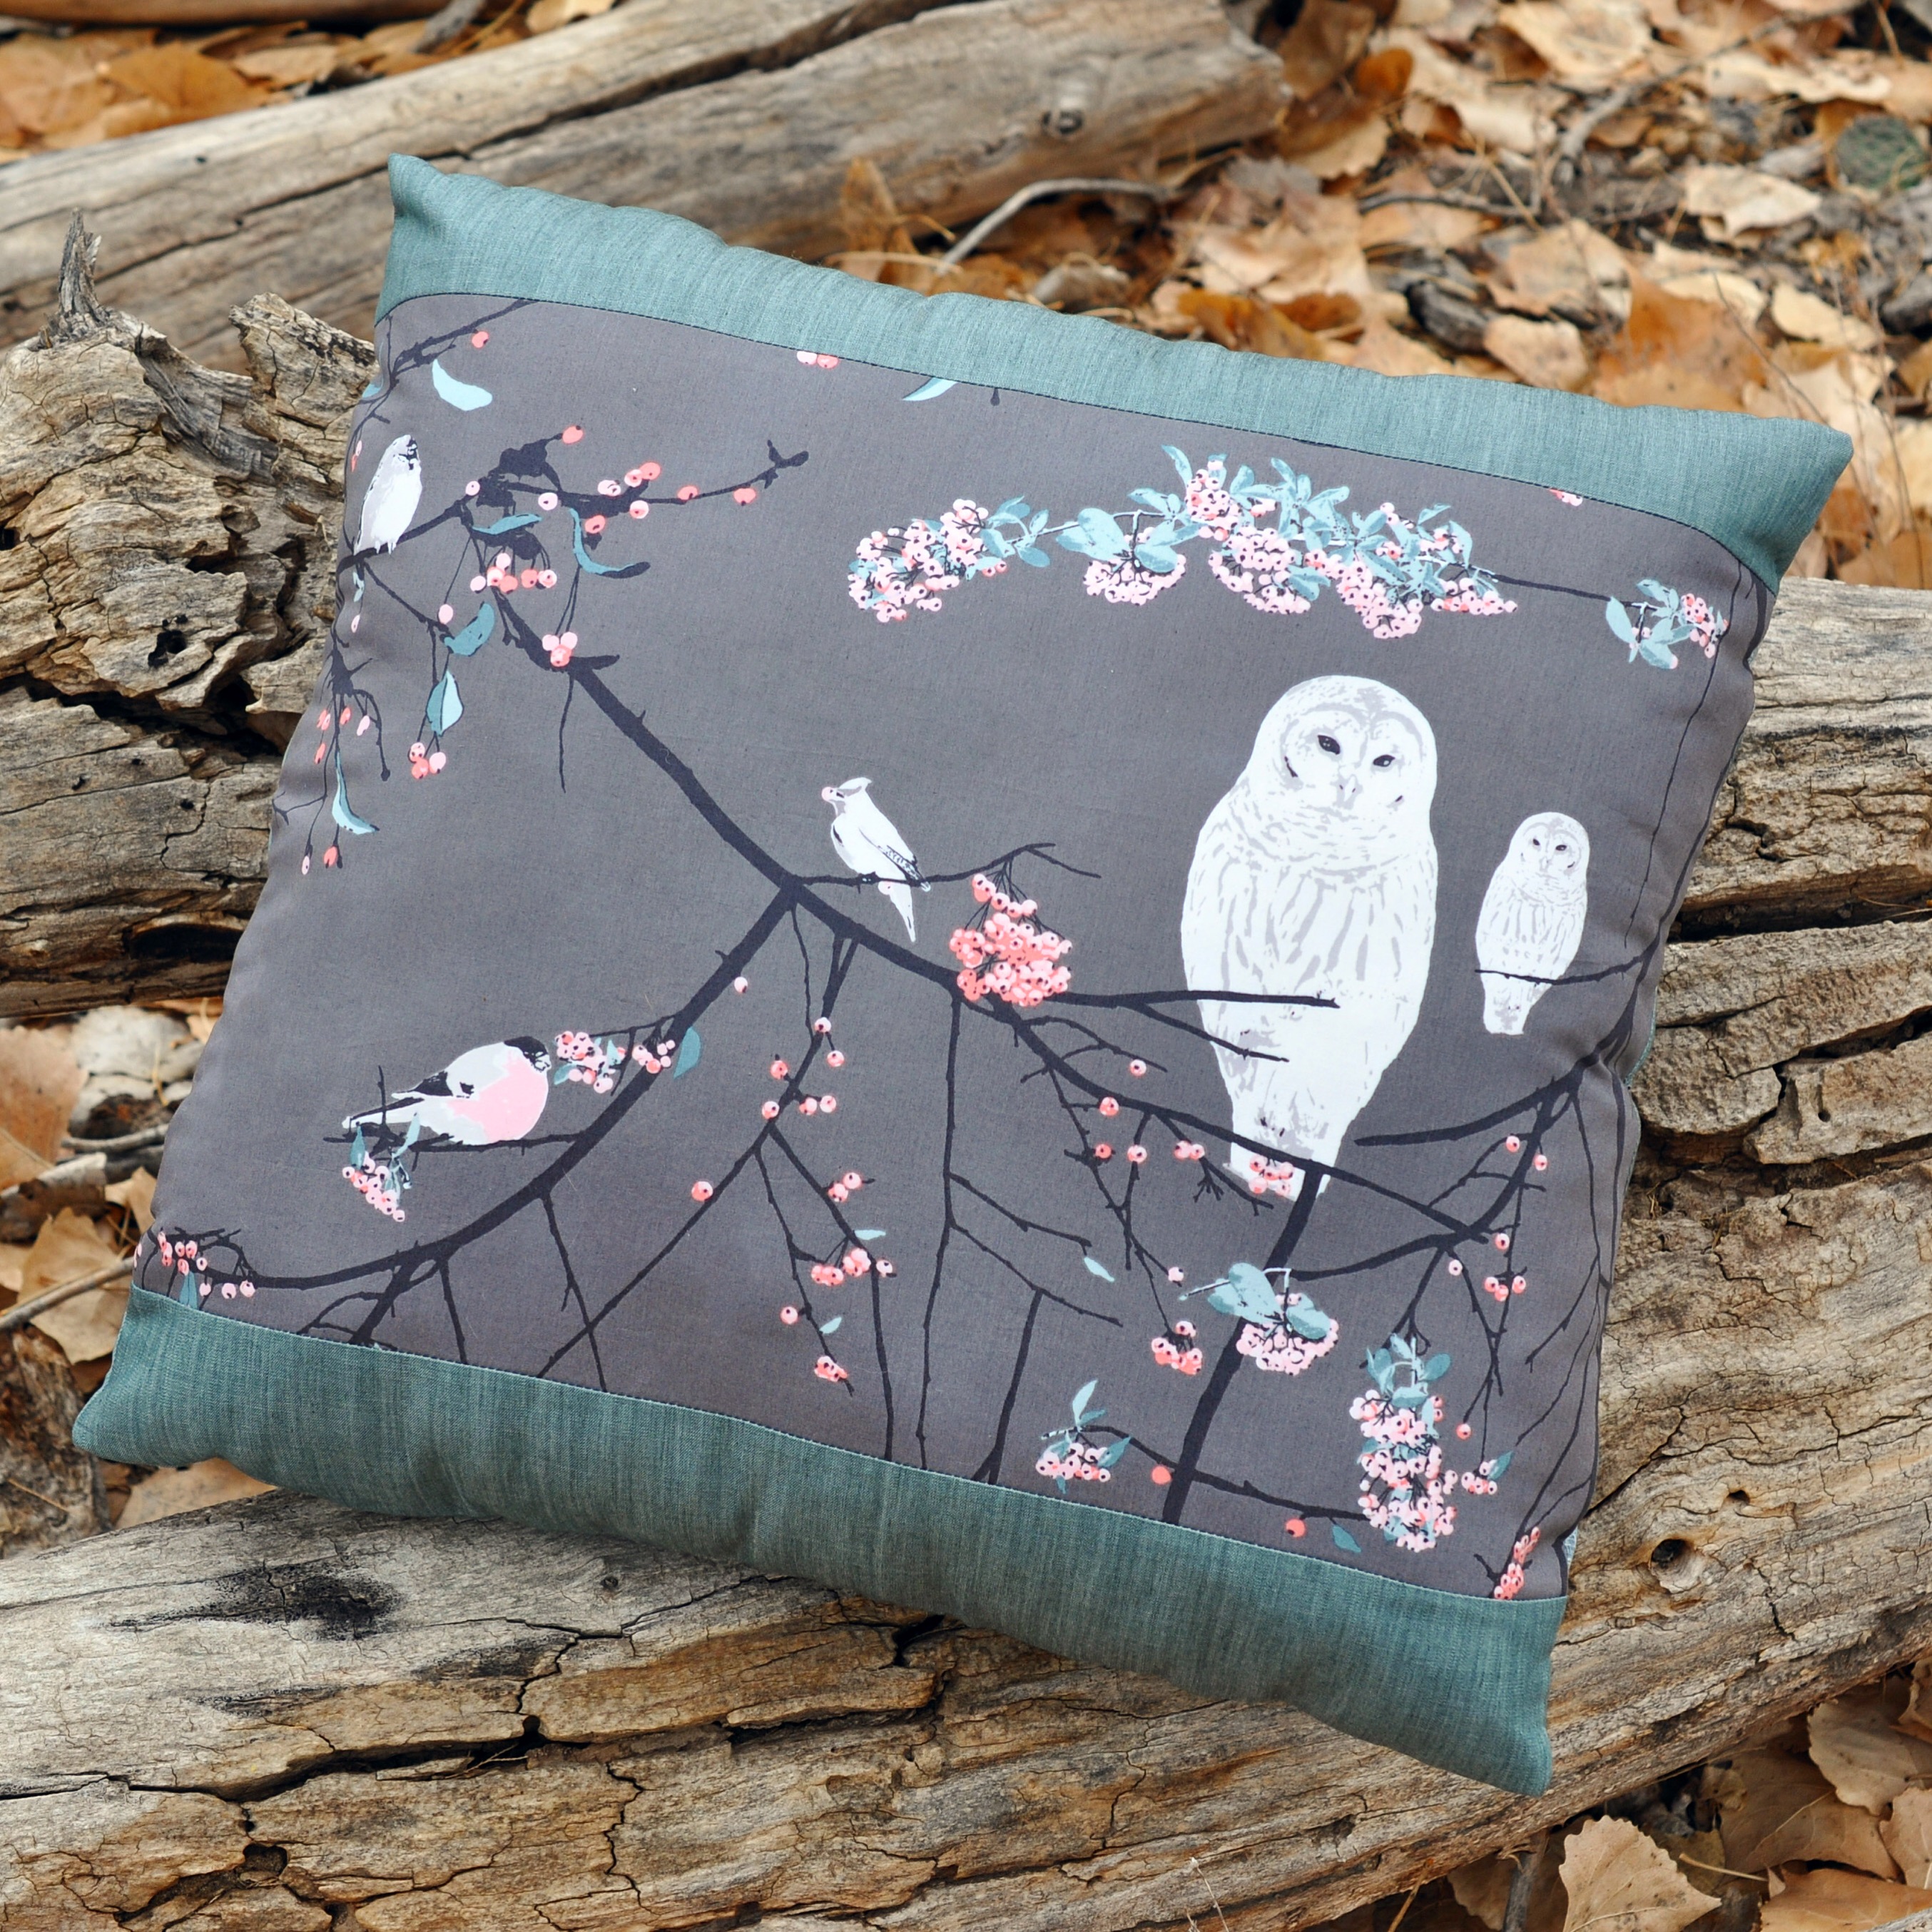
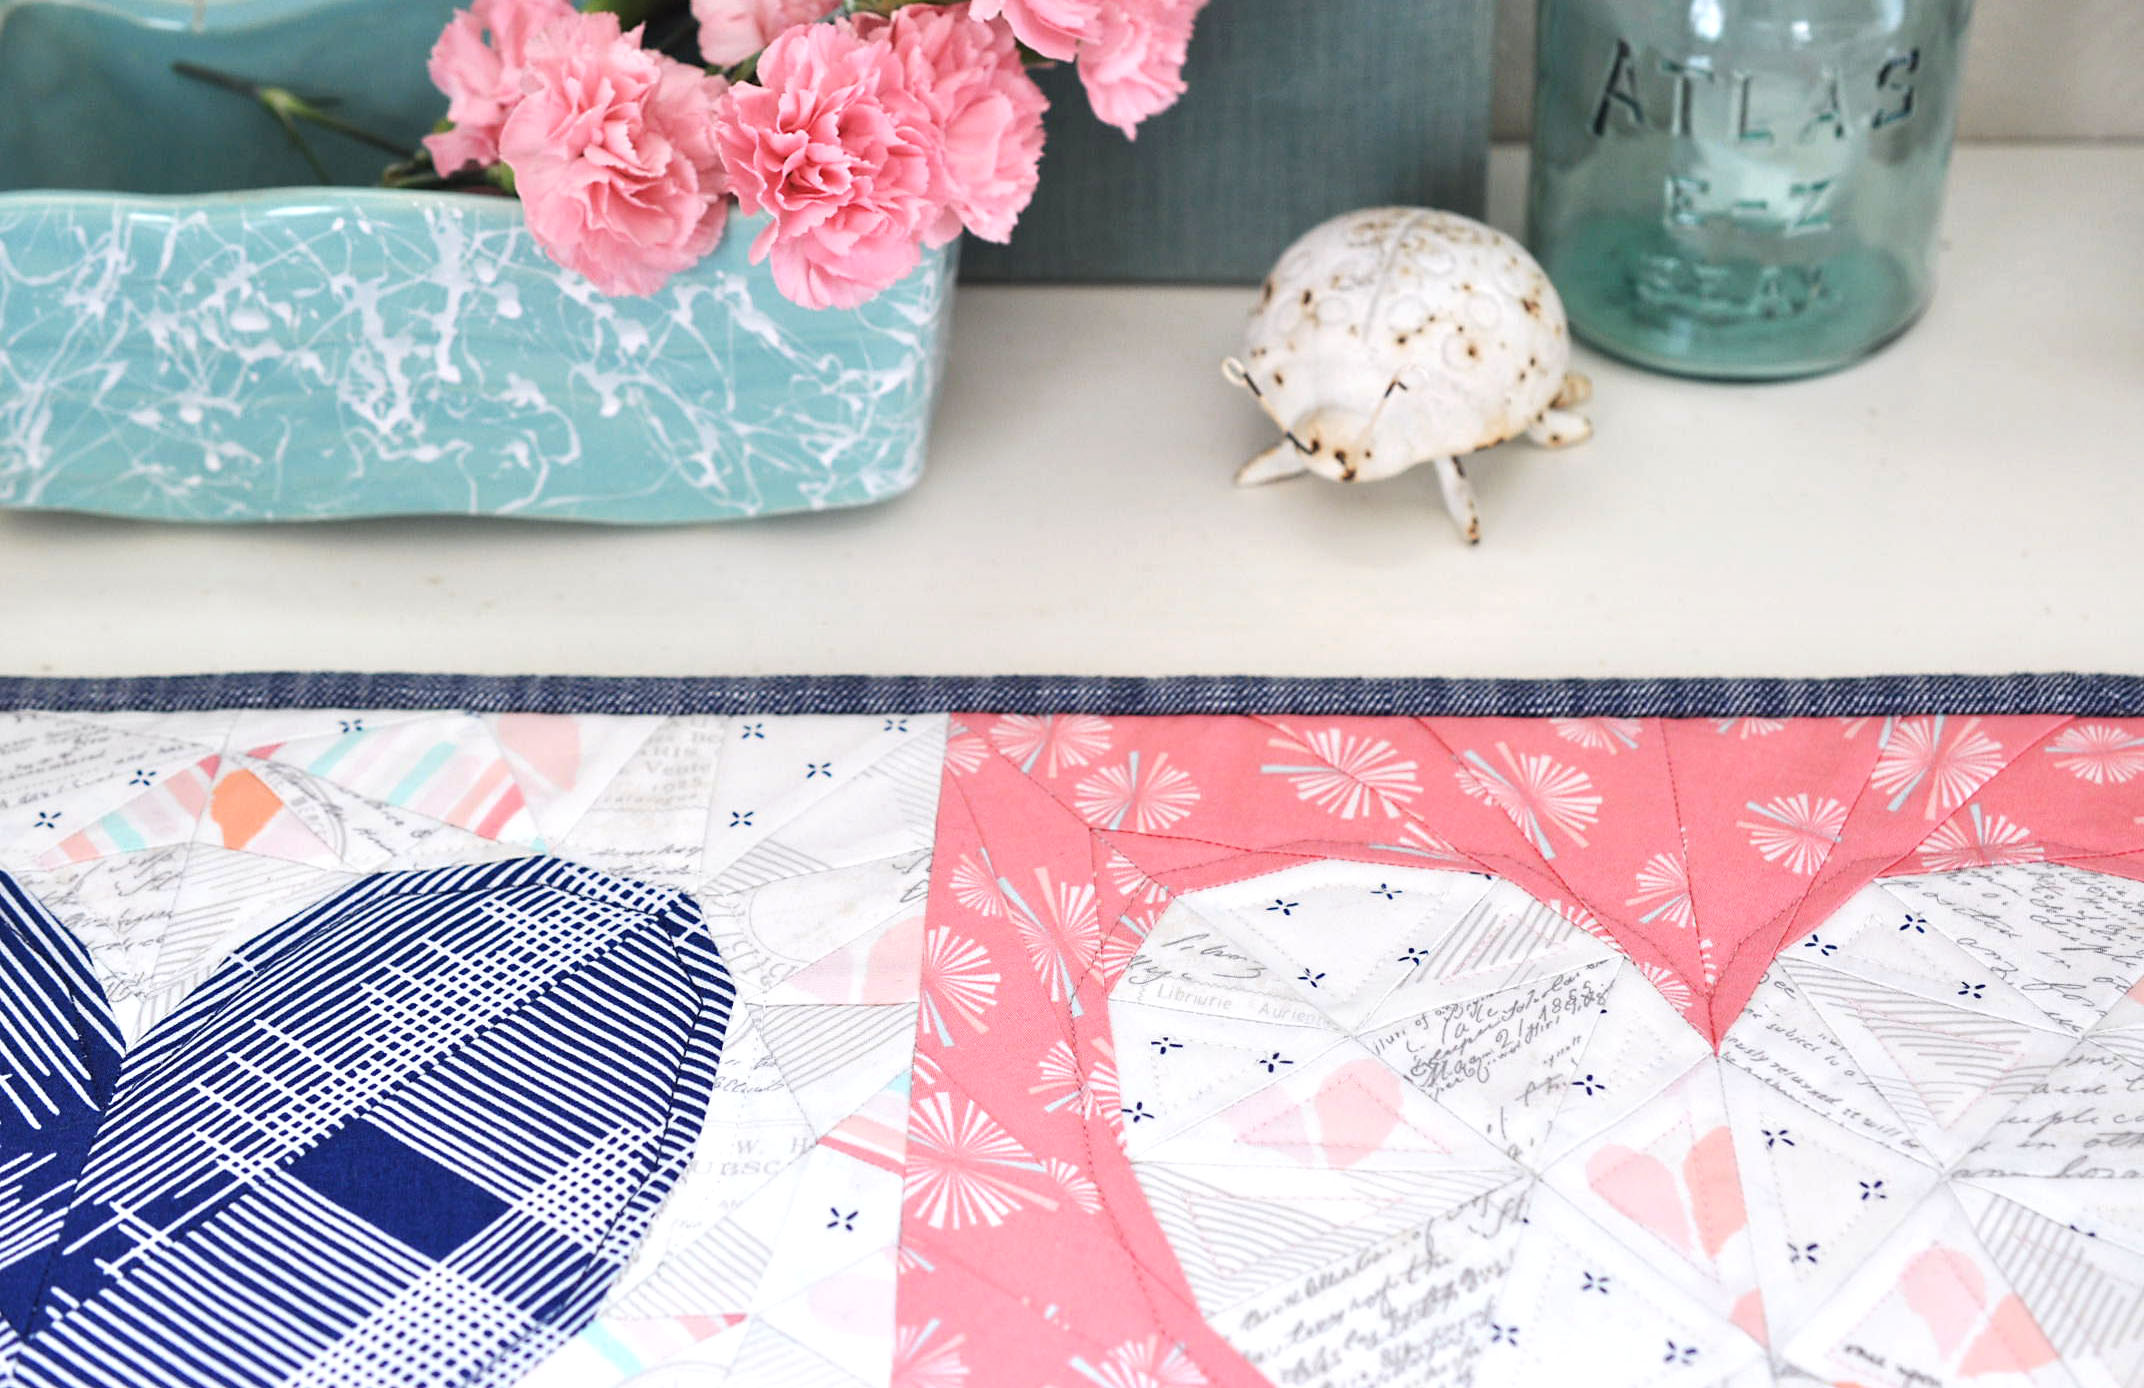
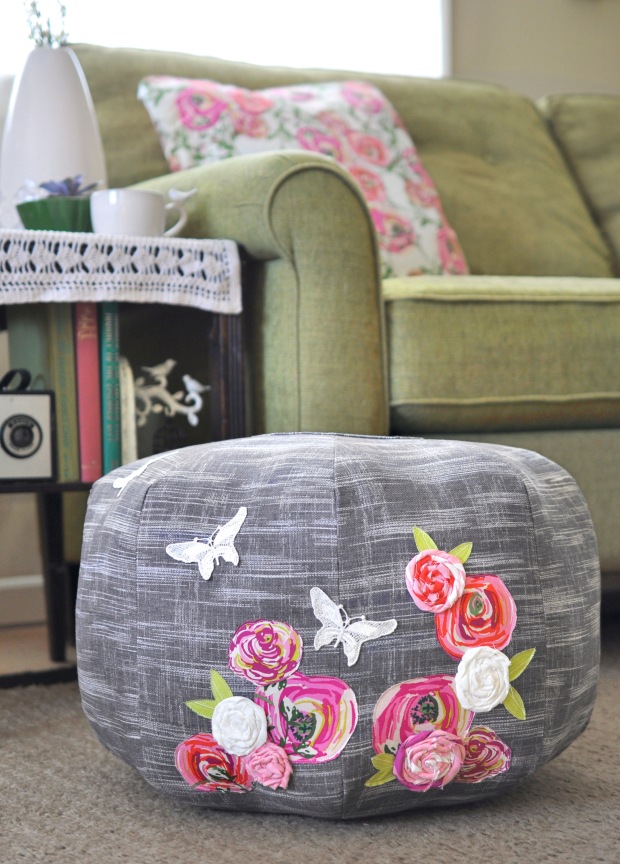
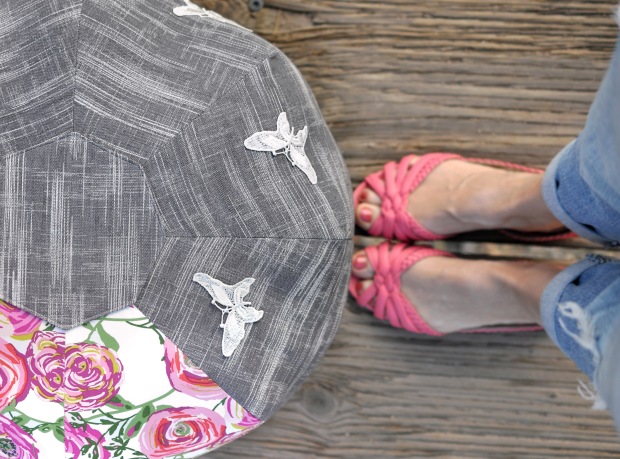
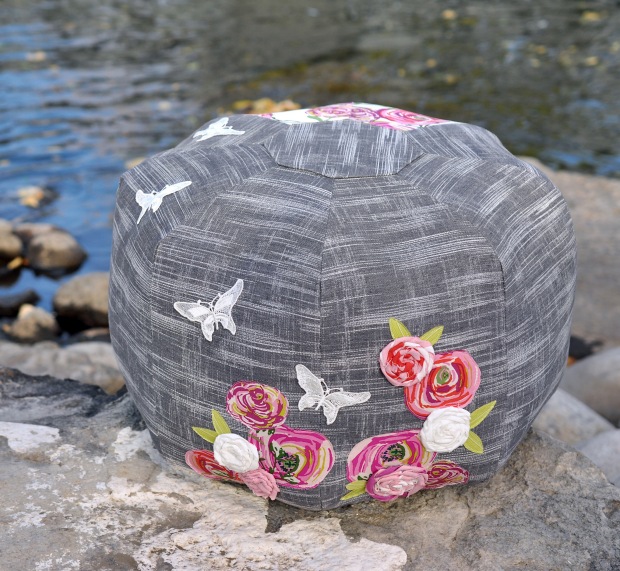
When I saw the new Crosshatch Textured Denim, I knew I had to do a home decor project. I have been wanting to make Amy Butler’s Gumdrop Floor Pillows for YEARS, since long before I was sewing regularly, but now was finally the time.

feetblog

ABOUT THE FABRICS

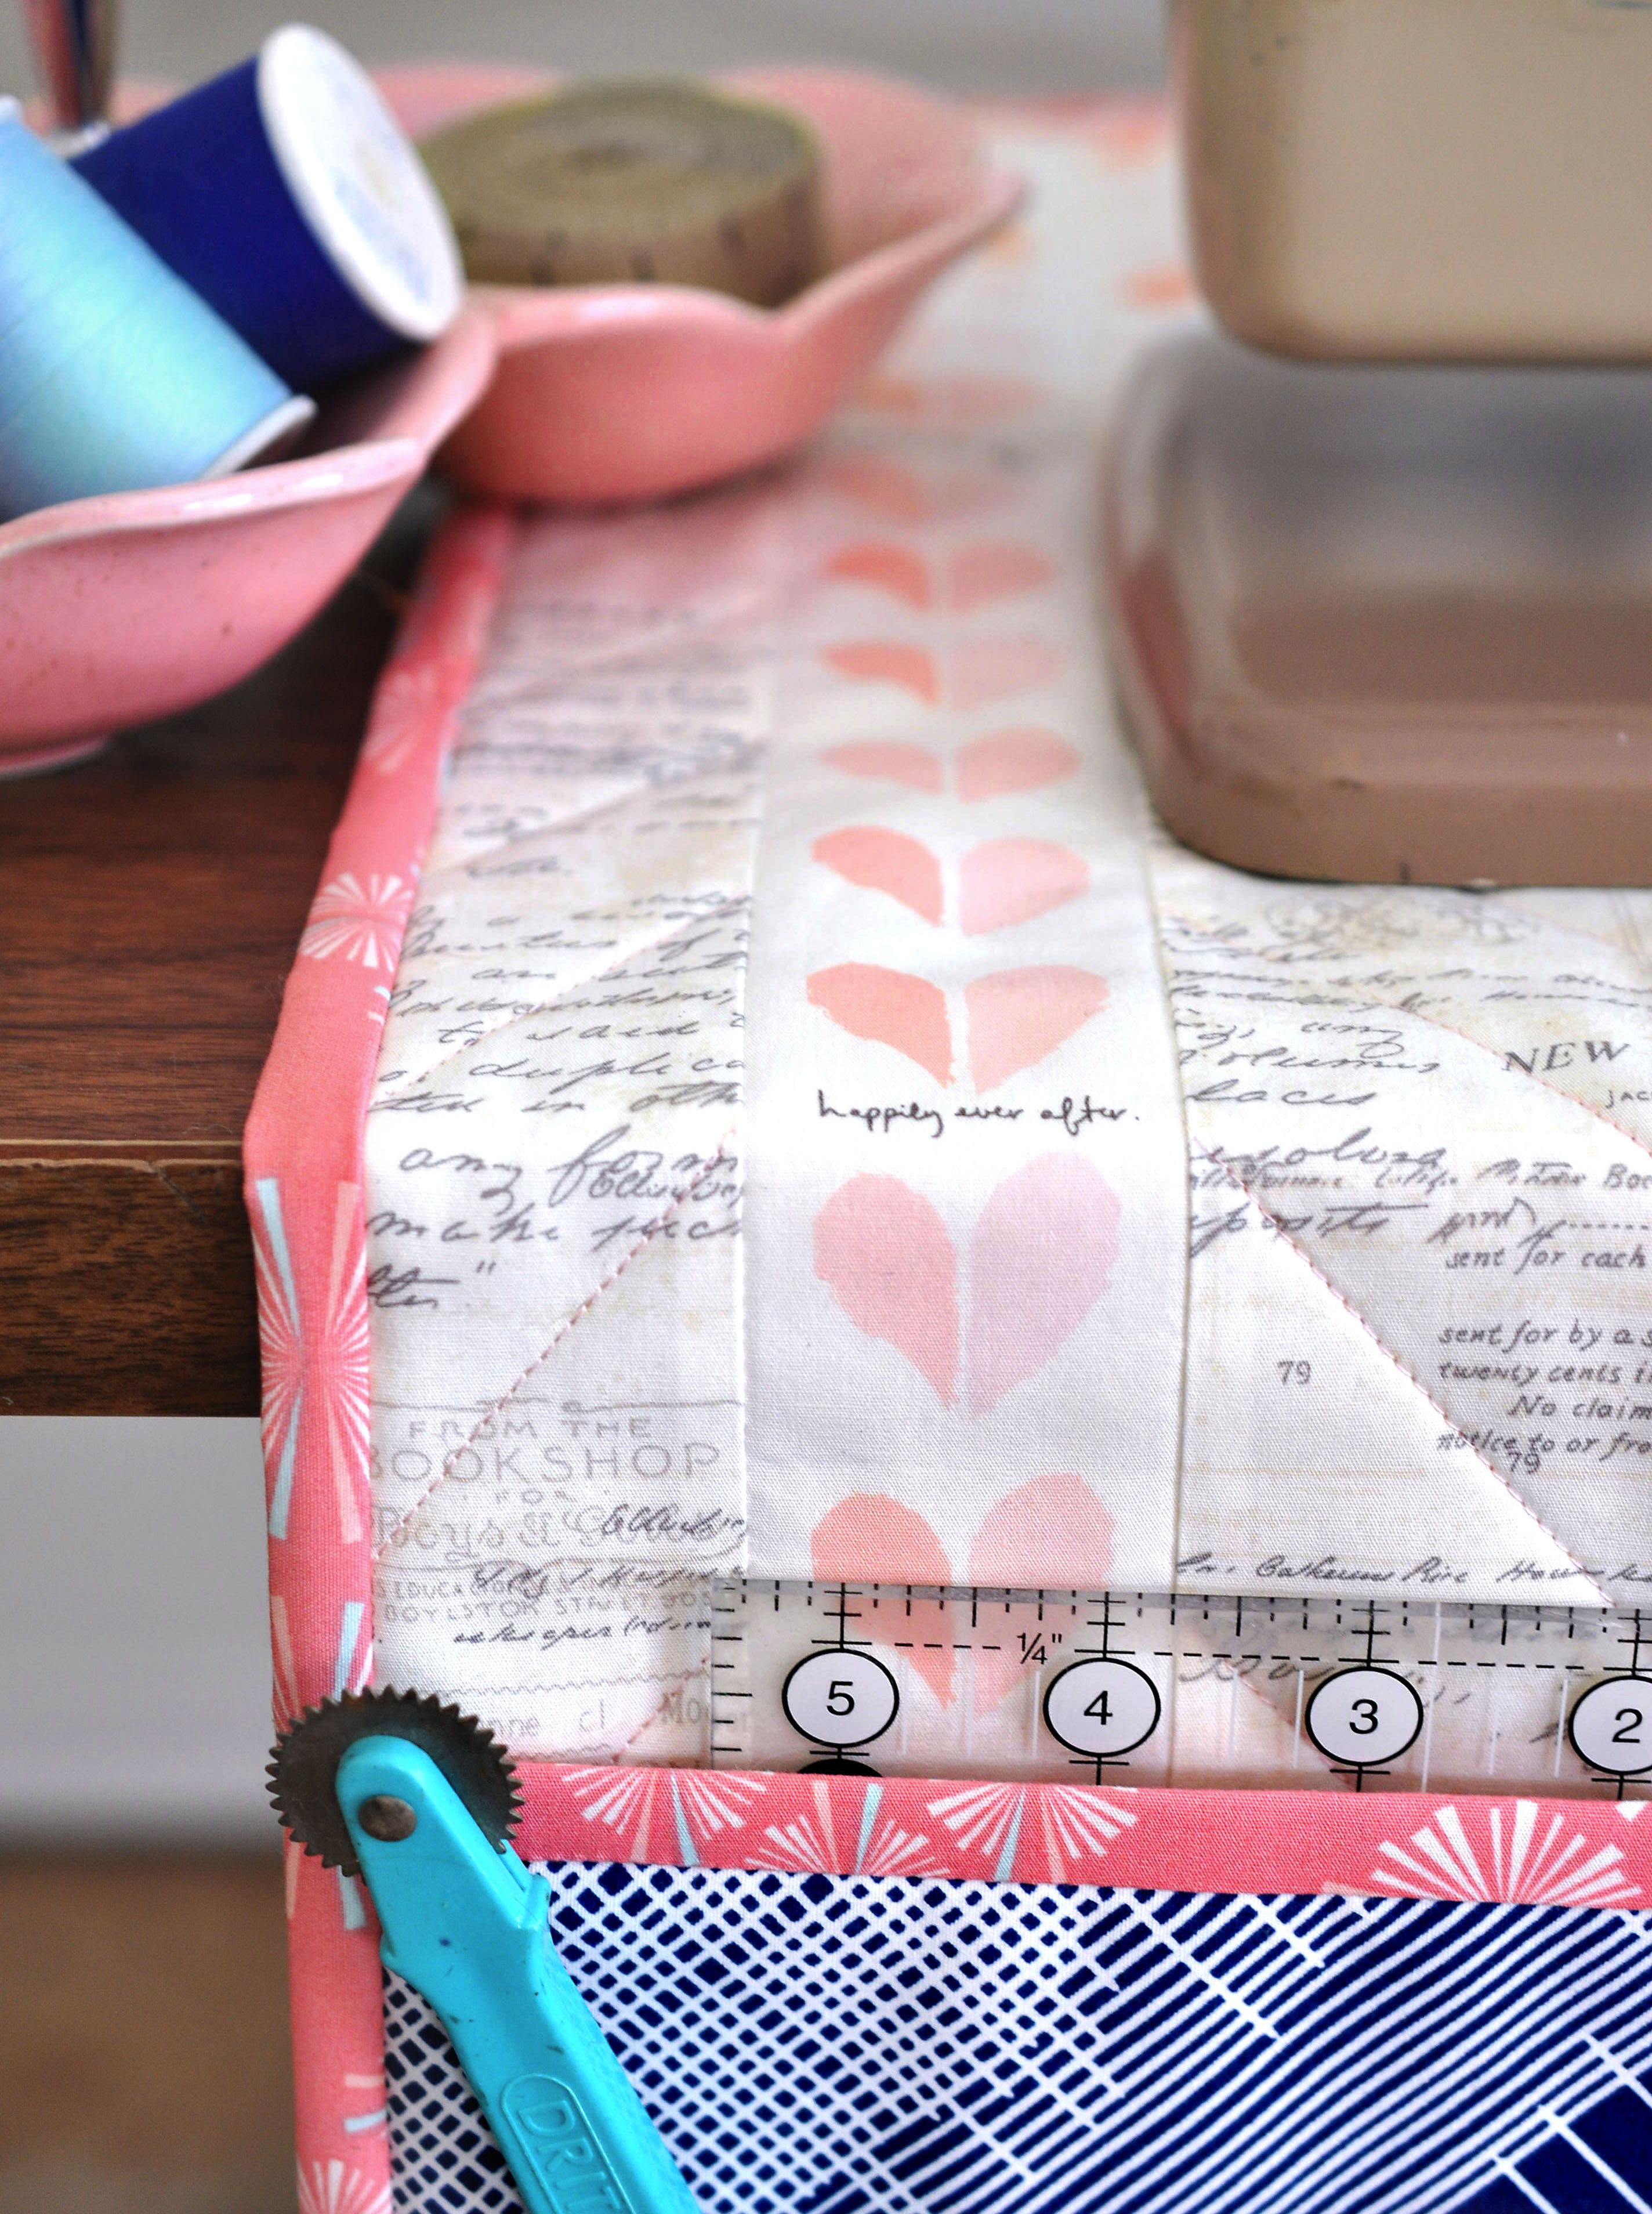
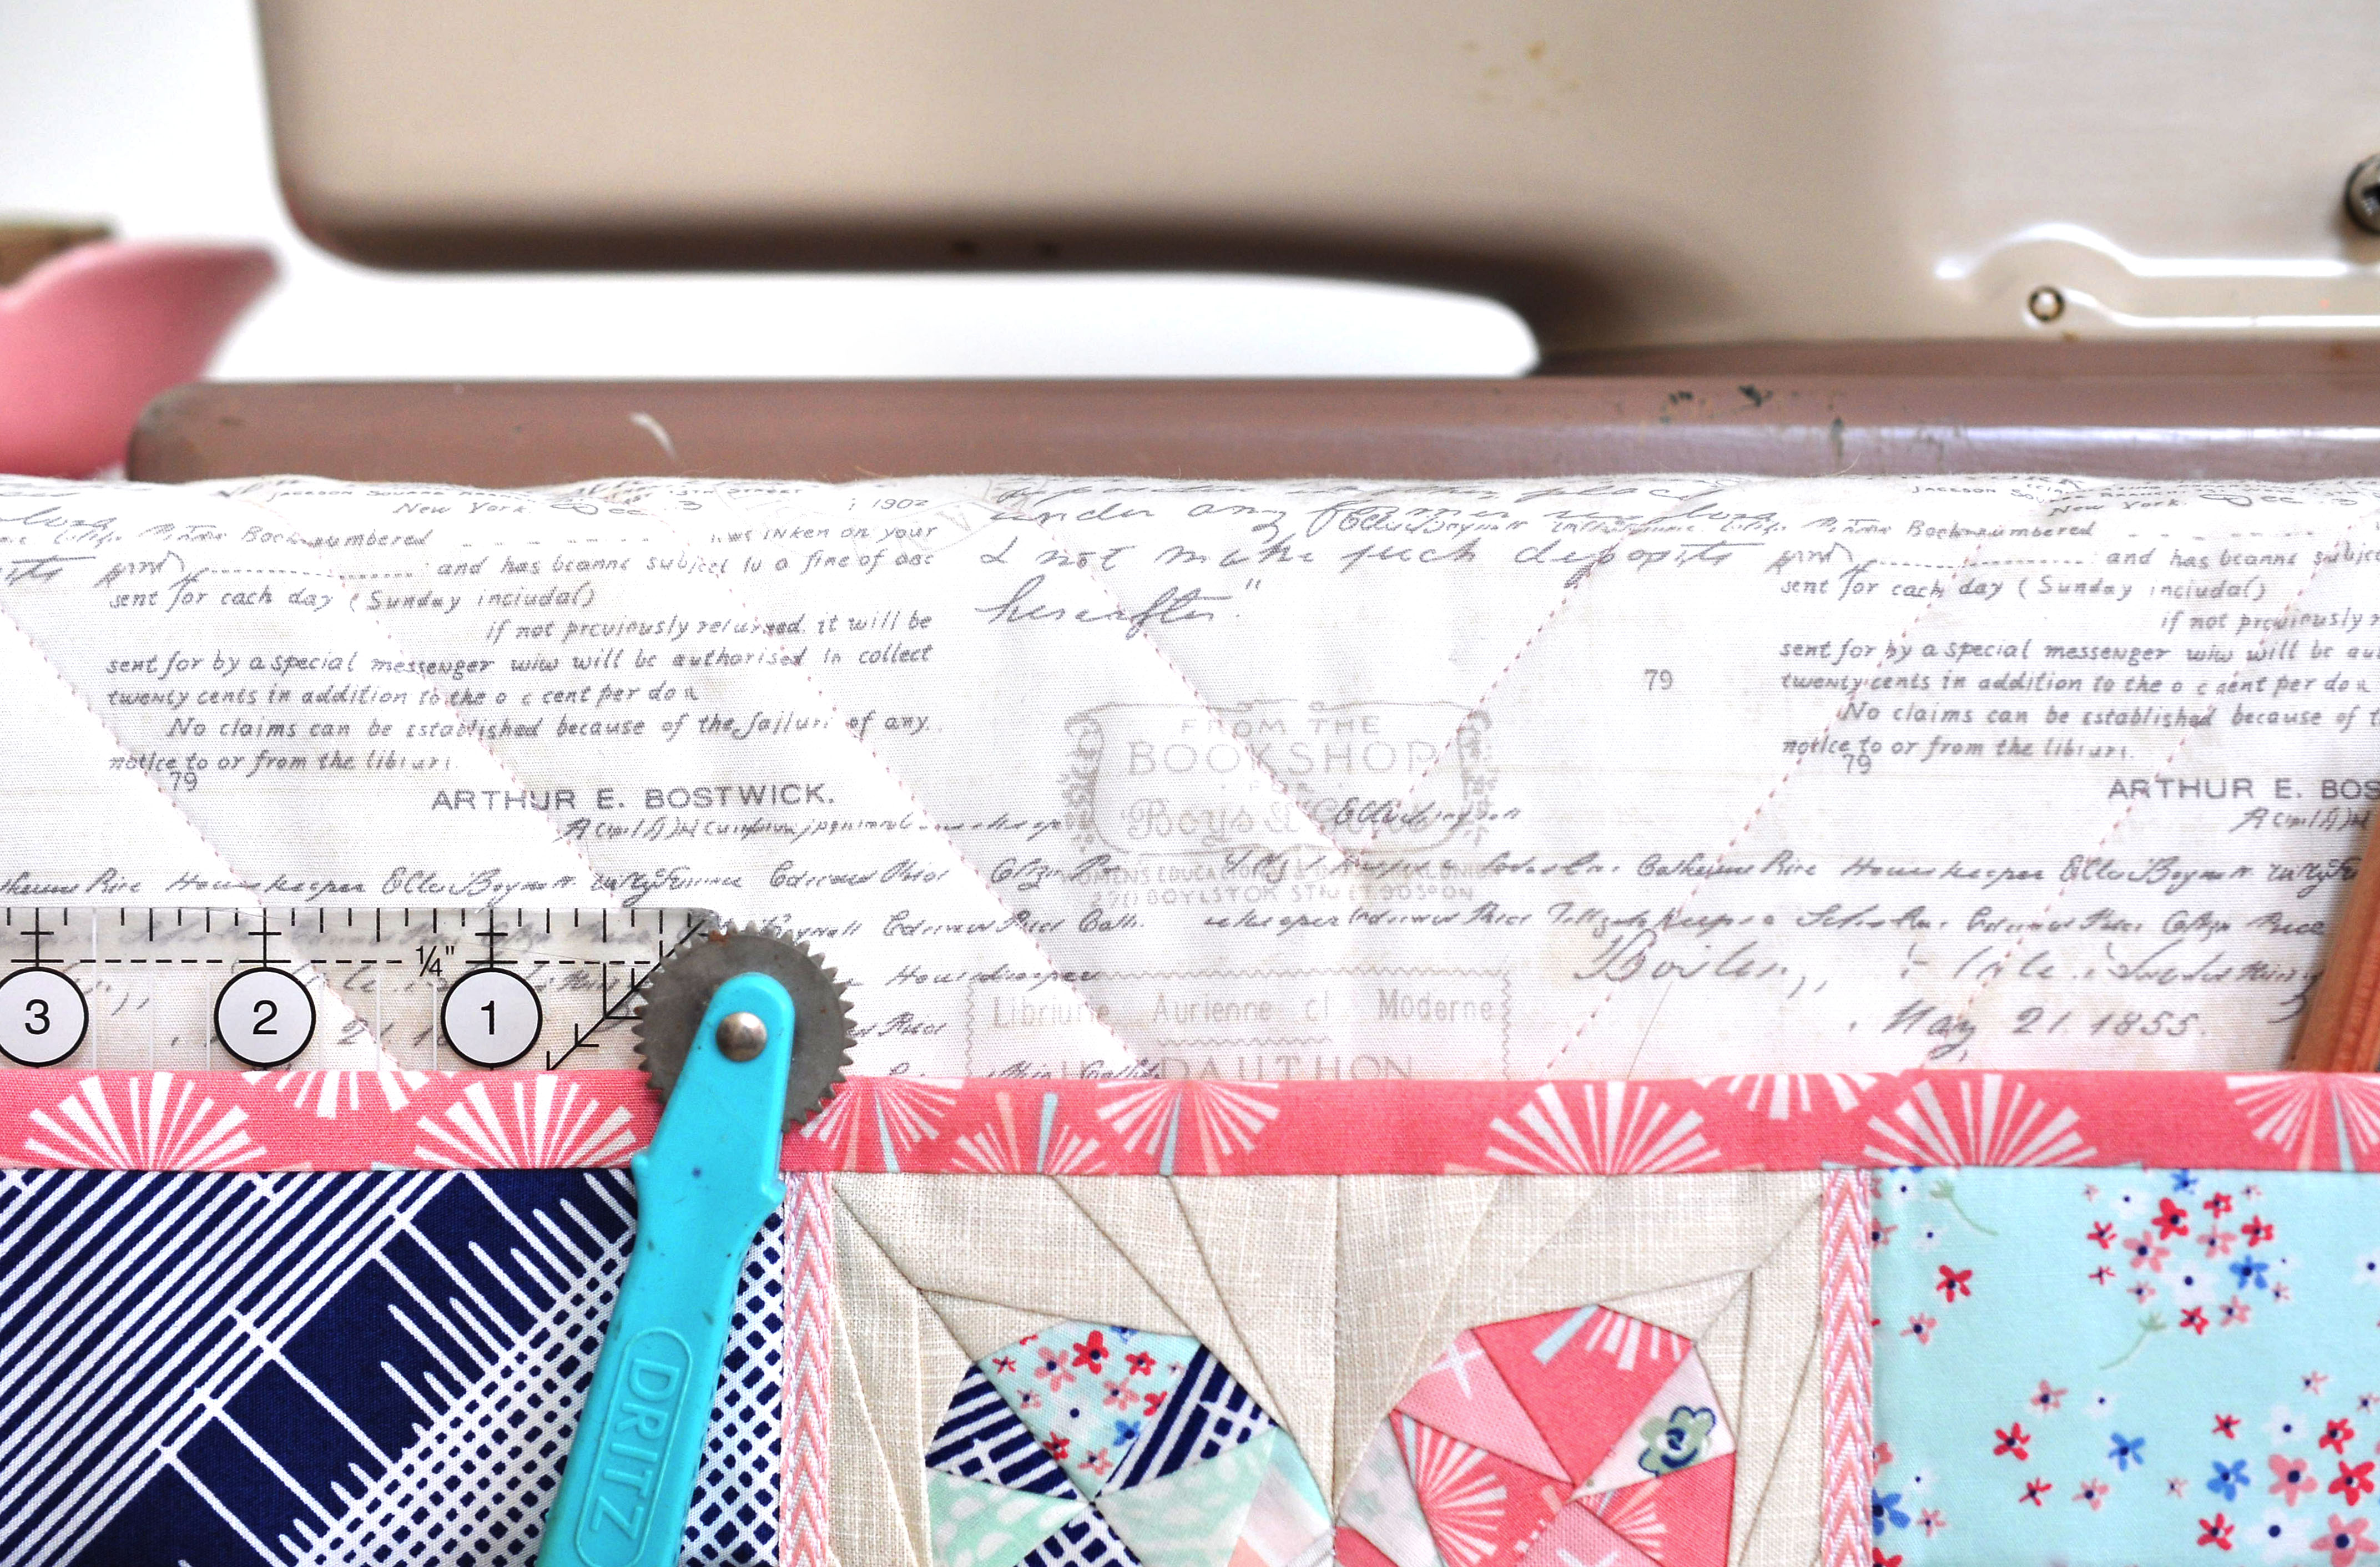
The crosshatch textured denim is 100% cotton and a heavier weight, 10 oz vs. the 4 to 4.5 oz of     the solid smooth denims that would be considered quilting or light apparel weight, making it perfect for this project. I would equate it to a soft, denim canvas. It comes in gray (Clouded Horizon), which I used here, dark blue (Rainy Night) and a medium blue (Babbling Brook) and in addition to decor projects, it could also be used for bags, upholstery, and even as a durable quilt back.

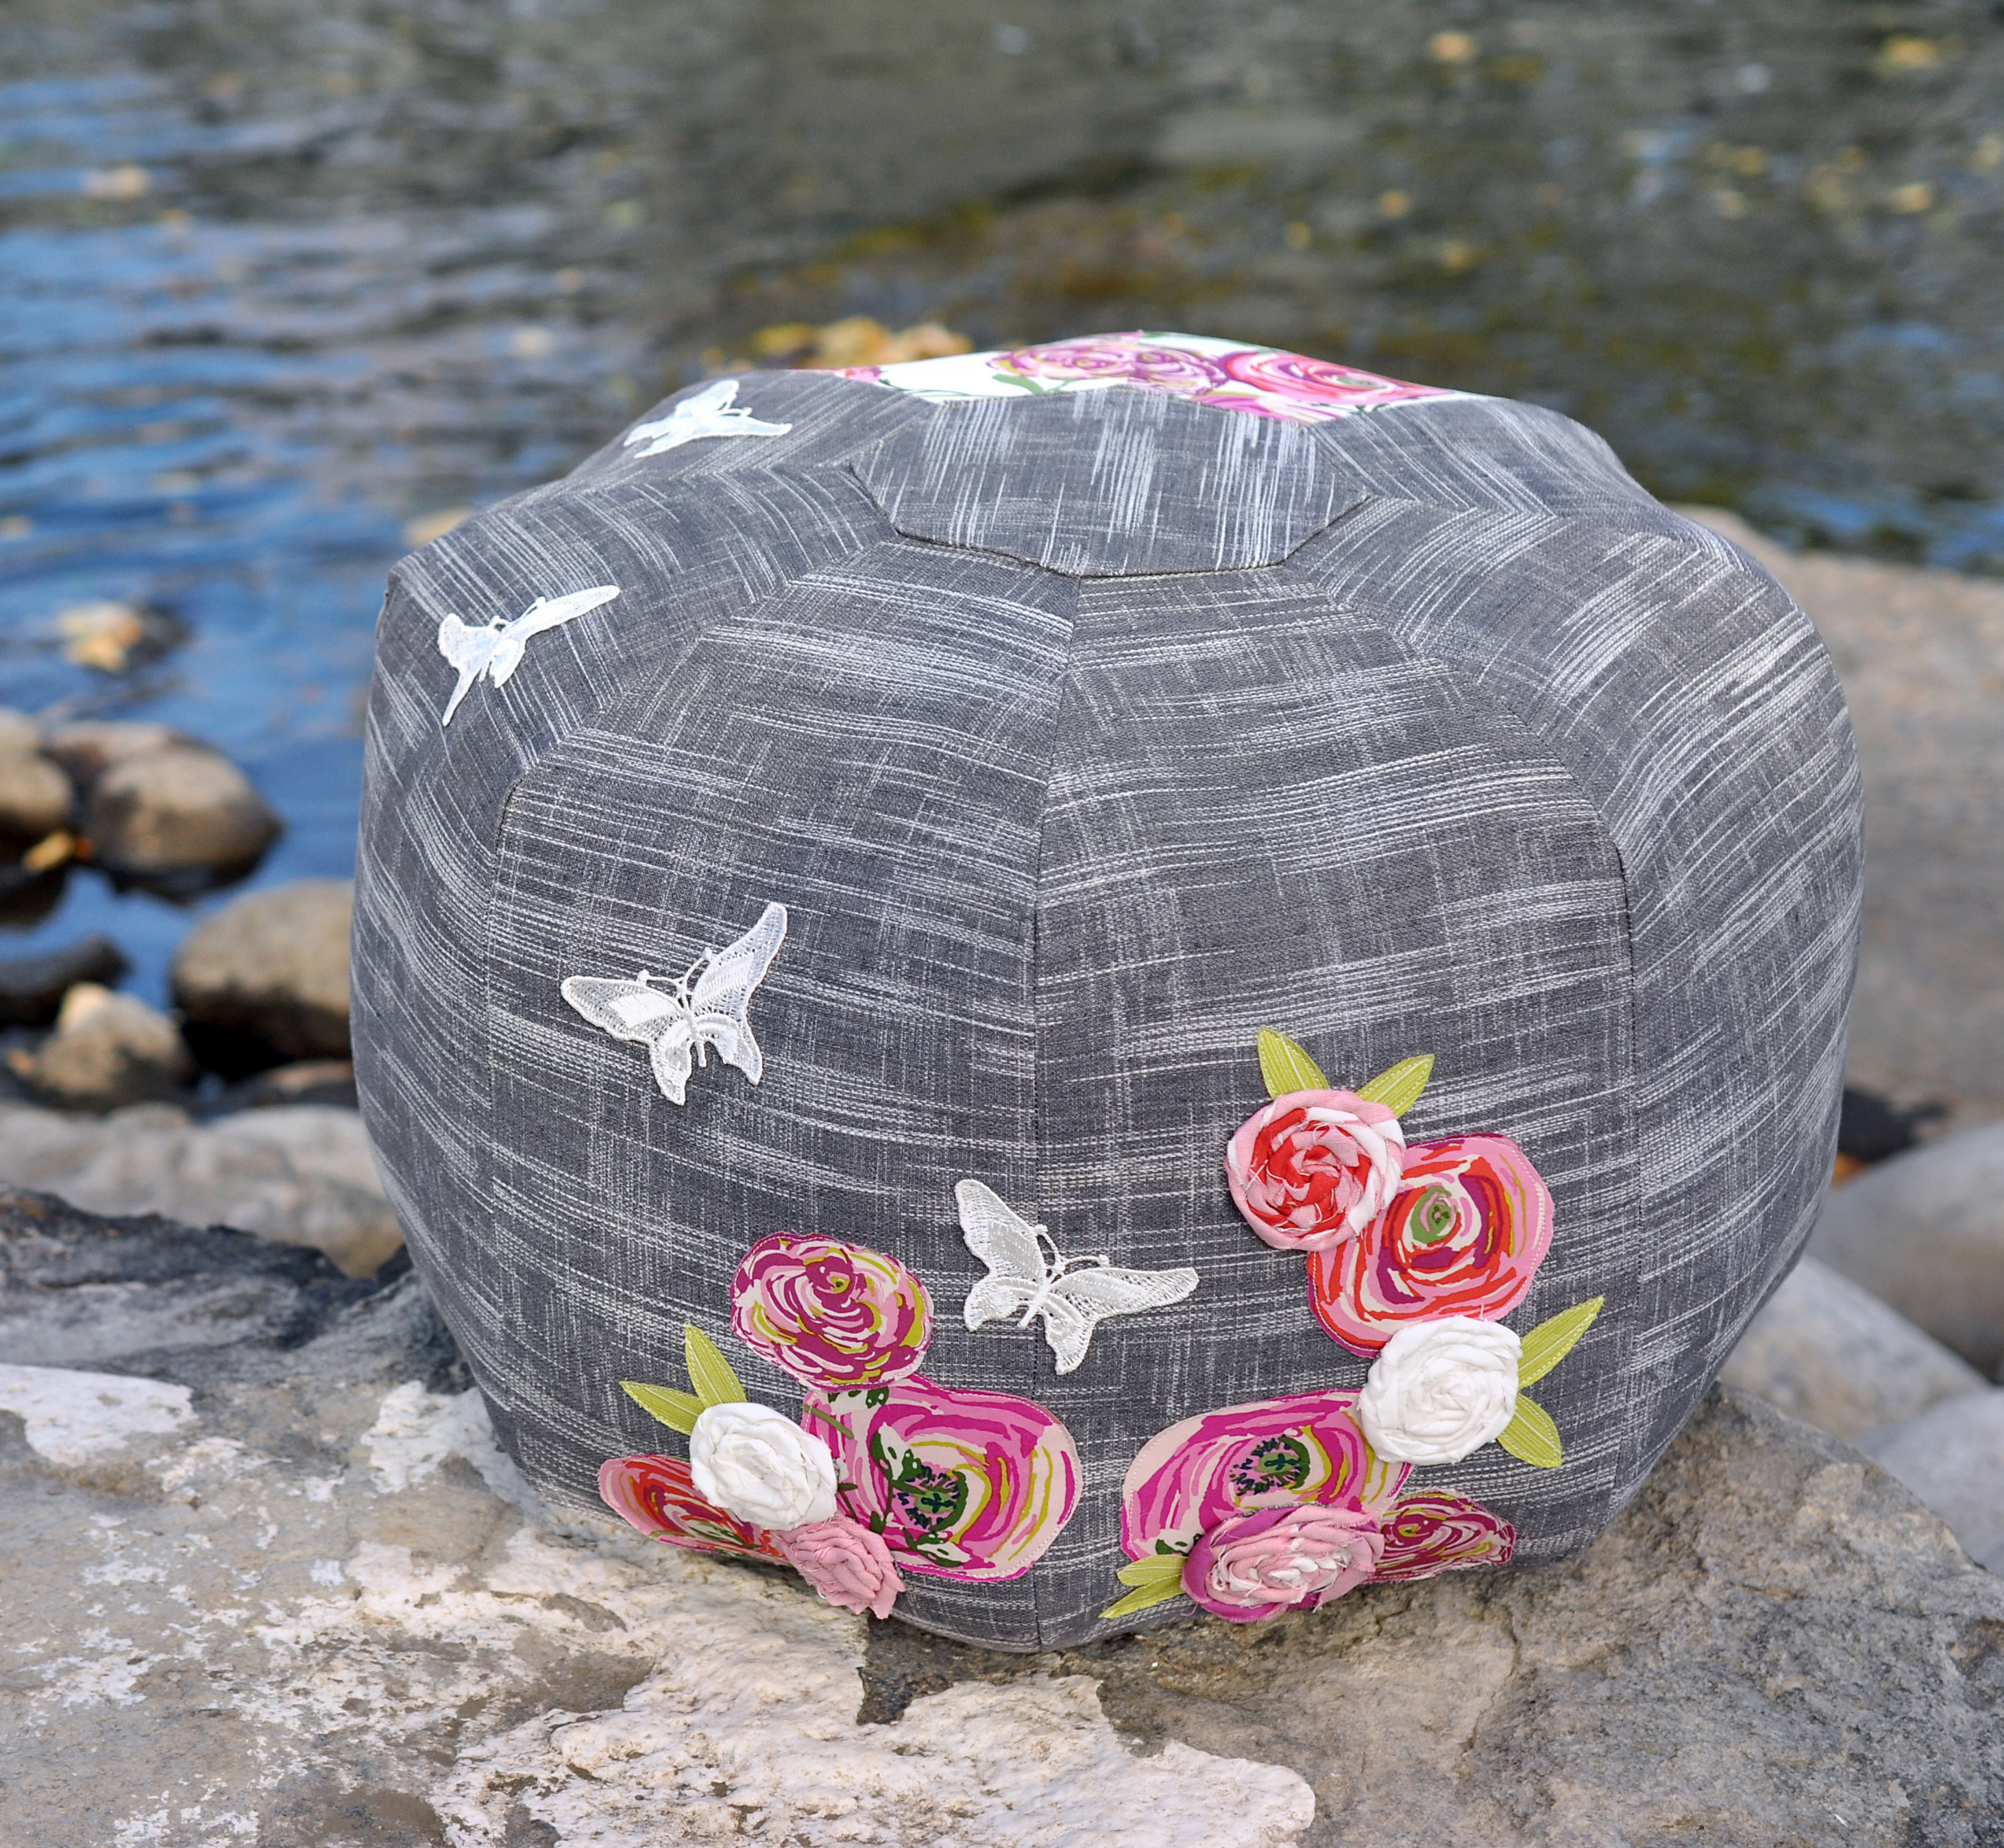
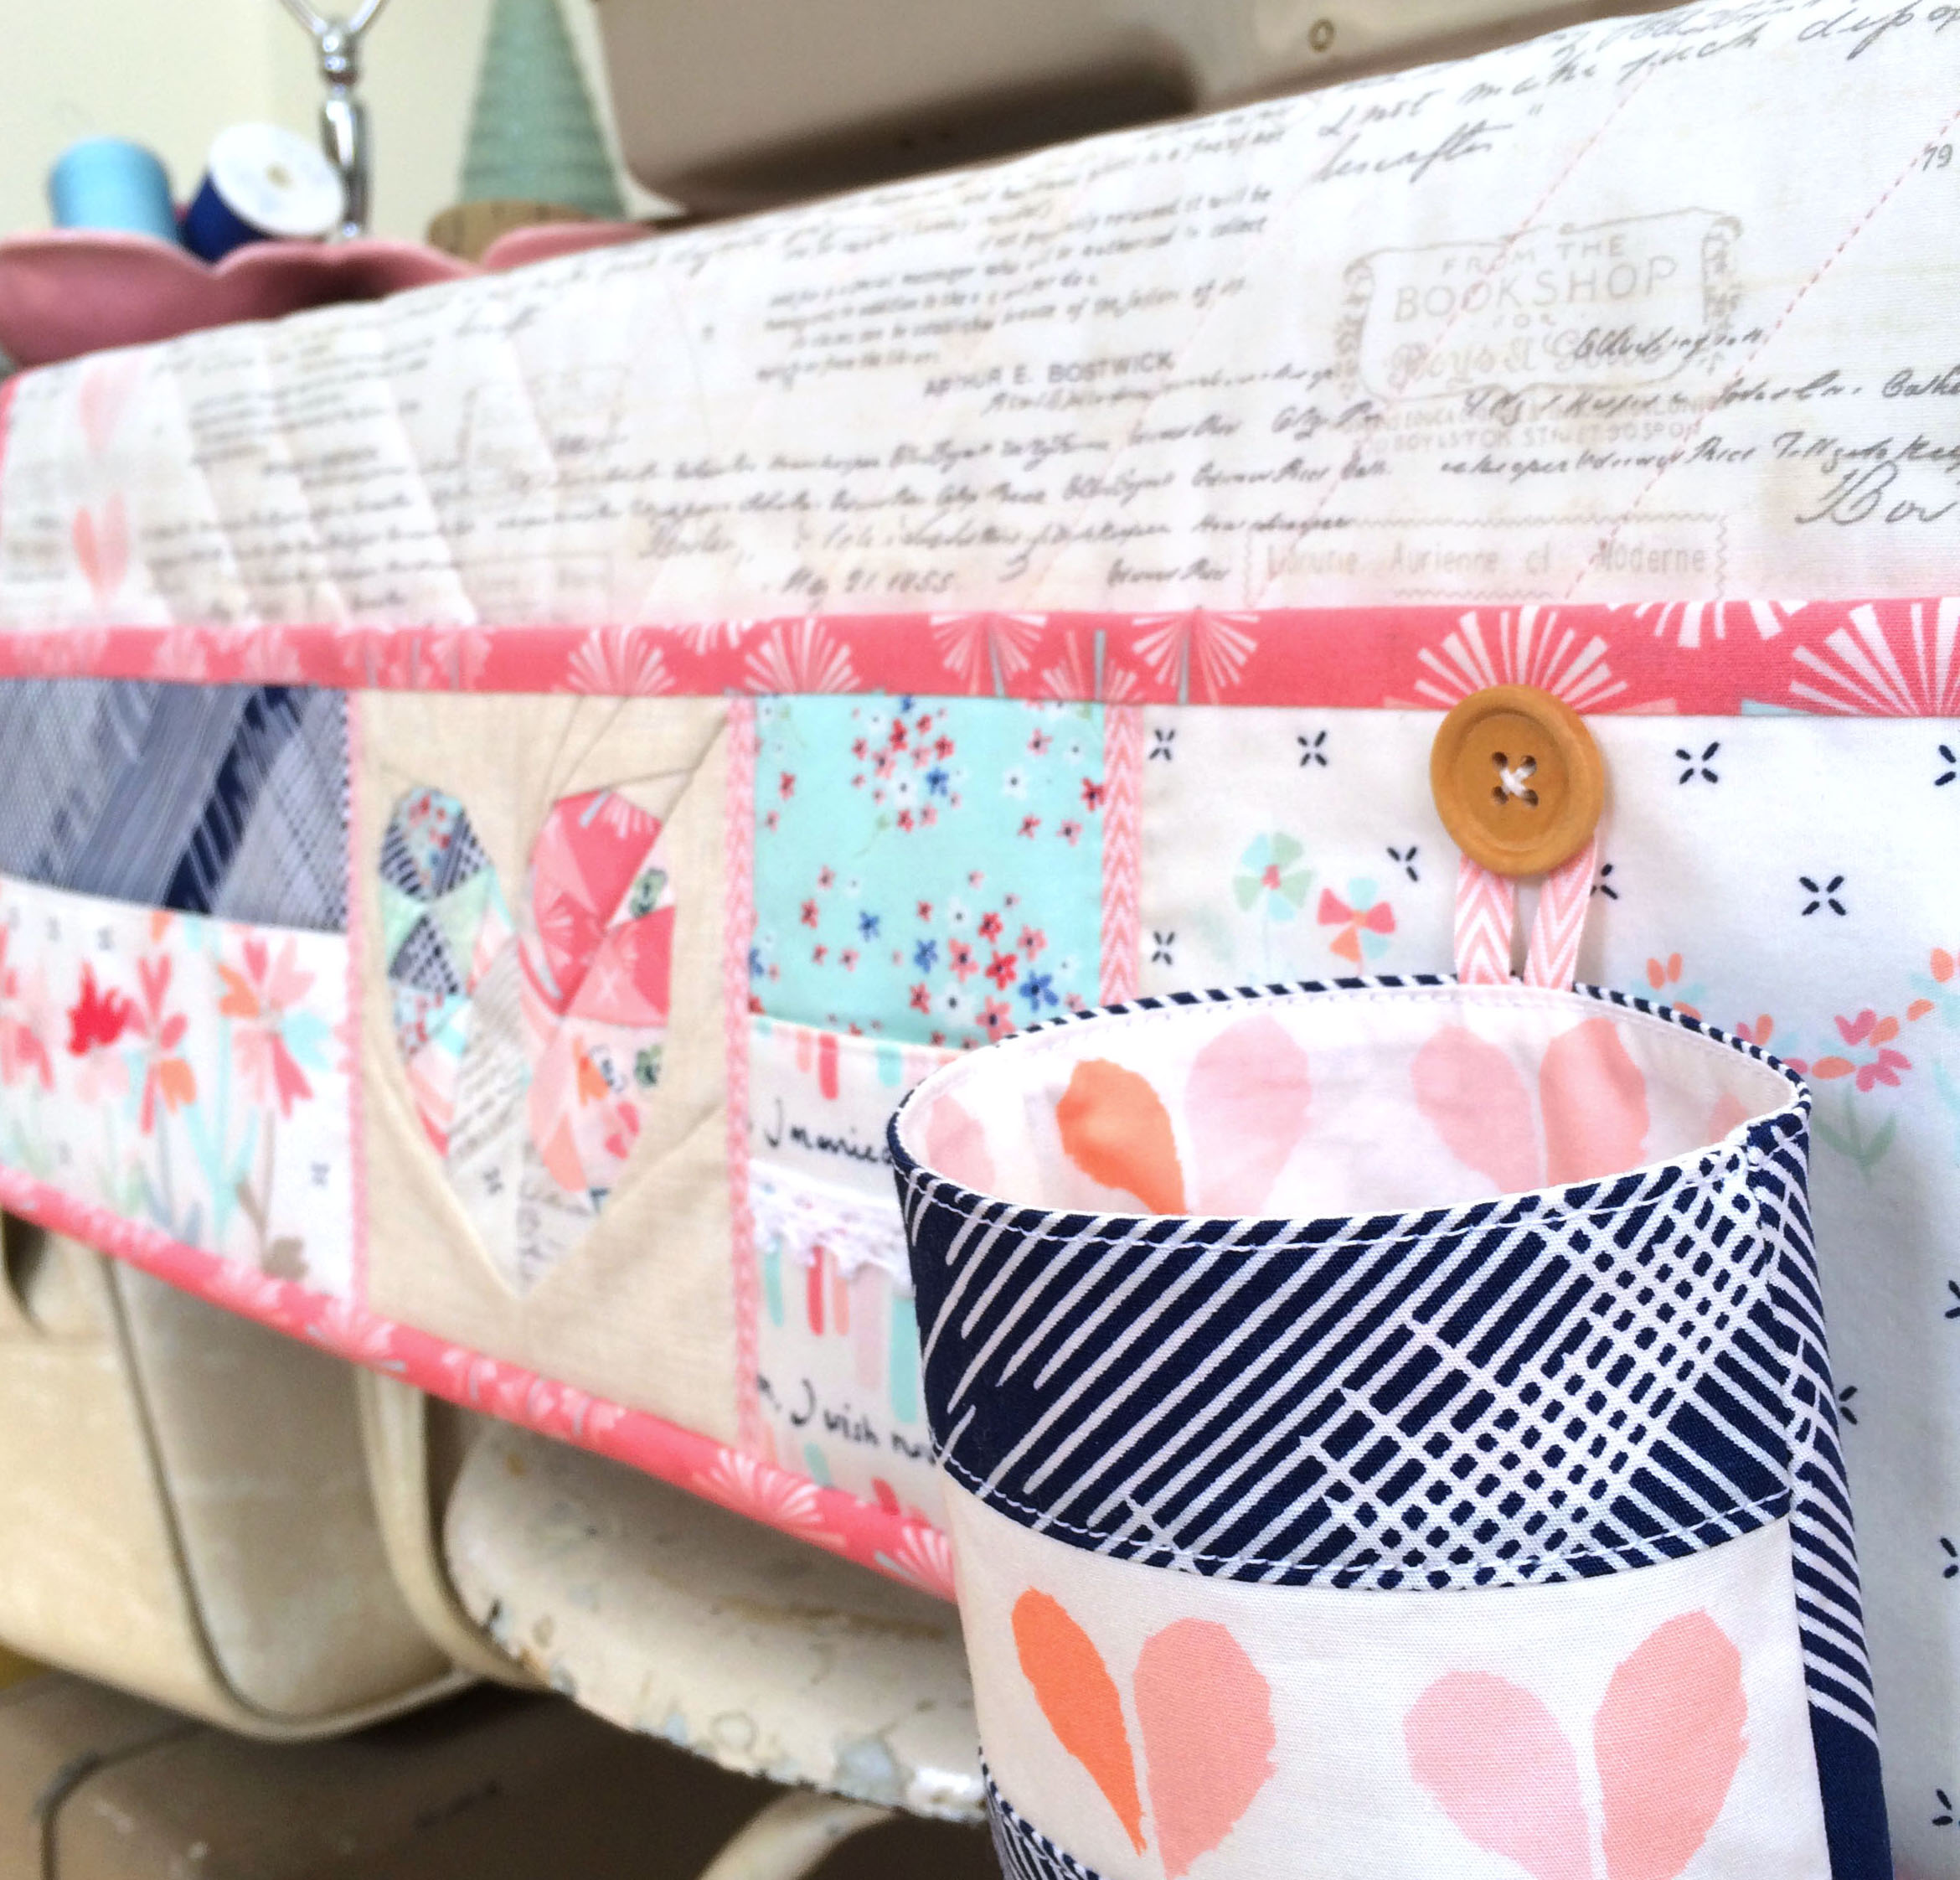
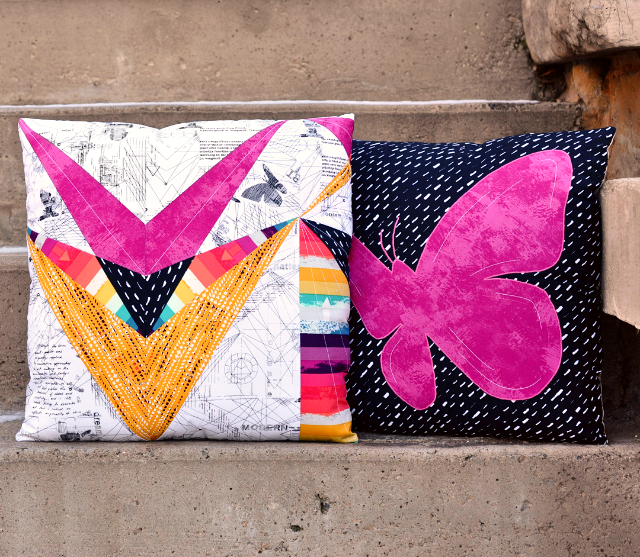
The crosshatch denim is definitely interesting enough to stand on its own (I would love to upholster an armchair!), but I wanted to have some fun and incorporate a print from Bari J’s newest line, Joie de Vivre, because, pretty flowers! I decided to do a little appliqué and add a three dimensional element using a fabric rose technique that is a favorite of mine for making brooches and hair clips.

closeup

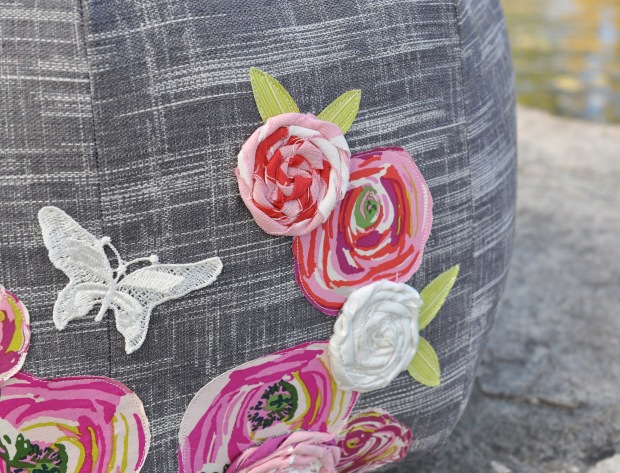
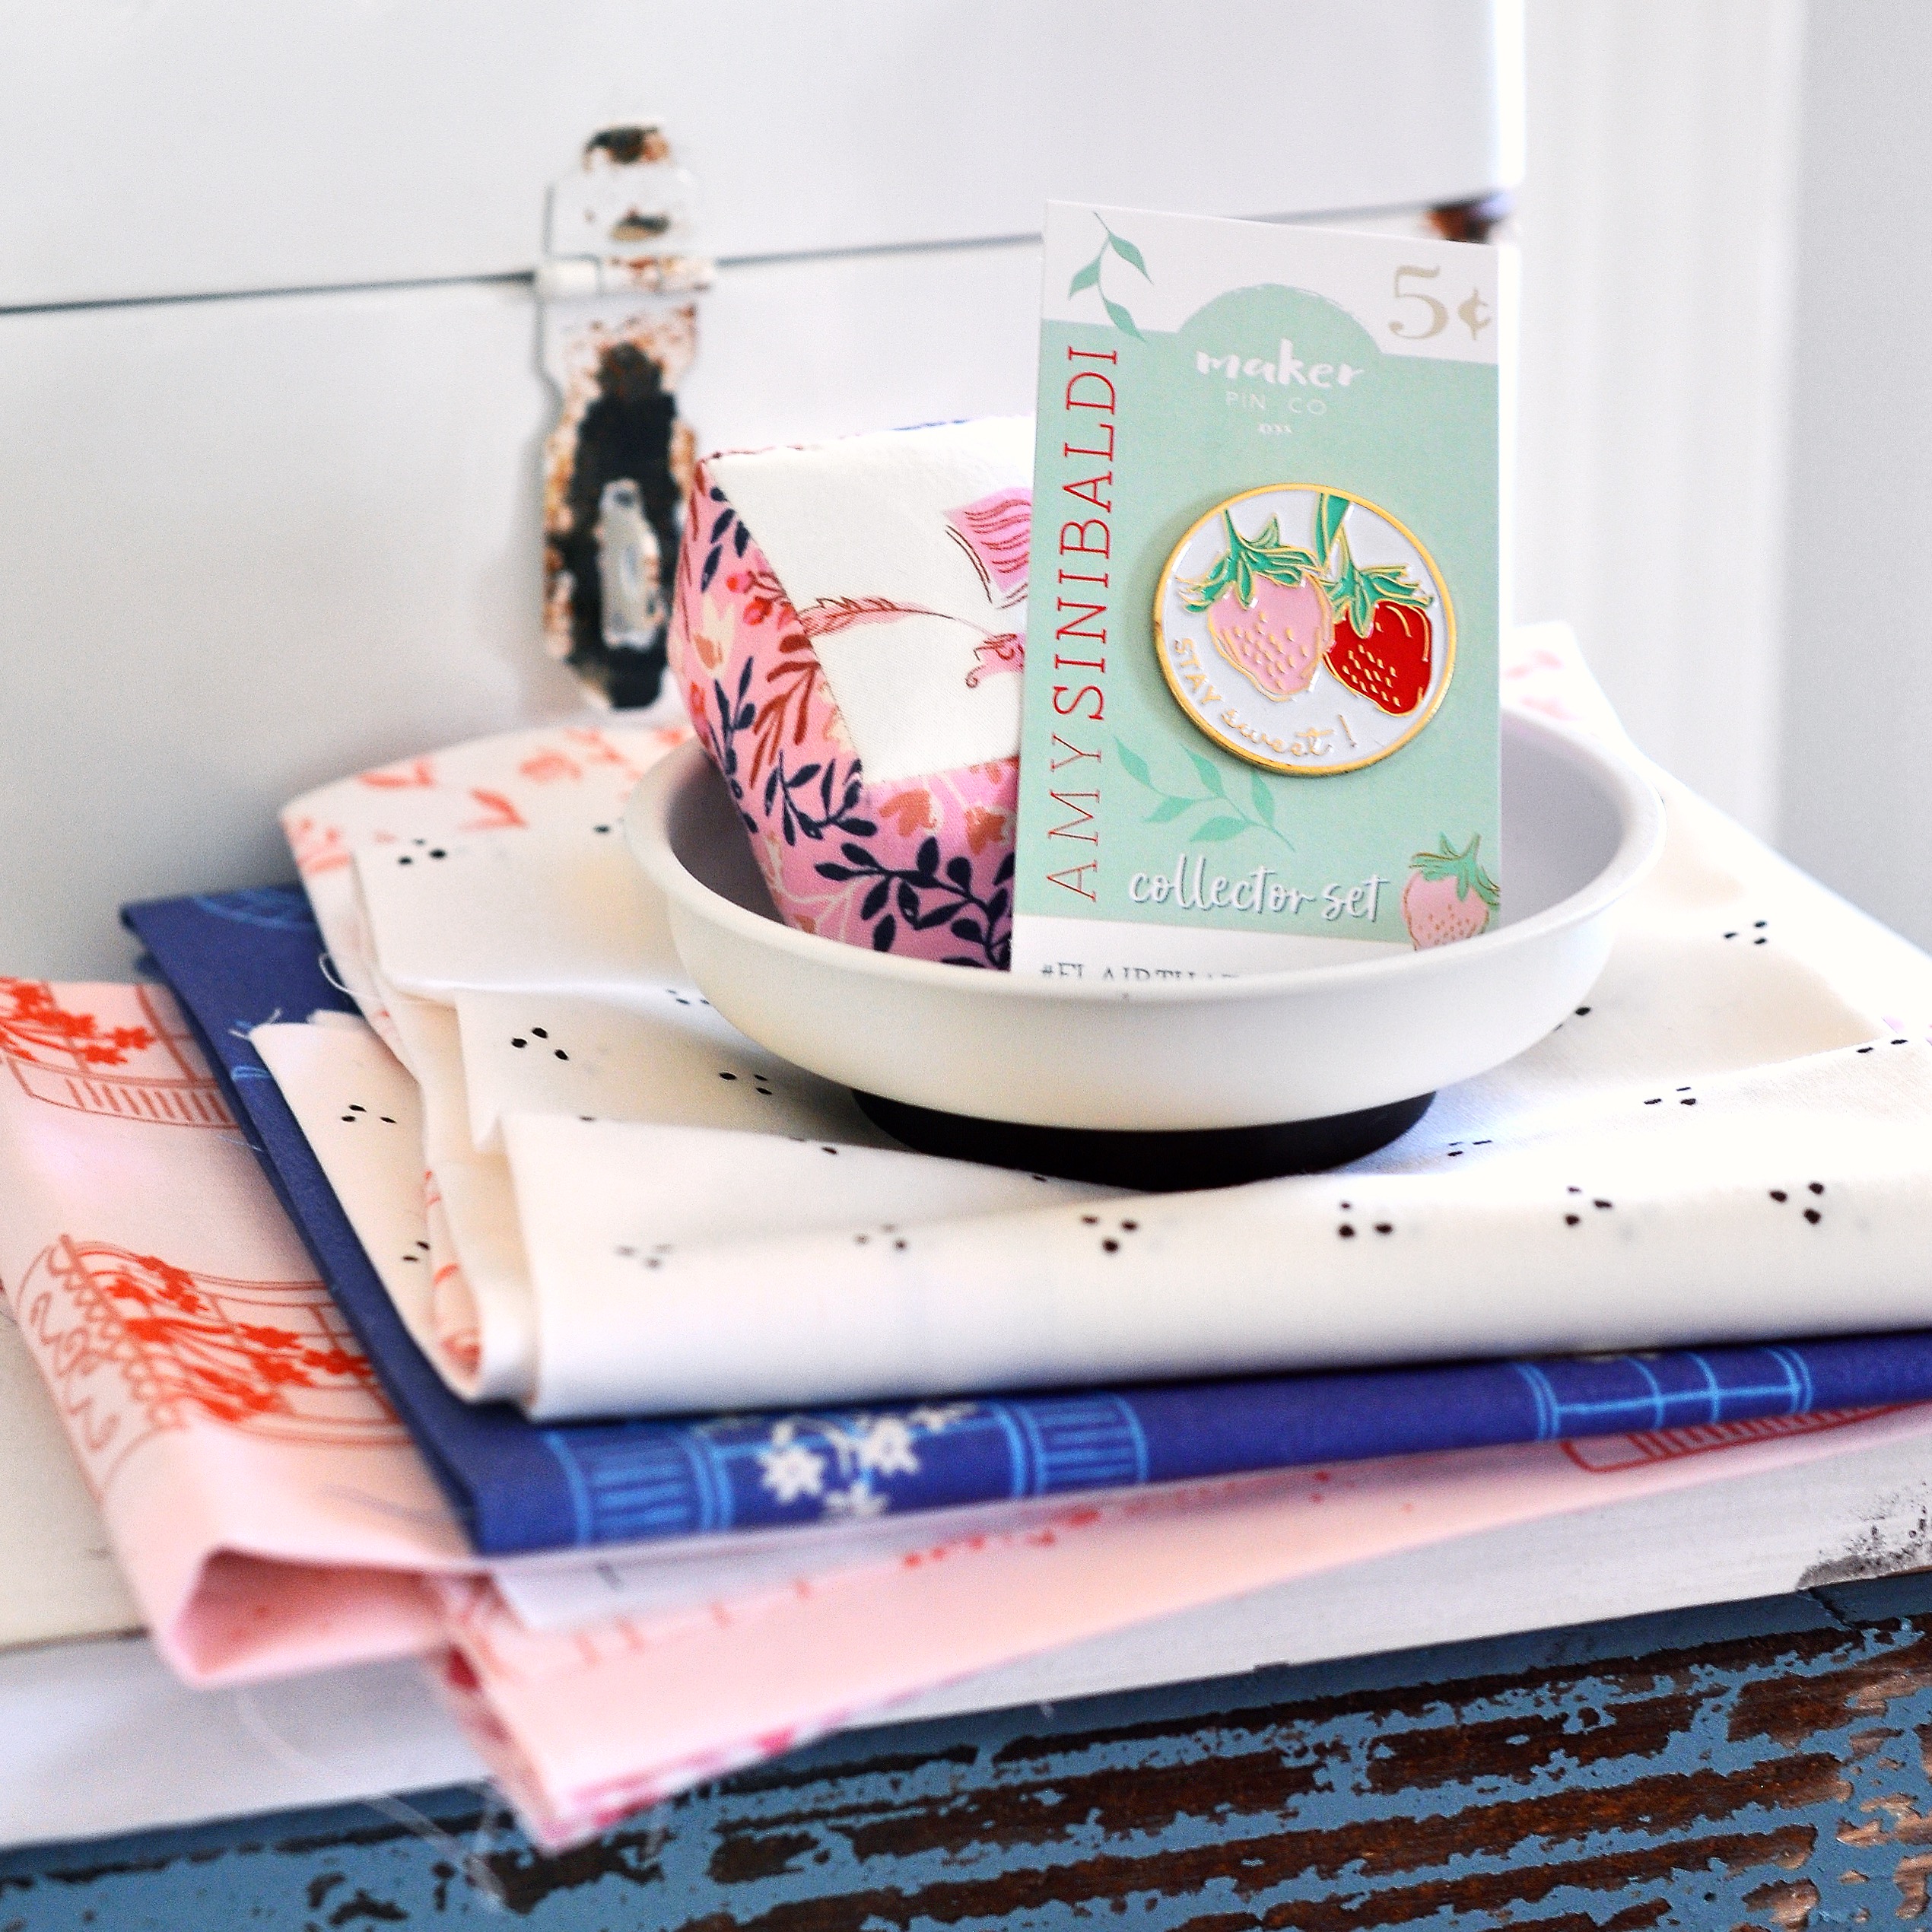
The beautiful white, red, and pink denims I used to create the roses are part of another new addition to The Denim Studio, a collection of light weight yarn dyes in the most amazing colors. They are just a tad lighter than the solid smooth denims and have a little bit of a different feel, very soft and almost linen like, but 100% cotton.

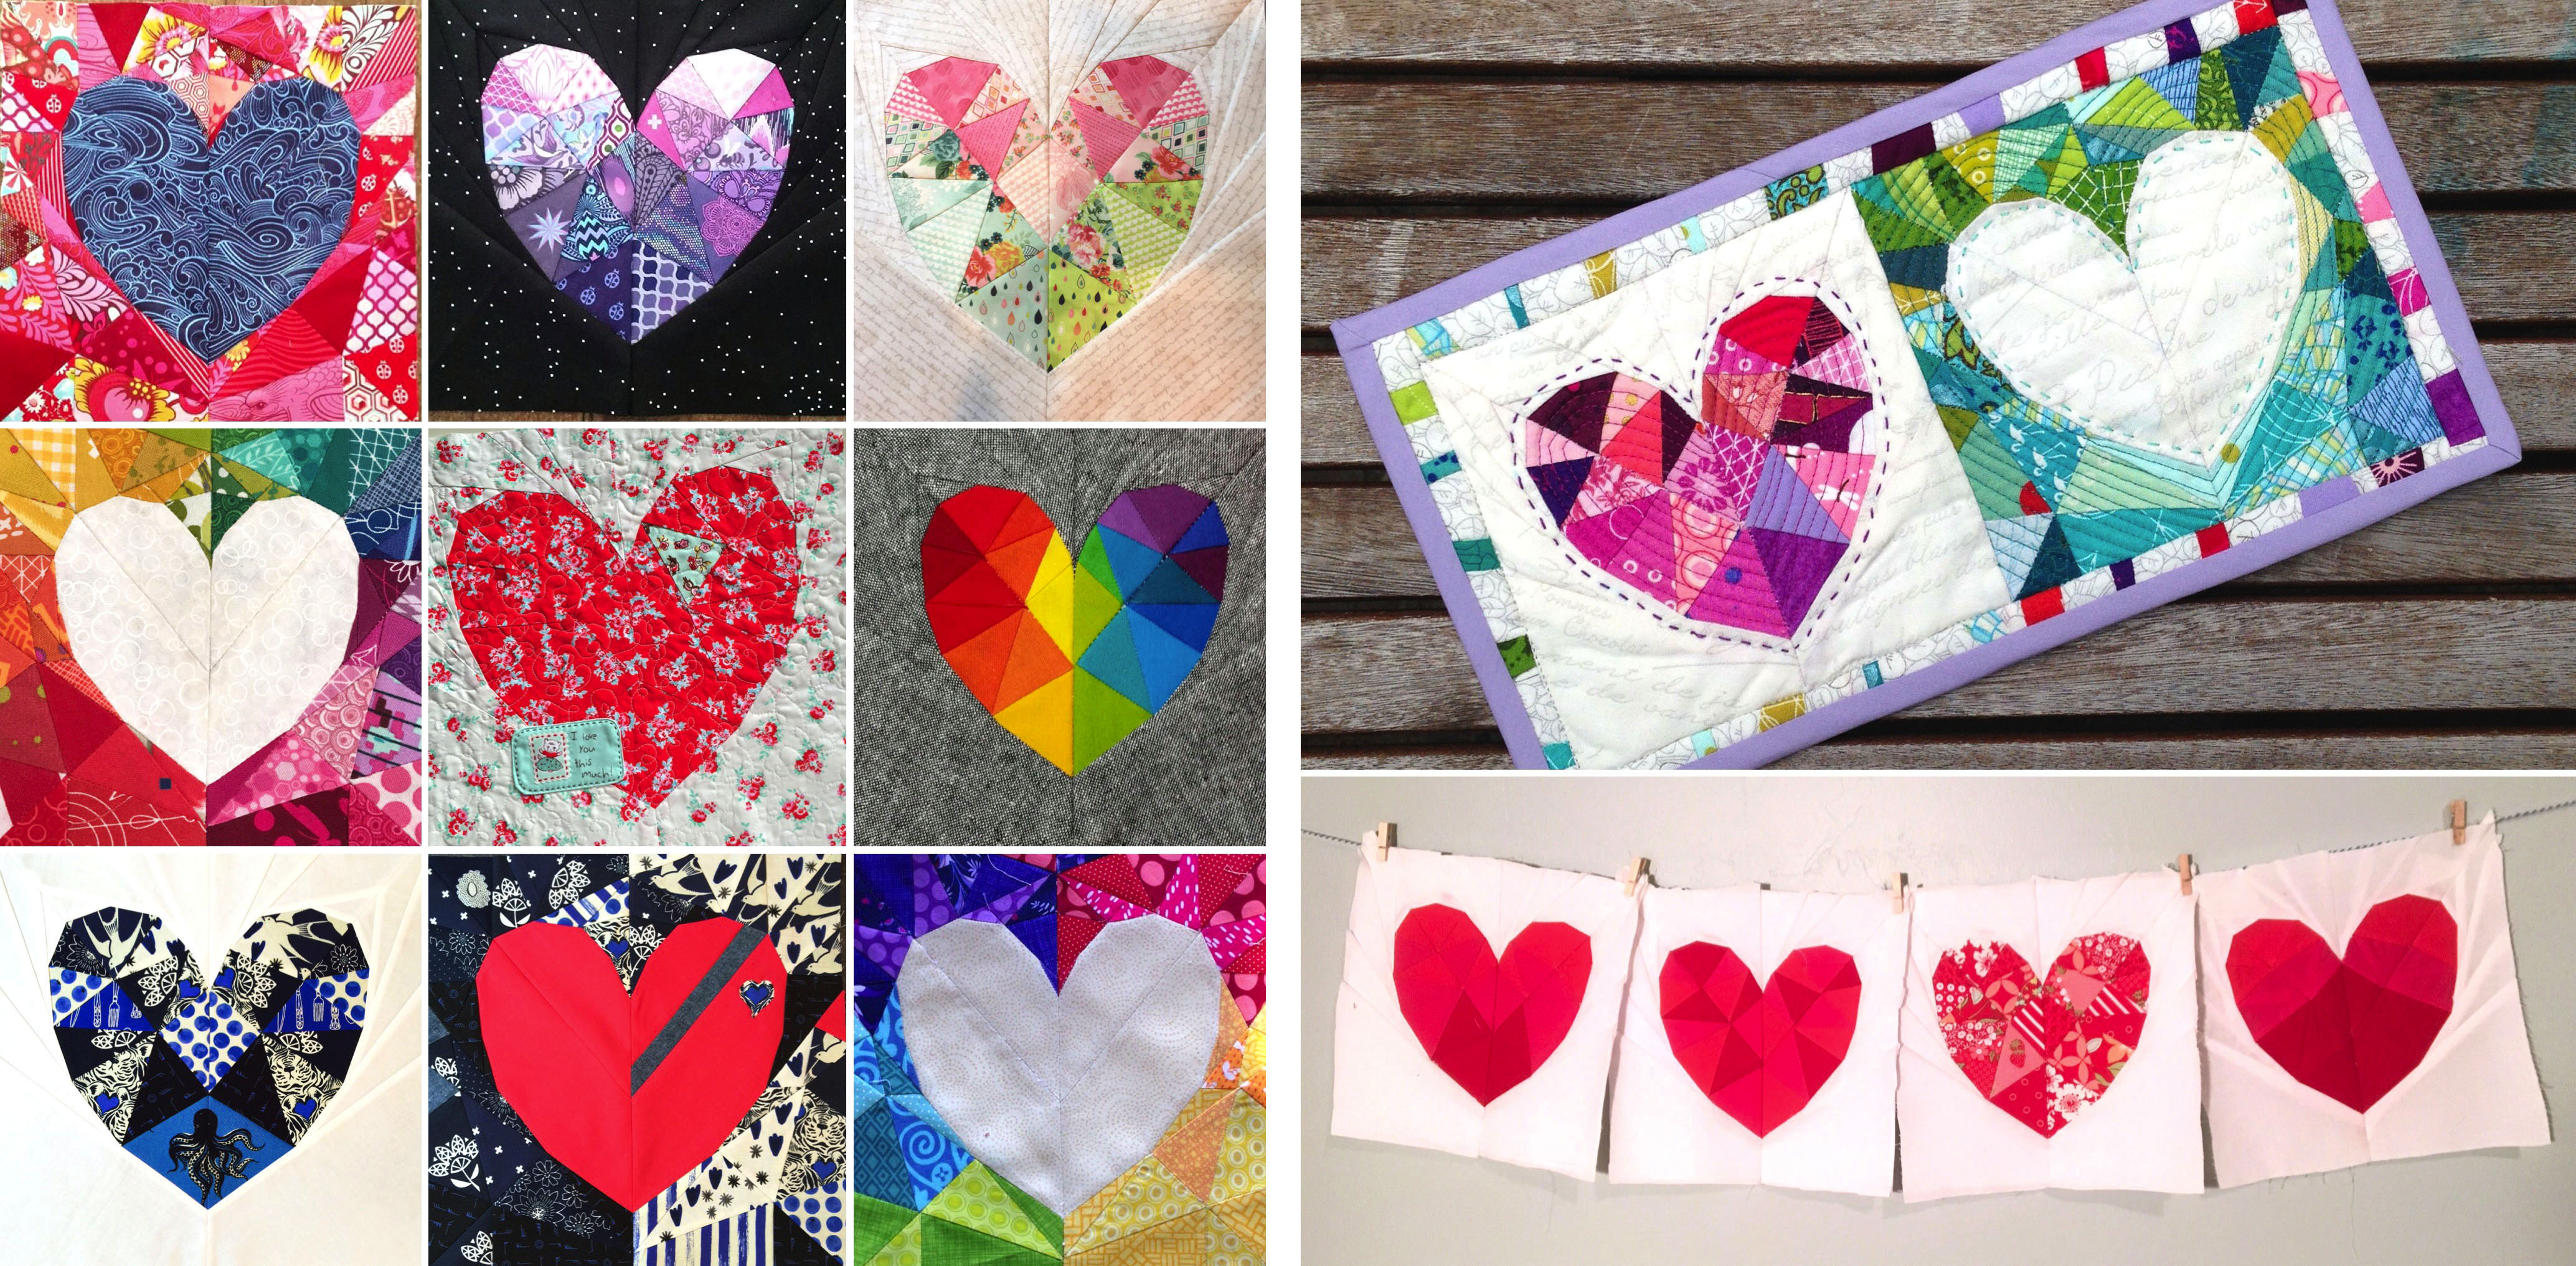
I have an old tutorial that you can find here on how to create the fabric roses. For the multicolored ones, I simply pieced thin strips of different colors together before pressing in half and rolling into shape.

After fussy cutting the roses from the Joie de Vivre print, I secured them with a raw edge appliqué style stitch using my machine and then I hand stitched the three dimensional roses in place afterwards.

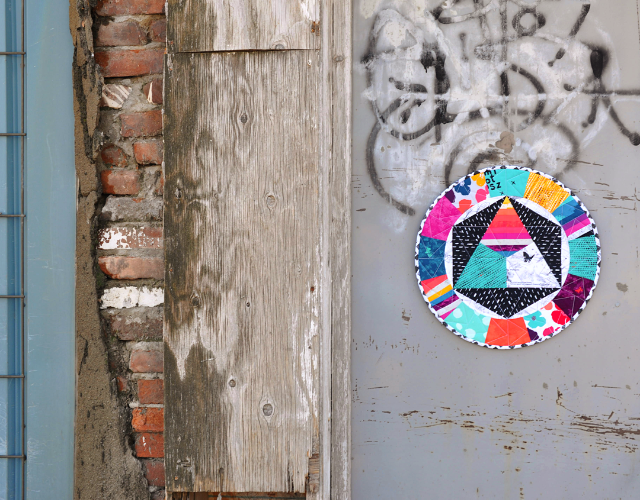
The lace butterflies are cut from a trim that I purchased on eBay for a different project. As so often happens, they were sitting on my cutting table while I was working on my pillow and it all just clicked. They are the perfect accent and I think I would feel that something was missing without them.

wrap

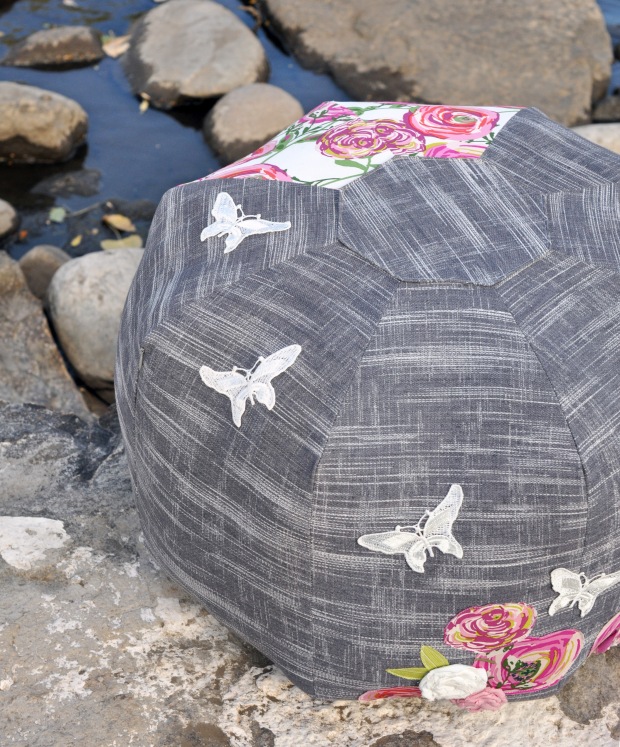
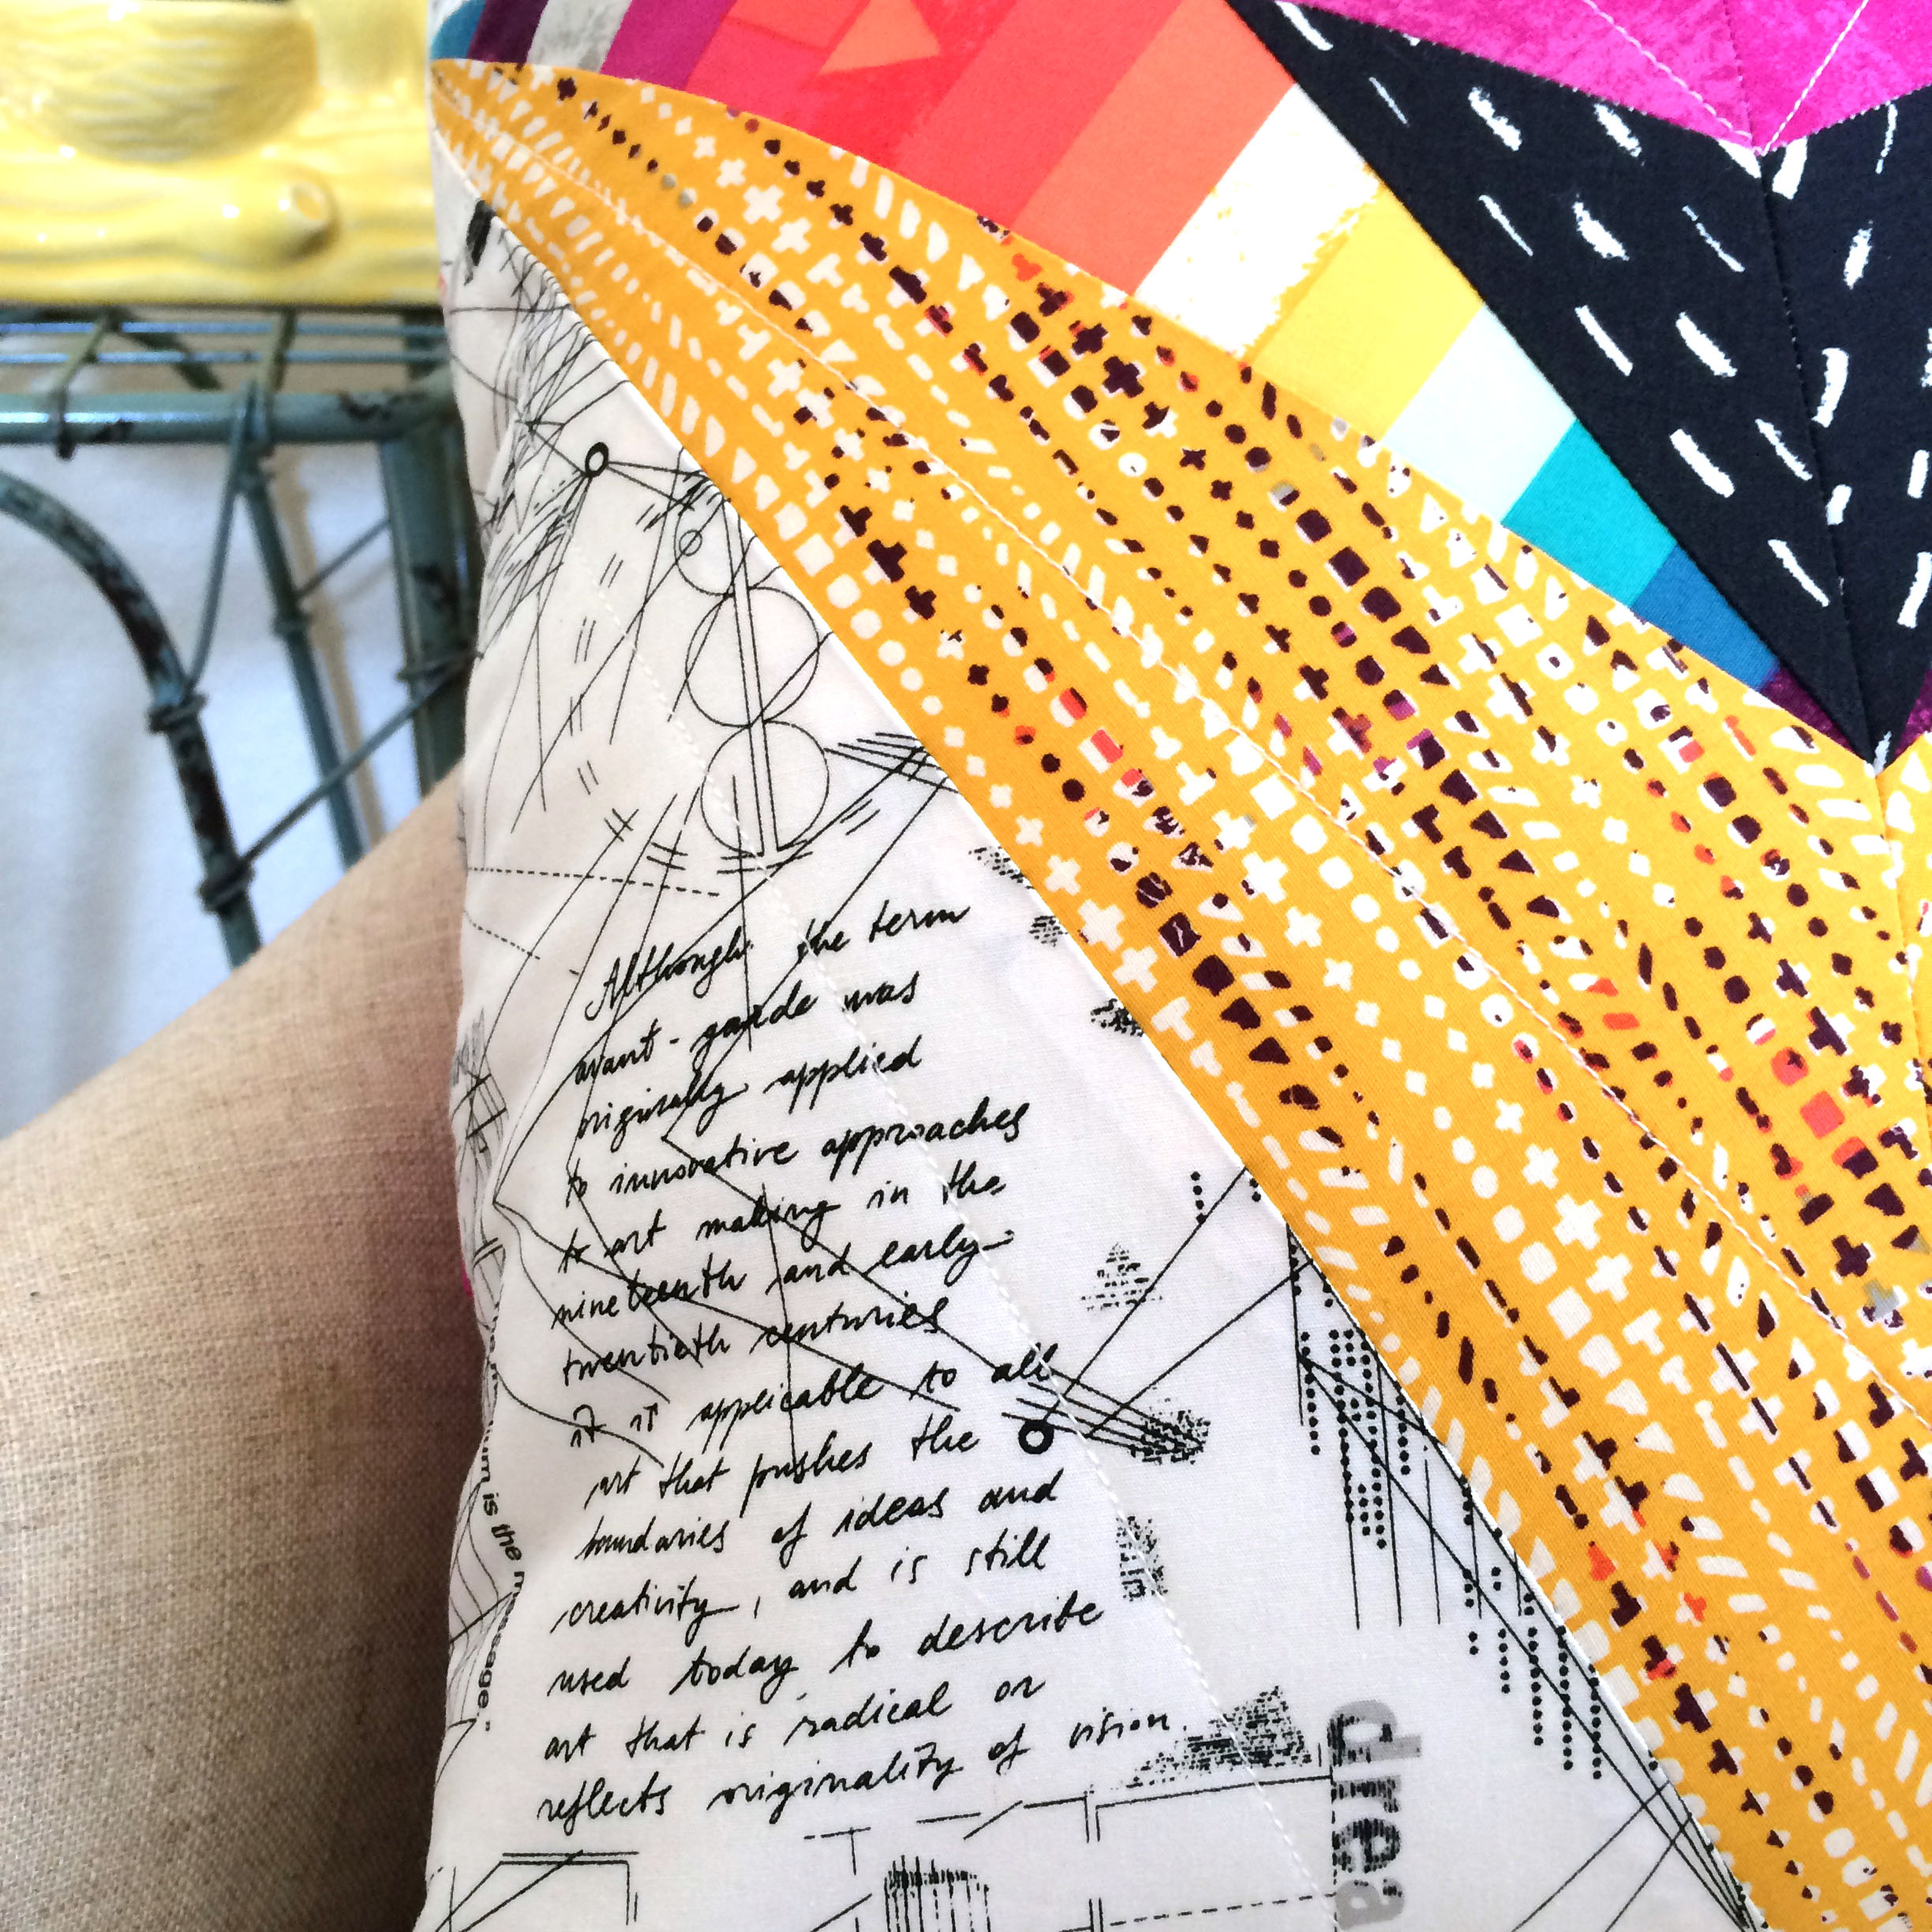
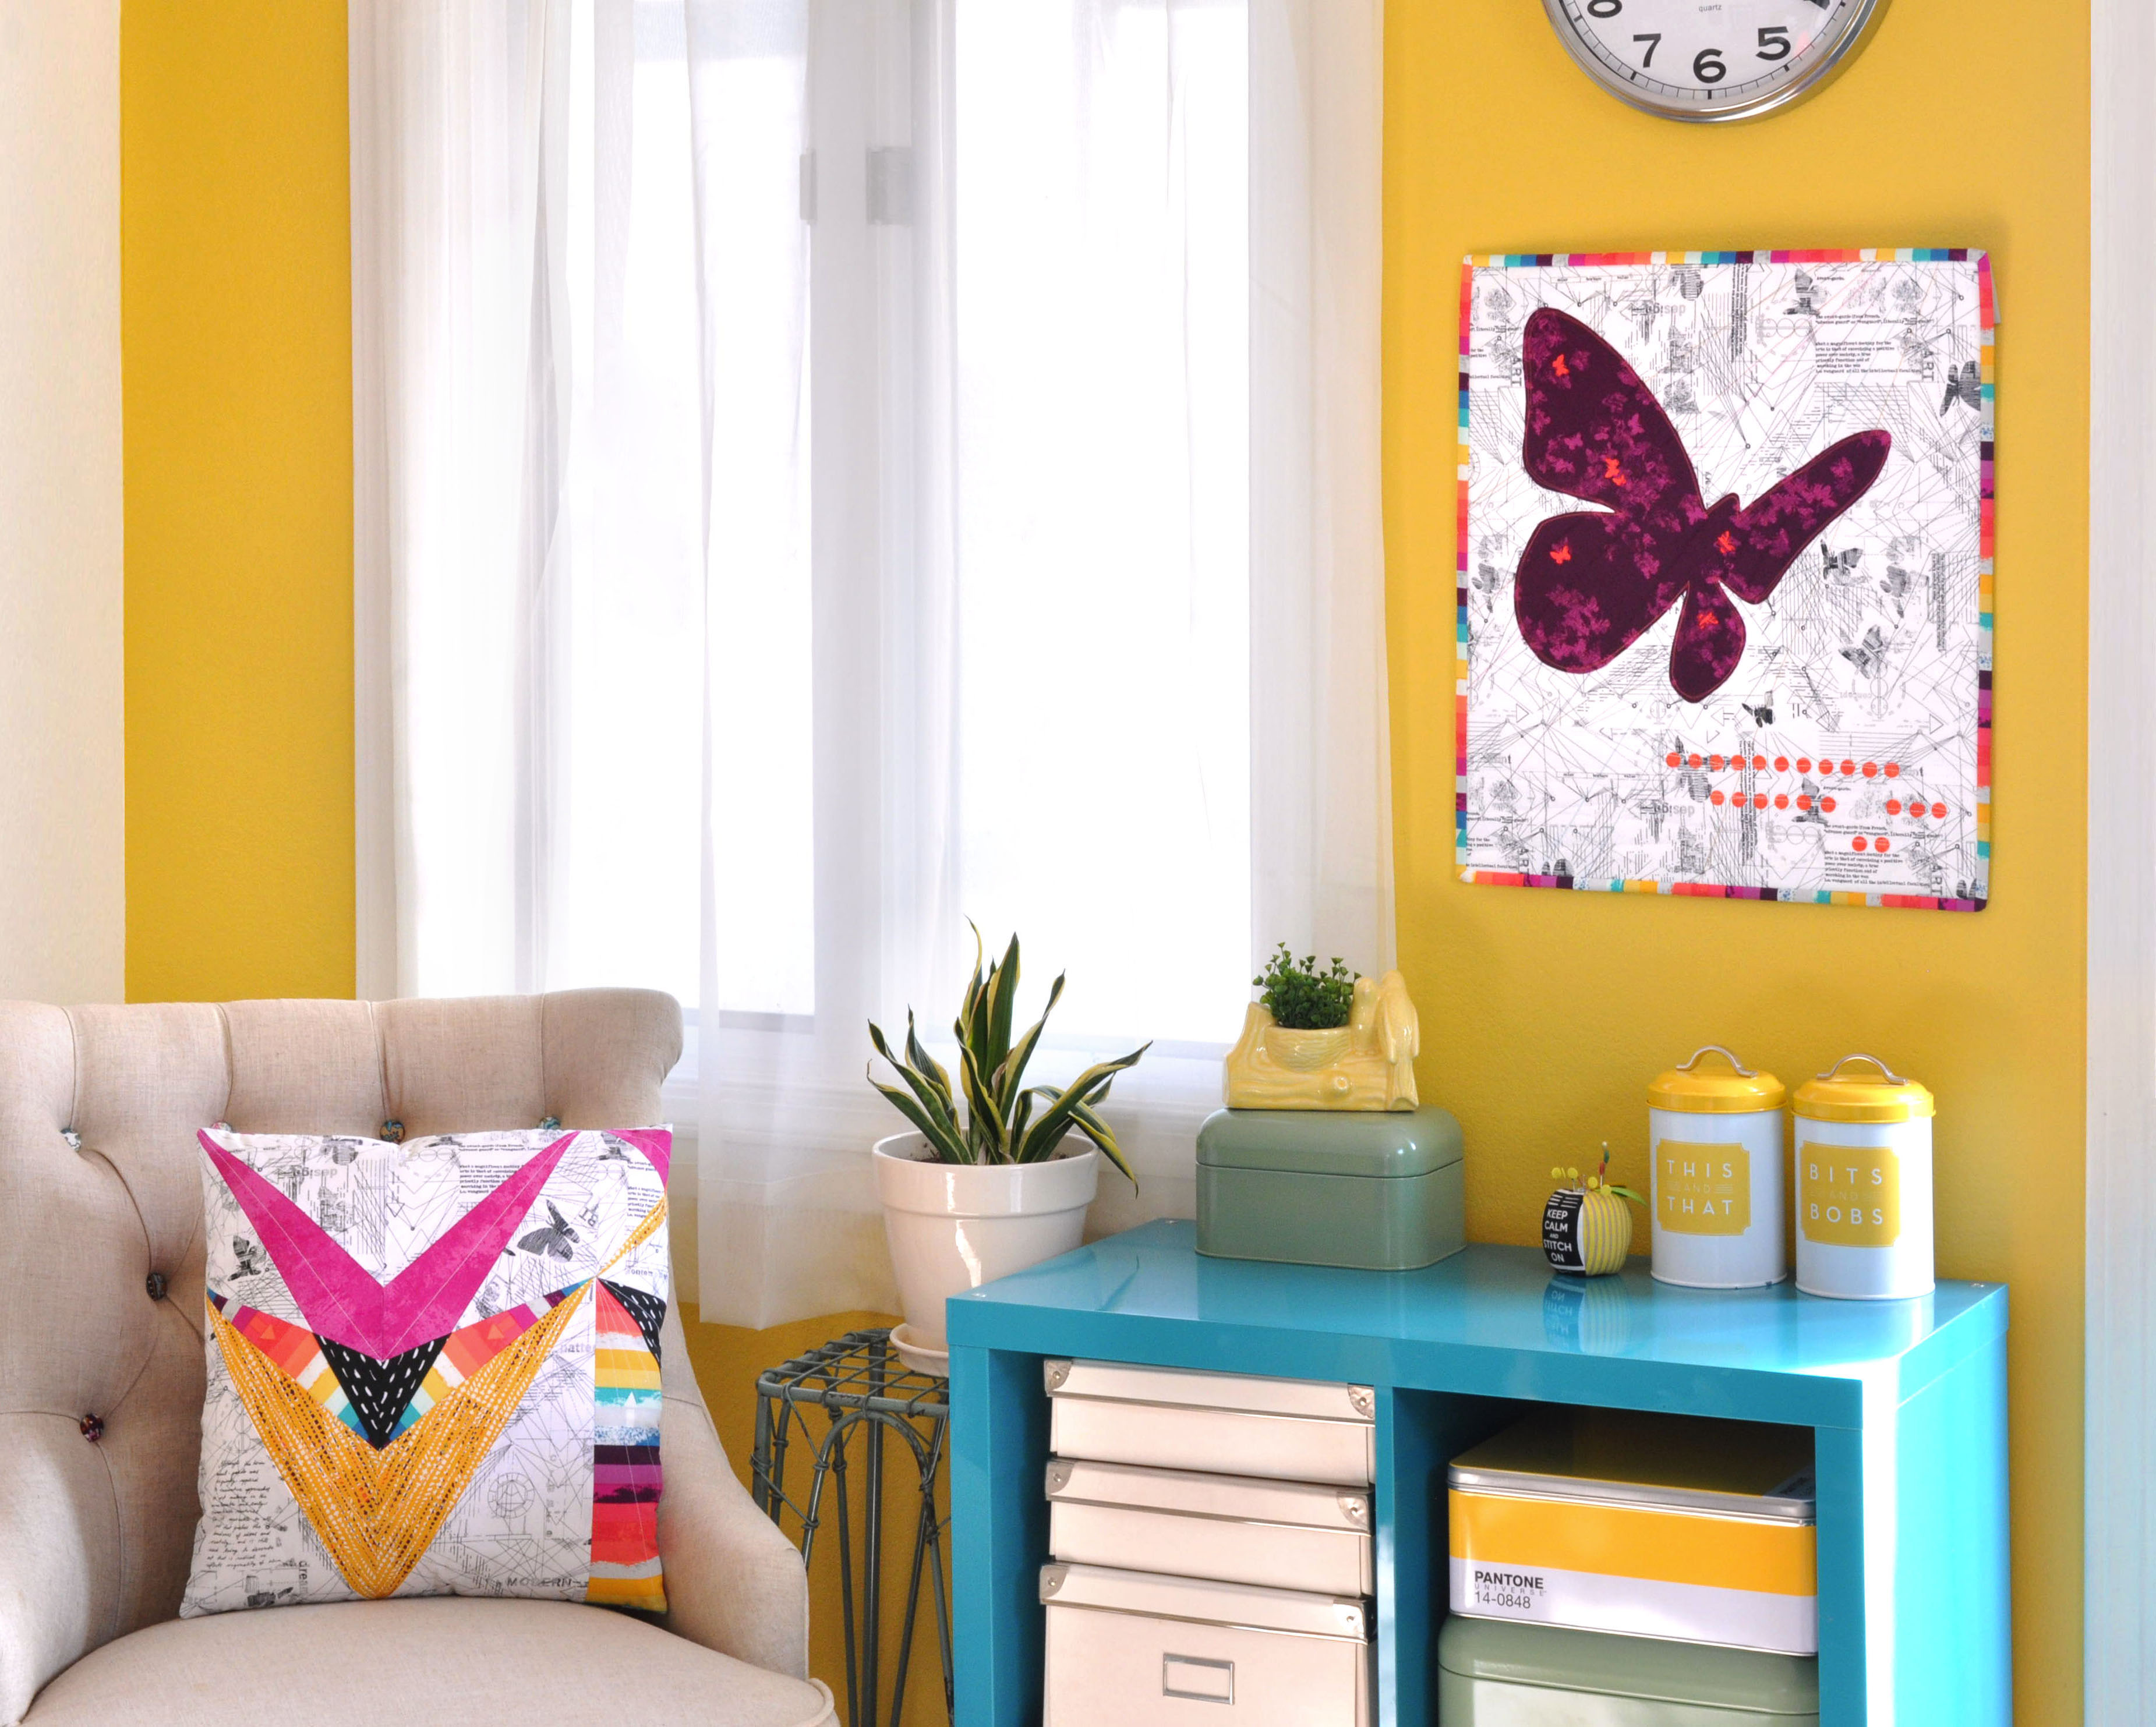
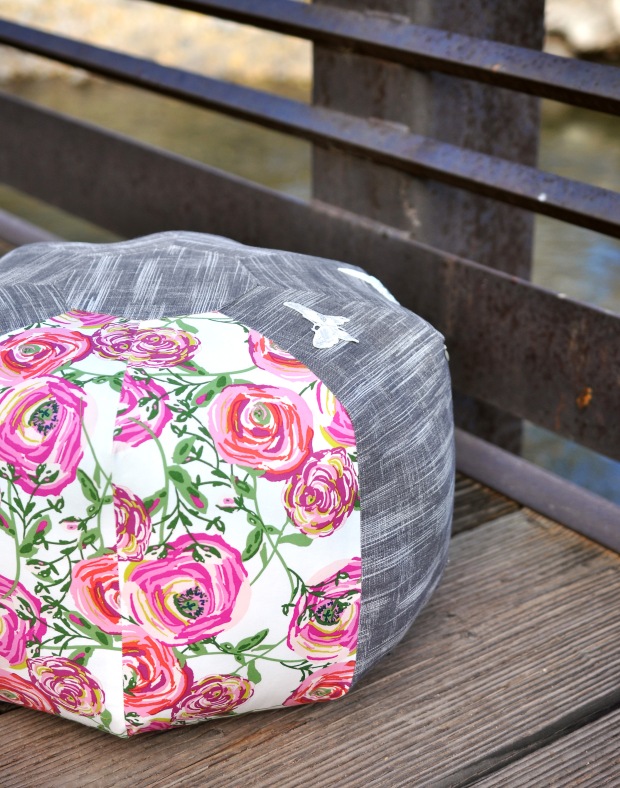
Because I loved the floral print so much, I decided to use it on two full panels of the pillow along with the gray denim, and I absolutely love it! I used a fusible featherweight interfacing on these before cutting them.

roseprint

All of the fabrics I used on this project were a dream to work with. It came together flawlessly and has an amazing look and feel to it, I could not be any happier with how this came out.

The AGF denims are seriously my go-to for everything – quilts, bags, decor, garments. Since they debuted The Denim Studio collection, I have included them in about 95% of my projects. For someone who does not like to use solids (me, me, me!), denims are a perfect alternative. They are technically a “basic”, but there is nothing basic about them. They are classic and timeless and we all know they go with everything!

Denims are the new denim! Wait? Denims are the new black? For the quilting world, maybe I should say denims are the new white! Regardless, I encourage you to give them a try. I guarantee you’ll fall in love.

river

ABOUT THE PATTERN

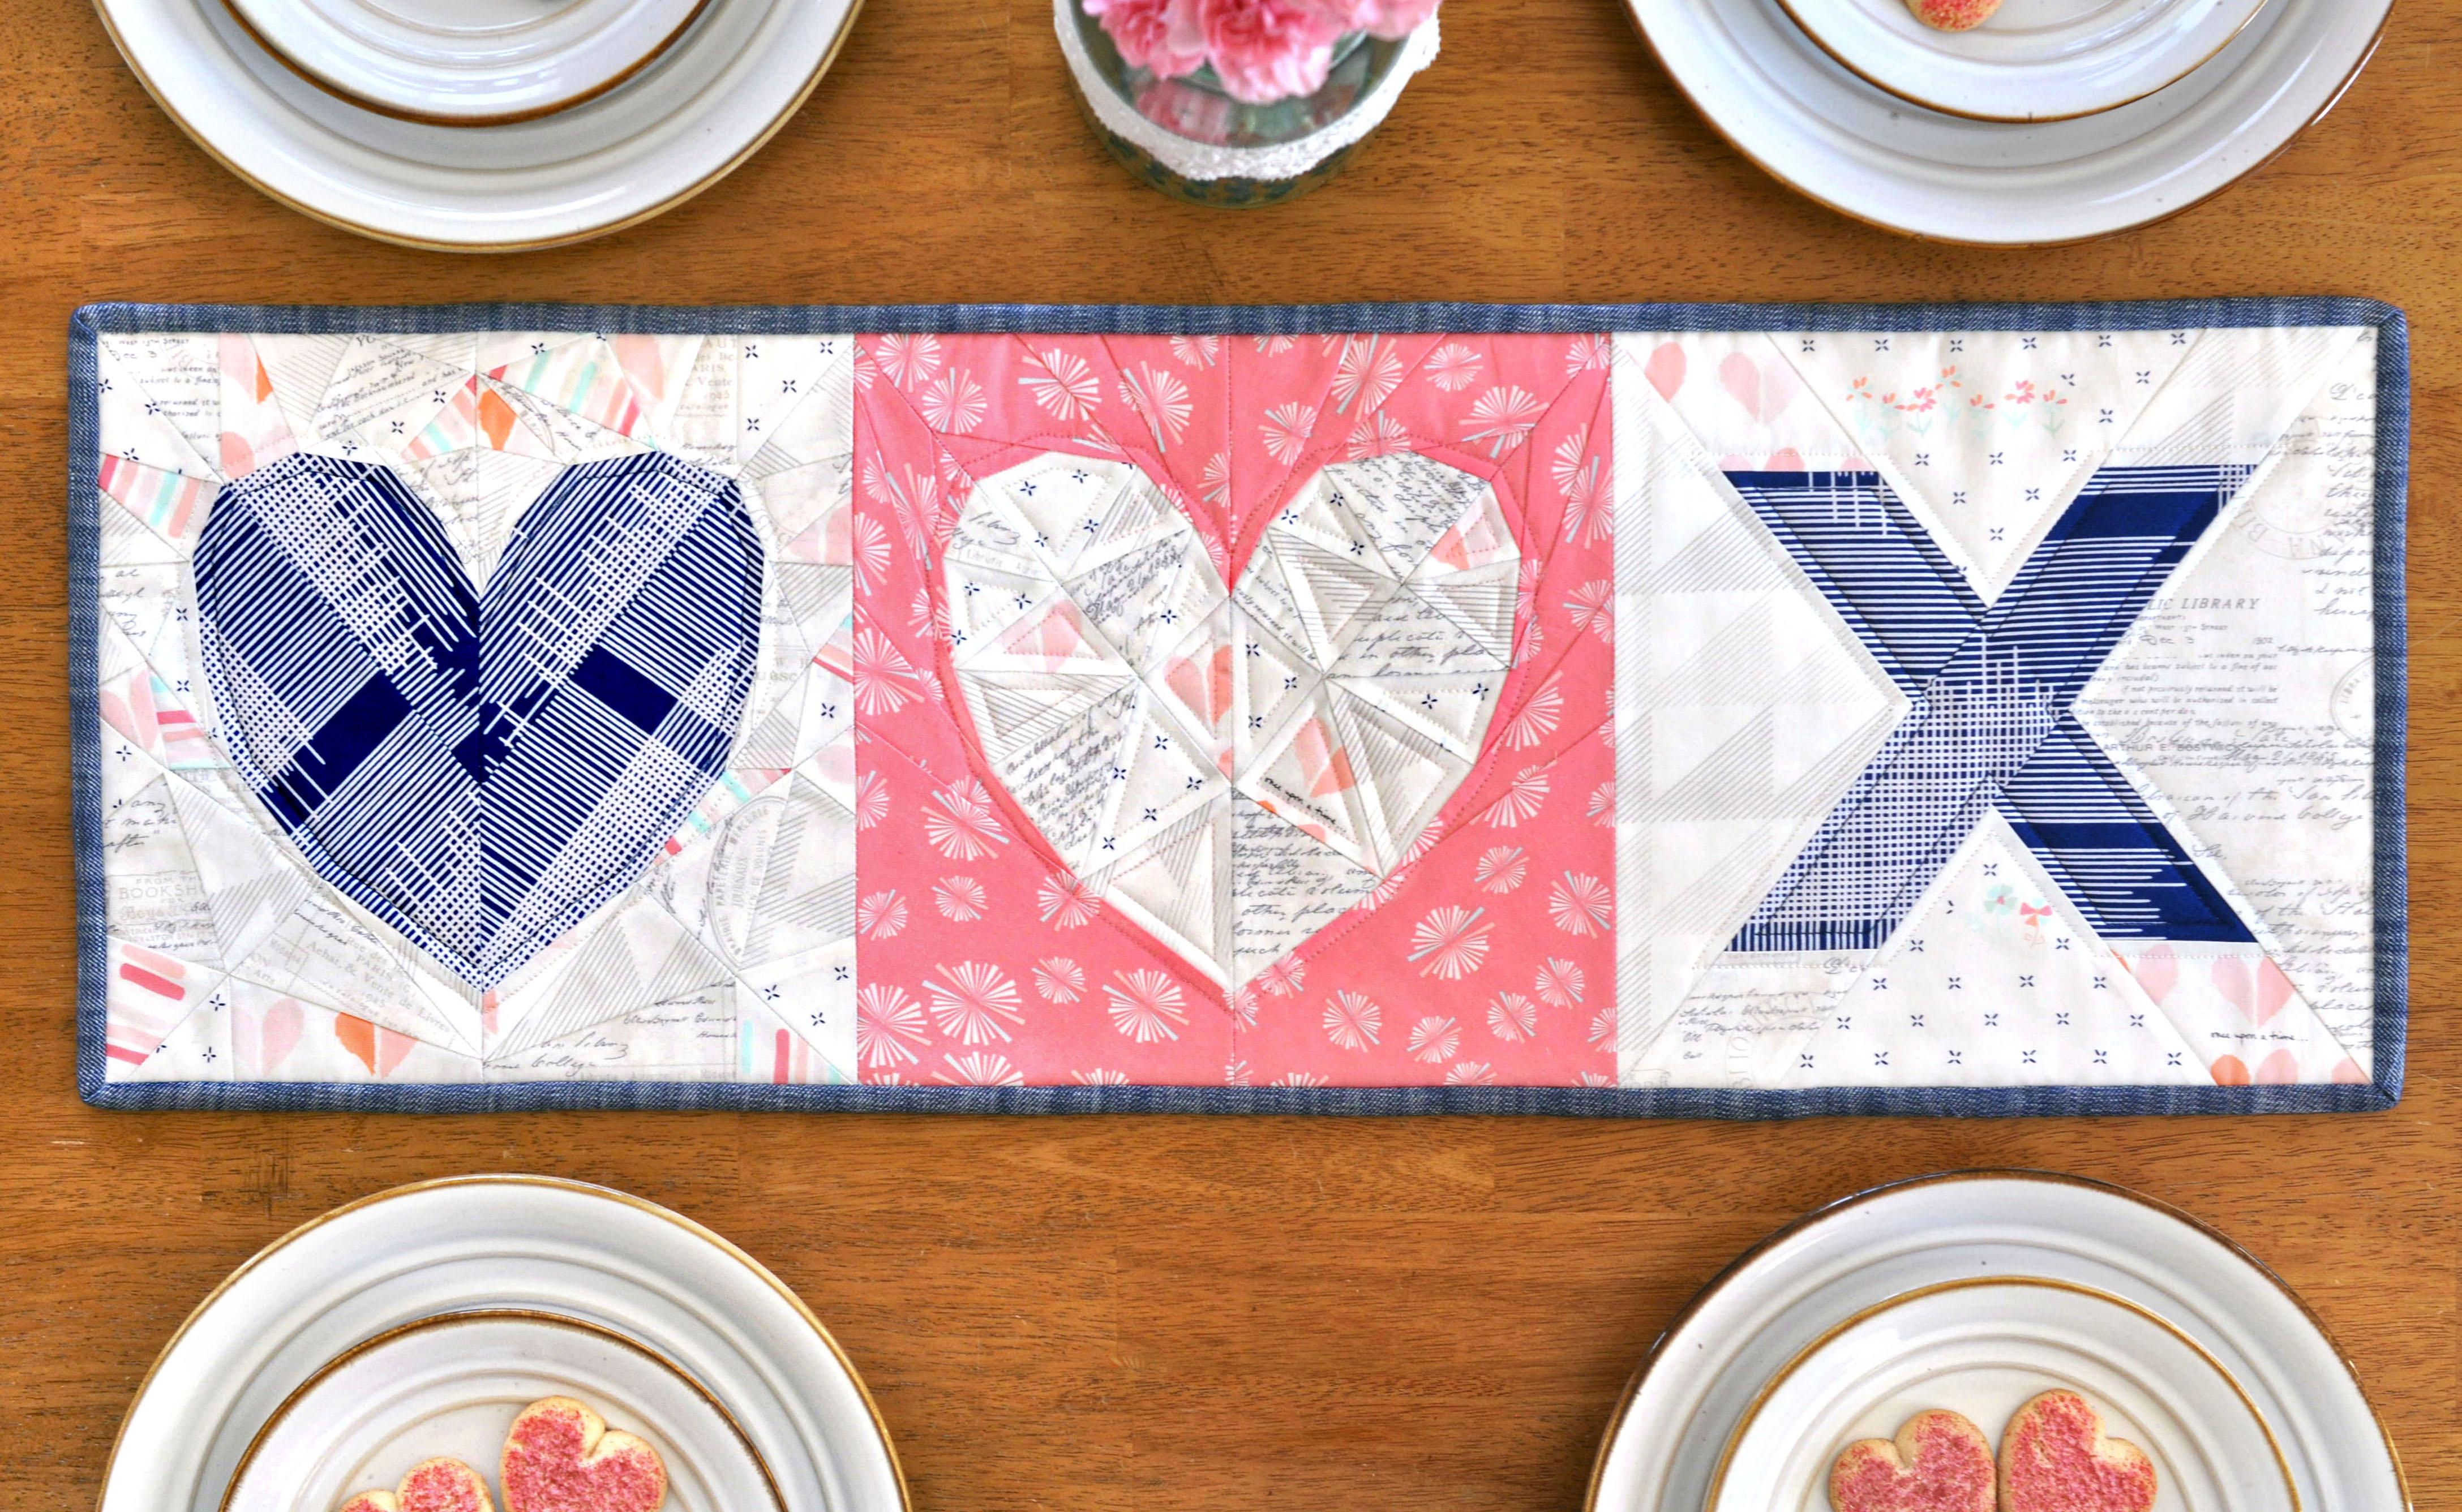
Even though I consider myself a fairly well-versed, experienced sewist at this point, I’ll admit I was a tad intimidated by this pattern. It’s big, it’s three dimensional, it has an invisible zipper, BUT it was quick, easy, and immensely satisfying! If it wasn’t so awkward to ship, I would be making these for everyone on my holiday gift list. Think anyone would care if I sent it flat and told them they had to stuff it themselves?! Seriously, Im going to be overrun by these things.

The pattern includes two sizes, 18″, which is what I’ve shown here, and a larger 24″ version. That size is the width across the piece. The 18″ one measures about a foot high.

I am currently working on a 24″ one now using another of my favorite prints from Joie de Vivre and more of the new yarn dye denim in a gorgeous tealy blue. I will be blogging about the process, the embellishment technique I’ll be using, and a few tips and tricks about putting it all together, if anyone is interested in making one themselves. I’ll be sharing that next week, so stay tuned!

—–

THAT’S A WRAP!

I truly hope this project has inspired you to work with new materials or try new techniques, and that you take a moment to check out the other inspiring projects on the Art Gallery Fabrics Denim 2.0 Blog Tour. I have seen them all, and trust me when I say they are unique and amazing!

Here is the full lineup:

Monday- Christopher http://www.thetattooedquilter.com

Tuesday – Nicole, that’s me!

Wednesday – Sari http://www.sariditty.com/

Thursday – Jenn http://gingerpeachstudio.com/

Friday – Mathew https://misterdomestic.net/

You can also follow along on instagram with the hashtags #AGFdenimtour2point0 and #thedenimstudiobyAGF.

happy stitching!
~nicole

porch2


Paperie Blog Tour + New Love Story Pattern

IMG_2667 edit 1

It’s funny how things work out. The way life’s puzzle pieces always end up fitting together. I first designed the Love Story Pattern for my class at the Swapaholics Retreat last September. Amy Sinibaldi was also teaching and her debut fabric line, Paperie, had not yet been announced when I was prepping for the retreat.

Flash forward a few months to 2016. I’m amping up my pattern in preparation for release and Amy invites me to join her Paperie Blog Tour. I think you’ll see that her fabric and this pattern go together like sprinkles and donuts. And not that pink hearts are ONLY for Valentine’s day, but what perfect timing, wouldn’t you say?

Undercover Maker Mat featuring Paperie Fabrics | lillyella stitchery

As usual, I had trouble wrangling in all my ideas. I did know for certain that first I wanted to make my Undercover Maker Mat (download the free pattern here) using the 5″ Love Story block in place of the butterfly charm block used on the original. This mat is such a fun and useful project that sews up quick and lets you showcase your favorite fabrics.

I decided to make the secondary pockets on this one in solid prints, rather than the selvedges, so I could really show off the line.

Undercover Maker Mat featuring Paperie Fabrics | lillyella stitchery

I was torn between using the texty print or the hearts for the main body of the mat, but now that it’s all finished, I don’t know how it was even a question. The text is just perfect and the strip of hearts pieced in just plain makes me happy!

Undercover Maker Mat featuring Paperie Fabrics | lillyella stitchery

I then carried the heart print over to the removable thread catcher by piecing a strip into the front and using it on the lining. I think it really just balances it all out perfectly.

I used a delicate pink chevron trim on the pocket panel and added a bit of crochet lace on the secondary pocket – in true Amy style!

Undercover Maker Mat featuring Paperie Fabrics | lillyella stitchery

Thanks to the expert advice my official quilter, Sari, I went with a large chevron pattern for the quilting on the mat body. It echos the seams of the heart block perfectly (thank you very much) and also ties in the trim. I used a pale pink Aurifil thread that gives it just the tiniest hint of color and I couldn’t love it more!

Undercover Maker Mat featuring Paperie Fabrics | lillyella stitchery

I kept trying to find a way to use this pretty aqua trim on the pocket panel, but it just felt overpowering. It did, however, work out perfectly for the side ties!

So, what do you think? Is this mat your style? I’ll be giving it away on Instagram next week (and a bundle of fabric!), so stay tuned for that!

• • • • • • • • • • • • • • • • • • • •

Love Story + Cross my Heart Pattern | lillyella stitchery

Another idea that I just knew I had to run with was designing an X block that coordinated with Love Story. Like Xs and Os, but with a cute heart instead! I’m calling it Cross my Heart and you can download it for free here.

I thought it would be an adorable mini quilt with 4 blocks in a large square, or as a set of pillows (or a two sided pillow!) or a table runner, which is what I decided to make for my sample project.

Love Story Pattern | lillyella stitchery

My Love Story pattern includes two block designs – Poetry (the pink block) and Prose (the navy and white block). I wanted to showcase them both, along with the X, so I thought a little asymmetry would be fun! I used the 10″ blocks here, and the X pattern also includes a 5″ block (how about a set of heart and X coasters?!).

Love Story Pattern | lillyella stitchery

I love how striking the bold pops of pink and navy in this line are mixed with all the beautiful, soft low volumes. By random chance, I had a piece of my favorite chambray denim on my cutting table when I was feverishly trying to decide what to bind my runner with. It was a match made in heaven! The denim pairs so amazingly with this line, it started my mind racing with quilt ideas using Paperie and the new Art Gallery denim line that is coming out soon. SO EXCITED!

Love Story Pattern | lillyella stitchery

Love Story Pattern | lillyella stitchery

I’ll be sharing some design ideas and other fun Love Story projects (including a lap quilt pattern) here and on my Instagram feed over the next couple weeks. You can also check the hashtags #lovestorypattern and #crossmyheartpattern for more inspiration. As always, I can’t wait to see what you all create!

Love Story + Cross My Heart Patterns | lillyella stitchery

Be sure to check out all the other stops on the Paperie Blog Tour for all sorts of swoon worthy projects! You can find links and photos in Amy’s instagram feed and on her blog.

• • • • • • • • • • • • • • • • • • • •

Love Story Pattern | lillyella stitchery

Now I am in desperate need of a nap! So I will leave you with some more eye candy inspiration! Above is the original Love Story block as it was designed to fit my flex frame pouch project for the retreat.

For the pattern release, I squared off the block and made a coordinating reverse design where the heart is solid and the background is faceted instead. I love the possibilities this opens up for color play and layout ideas!

Love Story Pattern | lillyella stitchery

Here are just a few blocks that my amazing testers sewed up. I’ll be sharing their finished projects soon! You can pick up a copy of the pattern on sale for $6.50 now thru Valentine’s Day in my Payhip, Etsy or Craftsy shops.

happy stitching! ~nicole

Avantgarde Blog Tour – The Neo Quilt Series

Avantgarde Blog Tour

When Sari and I were invited to join Katarina Rocella’s Avantgarde Blog Tour, we had just wrapped our Sariella Retreat, Western Edition, where we started working on our first collaborative patterns, so we knew this was a perfect opportunity to work on some more!

We were both in love with the bold, bright colors and textural patterns in the line and the Bauhaus Dissection print was our favorite, so we decided to use it as inspiration for designing the patterns.

Neo Quilt Series | sariella

The next question was what to make… lap quilt, minis, pillows? In the end, we decided on all, of course! I have come to adopt my husband’s motto, anything worth doing is worth overdoing. I mean, he has a point…

After days (literally) of sketching, texting, facetime and phone calls, we had our plan. We both love versatility, so that’s what won in the end. We created a collection of panels, or blocks, that would go together into a beautiful (and customizable) lap quilt, but could each also be used independently to create mini quilts and pillows. Think of it as a create your own adventure pattern! And because we are mild overachievers and can’t contain all our ideas, we created an additional separate mini quilt pattern, too. Together, we’re calling it the Neo Quilt Series (#NeoQuiltSeries).

I’m so excited to finally share these patterns that we’ve been feverishly working on for weeks! Sari will be sharing the full quilt design on her blog tomorrow, but today I’m showing you some of the mini quilt and pillow patterns. They will all be headed to testers shortly and will be available in March, but we also have a free one for you today! And it is where I will begin…

NeoVolheader

NeoVol pattern | Sariella

This is NeoVol. Simple appliqué lends itself to a beautiful 18×20 mini quilt that is quick to sew and allows you to showcase a fun print. It also makes a darling pillow (shown a couple photos down) and can be resized to create a variety of different designs (another of which you’ll see used in the quilt reveal tomorrow).

You can download the free pattern here. We hope you enjoy it!

NeoVol Pattern | sariella

I kept the quilting simple (but awesome!) on this mini with a little rainbow explosion coming from the top corner. I continued the lines through the butterfly, but switched to a dark purple, and then picked the rainbow color up again on the other side of the butterfly.

I also did some random angled lines horizontally across the bottom and the dots to help hold them in place. My favorite part, by far, is the striped binding!

• • • • • • • • • • • • • • • • • • • • • • • • • • • • • • • • • • • •

NeoBurstHeader

NeoBurst Pattern | sariella

Another panel from the quilt design is NeoBurst, which will be part of the quilt pattern and also available separately as an 18×20 mini quilt pattern. It will include an 18″ square variation, which is shown here made into a pillow.

NeoVol Pillow | sariella

NeoBurst is another quick-sew block with simple paper piecing and the opportunity to really have fun with fabric placement. Together with the NeoVol pattern, shown above as a pillow, you have a perfect set.

• • • • • • • • • • • • • • • • • • • • • • • • • • • • • • • • • • • •

NeoSphereHeader

NeoSphere Pattern | sariella

Last, but certainly not least, from me for today is NeoSphere. My favorite piece from the Neo Series changes every few minutes, but this circle has a special place in my heart! How can you not love it?!

The pattern will include directions to make this 18″ circular mini, as well as a box edge pillow. It will also include an option to finish the block as a square to use in a quilt or simply as a square mini or pillow.

NeoSphere Pattern | sariella

NeoSphere Pattern | sariella

My favorite thing about this pattern is that it looks complex, but goes together quick and easy. Don’t fear the curves! The center is created using simple paper piecing and the curved border is cut with templates. the final piece goes together in six wedges.

You can also change the design of the center by placing the templates in a different order, or how about an appliqué NeoVol butterfly in the center of the triangle? So many possibilities!

Sari's Mini

Sari has informed me that she has an open spot on her wall reserved for this one, so it will be headed off to hang out with Hazel, Luminaria and the rest of the gang out in WV! But I’ll be there to visit it soon, for the Sariella Retreat, Appalachian Edition!

• • • • • • • • • • • • • • • • • • • • • • • • • • • • • • • • • • • •

Neo Quilt Series | sariella

Sari and I have had so much fun creating these patterns and working with this amazing line. You can see how these fabrics really add such a fun pop of color and life to a space. It’s impossible to not be drawn to them.

I really need a whole cloth quilt with those stripes!

NeoVol Pattern | sariella

I can’t wait to hear what you think of the designs and show you all the fun variations our testers create over the next few weeks.

Be sure to stop by Sari’s blog tomorrow for more about the Neo Series and the Neoteric Quilt reveal! And stay tuned to our personal Instagram feeds (@lillyellasworld and @sariditty), as well as our Sariella feed (@sariellastudios) for updates and giveaways, including the NeoVol mini and a few bundles of Avantgarde fabric!

NeoQuilt Series | sariella

You can also check out all the other projects from the tour on @KatarinaRoccella or under the hashtag #avantgardefabricsblogtour.

see ya soon!
~ nicole

Neo Quilt Series | sariella