Today is the day! Butterfly Effect is out in the world and I’m SO DARN EXCITED! This pattern has been a really long time in the making. I started and stopped and started and stopped and almost gave up on it a few times. I sketched dozens of options and fought with geometry for too many hours to count, but… TOTALLY WORTH IT!
The pattern finishes at 24” square as written (shown above), making it a perfect mini quilt or pillow, but you can continue to grow your piece to any size or use small sections of the pattern for other applications.
The pattern includes printable templates and pattern papers so you have everything you need to jump right in or you can order laser cut paper packs and acrylic templates at PinkDoorFabrics.com.
**UPDATE: Butterfly Effect Supplies (templates, paper packs and printed patterns) are now available from Paper Pieces HERE. Thank you!
• • • • • • • • • • • • • • • • • • • • • • • •
SUPPLIES
**UPDATE: Butterfly Effect Supplies (templates, paper packs and printed patterns) are now available from Paper Pieces HERE. Thank you!
• • • • • • • • • • • • • • • • • • • • • • • •
I believe that any level sewist can create this pattern, even EPP beginners! Complete instructions on EPP are not included, but many tutorials can be found online. You can also check out my Beginners Guide to EPP. Even if you are experience with EPP, you may find some helpful information in this post, plus links to all my favorite tools!
I will be hosting a Butterfly Effect Sew Along that will kick off May 3 where will we work step-by-step together, so if you’re a newbie but want to give this a try, I hope you’ll sew along! You can sign up by clicking here.
I hope you love creating this pattern as much as I have. Remember to share your projects and find inspiration with the hashtag #ButterflyEffectPattern on social media!
My new Butterfly Effect Pattern comes out TOMORROW (March 3) and I wanted to share ALL THINGS EPP with you today to help you prepare! Whether you are new to English Paper Piecing (EPP) or have dabbled in it before, I hope you find some useful tips and techniques here today. Below I’m sharing all the basics about EPP, as well as my essential (and favorite) tools and a variety of tutorials on basting, stitching and more.
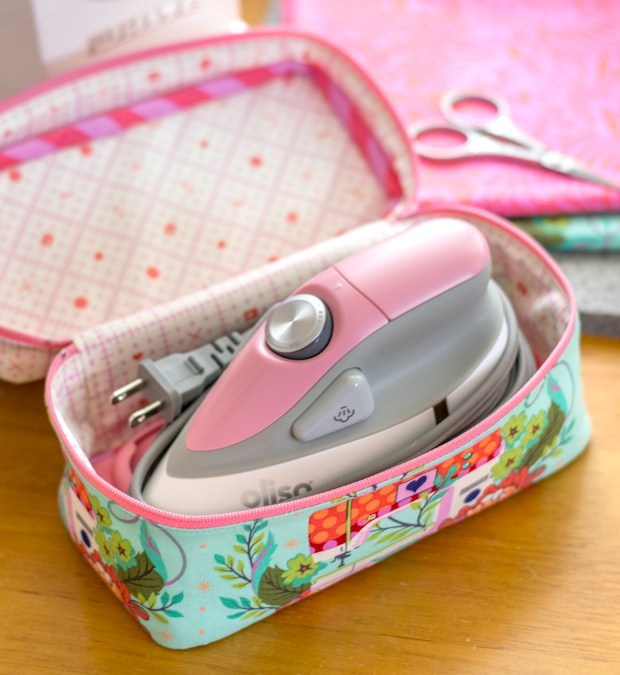
English Paper Piecing (EPP) is a hand sewing technique that uses heavy paper templates to create shapes and stabilize them for stitching. EPP allows you to create intricate designs that would be difficult or impossible to achieve through machine sewn seams. I, personally, find great satisfaction in creating a beautiful quilt with just my hands. Though the process can be slow and meticulous at times, it’s one that people often describe as therapeutic and rewarding. One of my favorite things about EPP is the portability. I like to be busy (you know what they say about idle hands…) and I can take EPP anywhere – on car rides, while waiting for appointments, to the park, on road trips – with minimal equipment. You can toss a few things in a little pouch and always have a project on hand.
Next I will be diving into tools and techniques for EPP. I will be sharing some detailed information and tutorial links, but this is still a surface level intro to help get you started. I will be doing a deep dive into all of this and more with my own photos and video tutorials during the Butterfly Effect Sew Along which will be scheduled later this Spring (probably early May), so stay tuned for that!
· · · · · · · · · · · · · · · · · · · · · · · ·
GETTING STARTED
There are a few tools that are essential for EPP and several others that are simply beneficial and make the process easier, more efficient and more accurate. These tools include papers, templates, needles, thread, a thimble, a glue pen, small scissors, a small rotary cutter, Friction pen, SewTites, washi tape, Clover Clips, and more. You can see many of these items above and I will discuss them all in more detail.
The first thing you need for every EPP project is paper templates. Some patterns have the option of printing the papers yourself on your home printer (or at a copy shop) using card stock and many patterns have pre cut paper packs available. My Butterfly Effect Pattern includes printable paper files if you’d like to print and cut them yourself or you can order precut paper packs from Pink Door Fabrics (shown below). They will be available for preorder March 3.
You baste your fabric to these paper pieces and then stitch them together leaving the papers in place until your project is complete (more on basting later in the post!).
The next tool in the EPP process is templates. These help you cut your fabric pieces to the right size and shape before basting them to your paper pieces. Templates are not essential to the EPP process, but they are extremely handy and helpful. With EPP patterns, you will use either a 1/4″ or 3/8″ seam allowance on your fabric pieces. This is often determined by the size and shape of your pattern pieces. You can use your paper pieces as a guide/template, cutting your fabric 1/4″ – 3/8″ larger all around or you can use templates. EPP templates are clear acrylic shapes that are the same size and shape as the paper pieces that you baste to, but include a seam allowance and allow you to easily fussy cut fabrics for your pattern, which is one of the great joys of EPP! Some EPP patterns will also include printable template files that you can print and cut from card stock just like the papers. You can use them whole or cut out the centers for easy fussy cutting.
My Butterfly Effect pattern includes printable templates and you can also order acrylic templates from Pink Door Fabrics. There are two options available. One includes a full set of templates for every piece of the pattern and the second is a mini set which includes acrylic templates for the butterfly and moth wings. You would then print and cut the other templates yourself.
Above you can see a set of acrylic templates from Pink Door fabrics. They ship with paper on the back that you peel off. I *always* fussy cut so I love acrylic templates. They are also beneficial because you can easily use them to cut your fabrics with a small 28mm rotary cutter. If you did this with paper templates, you could cut into your templates, so you would need to trace your shapes and then cut them with scissors. If you choose to trace shapes on your fabric, I love using a Frixion pen that erases with heat.
If you use acrylic templates, you may find No Slip Grip Dots helpful, especially if you’re using a small rotary cutter. You affix these to the back of the acrylic templates to help keep them from slipping around on your fabric when tracing or cutting.
You can also consider an EPP starter kit like this one!
· · · · · · · · · · · · · · · · · · · · · · · ·
BASTING
Basting is the process of attaching your fabric to the paper pieces in preparation for stitching them together. You can baste with thread or glue and this is a personal preference. I prefer glue basting. I find it to be quicker and to hold my fabric to the paper tighter which allows me to more accurately and easily stitch my pieces together. I like to use a Sewline Glue Pen because it’s small and accurate (don’t forget the refills!), but you can also use a glue stick.
Here are three great articles talking about basting that show various techniques. Check them out and experiment yourself to see what works best for YOU!
There are also oodles of videos on YouTube at your disposal if you search EPP basting.
· · · · · · · · · · · · · · · · · · · · · · · ·
Stitching supplies & techniques
My preferred basic stitching supplies – needle and thread – are Tulip needles and Invisafil thread. I have used Aurifil thread, but for me it sometimes breaks because I’m a little rough when I pull it. The synthetic thread holds strong and is practically invisible. I love it! I also use a thimble and my favorite is the Clover natural fit leather thimble. I can’t sew without it!
When it comes to stitching your pieces together, there are a variety of methods. None are right, wrong or better than another, it all comes down to personal preference. I recommend, once again, experimenting and finding what works best for you. Keep in mind, this may change with practice and over time or even with the specific project you are working on, so always be open to trying new things.
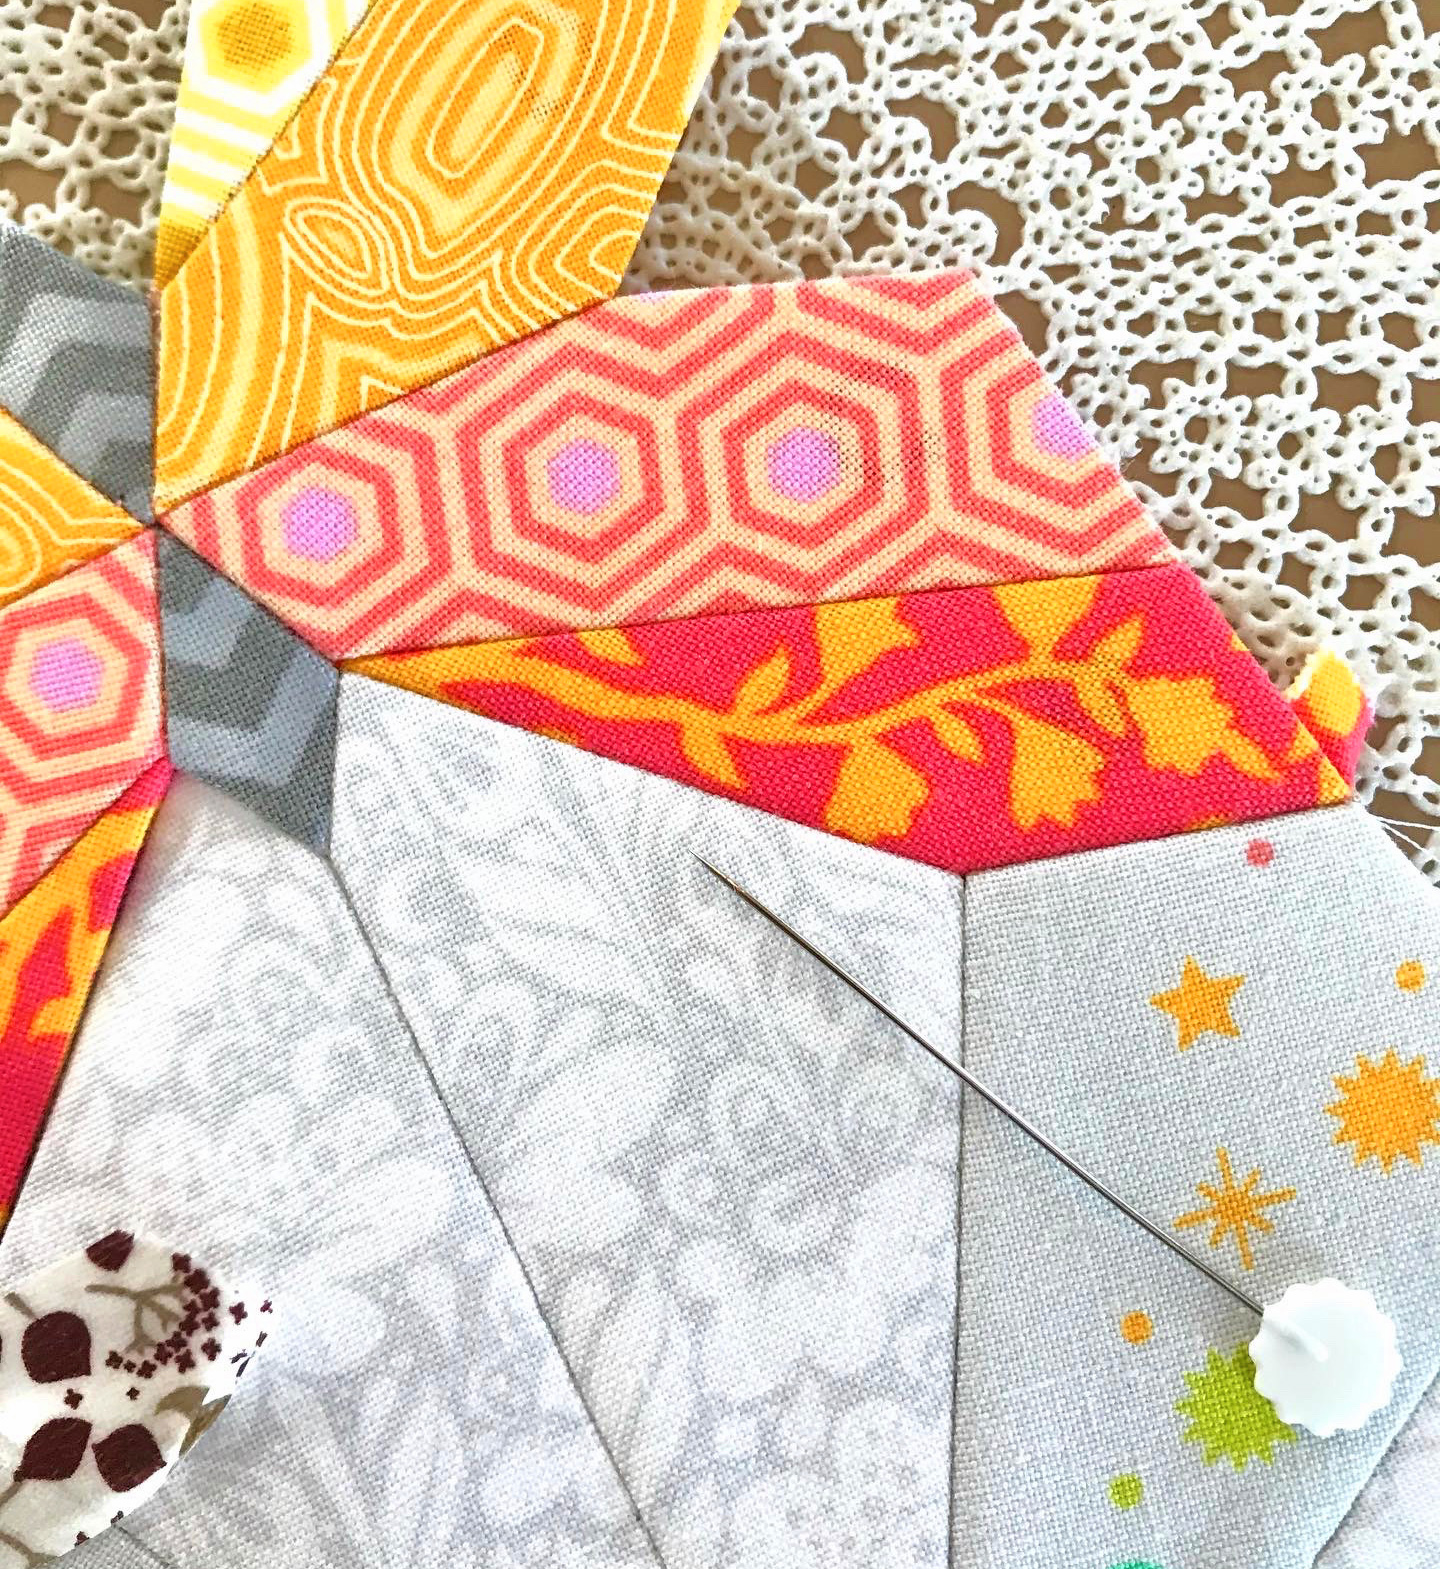
My preferred method of stitching is the flat back stitch. This is when you keep your pieces flat, butted up next to each other, and stitch across the seam. This is opposed to other methods where you place your pieces face to face and whip stitch or ladder stitch along an edge.
I like using a flat back stitch because I find it the easiest way to keep everything perfectly lined up and because your stitches are invisible! Above you can see that all my seams are neat, even and have no stitches showing. Below is a shot of the back where you can see my stitches. One thing to note is that invisible stitches is a preference. Sometimes different methods are used to intentionally see stitches.
I learned the flat back stitch from Karen the DIY Addict. She has a short video that I first watched hereand she also just released a fantastic master class on the flat back stitch which you can find below. This video also includes ample information about basting.
I will share more videos and details during the sew along, but when I flat back stitch, I use a generous amount of washi tape/painters tape and Clover Clips, but also totally rely on SewTites, specifically when my project gets bigger. They are a game changer!! (You can use code lillyella for 15% off on their site, too!). When I start joining multiple pieces together and have a lot of seams and folded fabric, I use tape, pins and SewTites to move things out of the way as needed.
If you’d like to try a traditional whip stitch method of joining your pieces, here is another great tutorial from Jodi Tales of Cloth.
Another method is the invisible feather stitch demonstrated by Pat Bravo of Art Gallery Fabrics in the video below.
Finally,here is an article by Amira The Little Mushroom Cap talking about five different stitching methods. Once again, you can find endless articles and tutorials with an internet search.
Play around with some basic hexagons or triangles and see what feels right for you!
· · · · · · · · · · · · · · · · · · · · · · · ·
additional tools
There are a few more tools that I use on the reg that really help me with my EPP (and all my sewing projects!). I will talk about them more in depth during the upcoming Sew Along, but here is a quick list with links:
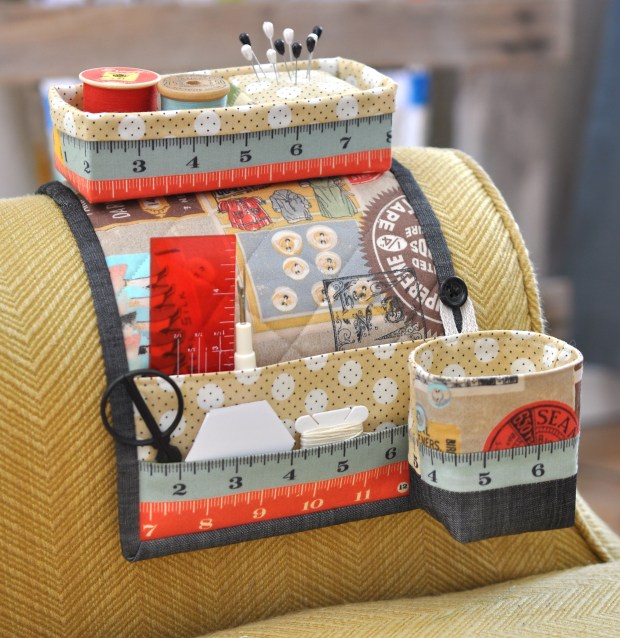
Last, but not least, I recommend making yourself a Mini Maker Station! This is one of my free patterns and it’s perfect for EPP! You can download the pattern here.
· · · · · · · · · · · · · · · · · · · · · · · ·
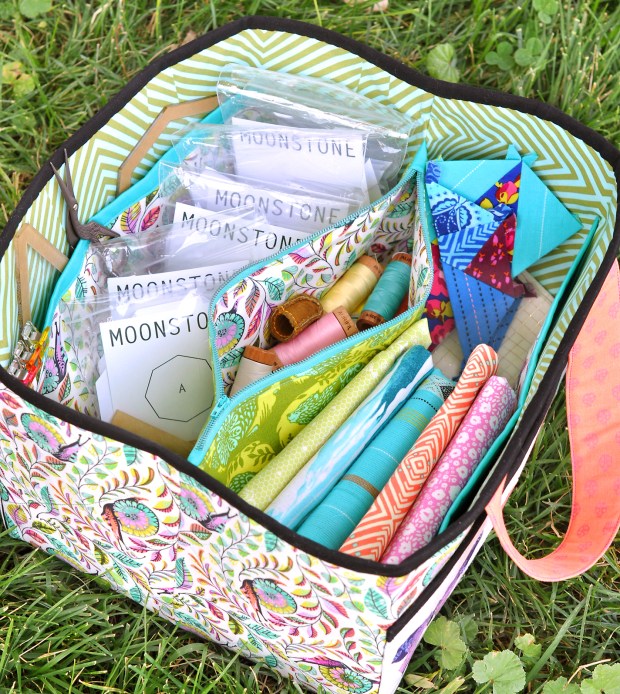
I also REALLY love the Sewing Date Traveler pattern for storing and toting around all my project supplies. You can download the free pattern here. I made this one a few years back and it’s constantly in use!
· · · · · · · · · · · · · · · · · · · · · · · ·
I hope you have found this post helpful and try your hand at some EPP!
I want to add, if you don’t love it at first try or get frustrated with perfection or techniques, don’t give up! Like everything, it can require some practice and finessing.
Stay tuned for my pattern release TOMORROW and I hope you’ll join in the upcoming Sew Along! I will post details here on the blog and you can also stay up to date with everything on my Instagram page and by joining my email newsletter here.