Midnight Bite Sew Along Sign-Up & Schedule

It’s time for the Midnight Bite Sew Along 2020! The sew along (SAL) will begin on October 9 and run through Halloween. Please read through this entire post carefully as everything you need to know is included – how to participate, what to expect, where to direct questions and more.

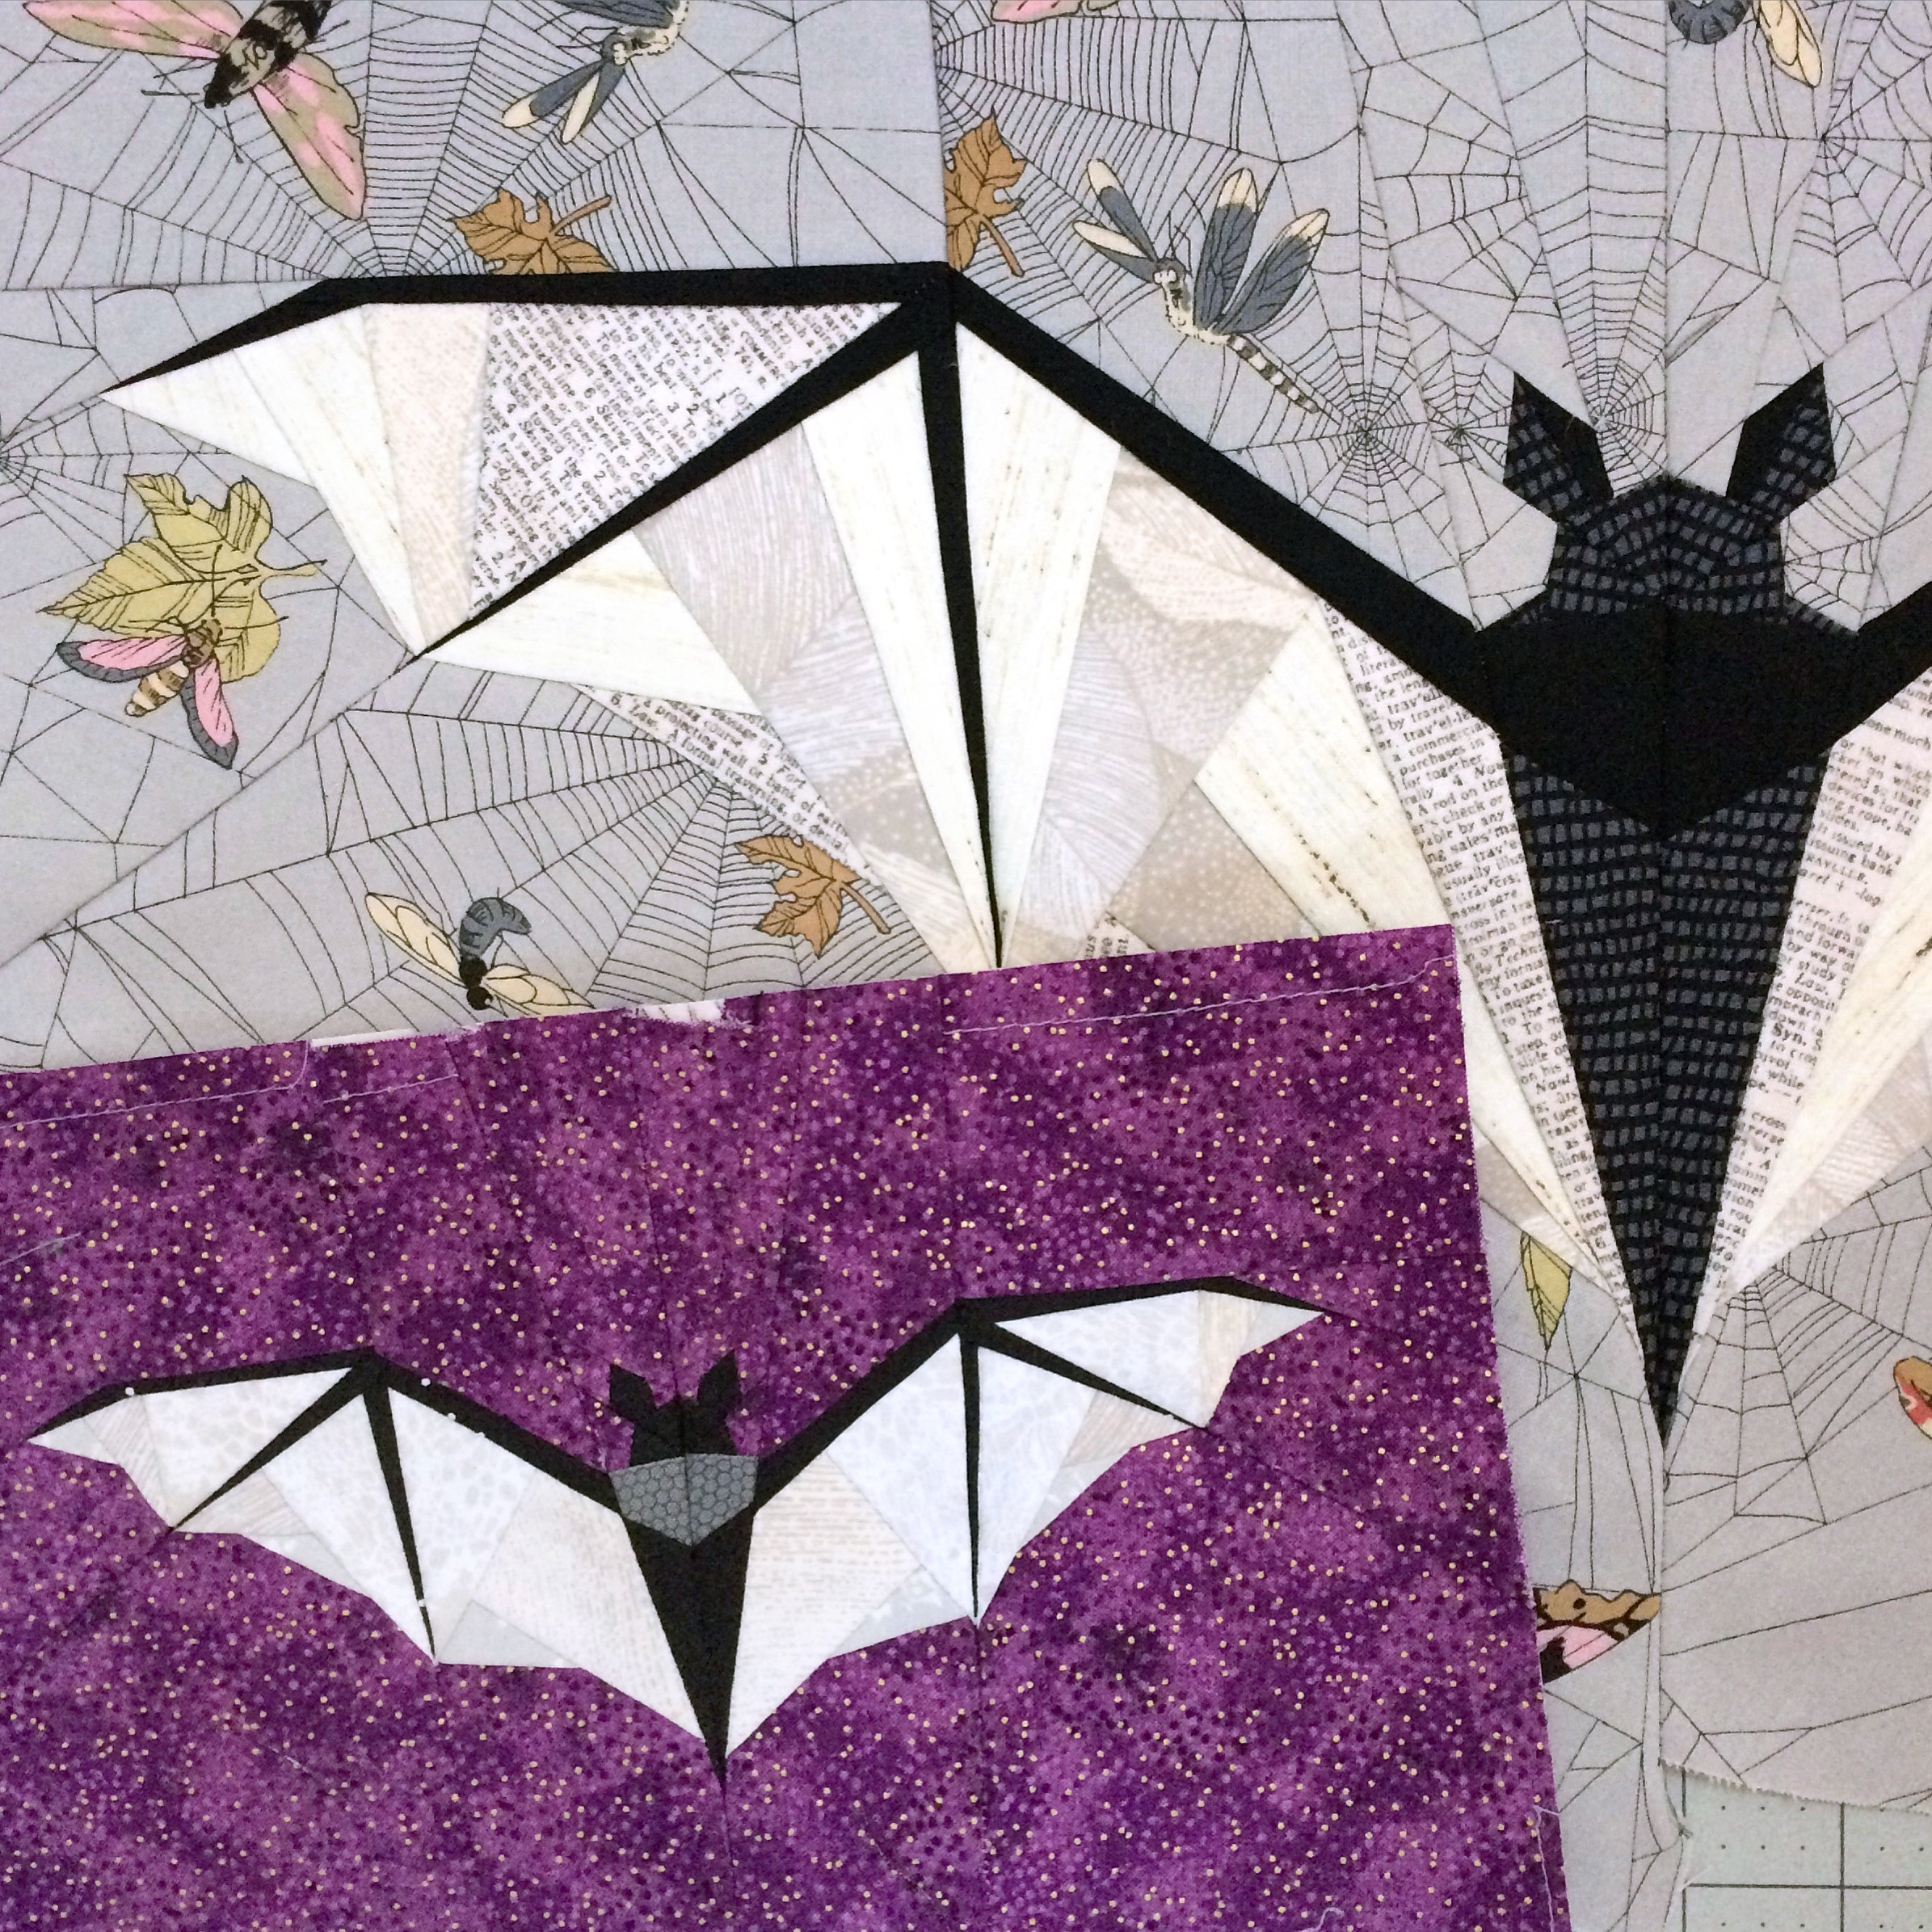
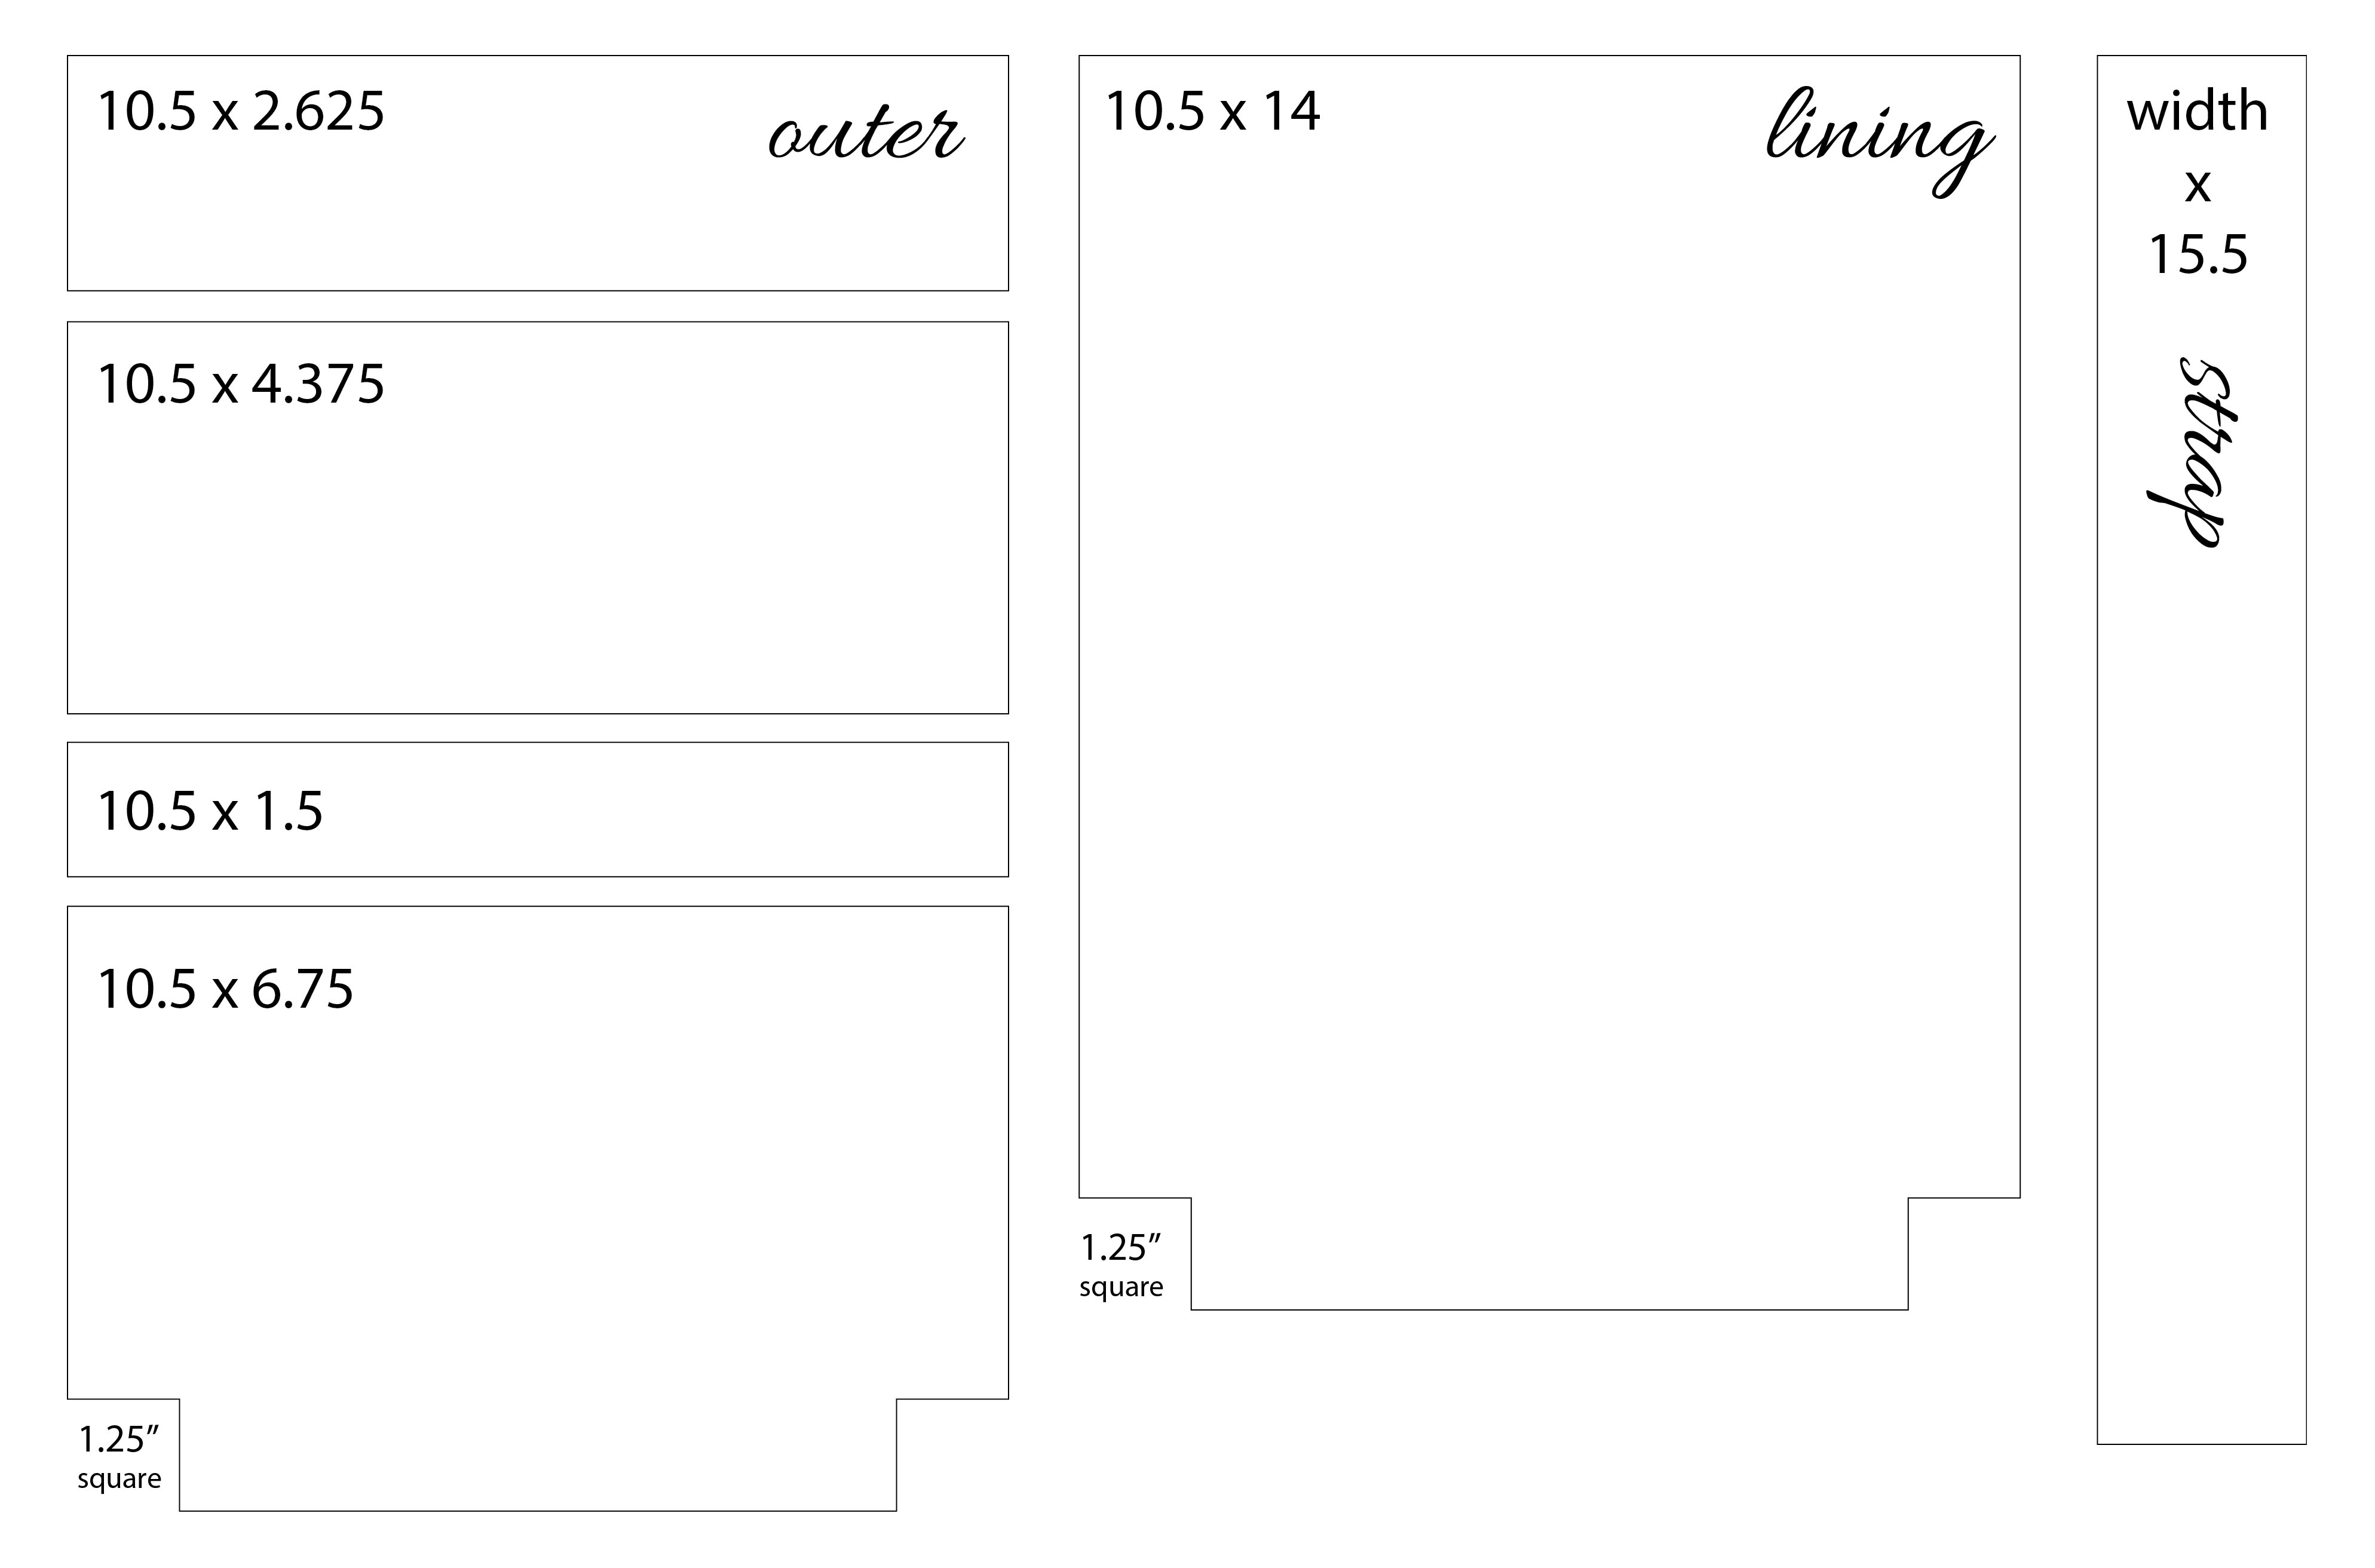
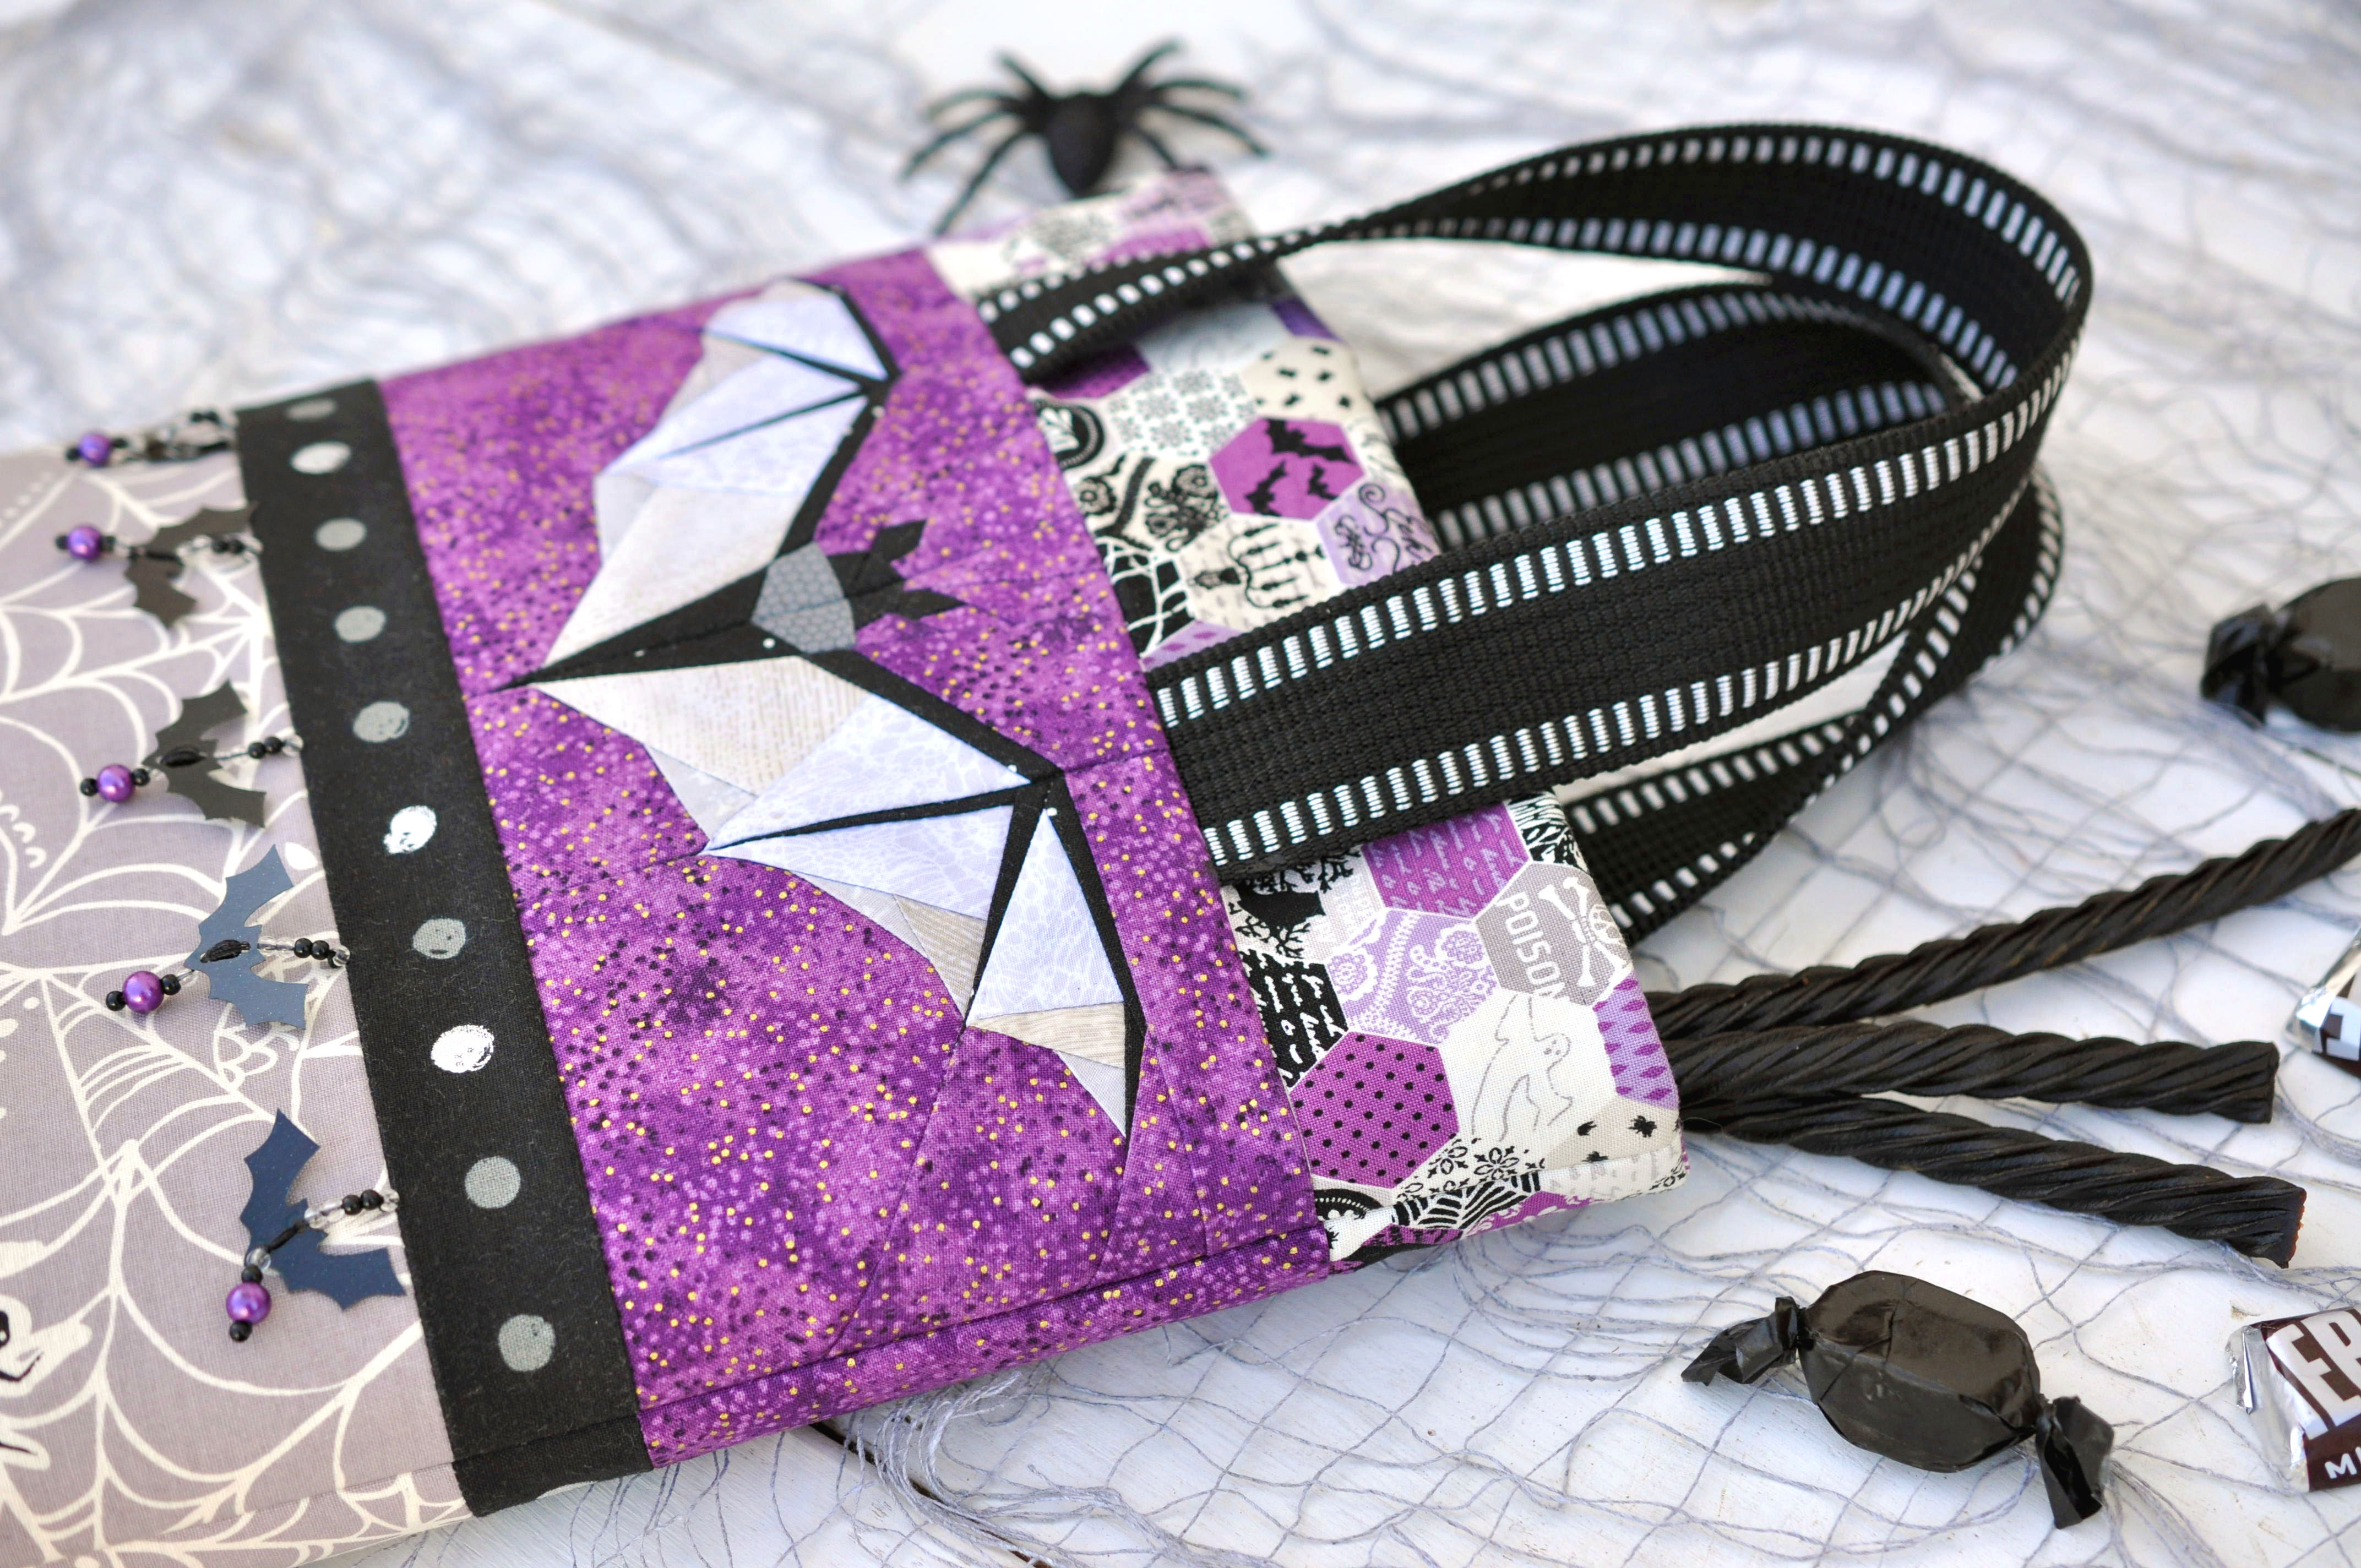
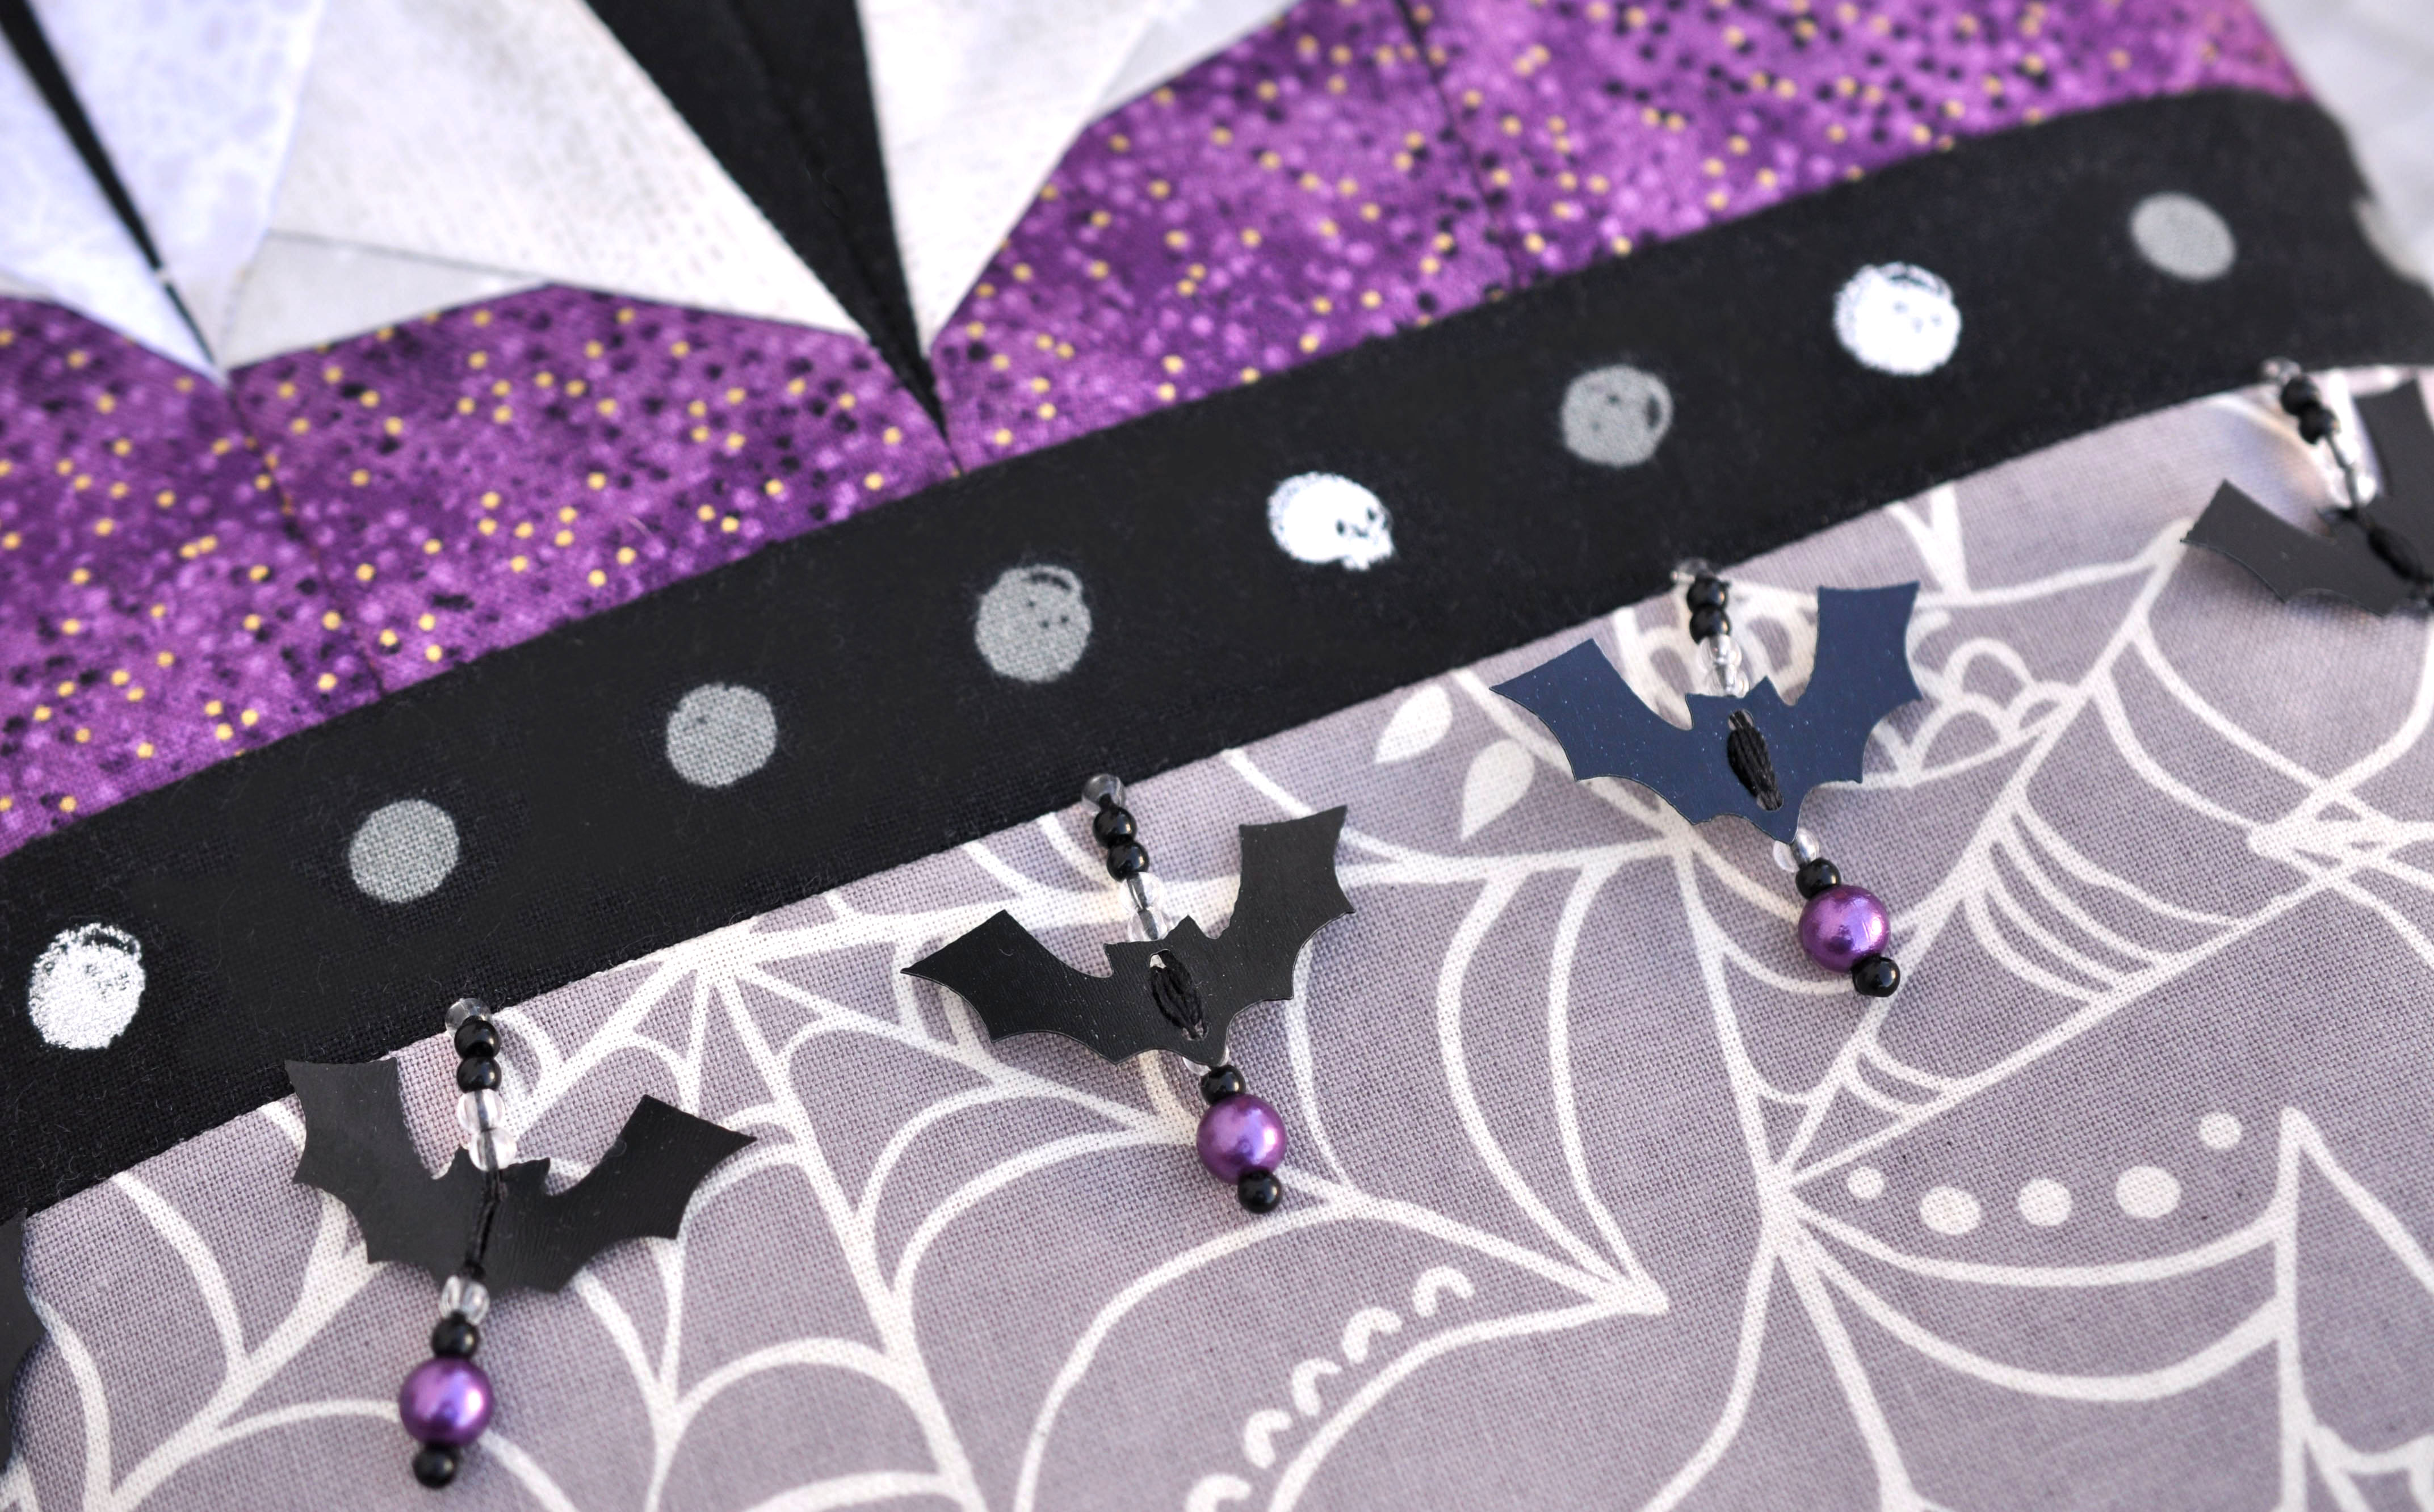
You can find the Midnight Bite bat pattern and Wicked Weaver spider pattern in my Etsy shop here. Both patterns include three blocks sizes from 8” to 24” so there are endless possibilities with what you can create using them! Throughout this post you will see a few variations of the blocks, as well as some finished projects made with them including the Midnight Bite Treat Bag and an improv wonky log cabin pillow.

Whether you’re a sew along fanatic or have never participated in one before, I hope you’ll join in! A sew along is essentially just what the name implies, a group of people sewing through a specific pattern “together” virtually over a set time period. Sometimes a SAL is very structured with a set schedule and specific prompts for sharing your work on social media etc, and sometimes a SAL is very loose with nothing shared along the way but what others choose to share as they work their own project. Sew alongs are typically most active on social media, such as Instagram and Facebook, where people share photos of their progress using specified hashtags so everyone participating can view each other’s work, answer questions, share tips & inspiration and more. The best part about a sew along is that it often gives someone the motivation to start or stick with a project and it’s also a fabulous opportunity to learn new skills and make new friends!

This is not a live event or class, all information will be sent via the email newsletter list (sign up below!) on scheduled days with links to blog posts found here. The posts will include pattern tips, tutorial links and videos to help you through your project. You are welcome to work ahead at any time or you can follow the schedule. Between posts, everyone works at their own pace and shares their progress on Instagram and in the Sew Along Facebook Group. If you’re not on social media, that’s ok! You can still view others posts and email me photos of your work.

For this SAL, I will not be sharing a complete step-by-step how-to on foundation paper piecing (we’ll do that in the Spring!), but I will share a variety of tutorials for those who are new to FPP. I will, however, be sharing tips and videos on how I prepare my pattern, cut my fabric (including fussy cuts and directional fabric), join sections with accuracy, and more, and I think many of these tips and tricks will be new and helpful to even experienced paper piecers! Below you will find more information on option tools and materials for this project.

Throughout the sew along, I ask that you direct any questions you may have to the Sew Along Facebook group rather than emailing or contacting me through social media. I will be checking these things, but chances are someone has already asked the same question and you will get a much faster response than I can provide! The FB group also has a search feature, so it’s easy to look for answers. I will be taking a cross country road trip during this sew long (crazy, I know!), so I will have limited internet access.

· · · · · · · · · · · · · · · · · · · · · · · ·

SEW ALONG SIGN UP

I have created an email newsletter sign-up as an easy to communicate with everyone participating in the sew along. Emails will only be sent during the sew along and the list will be deleted after it’s over. Please click here to join in! Be sure that you see the confirmation after joining and then look for a welcome email. If you do not see it, please check your junk/spam folders and if you still don’t receive it, please try signing up again.

· · · · · · · · · · · · · · · · · · · · · · · ·

SEW ALONG SCHEDULE

There aren’t too many steps in the process of foundation paper piecing, but I will cover pattern and fabric prep, general piecing and finally joining on sections. I will move quickly through the schedule for those who work fast, but there’s plenty of time during the sew along to work on your block, so don’t worry!

October 9: Pattern prep and cutting fabric. I will share helpful tips, my favorite tools, and a few videos on how I do this. There may be some surprises and helpful information for even experienced paper piecers, so I suggest you wait for this post to begin!

October 12: Begin piecing sections. I will share a variety of foundation paper piecing tutorials showing different methods and talk about what I prefer. I will also discuss trimming sections in preparation for the next step of joining them.

October 19: Joining sections. I will share videos and tips on how I join my sections with perfect accuracy and talk about ways to use your block in projects.

October 26: Final post and time to begin sharing finished blocks!

· · · · · · · · · · · · · · · · · · · · · · · ·

· · · · · · · · · · · · · · · · · · · · · · · ·

tools and materials

Though it’s not necessary, I use an Add-A-Quarter 12″ ruler for foundation paper piecing and will be using that in my demonstrations and tutorials. I also print my pattern on newsprint or foundation paper and this is what I recommend using if you’d like to pick some up. I will talk more about the benefits in the first blog post.

· · · · · · · · · · · · · · · · · · · · · · · ·

Until we kick things off on October 9, you can check out the #midnightbitepattern and #wickedweaverpattern hashtags on Instagram to get your creative juices flowing! You can start pulling fabric and share a snapshot on social media with the hashtags #MidnightBiteSAL and #MidnightBitePattern (for the bat) or #WickedWeaverpattern for the spider and in the Sew Along Facebook group!

See you on October 9!

Midnight Bite Treat Bag Tutorial

Midnight Bite Treat Bag Tutorial | lillyella stitchery

After falling in love with that hexie print, I found the matching purple fabric and there began my plan! When I pieced the 10″ Midnight Bite block, I just knew it had to become a treat bag. This project slowly came together as I found each new piece and it couldn’t have worked out better!

The handles are webbing I found in the trim section of Joanns, the silver is reflective so it’s perfect for night time candy hunting! Then there is the bat trim… I mean, come on! It’s even purple. No brainer. I also found this at Joanns. It’s made by Simplicity and was on an endcap of an aisle. There were spider pom poms too, which I also have big plans for.

Midnight Bite Treat Bag Tutorial | lillyella stitchery

This bag was quick and easy to make and can be customized in a variety of ways. You can use any fabrics, a variety of trims or fabric for the handles, and you can even adjust the measurements to modify the size for your preferences. It doesn’t even have to be just for halloween, it would make a perfect holiday gift bag!

This tutorial is really basic (because I have more bats to make!), but if you have any questions, just leave a comment below or shoot me an email. Please read thru the entire tutorial before beginning.

PREPARING YOUR BAG PANELS:

The finished size of this bag is 10″ wide x 12″ high x 2.5″ deep at the bottom with a 4.5″ drop. Below are the trim sizes for the outer pieced panels, the bag lining and the handles. You will need two of each piece. My handles are about 1.25″ thick but you can make them any size you wish.

My bag has a small boxy bottom. Simply eliminate the corner cuts if you don’t want a boxy bottom. You may also want to shorten your bag if you do this. I wanted my bag handles to be just long enough to slide over my hand easily and hang from my forearm, but not so long that the bag would drag on the ground if a little one was carrying it. You can adjust this measurement to be comfortable for you.

Midnight Bite Treat Bag Tutorial | lillyella stitchery

Begin by piecing the three bottom outer panel pieces with a 1/4″ seam. In my bag, this is the bottom spiderweb print, the strip of dots and the focal bat (*see ‘Adding Decorative Trim’ section below for options on how to add trim accents).

Midnight Bite Treat Bag Tutorial | lillyella stitchery

The focal bat panel is the 10″ block from my Midnight Bite pattern, the finished width is 10.5″ and I trimmed the height of the block to 4.375″. This odd measurement was simply based on how I visually liked the bat to be framed, you can make this focal panel any size, just be sure to adjust the lining measurement equally. The same applies to the top band of my bag (the hexie print), the measurement was based on the size of the hexies.

Next you will add the handle before piecing on the top band of fabric.

Midnight Bite Treat Bag Tutorial | lillyella stitchery

Lay your top fabric right side up, right reading. Lay your handle on top spacing the two ends equally from the center. You can line up your handles with the bottom edge of your fabric or drop the ends down about 1/4″ below your fabric to give a little extra grip in there. My finished bag has about 2.5″ between the handles (it’s shown a little wider in this photo which I took after the fact). Pin in place.

Next you will lay the pieced section of your outer panel right side down, upside down, on top of your handle piece, lining up the bottom edges. Sew along the bottom edge with a 1/4″ seam. I recommend going back over the handle areas a couple times and backstitching well on either side of them.

Press the larger piece down. NOTE: My handles could not be ironed, so be sure to test your material if you aren’t sure.

Midnight Bite Treat Bag Tutorial | lillyella stitchery

Repeat these steps for the other side of your bag. After my two outer panels were assembled, I used fusible fleece  on them to stabilize my bag and I love the feel of it. You can also use batting and then quilt your panels or do some edge topstitching to hold it in place. If you’d like a lighter bag, you can use a medium weight interfacing, but I do recommend using some type of interfacing on the back of your outer panels. I did not use any interfacing on my lining.

CONSTRUCTING THE BAG:

Next you will take your two outer panels and place them right sides together. Sew with a 1/4″ seam down the left and right sides and across the bottom. You corner cut outs will be open. Repeat these steps for the two lining pieces, but leave a large gap in the bottom seam for turning. Just sew about 1/2″ in from either end.

To sew the boxed corners, keep your pieces wrong sides out. Open up the piece a bit and fold one inner side seam down to the inner bottom seam, lining them up and lining up both cut edges of your corner cut out. Sew along the edge with a 1/4″ seam. Repeat for the other side of your bag outside and your lining.

To sew in your lining, turn the outside of your bag right side out. Keep your lining wrong side out. Slide the outside of your bag into the lining, the two pieces will be right sides together. Line up the top edges making sure to match the side seams and sew around using a 1/2″ seam.

Turn your bag right side out through the gap in the bottom of your lining. Stitch the gap closed and turn your lining inside your bag. Press around the top and top stitch if desired.

Midnight Bite Treat Bag Tutorial | lillyella stitchery

ADDING DECORATIVE TRIM:

Once all the elements of this bag came together and I was planning the design (see a couple options I was tossing around below), I was going to stitch the bat trim onto the bag panels after they were pieced and then use a piece of woven striped ribbon on top. I liked the added design element but I also wanted to cover the satin ribbon the bats were on because it looked a little generic to me.

Midnight Bite Treat Bag Tutorial | lillyella stitchery

After texting about seven people for their opinions (ya, Im a high maintenance friend), I decided to keep it a little cleaner and just use the bat trim, but I did not want to throw off the balance of the black dotted fabric strip by having the black ribbon of the bats showing. Typically I would sew the trim into the seam, much like piping, but I was concerned about keeping it in place and hitting the beads with my machine foot. I also wanted the bats to fall evenly in line with my dots (OCD, I know). So I clipped the bats off the ribbon and restrung each one then sewed it in place on my bag panels. I did this after adding my fusible fleece to my pieced panels. Since there’s only five bats on each side, it went really quick.

FEATURED FABRICS:

The top hexie print is from the line Happy Haunting by Deena Rutter for Riley Blake (it also comes in orange and black!). I unfortunately have no idea what the purple background of my bat is. I grabbed it last minute at my LQS, but I’ll see if I can find it next time I’m up there. The Happy Haunting line has a purple print with tiny black spiders on it that would match and make a cute background, too. The black strip with the dots is Spellbound from Cotton + Steel and the bottom web print is from Spooktacular, Too (also in the newer Spooktacular Eve) by Maude Ashbury for Blend.

I hope you enjoy this tutorial, happy haunting, friends!

Midnight Bite Treat Bag Tutorial | lillyella stitchery