Today is the day! Butterfly Effect is out in the world and I’m SO DARN EXCITED! This pattern has been a really long time in the making. I started and stopped and started and stopped and almost gave up on it a few times. I sketched dozens of options and fought with geometry for too many hours to count, but… TOTALLY WORTH IT!
The pattern finishes at 24” square as written (shown above), making it a perfect mini quilt or pillow, but you can continue to grow your piece to any size or use small sections of the pattern for other applications.
The pattern includes printable templates and pattern papers so you have everything you need to jump right in or you can order laser cut paper packs and acrylic templates at PinkDoorFabrics.com.
**UPDATE: Butterfly Effect Supplies (templates, paper packs and printed patterns) are now available from Paper Pieces HERE. Thank you!
• • • • • • • • • • • • • • • • • • • • • • • •
SUPPLIES
**UPDATE: Butterfly Effect Supplies (templates, paper packs and printed patterns) are now available from Paper Pieces HERE. Thank you!
• • • • • • • • • • • • • • • • • • • • • • • •
I believe that any level sewist can create this pattern, even EPP beginners! Complete instructions on EPP are not included, but many tutorials can be found online. You can also check out my Beginners Guide to EPP. Even if you are experience with EPP, you may find some helpful information in this post, plus links to all my favorite tools!
I will be hosting a Butterfly Effect Sew Along that will kick off May 3 where will we work step-by-step together, so if you’re a newbie but want to give this a try, I hope you’ll sew along! You can sign up by clicking here.
I hope you love creating this pattern as much as I have. Remember to share your projects and find inspiration with the hashtag #ButterflyEffectPattern on social media!
My new Butterfly Effect Pattern comes out TOMORROW (March 3) and I wanted to share ALL THINGS EPP with you today to help you prepare! Whether you are new to English Paper Piecing (EPP) or have dabbled in it before, I hope you find some useful tips and techniques here today. Below I’m sharing all the basics about EPP, as well as my essential (and favorite) tools and a variety of tutorials on basting, stitching and more.
English Paper Piecing (EPP) is a hand sewing technique that uses heavy paper templates to create shapes and stabilize them for stitching. EPP allows you to create intricate designs that would be difficult or impossible to achieve through machine sewn seams. I, personally, find great satisfaction in creating a beautiful quilt with just my hands. Though the process can be slow and meticulous at times, it’s one that people often describe as therapeutic and rewarding. One of my favorite things about EPP is the portability. I like to be busy (you know what they say about idle hands…) and I can take EPP anywhere – on car rides, while waiting for appointments, to the park, on road trips – with minimal equipment. You can toss a few things in a little pouch and always have a project on hand.
Next I will be diving into tools and techniques for EPP. I will be sharing some detailed information and tutorial links, but this is still a surface level intro to help get you started. I will be doing a deep dive into all of this and more with my own photos and video tutorials during the Butterfly Effect Sew Along which will be scheduled later this Spring (probably early May), so stay tuned for that!
· · · · · · · · · · · · · · · · · · · · · · · ·
GETTING STARTED
There are a few tools that are essential for EPP and several others that are simply beneficial and make the process easier, more efficient and more accurate. These tools include papers, templates, needles, thread, a thimble, a glue pen, small scissors, a small rotary cutter, Friction pen, SewTites, washi tape, Clover Clips, and more. You can see many of these items above and I will discuss them all in more detail.
The first thing you need for every EPP project is paper templates. Some patterns have the option of printing the papers yourself on your home printer (or at a copy shop) using card stock and many patterns have pre cut paper packs available. My Butterfly Effect Pattern includes printable paper files if you’d like to print and cut them yourself or you can order precut paper packs from Pink Door Fabrics (shown below). They will be available for preorder March 3.
You baste your fabric to these paper pieces and then stitch them together leaving the papers in place until your project is complete (more on basting later in the post!).
The next tool in the EPP process is templates. These help you cut your fabric pieces to the right size and shape before basting them to your paper pieces. Templates are not essential to the EPP process, but they are extremely handy and helpful. With EPP patterns, you will use either a 1/4″ or 3/8″ seam allowance on your fabric pieces. This is often determined by the size and shape of your pattern pieces. You can use your paper pieces as a guide/template, cutting your fabric 1/4″ – 3/8″ larger all around or you can use templates. EPP templates are clear acrylic shapes that are the same size and shape as the paper pieces that you baste to, but include a seam allowance and allow you to easily fussy cut fabrics for your pattern, which is one of the great joys of EPP! Some EPP patterns will also include printable template files that you can print and cut from card stock just like the papers. You can use them whole or cut out the centers for easy fussy cutting.
My Butterfly Effect pattern includes printable templates and you can also order acrylic templates from Pink Door Fabrics. There are two options available. One includes a full set of templates for every piece of the pattern and the second is a mini set which includes acrylic templates for the butterfly and moth wings. You would then print and cut the other templates yourself.
Above you can see a set of acrylic templates from Pink Door fabrics. They ship with paper on the back that you peel off. I *always* fussy cut so I love acrylic templates. They are also beneficial because you can easily use them to cut your fabrics with a small 28mm rotary cutter. If you did this with paper templates, you could cut into your templates, so you would need to trace your shapes and then cut them with scissors. If you choose to trace shapes on your fabric, I love using a Frixion pen that erases with heat.
If you use acrylic templates, you may find No Slip Grip Dots helpful, especially if you’re using a small rotary cutter. You affix these to the back of the acrylic templates to help keep them from slipping around on your fabric when tracing or cutting.
You can also consider an EPP starter kit like this one!
· · · · · · · · · · · · · · · · · · · · · · · ·
BASTING
Basting is the process of attaching your fabric to the paper pieces in preparation for stitching them together. You can baste with thread or glue and this is a personal preference. I prefer glue basting. I find it to be quicker and to hold my fabric to the paper tighter which allows me to more accurately and easily stitch my pieces together. I like to use a Sewline Glue Pen because it’s small and accurate (don’t forget the refills!), but you can also use a glue stick.
Here are three great articles talking about basting that show various techniques. Check them out and experiment yourself to see what works best for YOU!
There are also oodles of videos on YouTube at your disposal if you search EPP basting.
· · · · · · · · · · · · · · · · · · · · · · · ·
Stitching supplies & techniques
My preferred basic stitching supplies – needle and thread – are Tulip needles and Invisafil thread. I have used Aurifil thread, but for me it sometimes breaks because I’m a little rough when I pull it. The synthetic thread holds strong and is practically invisible. I love it! I also use a thimble and my favorite is the Clover natural fit leather thimble. I can’t sew without it!
When it comes to stitching your pieces together, there are a variety of methods. None are right, wrong or better than another, it all comes down to personal preference. I recommend, once again, experimenting and finding what works best for you. Keep in mind, this may change with practice and over time or even with the specific project you are working on, so always be open to trying new things.
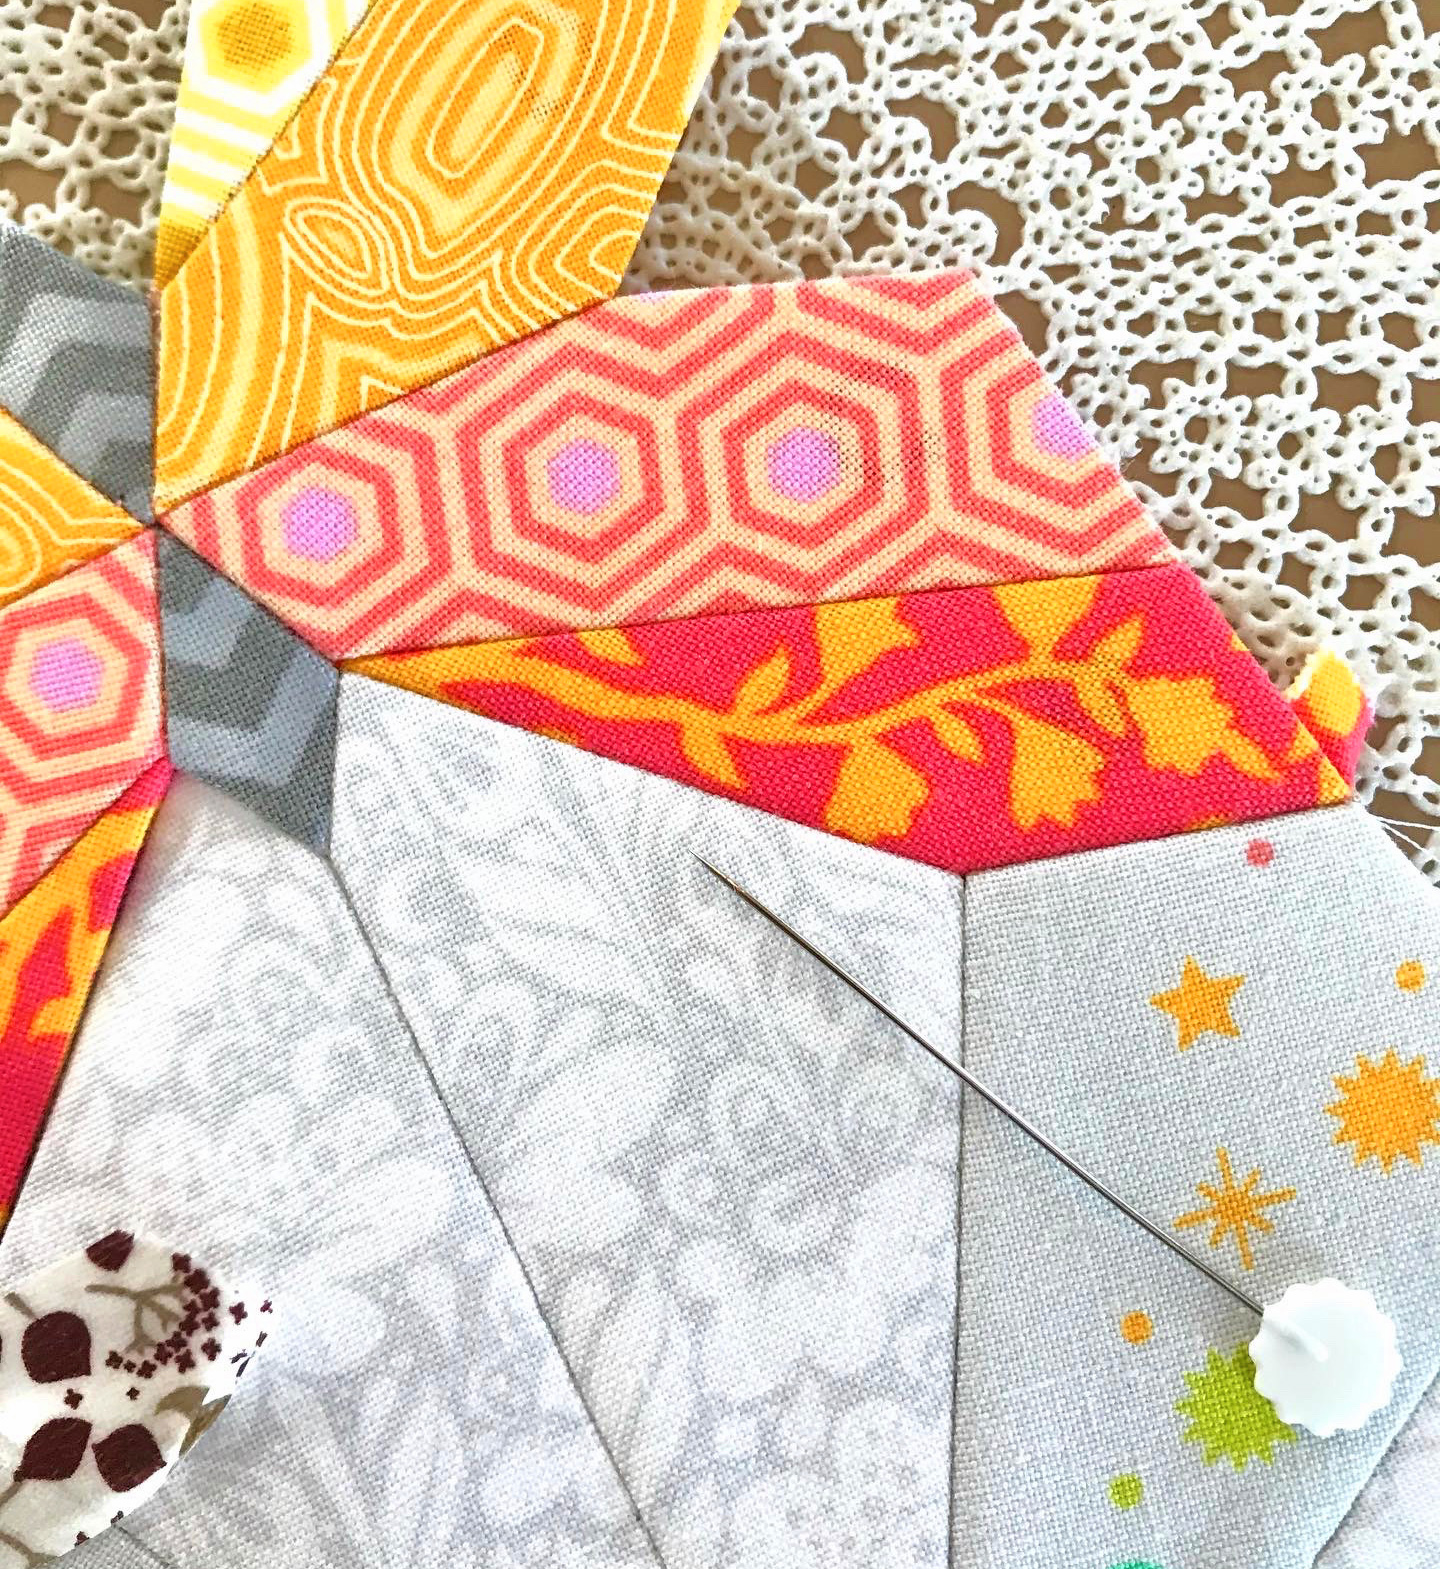
My preferred method of stitching is the flat back stitch. This is when you keep your pieces flat, butted up next to each other, and stitch across the seam. This is opposed to other methods where you place your pieces face to face and whip stitch or ladder stitch along an edge.
I like using a flat back stitch because I find it the easiest way to keep everything perfectly lined up and because your stitches are invisible! Above you can see that all my seams are neat, even and have no stitches showing. Below is a shot of the back where you can see my stitches. One thing to note is that invisible stitches is a preference. Sometimes different methods are used to intentionally see stitches.
I learned the flat back stitch from Karen the DIY Addict. She has a short video that I first watched hereand she also just released a fantastic master class on the flat back stitch which you can find below. This video also includes ample information about basting.
I will share more videos and details during the sew along, but when I flat back stitch, I use a generous amount of washi tape/painters tape and Clover Clips, but also totally rely on SewTites, specifically when my project gets bigger. They are a game changer!! (You can use code lillyella for 15% off on their site, too!). When I start joining multiple pieces together and have a lot of seams and folded fabric, I use tape, pins and SewTites to move things out of the way as needed.
If you’d like to try a traditional whip stitch method of joining your pieces, here is another great tutorial from Jodi Tales of Cloth.
Another method is the invisible feather stitch demonstrated by Pat Bravo of Art Gallery Fabrics in the video below.
Finally,here is an article by Amira The Little Mushroom Cap talking about five different stitching methods. Once again, you can find endless articles and tutorials with an internet search.
Play around with some basic hexagons or triangles and see what feels right for you!
· · · · · · · · · · · · · · · · · · · · · · · ·
additional tools
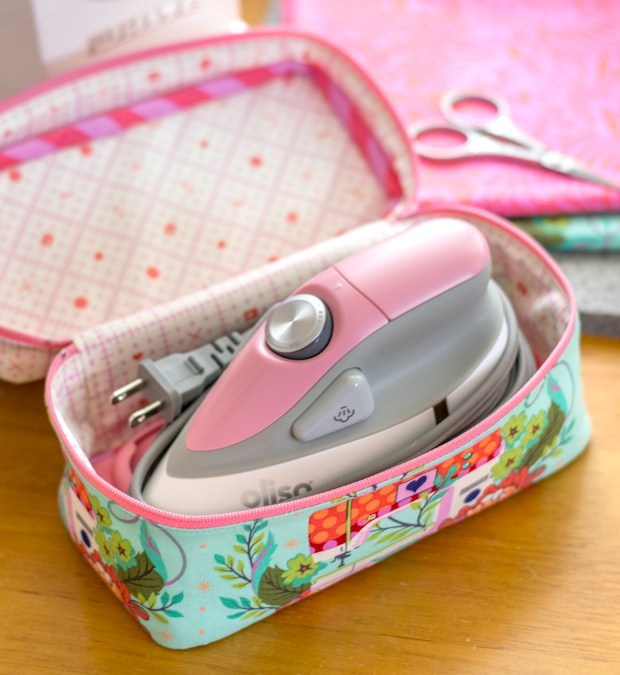
There are a few more tools that I use on the reg that really help me with my EPP (and all my sewing projects!). I will talk about them more in depth during the upcoming Sew Along, but here is a quick list with links:
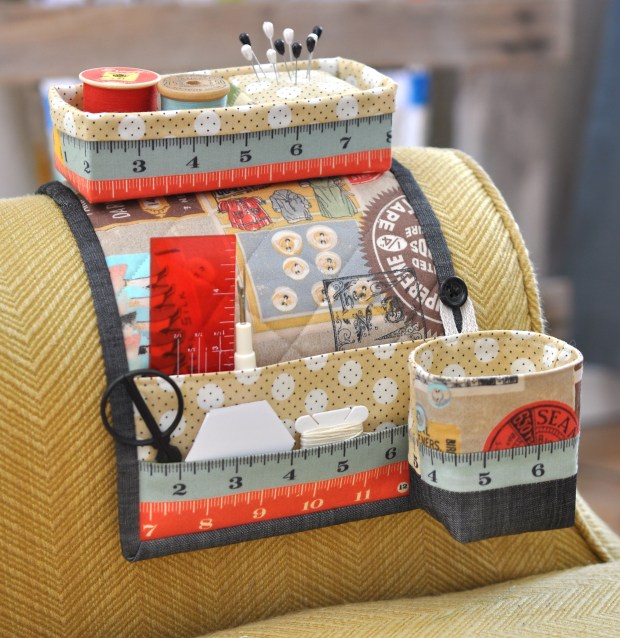
Last, but not least, I recommend making yourself a Mini Maker Station! This is one of my free patterns and it’s perfect for EPP! You can download the pattern here.
· · · · · · · · · · · · · · · · · · · · · · · ·
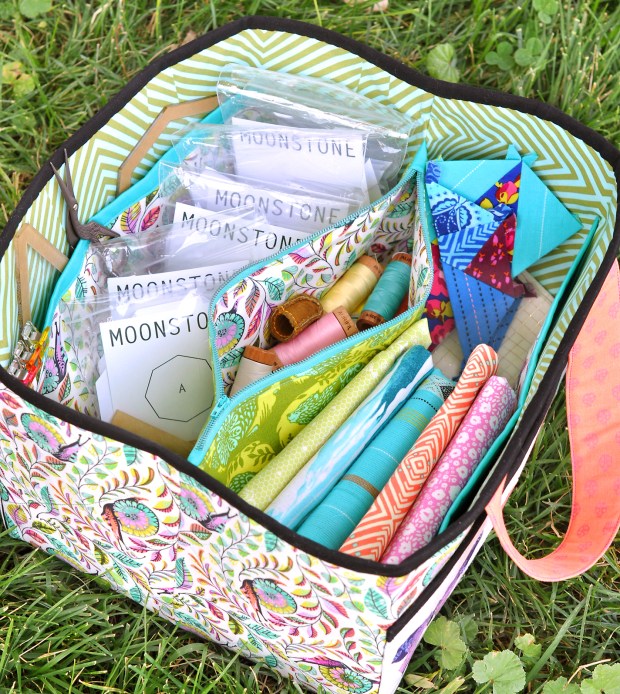
I also REALLY love the Sewing Date Traveler pattern for storing and toting around all my project supplies. You can download the free pattern here. I made this one a few years back and it’s constantly in use!
· · · · · · · · · · · · · · · · · · · · · · · ·
I hope you have found this post helpful and try your hand at some EPP!
I want to add, if you don’t love it at first try or get frustrated with perfection or techniques, don’t give up! Like everything, it can require some practice and finessing.
Stay tuned for my pattern release TOMORROW and I hope you’ll join in the upcoming Sew Along! I will post details here on the blog and you can also stay up to date with everything on my Instagram page and by joining my email newsletter here.
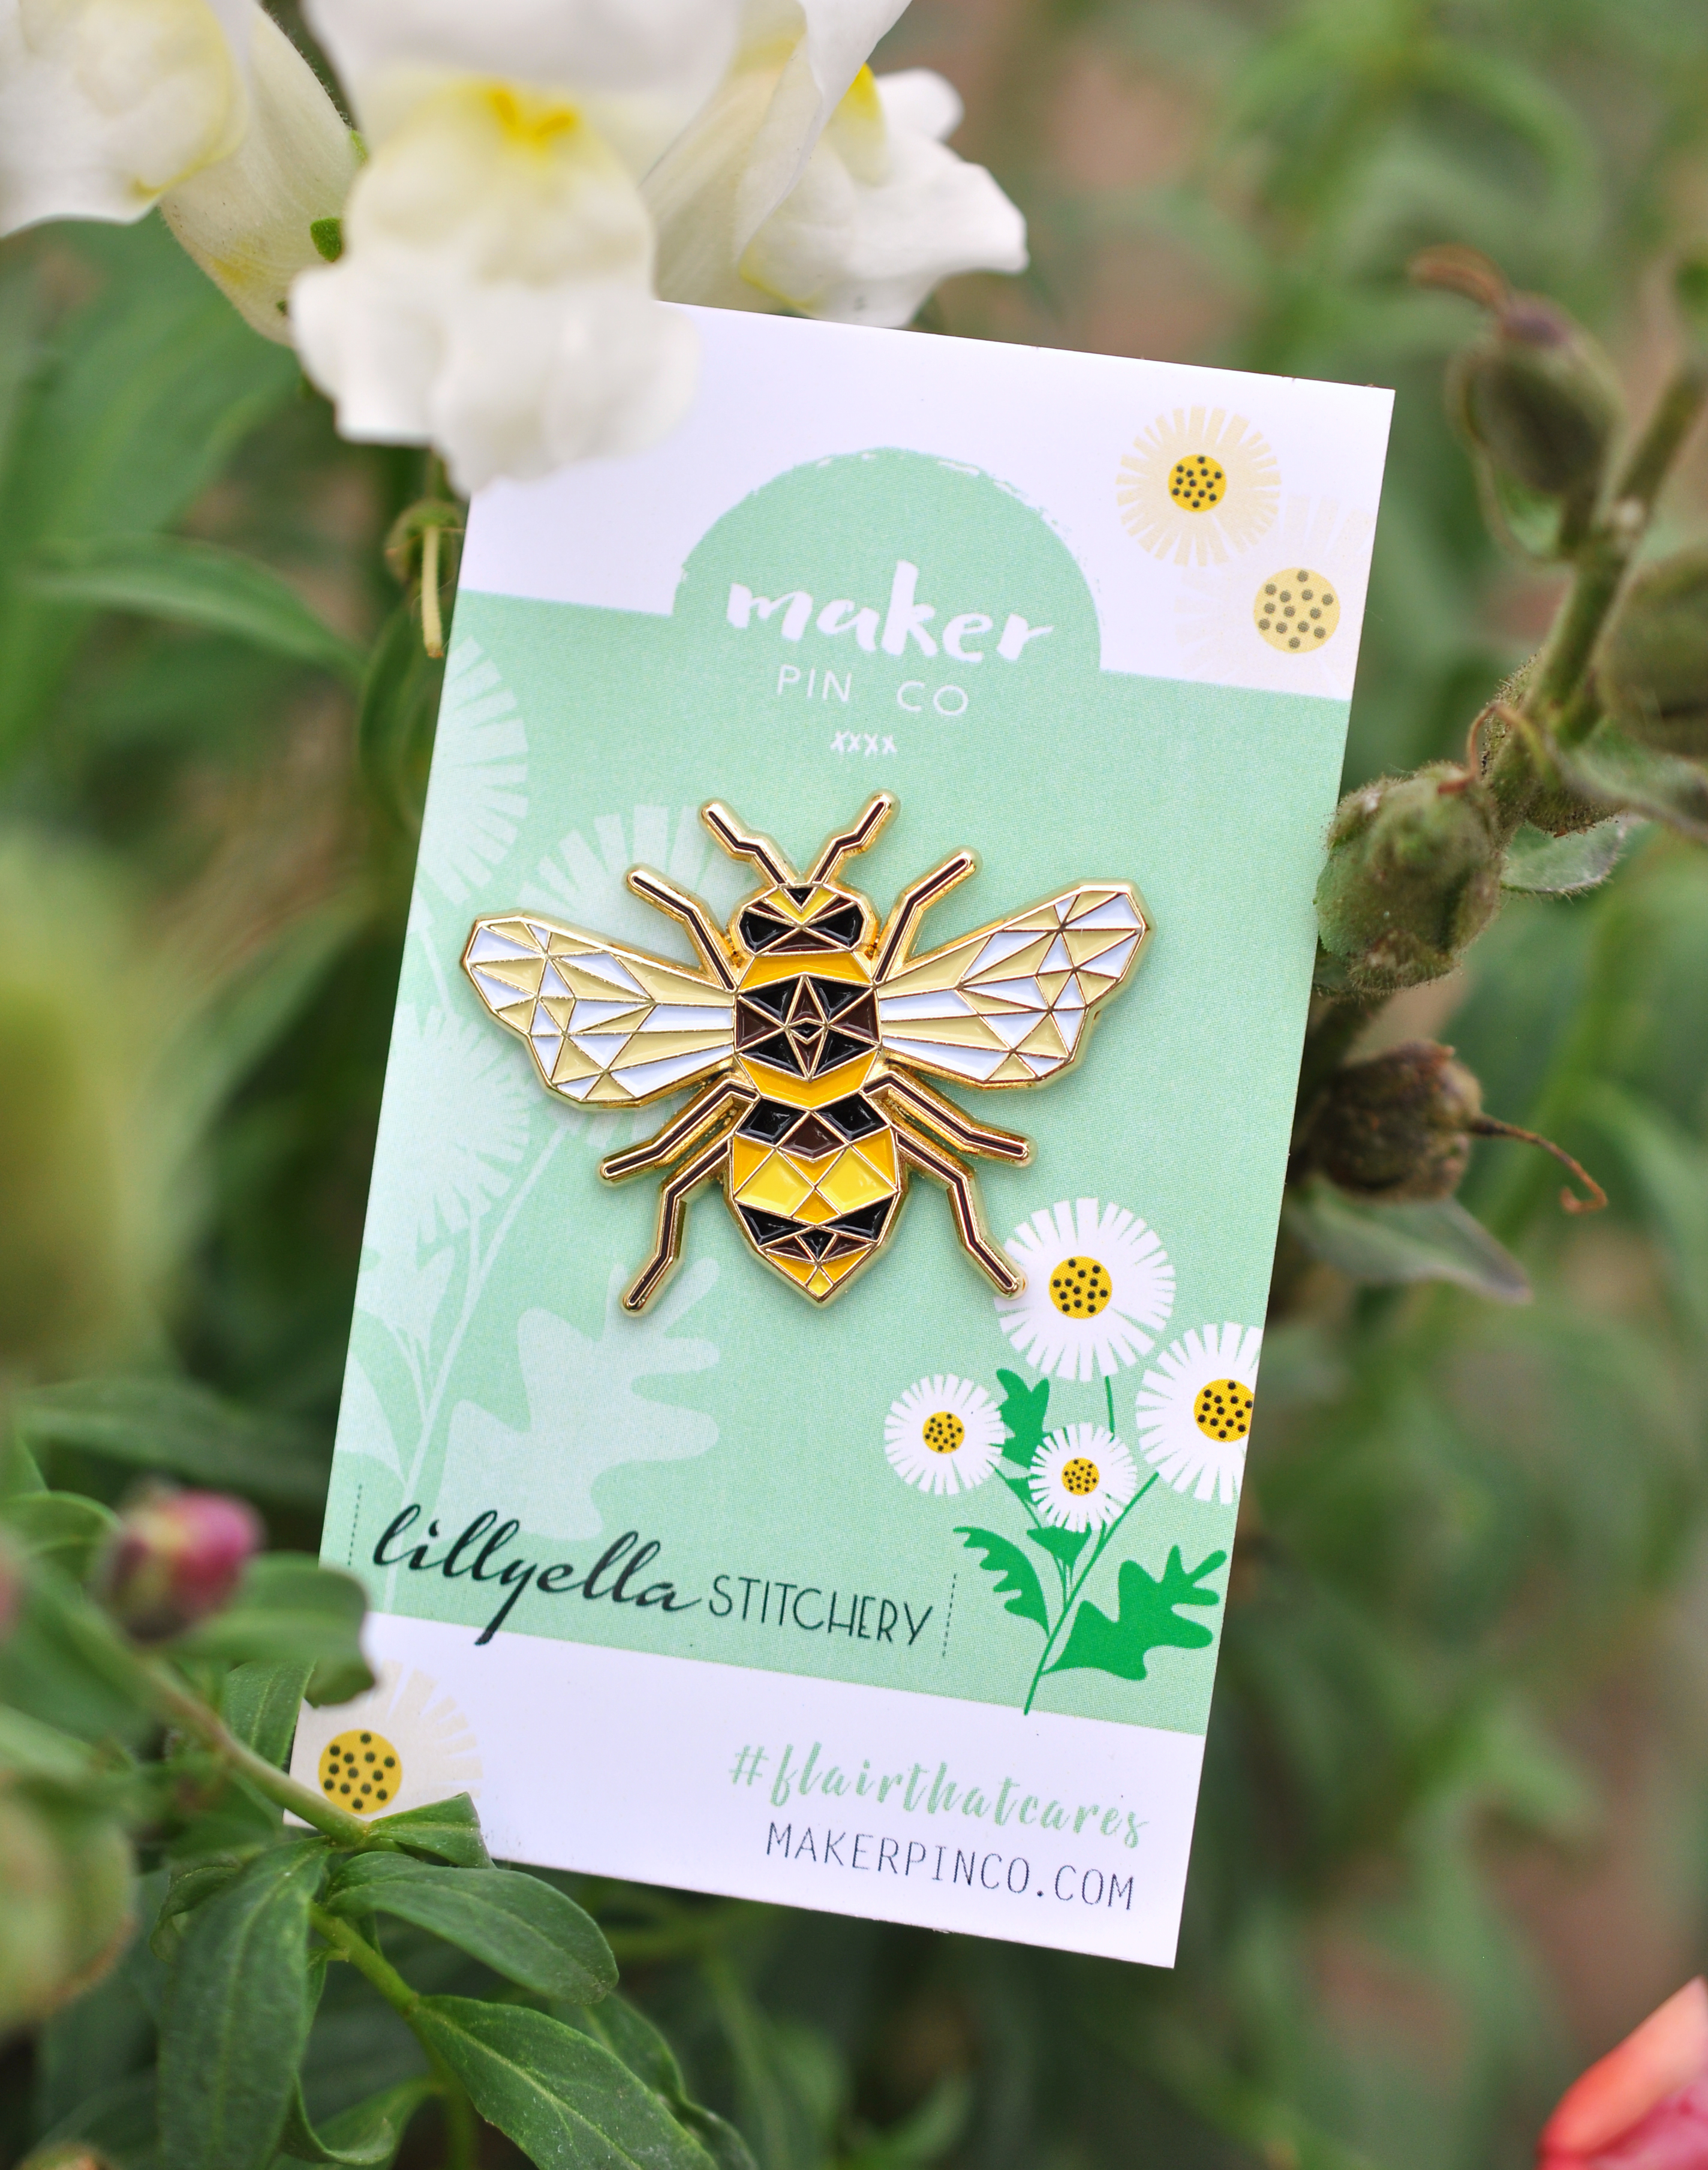
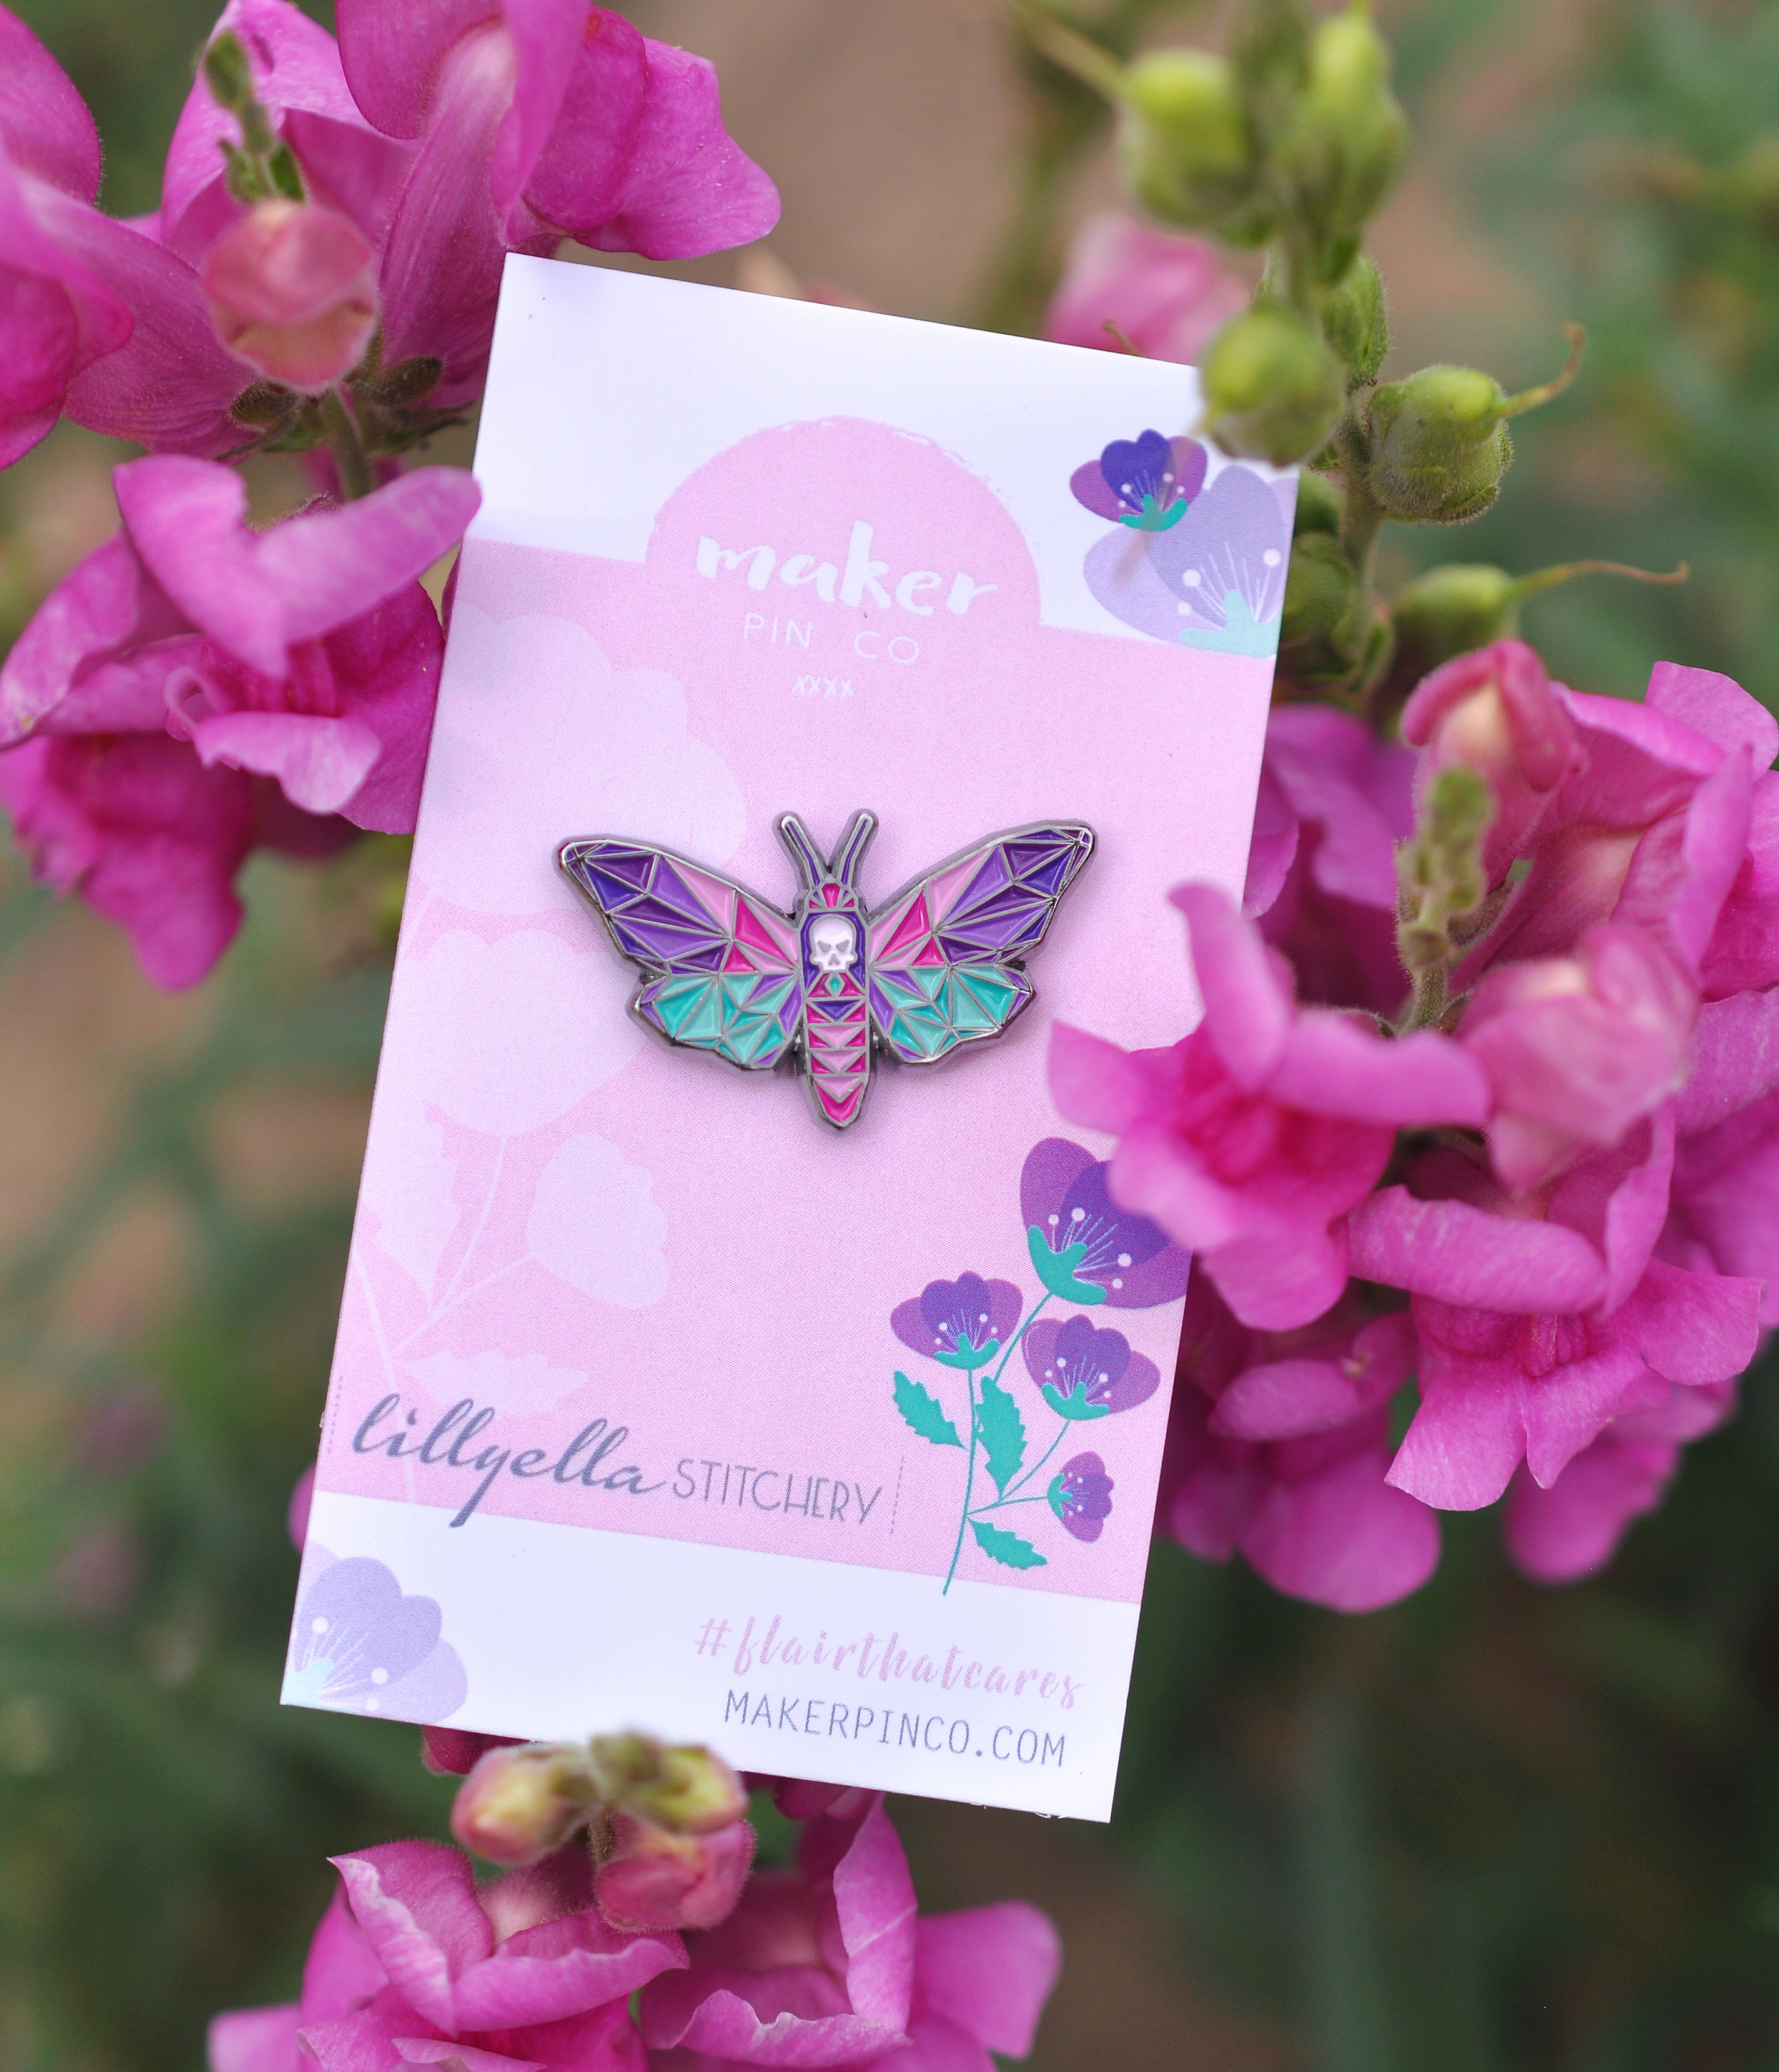
I was so excited when Amanda at Maker Pin Co. asked me to be her next collaborative artist! It was really hard to decide which of my paper piecing patterns to turn into a pin and I knew that two patterns I had in the works, a honey bee and a luna moth, would be super cute options, so I quickly finished them and we put four designs up for a vote. But, in the end, no one else could decide either so we produced all four and I just received the first batch. Aren’t they the cutest?!
We just opened up a second round of preorders through August 30, so if you’d like to snag one of these pins for yourself or as a gift or swap extra, pop over to Maker Pin Co. here!
If you haven’t heard of Maker Pin Co. yet, let me introduce you! Amanda, formerly of Stash Builder Box, recently began this new adventure. She works with different artists to create enamel pins using their designs and, just like with Stash Builder Box, maker Pin Co. is all about helping those in need with $1 from each pin sale being donated to a charity of the artist’s choice.
The charity I chose is the Pollinator Partnership. Founded in 1997, the Pollinator Partnership is the largest nonprofit in the world committed to protecting pollinators and their ecosystems and promoting conservation efforts. The charity works throughout North America and globally to safeguard birds, bees, bats, butterflies, moths, beetles and other pollinators.
We donated $280 so far from the first round of preorders and I’m hoping we can more than double that! What do you think?
The Bee pin measures 1.5″ wide and the rest measure 1.25″, making them perfect for jacket lapels, hats, bags, pouches or as push pins on bulletin boards!
If you don’t follow me on social media, I’ve been a little behind on blogging lately (summer is so busy!) and you may be wondering about the Bee and Luna Moth patterns. They are new and coming soon! I typically don’t share my new designs until I’ve sewn them up myself, but I really wanted to include them in the pin designs, and am so glad I did!
My goal is to have the Bee pattern, named Honey Maker, out in October or November, with the Luna Moth (Moon Dancer) released shortly after, but likely early in the new year. I hope you’re as excited about them as I am!
Thanks for stopping by today! Remember, pin preorders are only open through August 30, so head over there now and support our pollinators! Be sure to check out all the other awesome collaborative designs while you’re there, too!
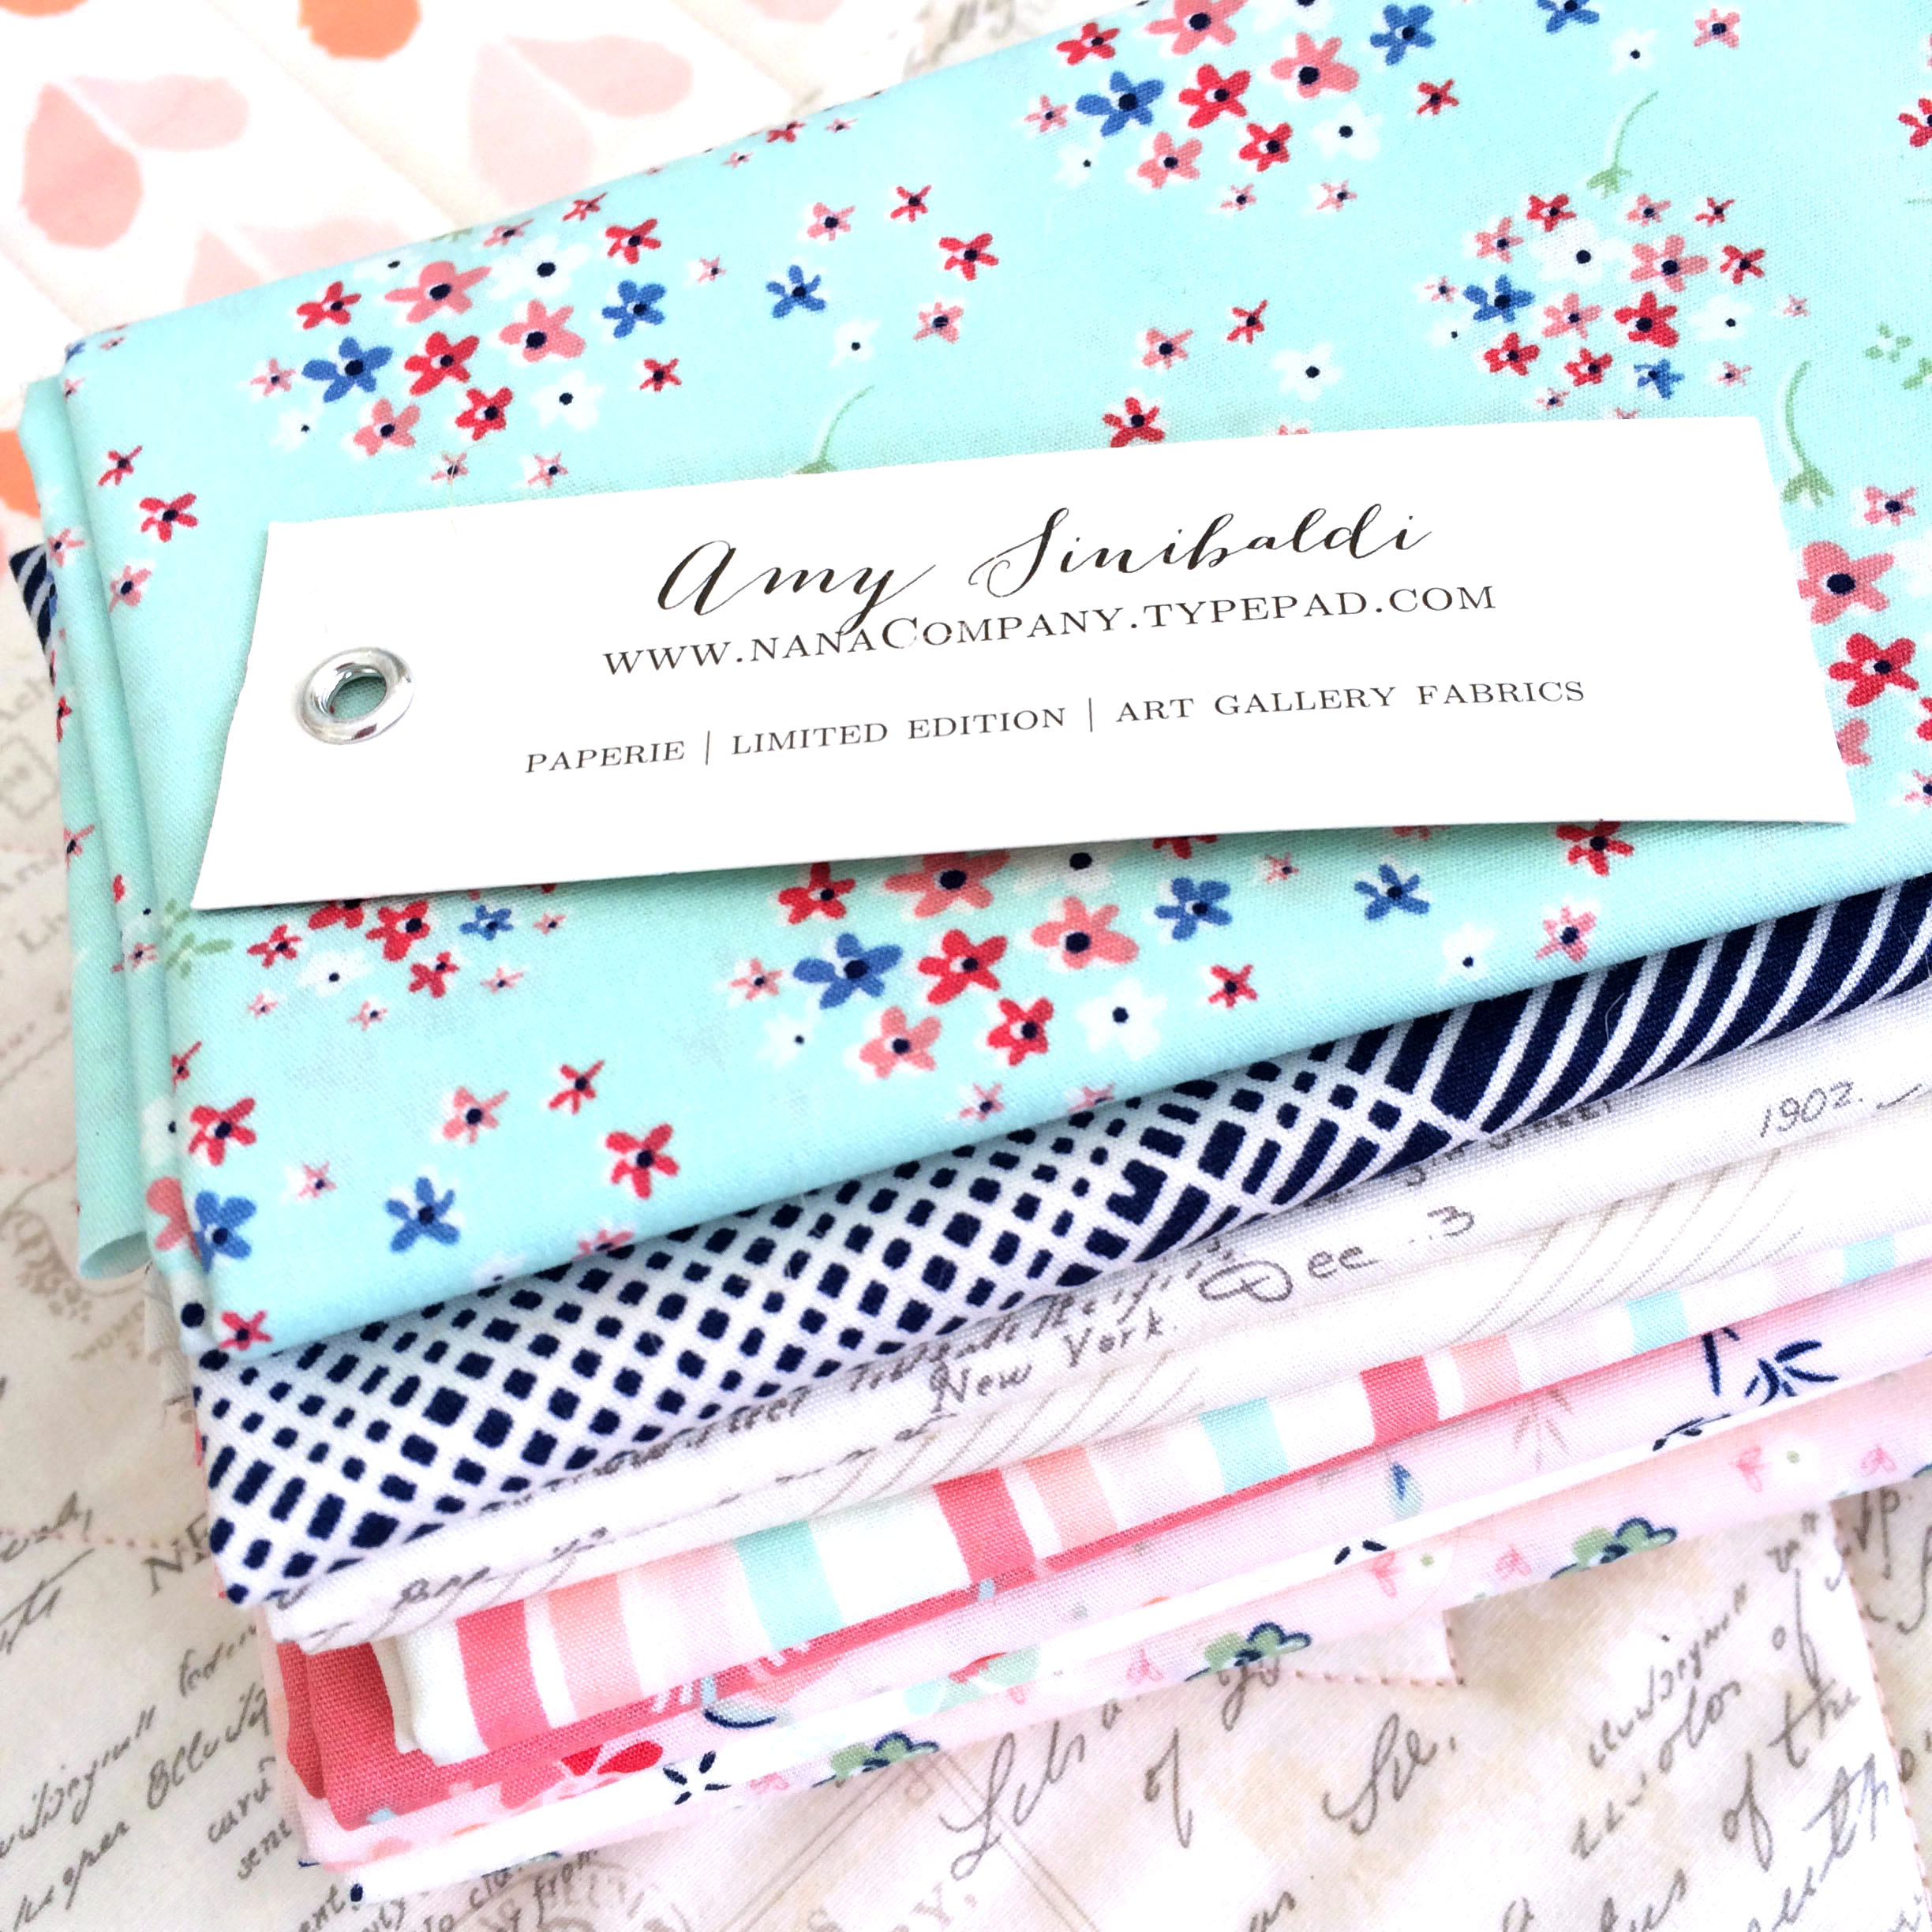
It’s funny how things work out. The way life’s puzzle pieces always end up fitting together. I first designed the Love Story Pattern for my class at the Swapaholics Retreat last September. Amy Sinibaldi was also teaching and her debut fabric line, Paperie, had not yet been announced when I was prepping for the retreat.
Flash forward a few months to 2016. I’m amping up my pattern in preparation for release and Amy invites me to join her Paperie Blog Tour. I think you’ll see that her fabric and this pattern go together like sprinkles and donuts. And not that pink hearts are ONLY for Valentine’s day, but what perfect timing, wouldn’t you say?
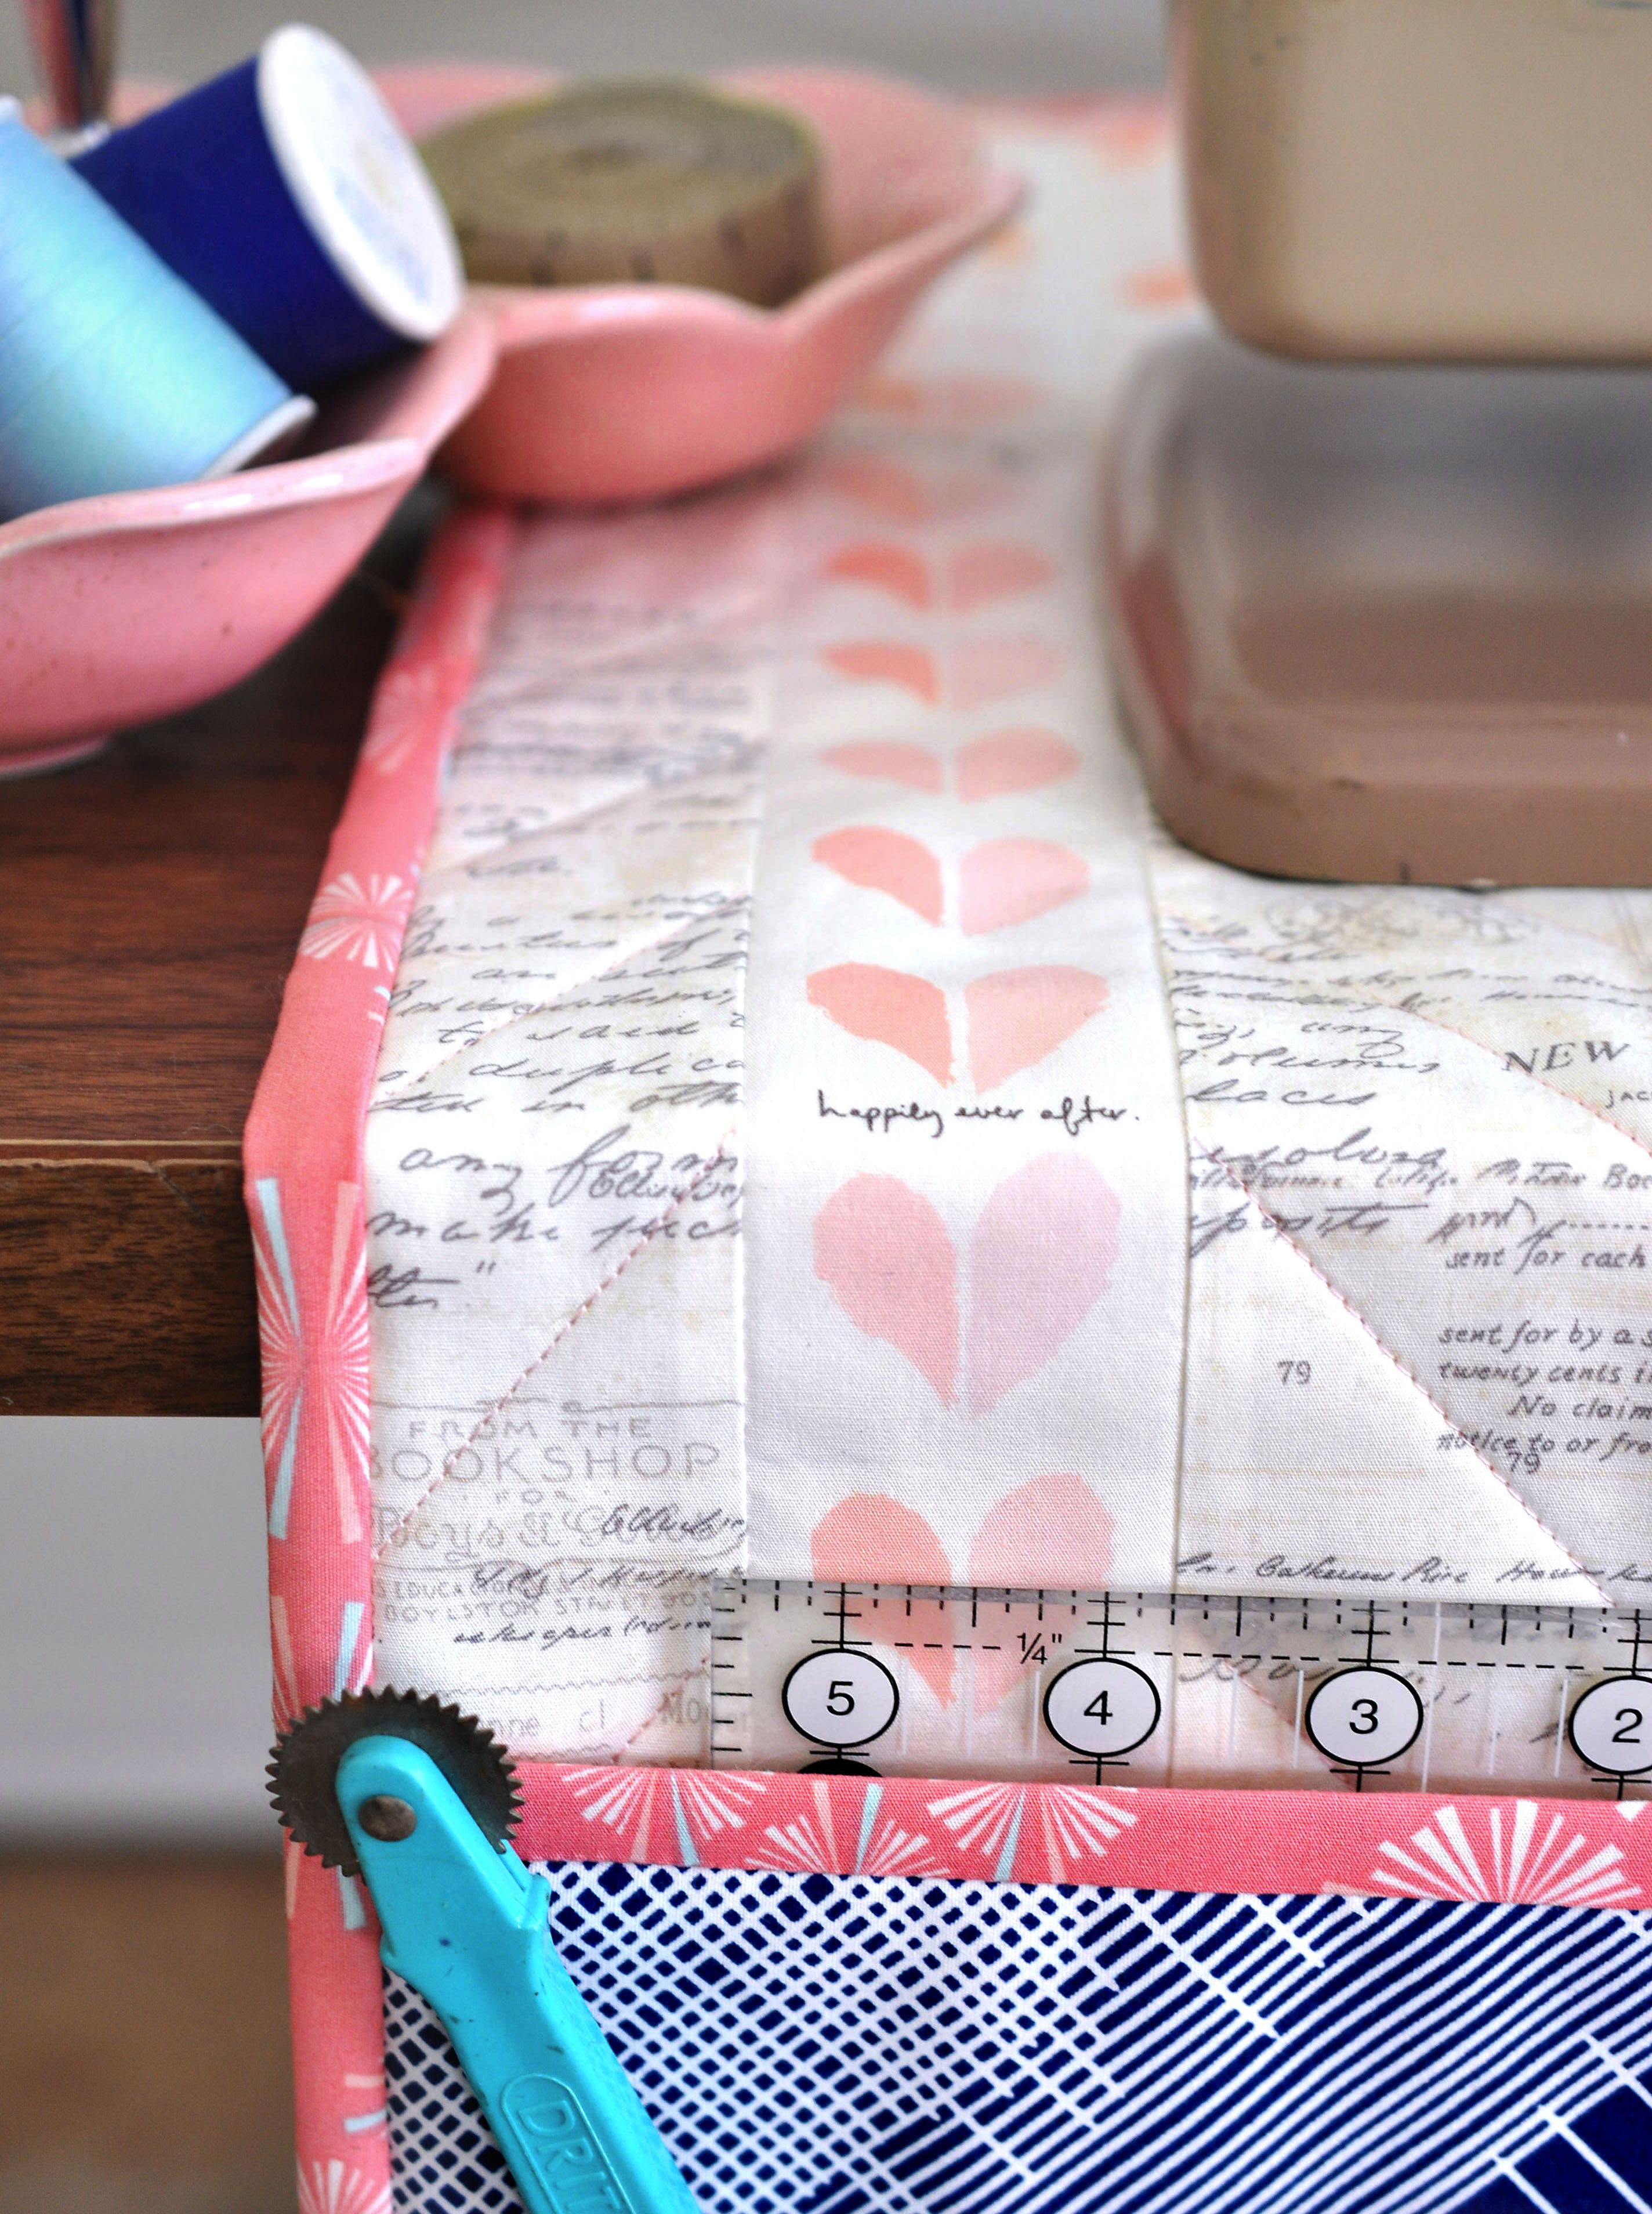
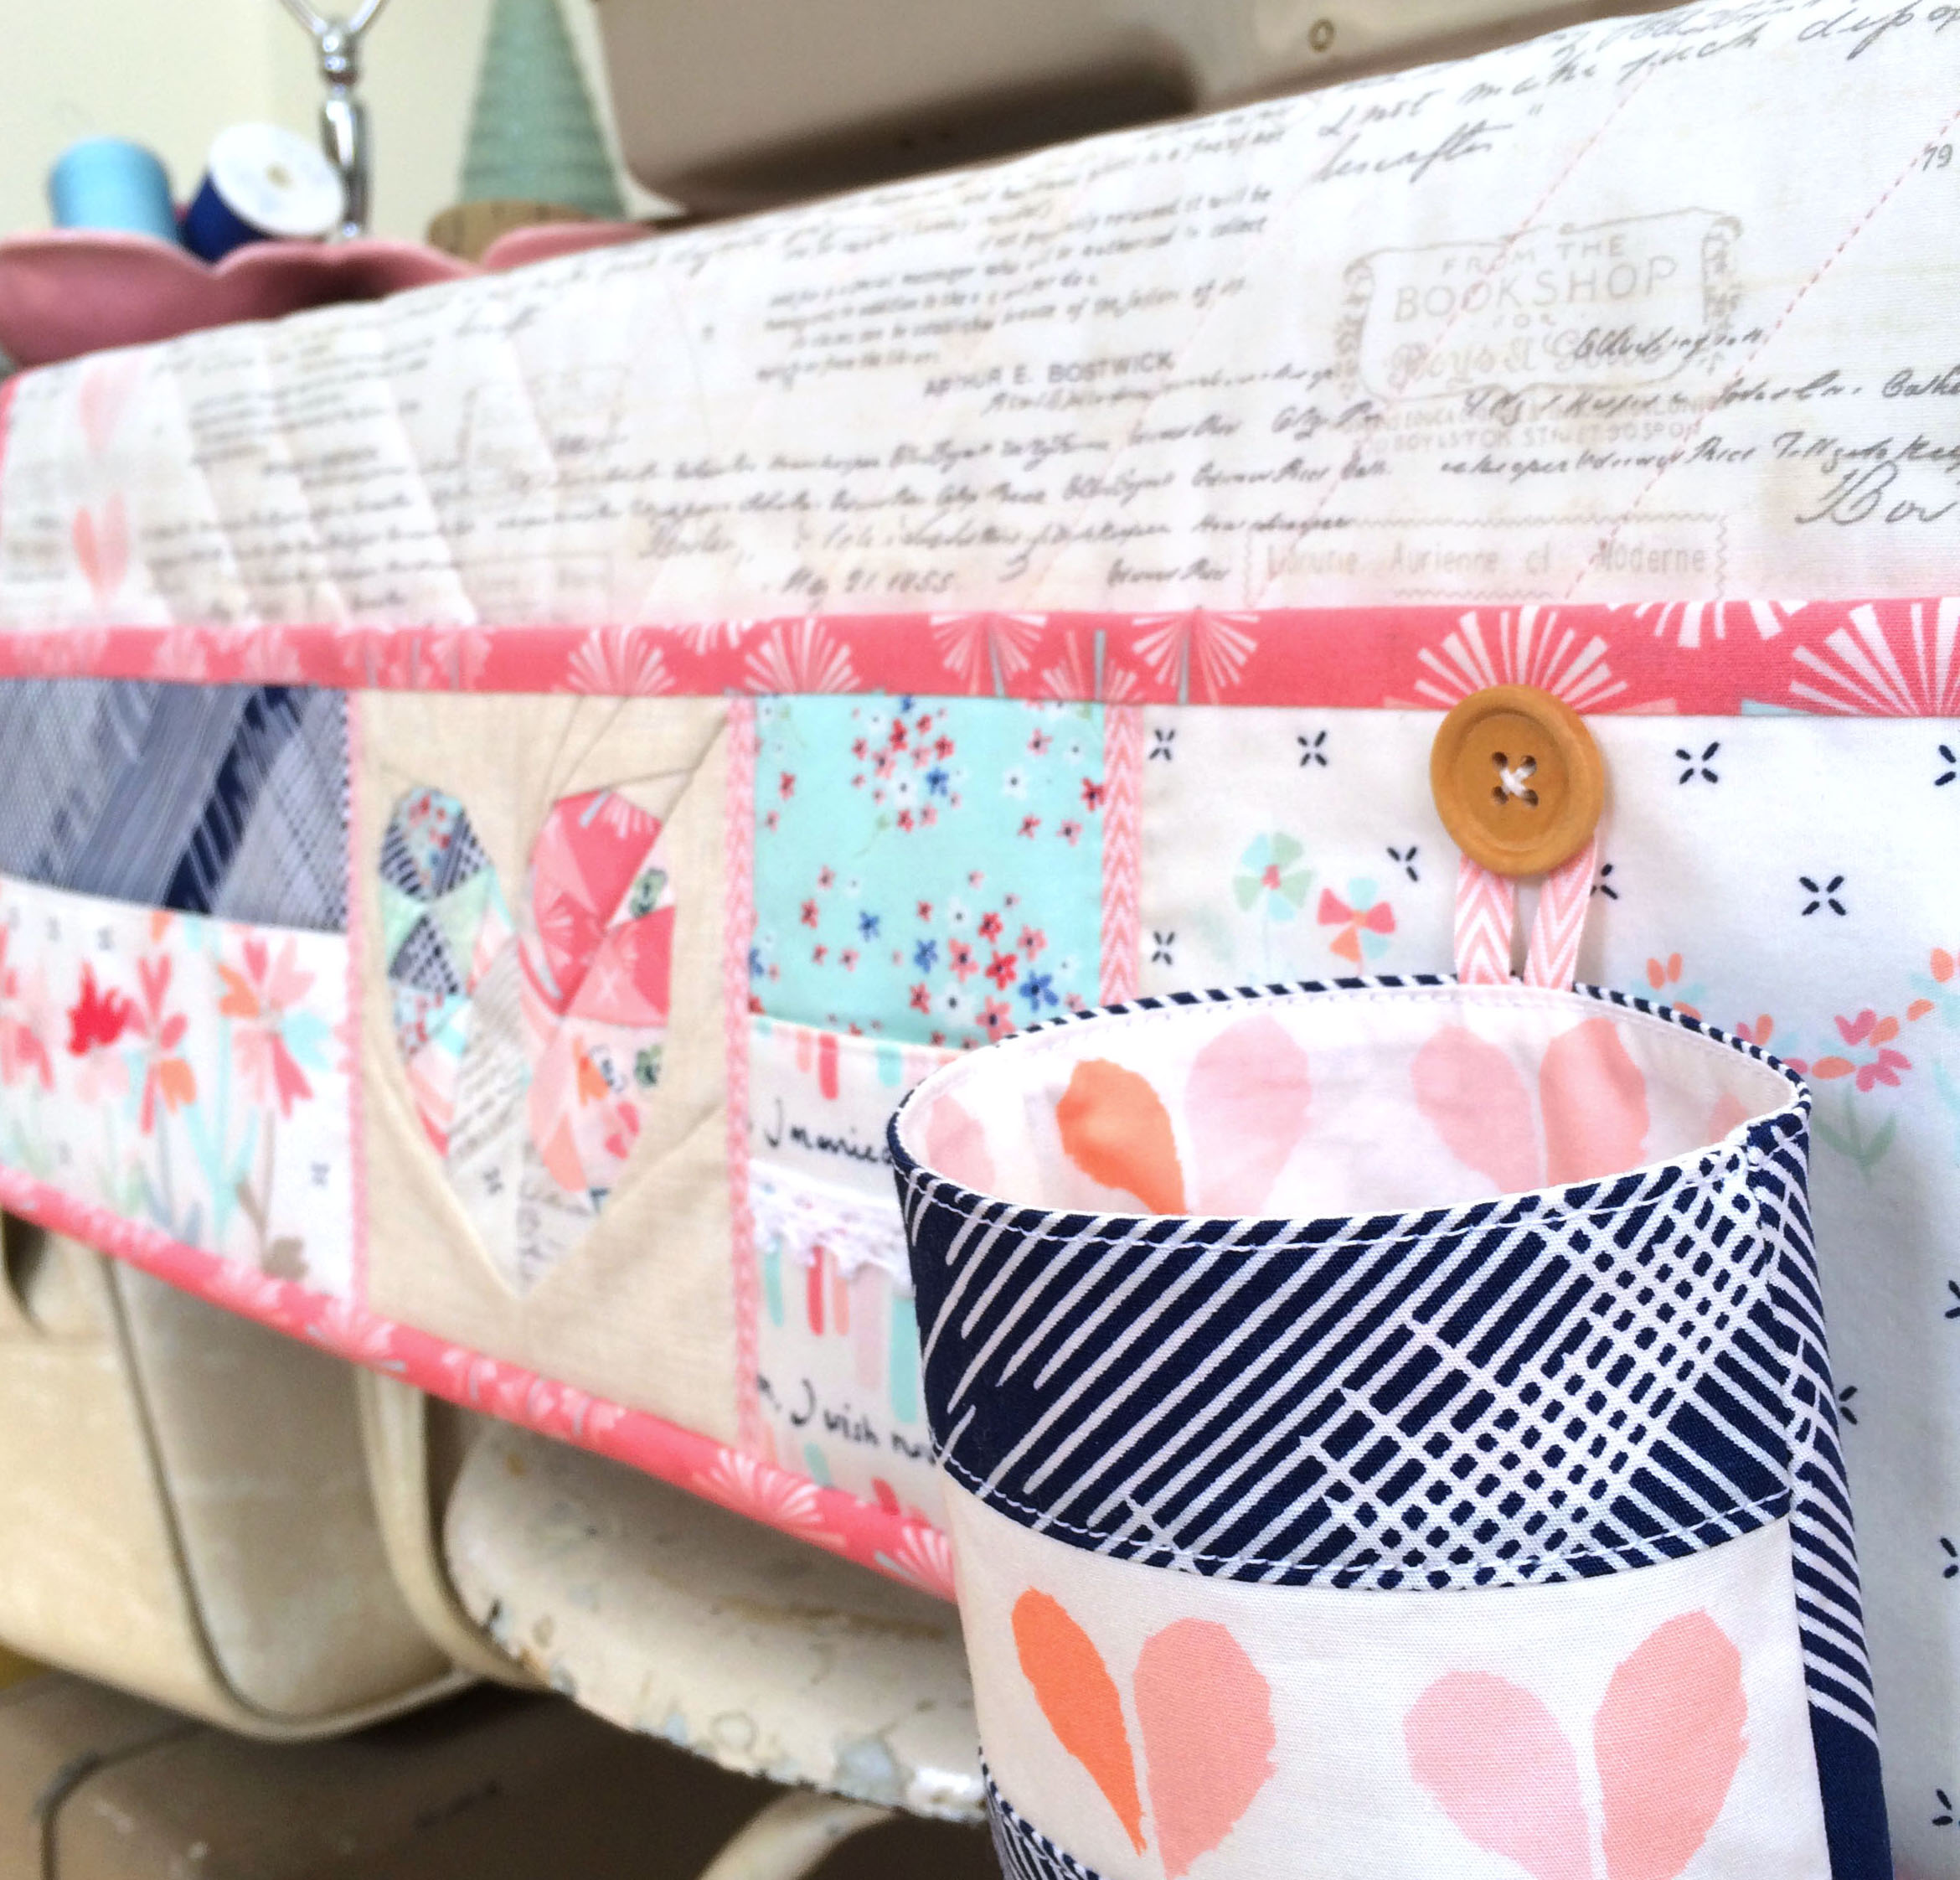
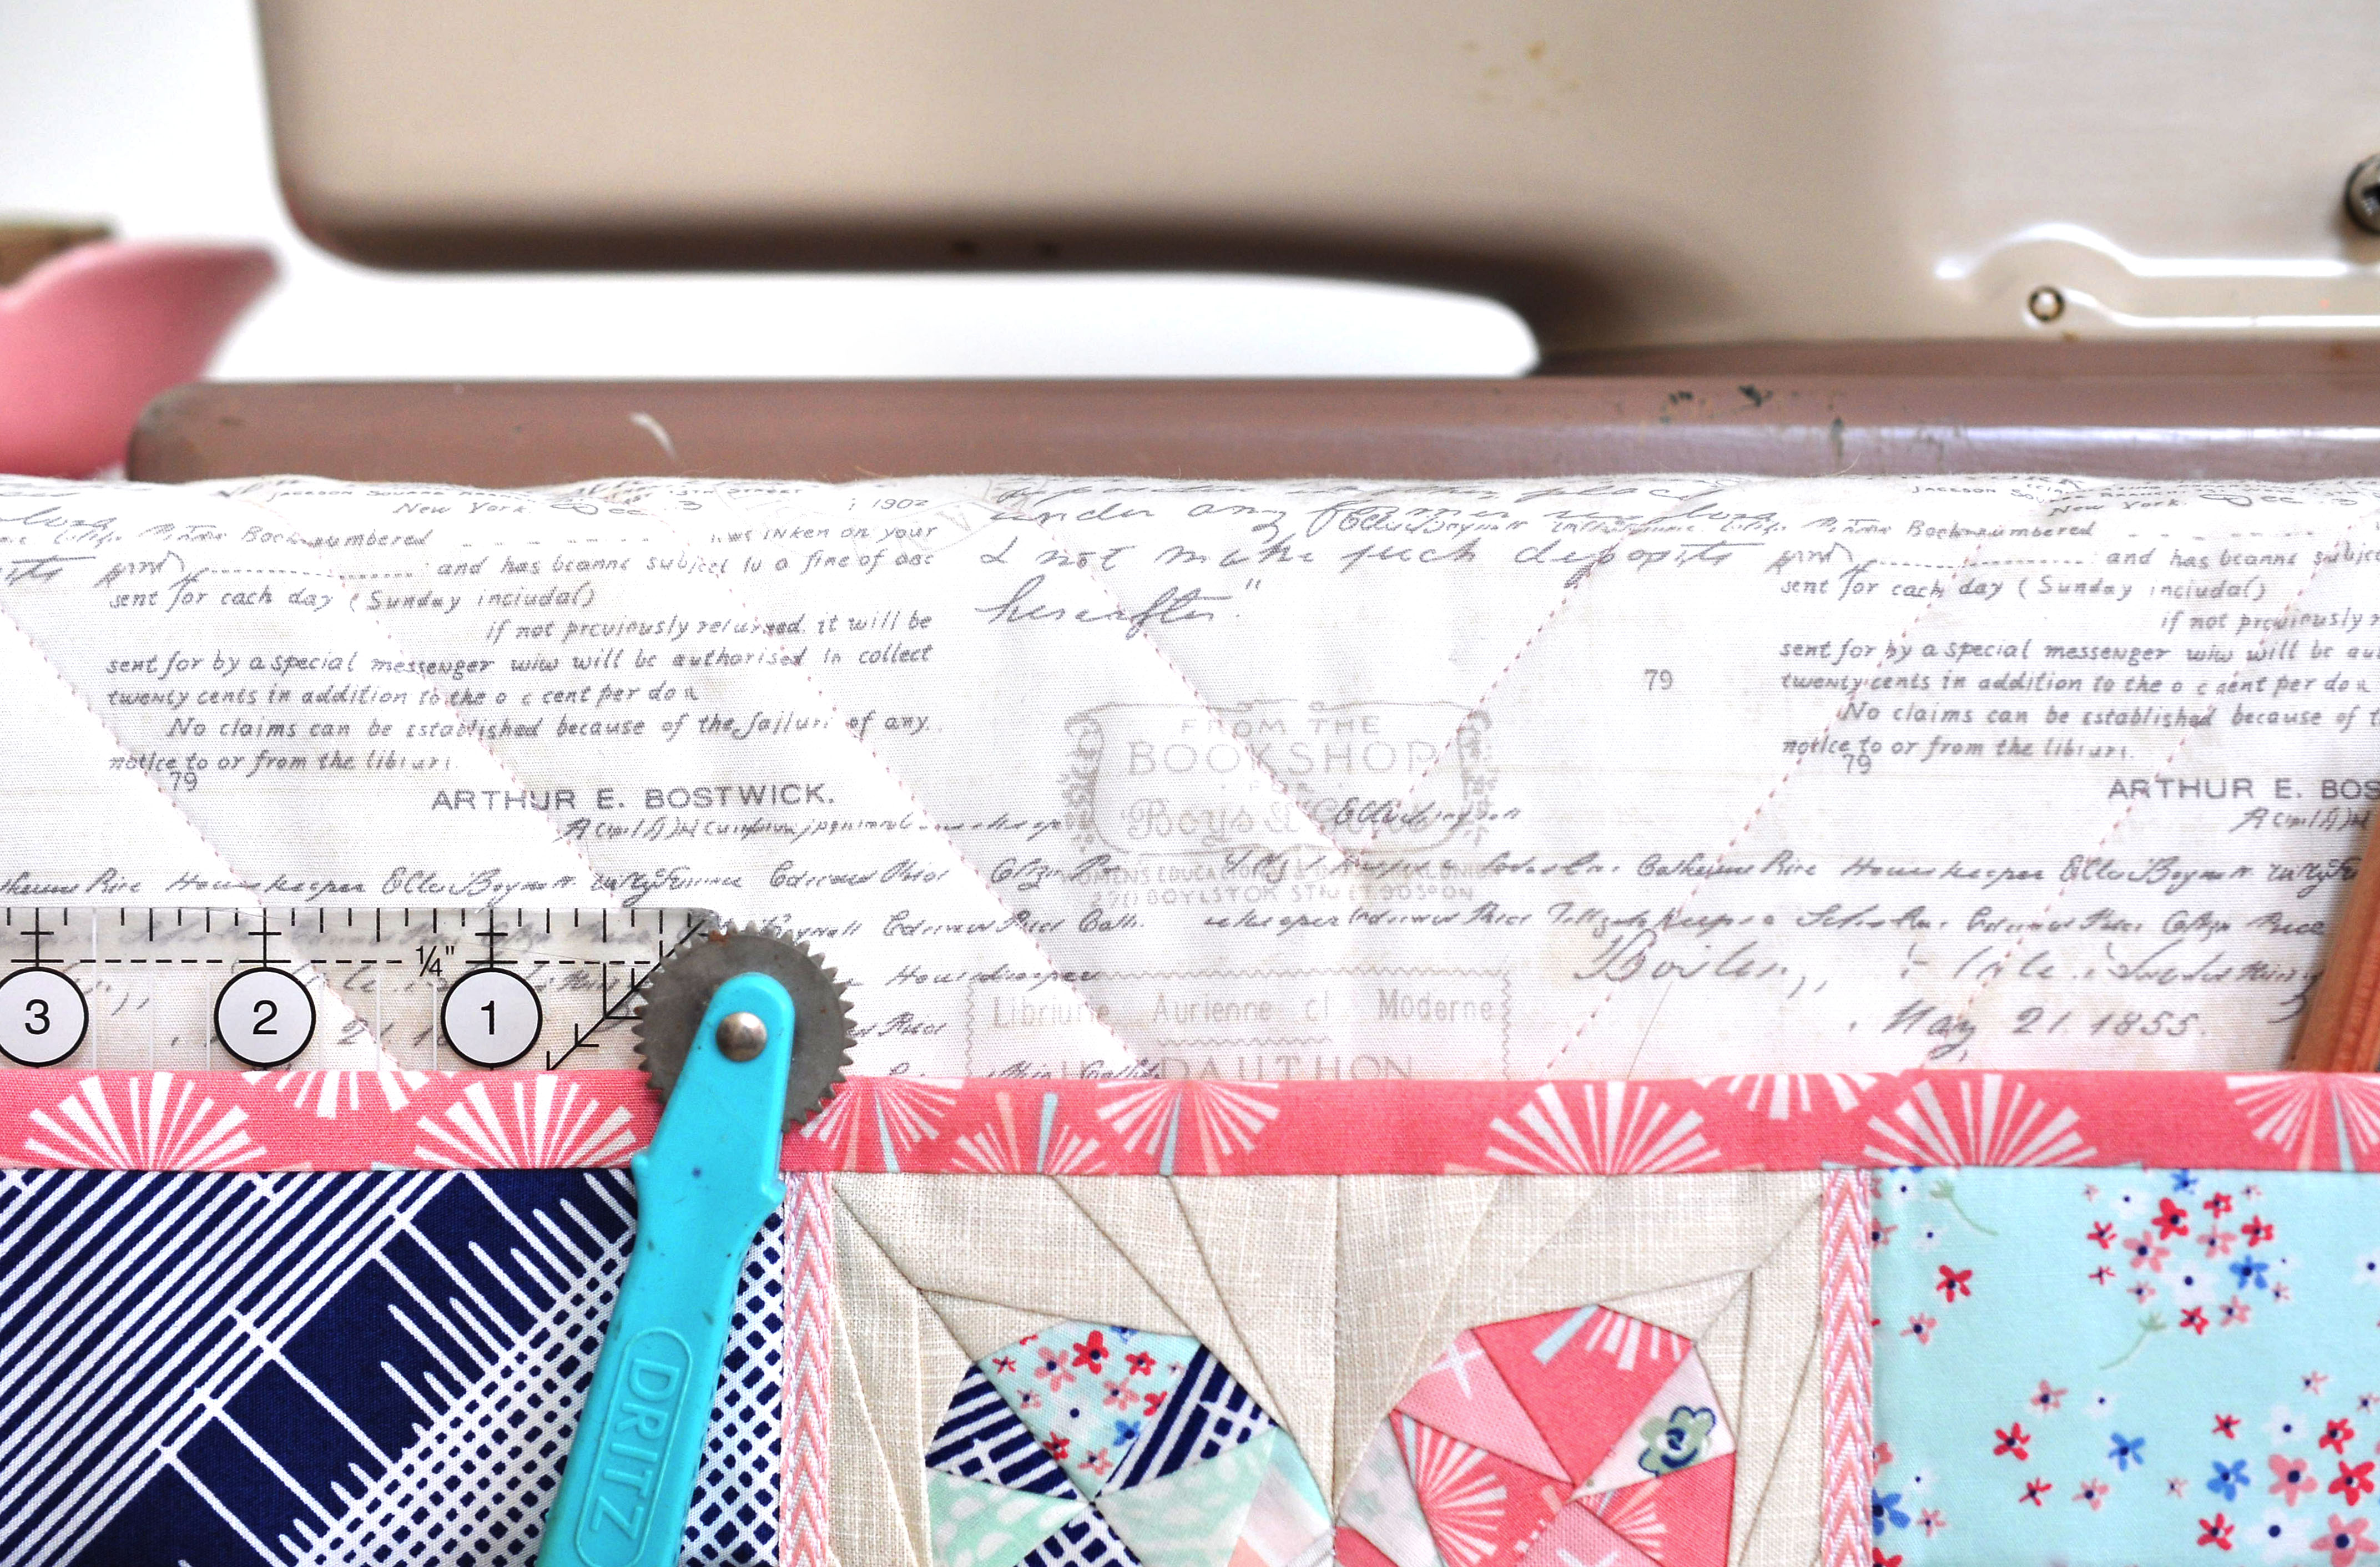
As usual, I had trouble wrangling in all my ideas. I did know for certain that first I wanted to make my Undercover Maker Mat (download the free pattern here) using the 5″ Love Story block in place of the butterfly charm block used on the original. This mat is such a fun and useful project that sews up quick and lets you showcase your favorite fabrics.
I decided to make the secondary pockets on this one in solid prints, rather than the selvedges, so I could really show off the line.
I was torn between using the texty print or the hearts for the main body of the mat, but now that it’s all finished, I don’t know how it was even a question. The text is just perfect and the strip of hearts pieced in just plain makes me happy!
I then carried the heart print over to the removable thread catcher by piecing a strip into the front and using it on the lining. I think it really just balances it all out perfectly.
I used a delicate pink chevron trim on the pocket panel and added a bit of crochet lace on the secondary pocket – in true Amy style!
Thanks to the expert advice my official quilter, Sari, I went with a large chevron pattern for the quilting on the mat body. It echos the seams of the heart block perfectly (thank you very much) and also ties in the trim. I used a pale pink Aurifil thread that gives it just the tiniest hint of color and I couldn’t love it more!
I kept trying to find a way to use this pretty aqua trim on the pocket panel, but it just felt overpowering. It did, however, work out perfectly for the side ties!
So, what do you think? Is this mat your style? I’ll be giving it away on Instagram next week (and a bundle of fabric!), so stay tuned for that!
• • • • • • • • • • • • • • • • • • • •
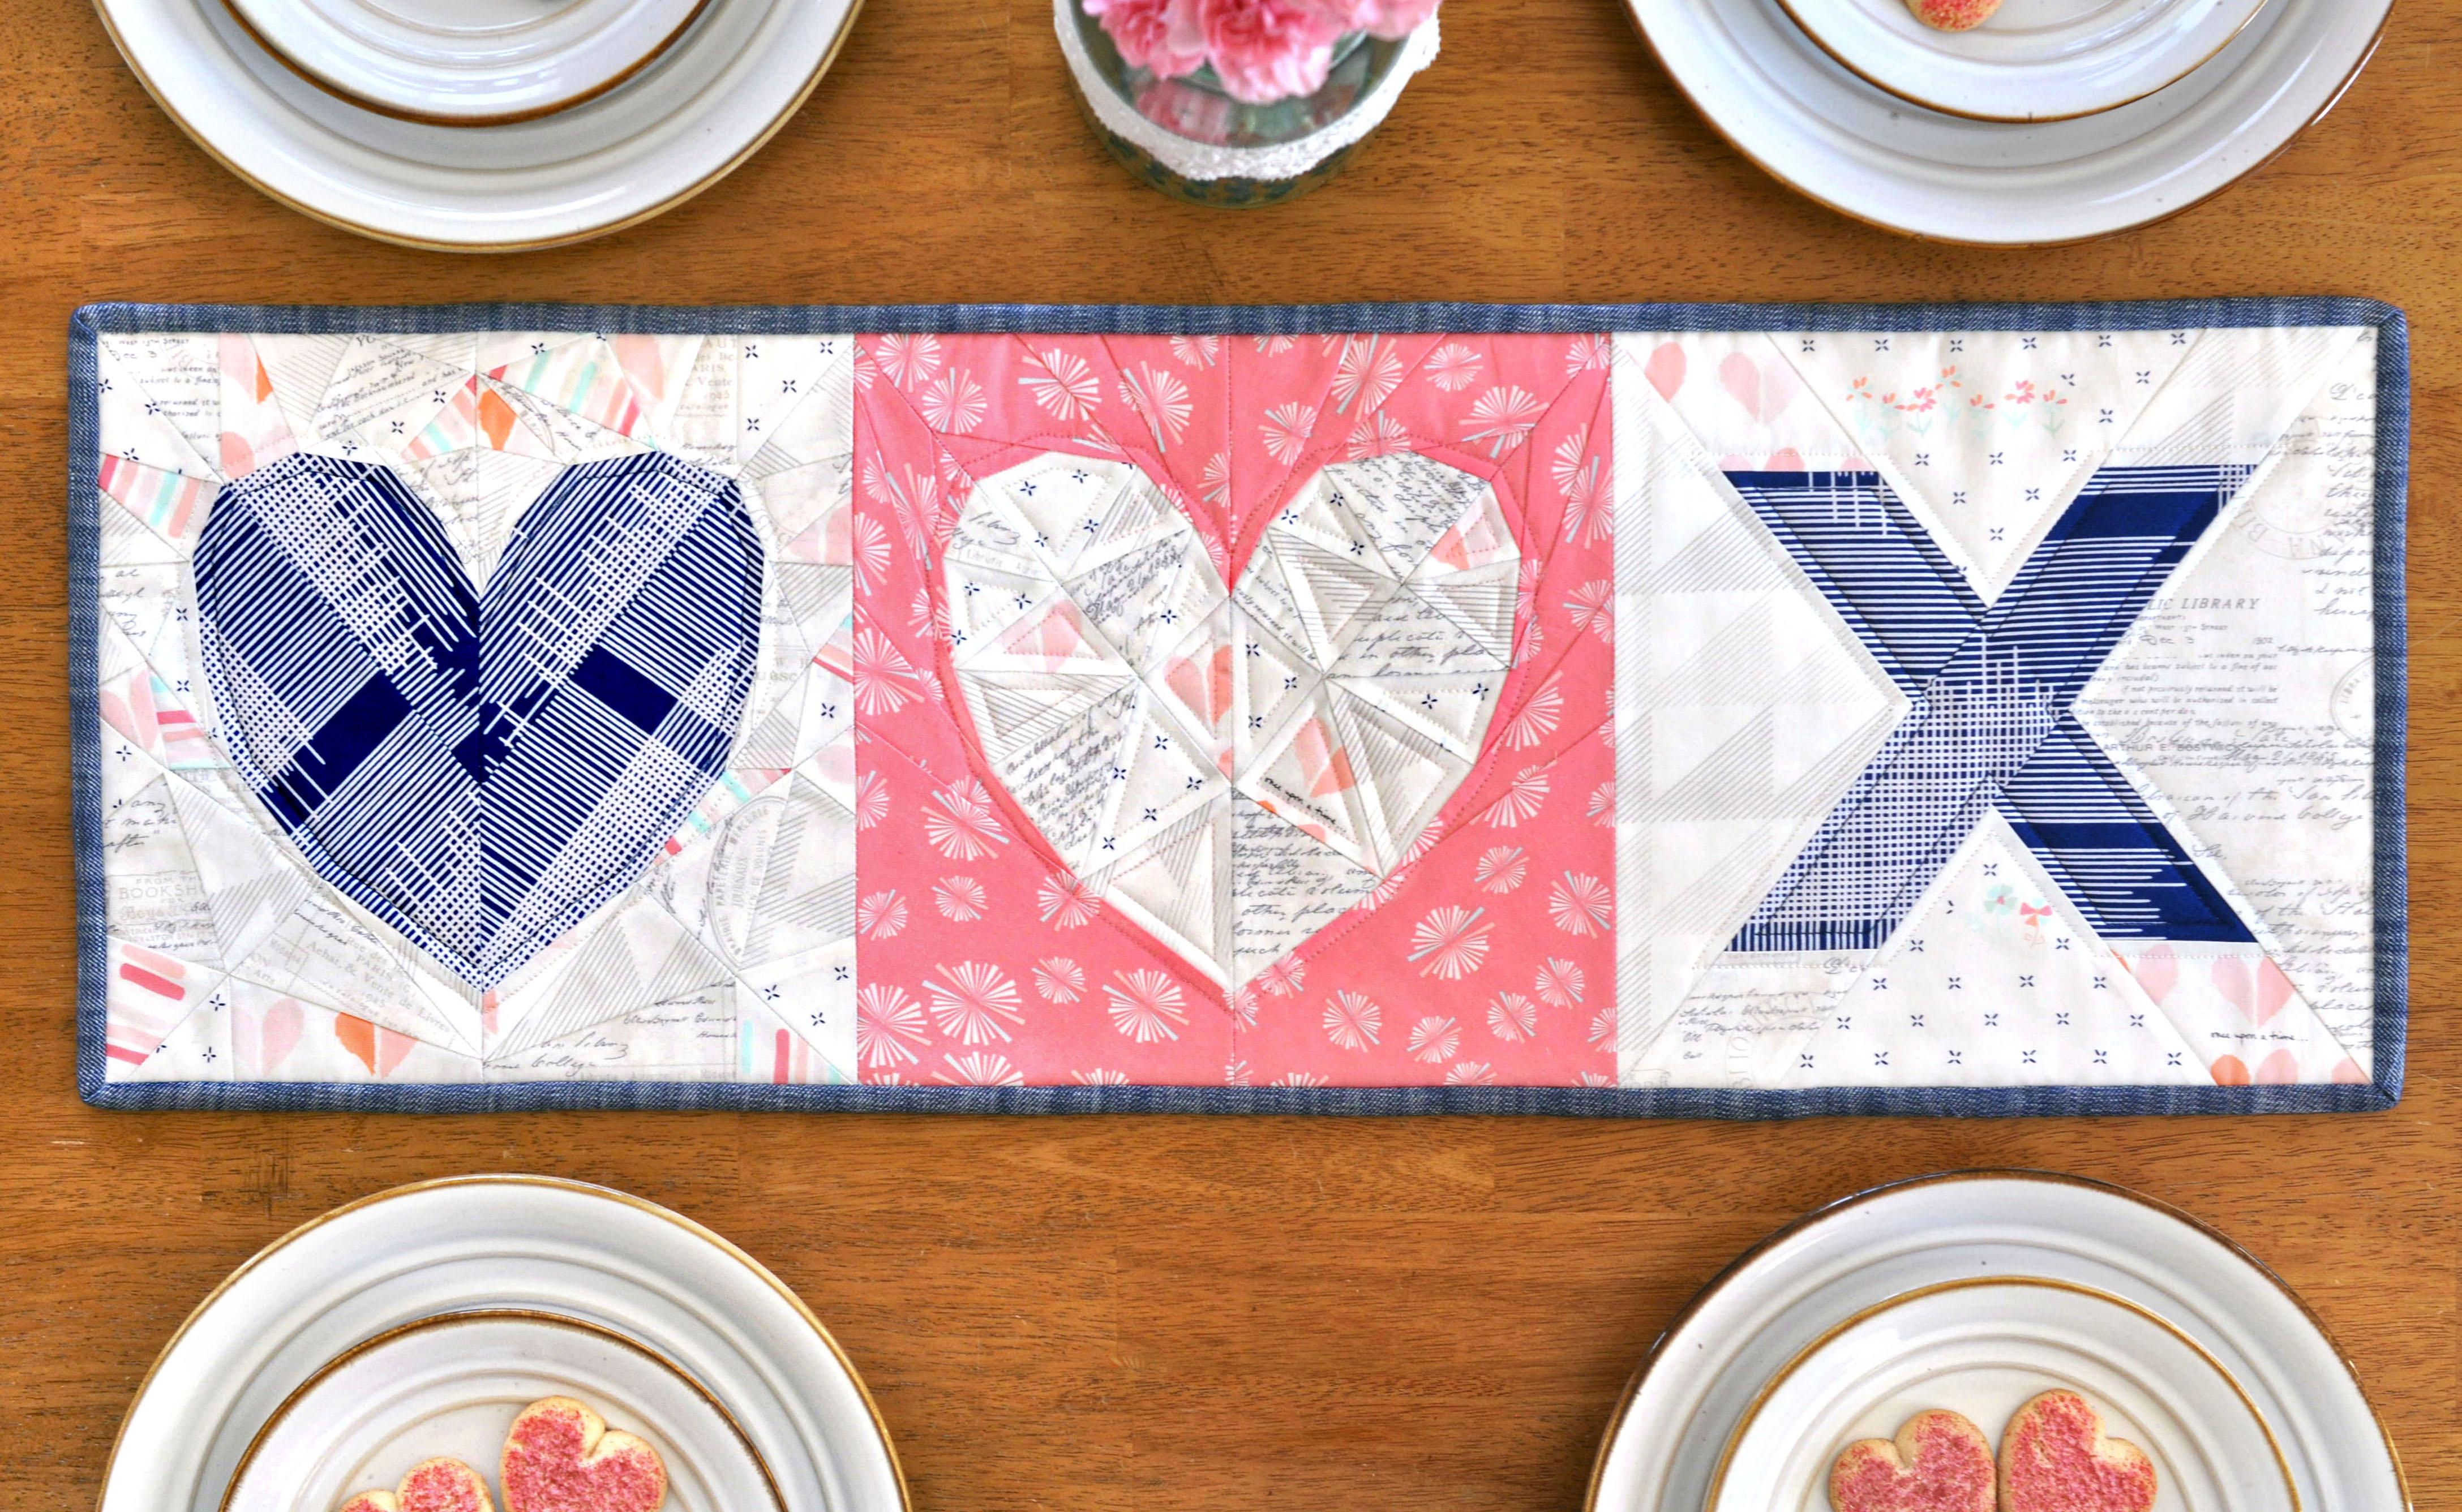
Another idea that I just knew I had to run with was designing an X block that coordinated with Love Story. Like Xs and Os, but with a cute heart instead! I’m calling it Cross my Heart and you can download it for free here.
I thought it would be an adorable mini quilt with 4 blocks in a large square, or as a set of pillows (or a two sided pillow!) or a table runner, which is what I decided to make for my sample project.
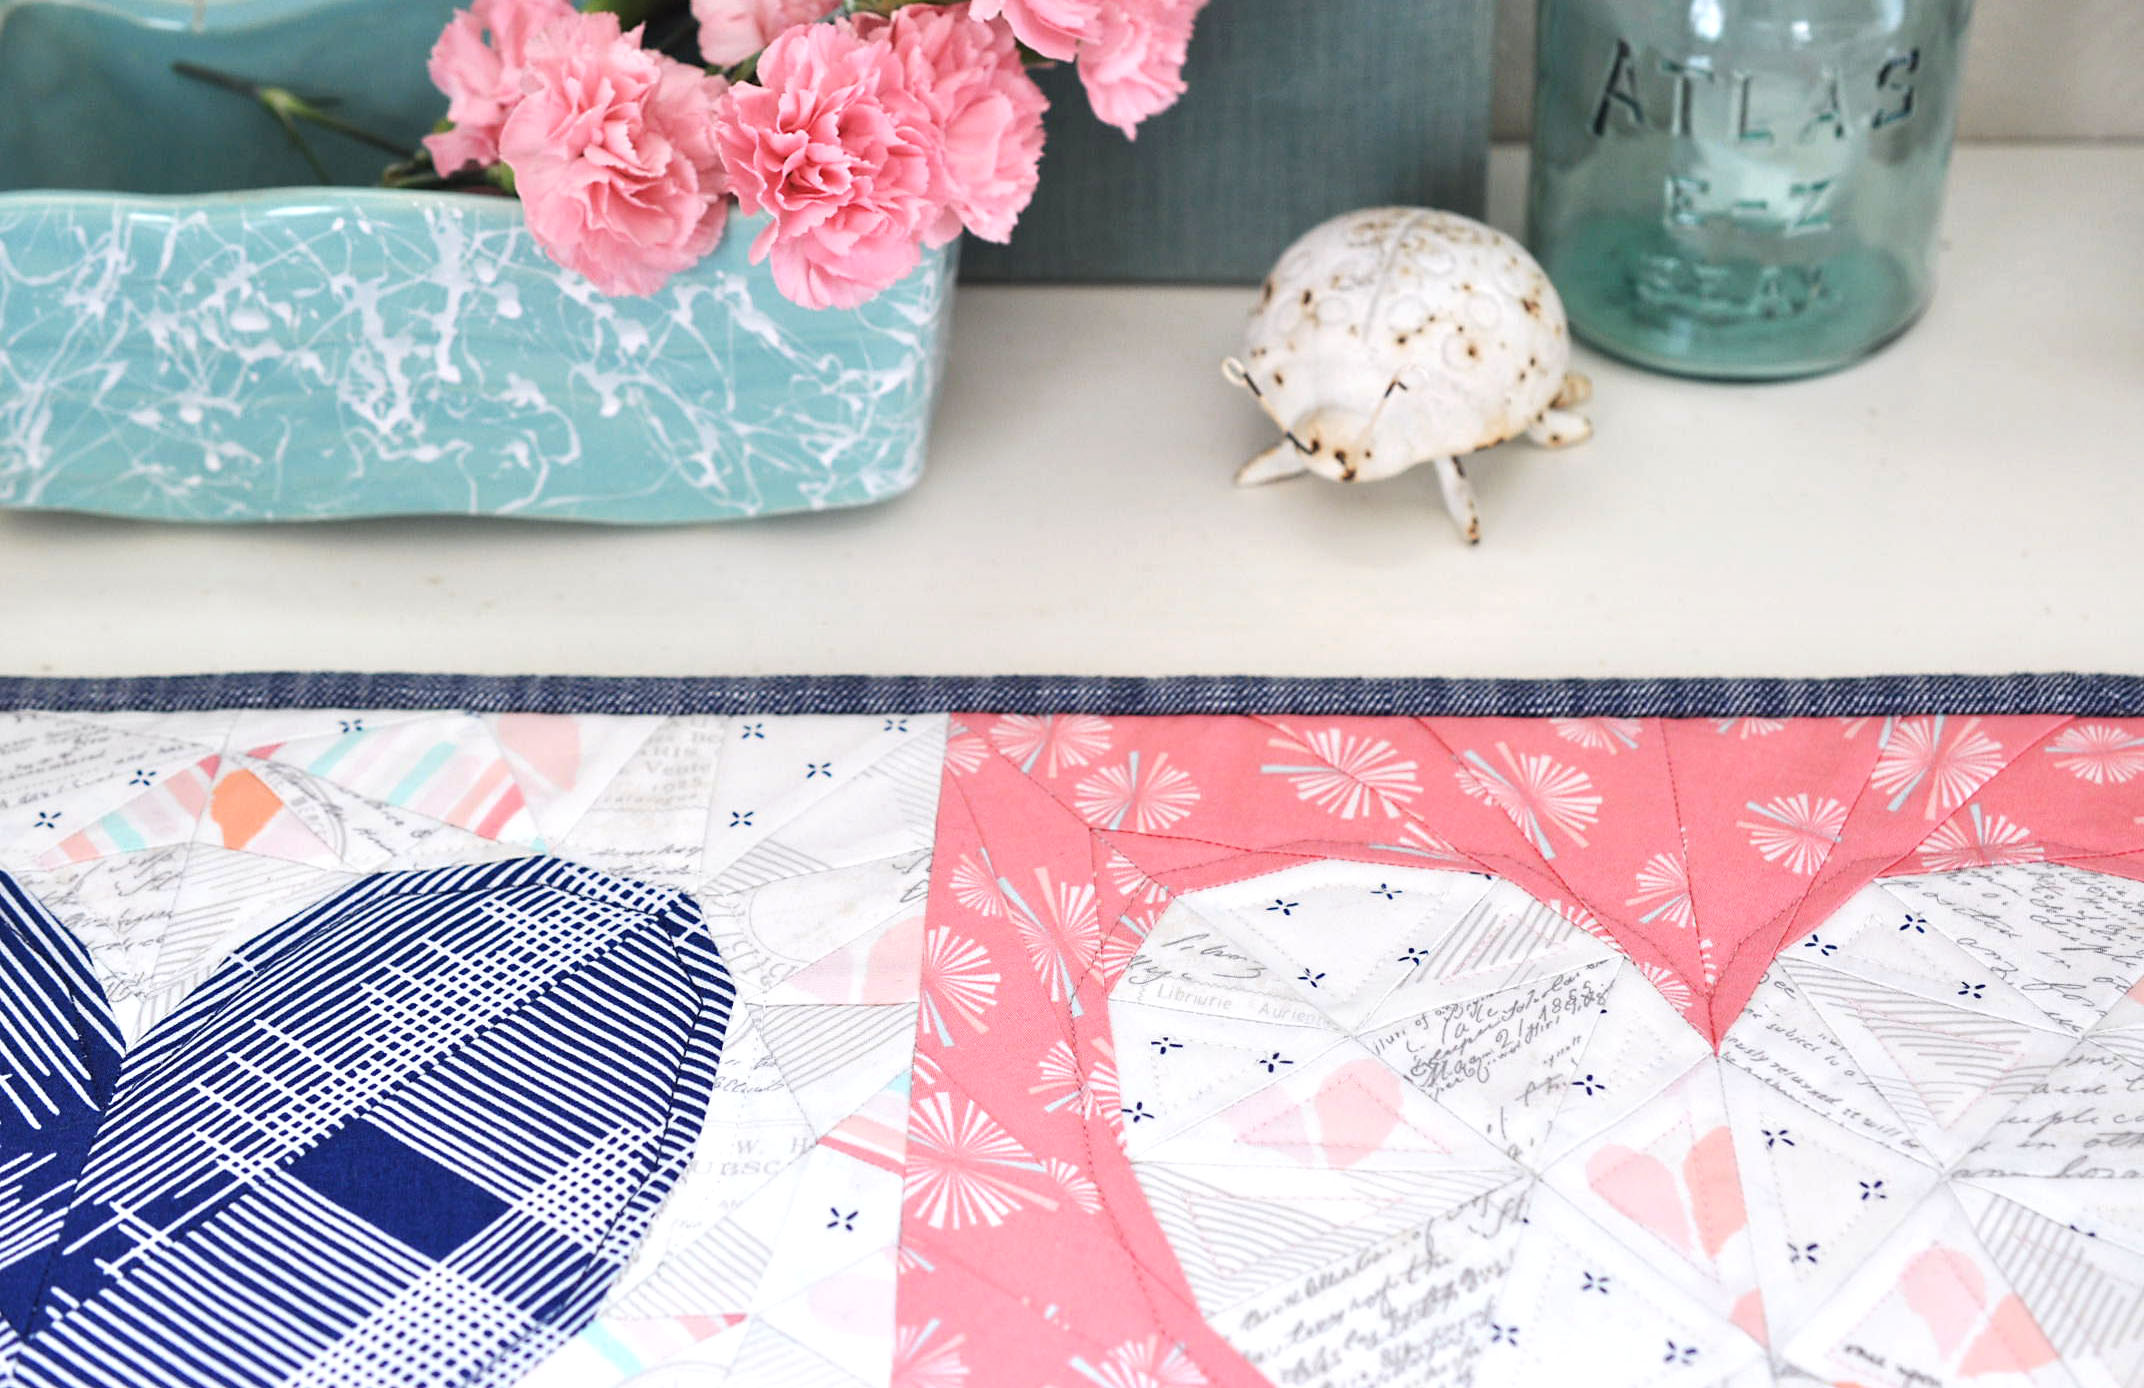
My Love Story pattern includes two block designs – Poetry (the pink block) and Prose (the navy and white block). I wanted to showcase them both, along with the X, so I thought a little asymmetry would be fun! I used the 10″ blocks here, and the X pattern also includes a 5″ block (how about a set of heart and X coasters?!).
I love how striking the bold pops of pink and navy in this line are mixed with all the beautiful, soft low volumes. By random chance, I had a piece of my favorite chambray denim on my cutting table when I was feverishly trying to decide what to bind my runner with. It was a match made in heaven! The denim pairs so amazingly with this line, it started my mind racing with quilt ideas using Paperie and the new Art Gallery denim line that is coming out soon. SO EXCITED!
I’ll be sharing some design ideas and other fun Love Story projects (including a lap quilt pattern) here and on my Instagram feed over the next couple weeks. You can also check the hashtags #lovestorypattern and #crossmyheartpattern for more inspiration. As always, I can’t wait to see what you all create!
Be sure to check out all the other stops on the Paperie Blog Tour for all sorts of swoon worthy projects! You can find links and photos in Amy’s instagram feed and on her blog.
• • • • • • • • • • • • • • • • • • • •
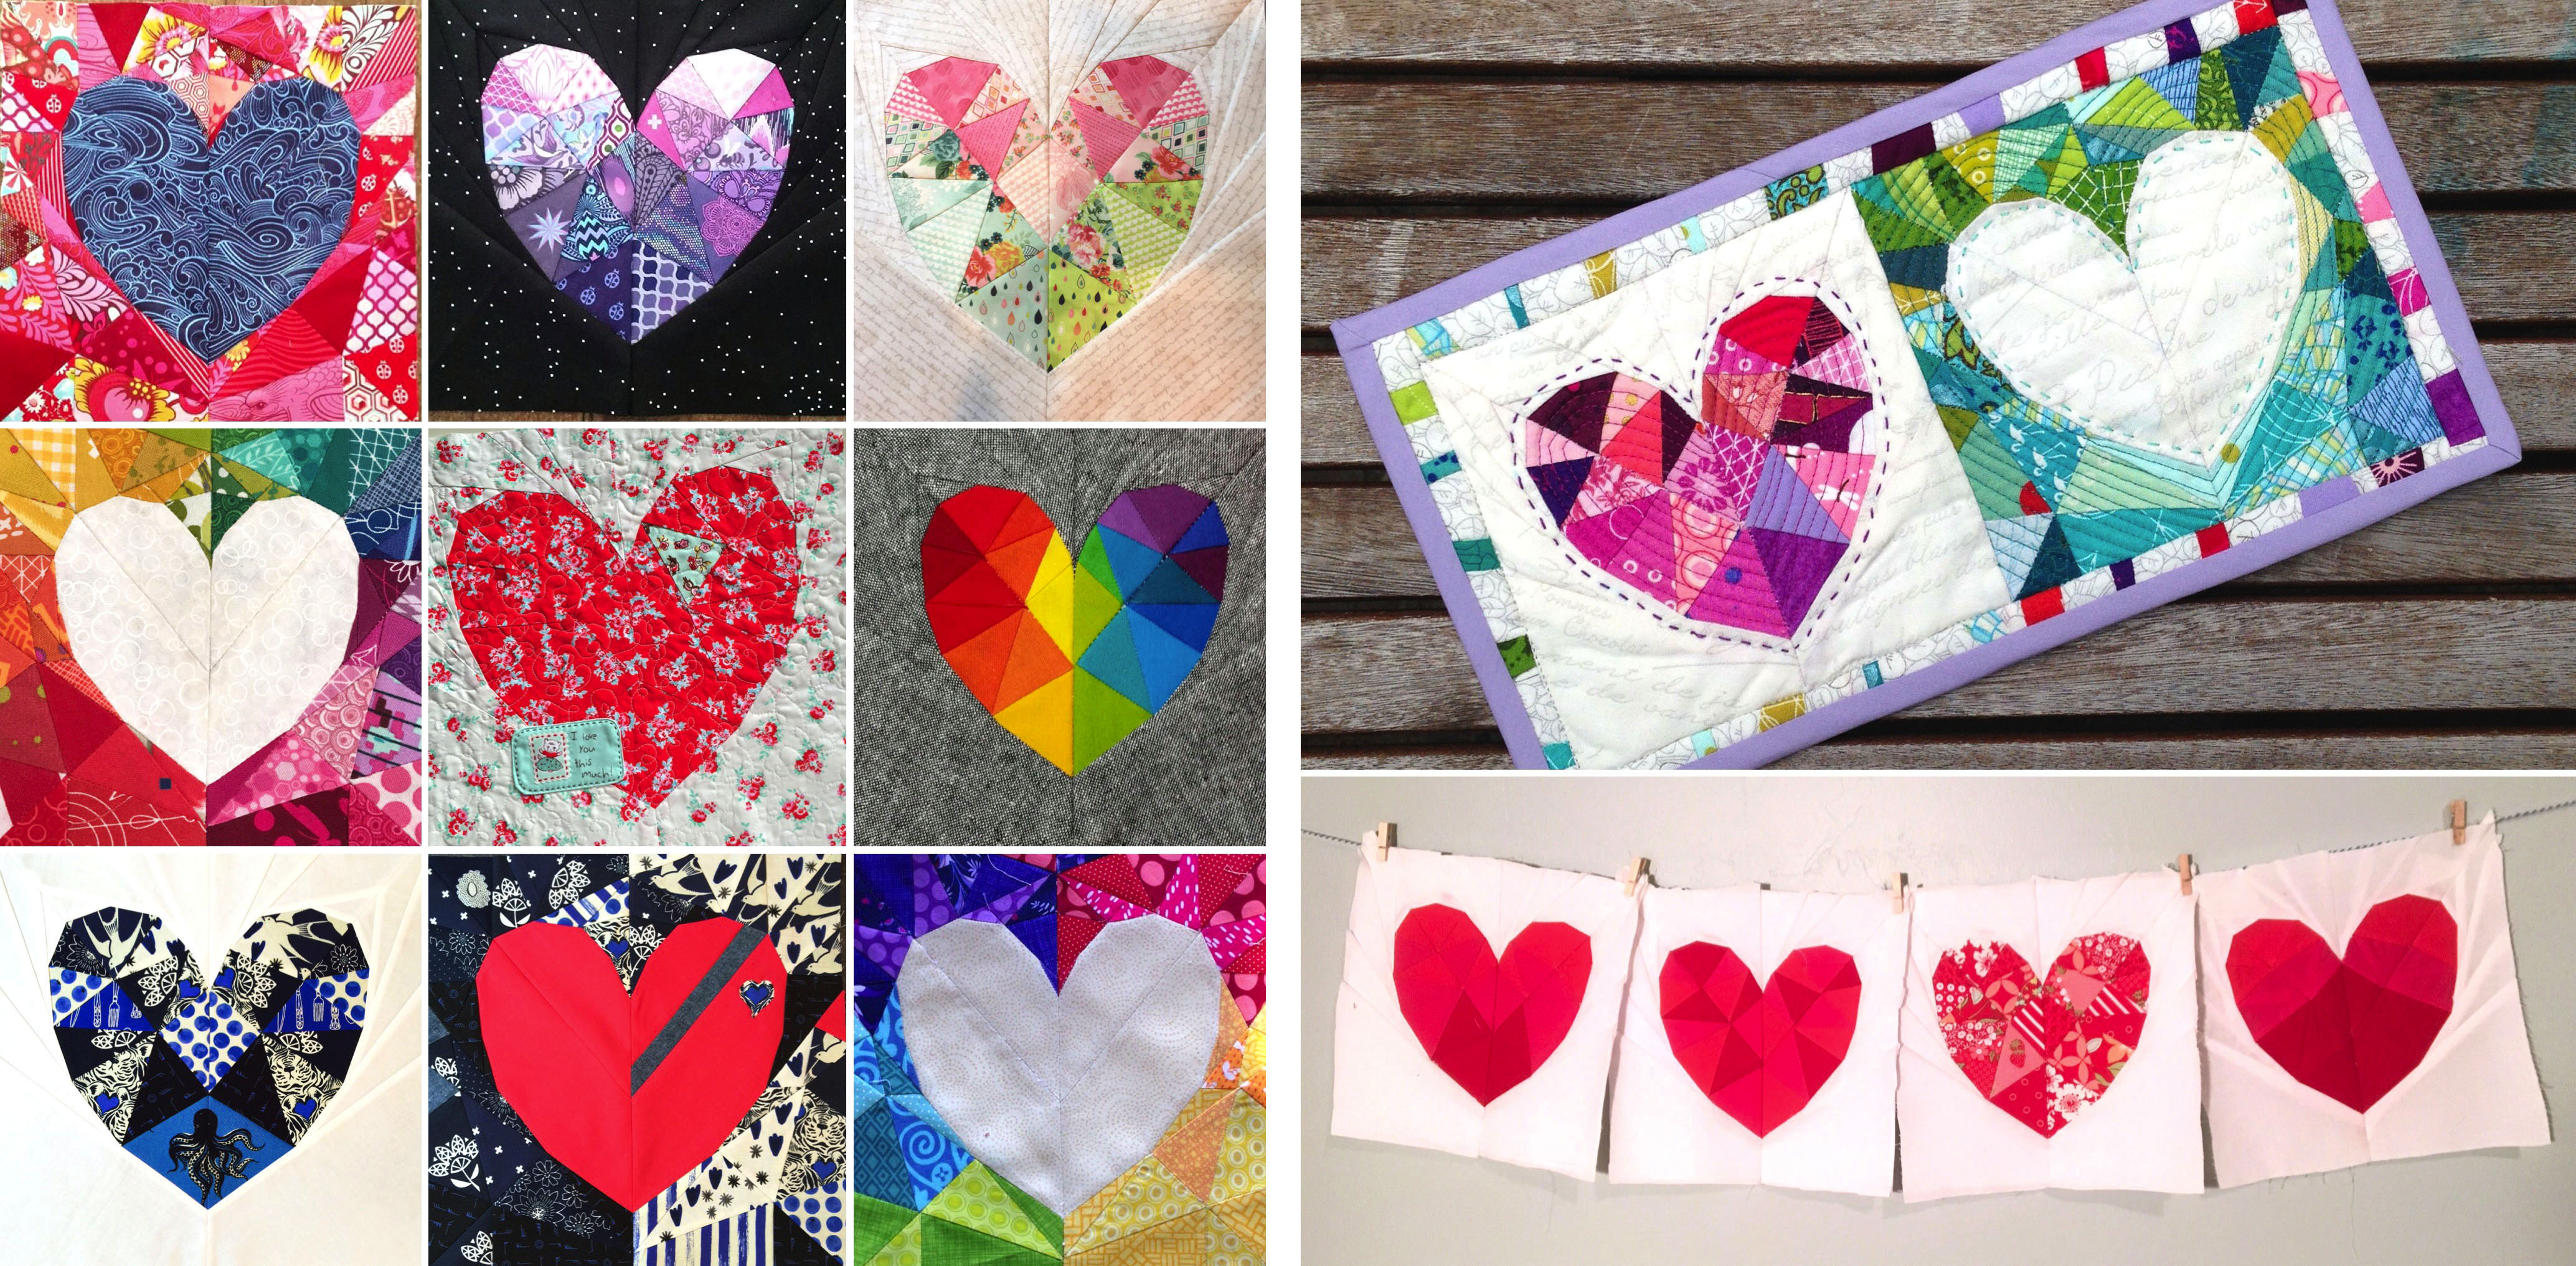
Now I am in desperate need of a nap! So I will leave you with some more eye candy inspiration! Above is the original Love Story block as it was designed to fit my flex frame pouch project for the retreat.
For the pattern release, I squared off the block and made a coordinating reverse design where the heart is solid and the background is faceted instead. I love the possibilities this opens up for color play and layout ideas!
Here are just a few blocks that my amazing testers sewed up. I’ll be sharing their finished projects soon! You can pick up a copy of the pattern on sale for $6.50 now thru Valentine’s Day in my Payhip, Etsy or Craftsy shops.
When Sari and I were invited to join Katarina Rocella’s Avantgarde Blog Tour, we had just wrapped our Sariella Retreat, Western Edition, where we started working on our first collaborative patterns, so we knew this was a perfect opportunity to work on some more!
We were both in love with the bold, bright colors and textural patterns in the line and the Bauhaus Dissection print was our favorite, so we decided to use it as inspiration for designing the patterns.
The next question was what to make… lap quilt, minis, pillows? In the end, we decided on all, of course! I have come to adopt my husband’s motto, anything worth doing is worth overdoing. I mean, he has a point…
After days (literally) of sketching, texting, facetime and phone calls, we had our plan. We both love versatility, so that’s what won in the end. We created a collection of panels, or blocks, that would go together into a beautiful (and customizable) lap quilt, but could each also be used independently to create mini quilts and pillows. Think of it as a create your own adventure pattern! And because we are mild overachievers and can’t contain all our ideas, we created an additional separate mini quilt pattern, too. Together, we’re calling it the Neo Quilt Series (#NeoQuiltSeries).
I’m so excited to finally share these patterns that we’ve been feverishly working on for weeks! Sari will be sharing the full quilt design on her blog tomorrow, but today I’m showing you some of the mini quilt and pillow patterns. They will all be headed to testers shortly and will be available in March, but we also have a free one for you today! And it is where I will begin…
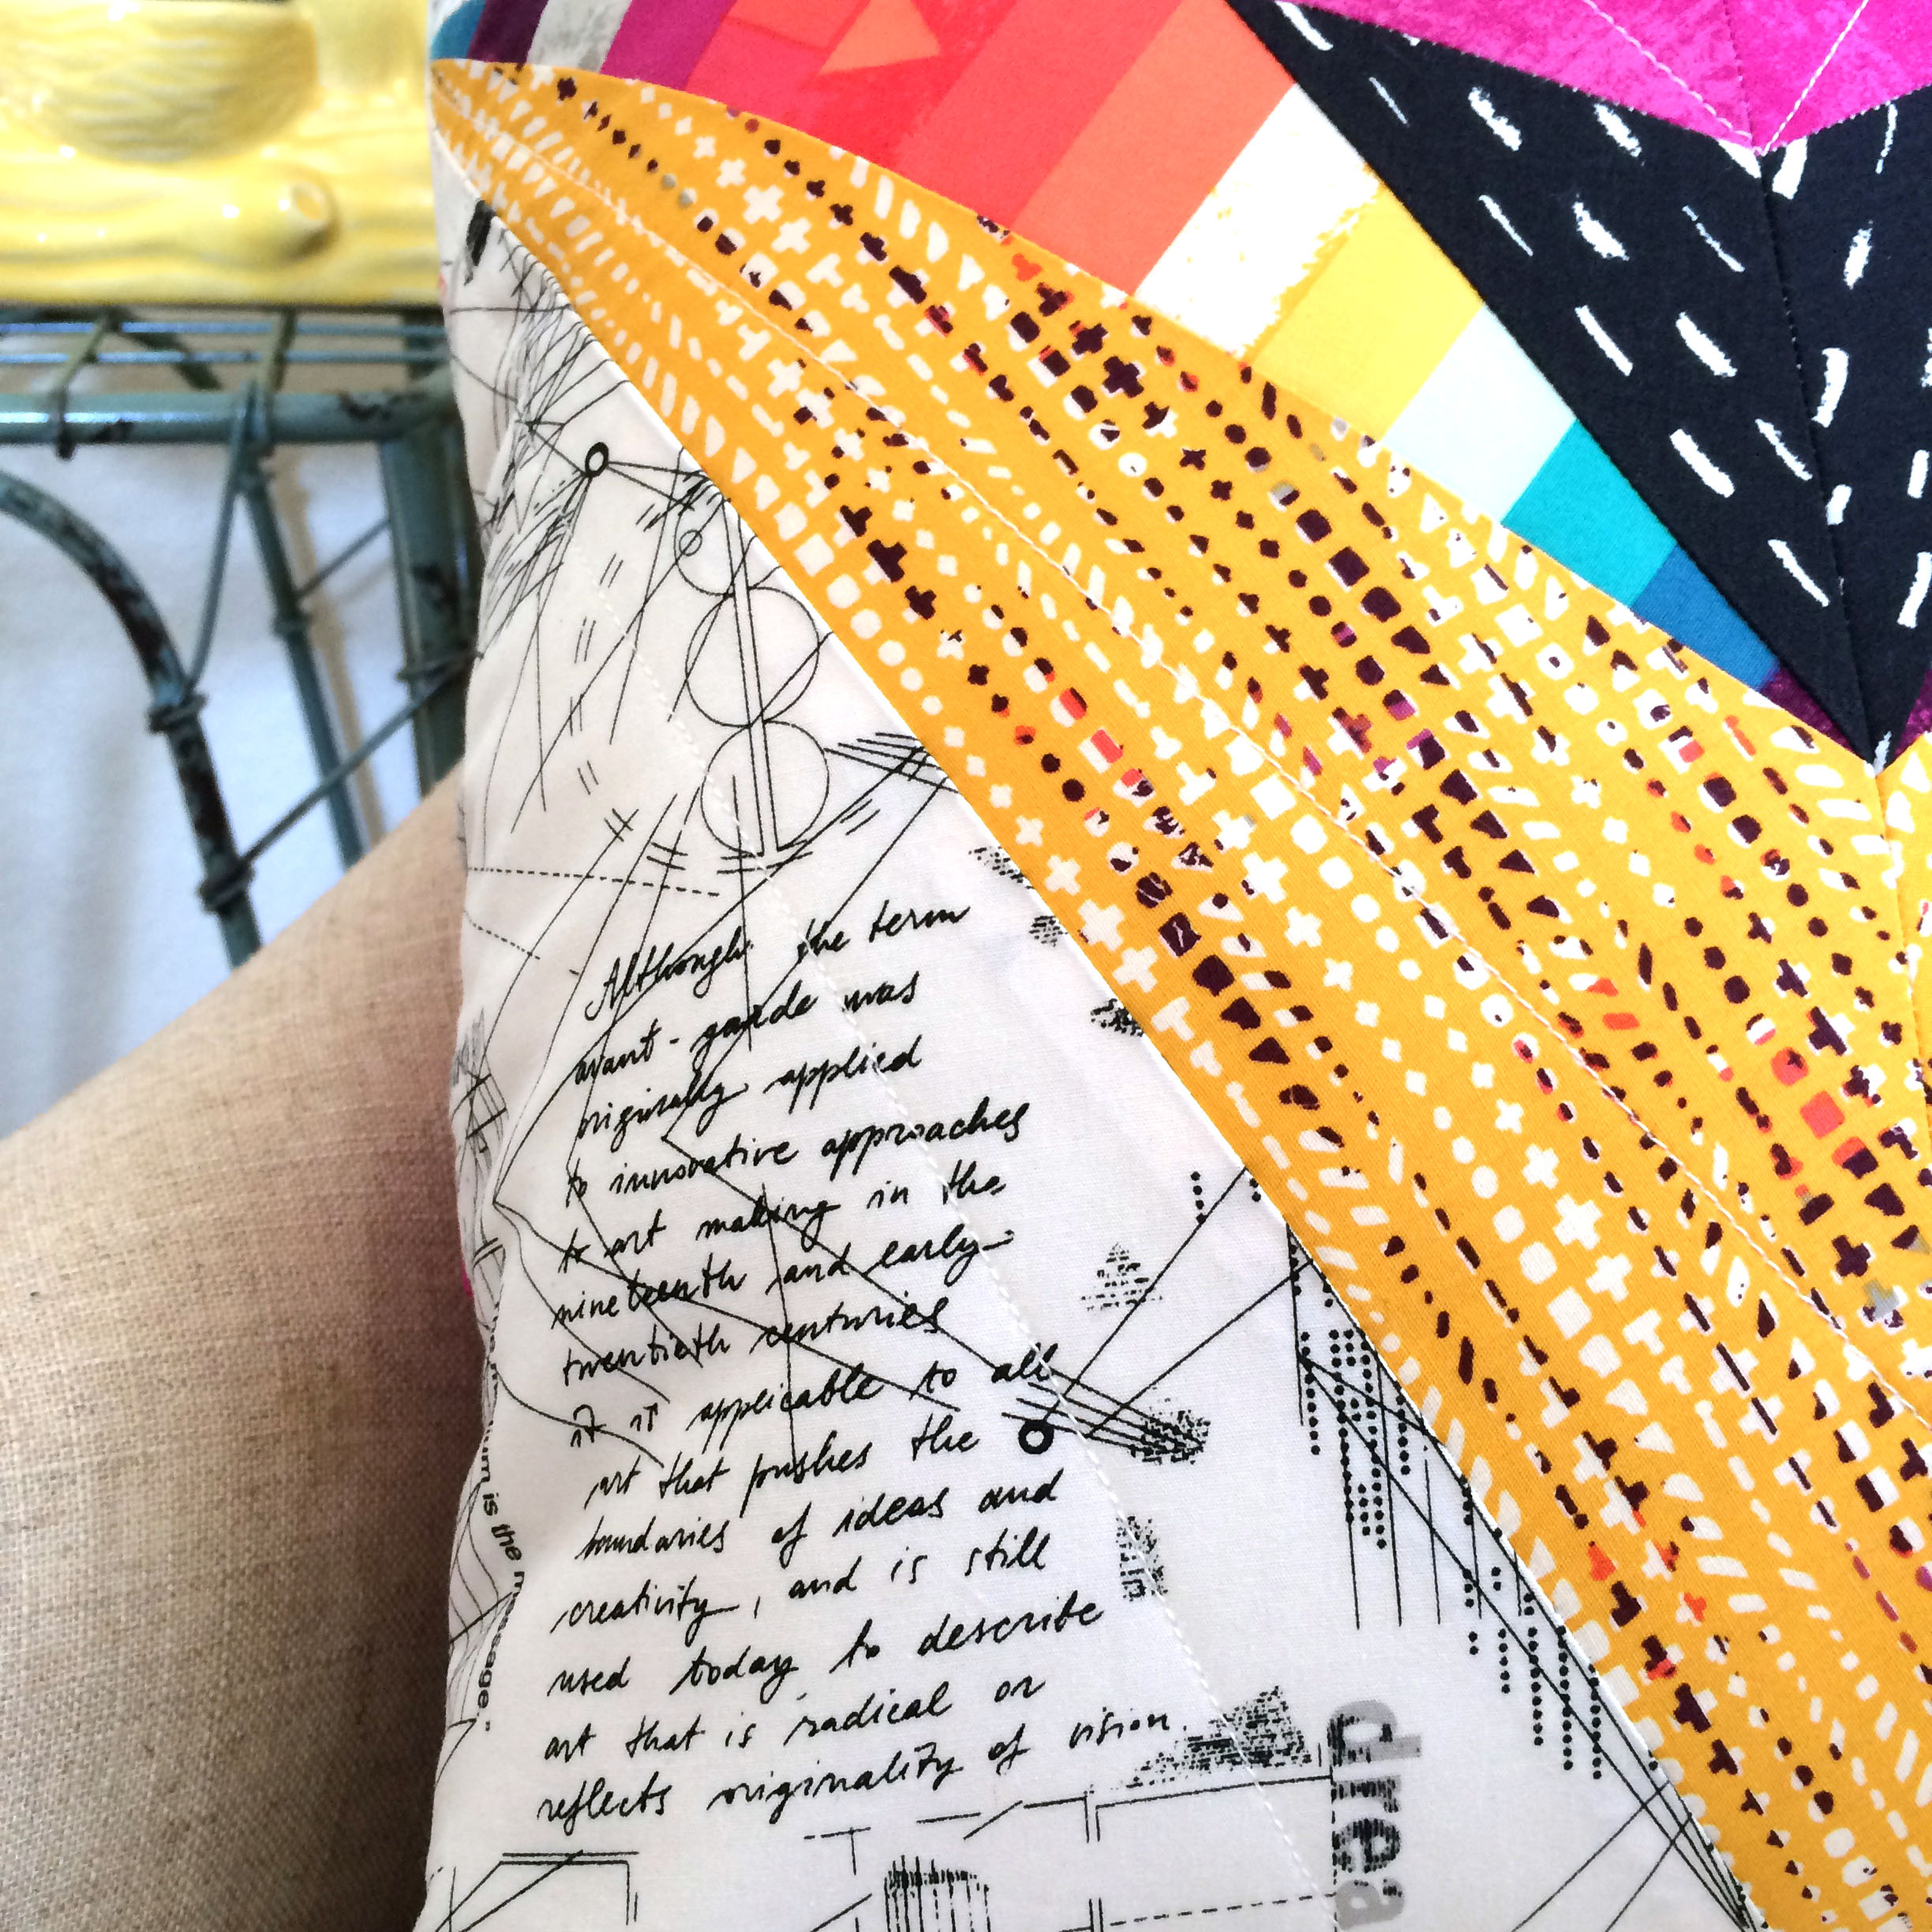
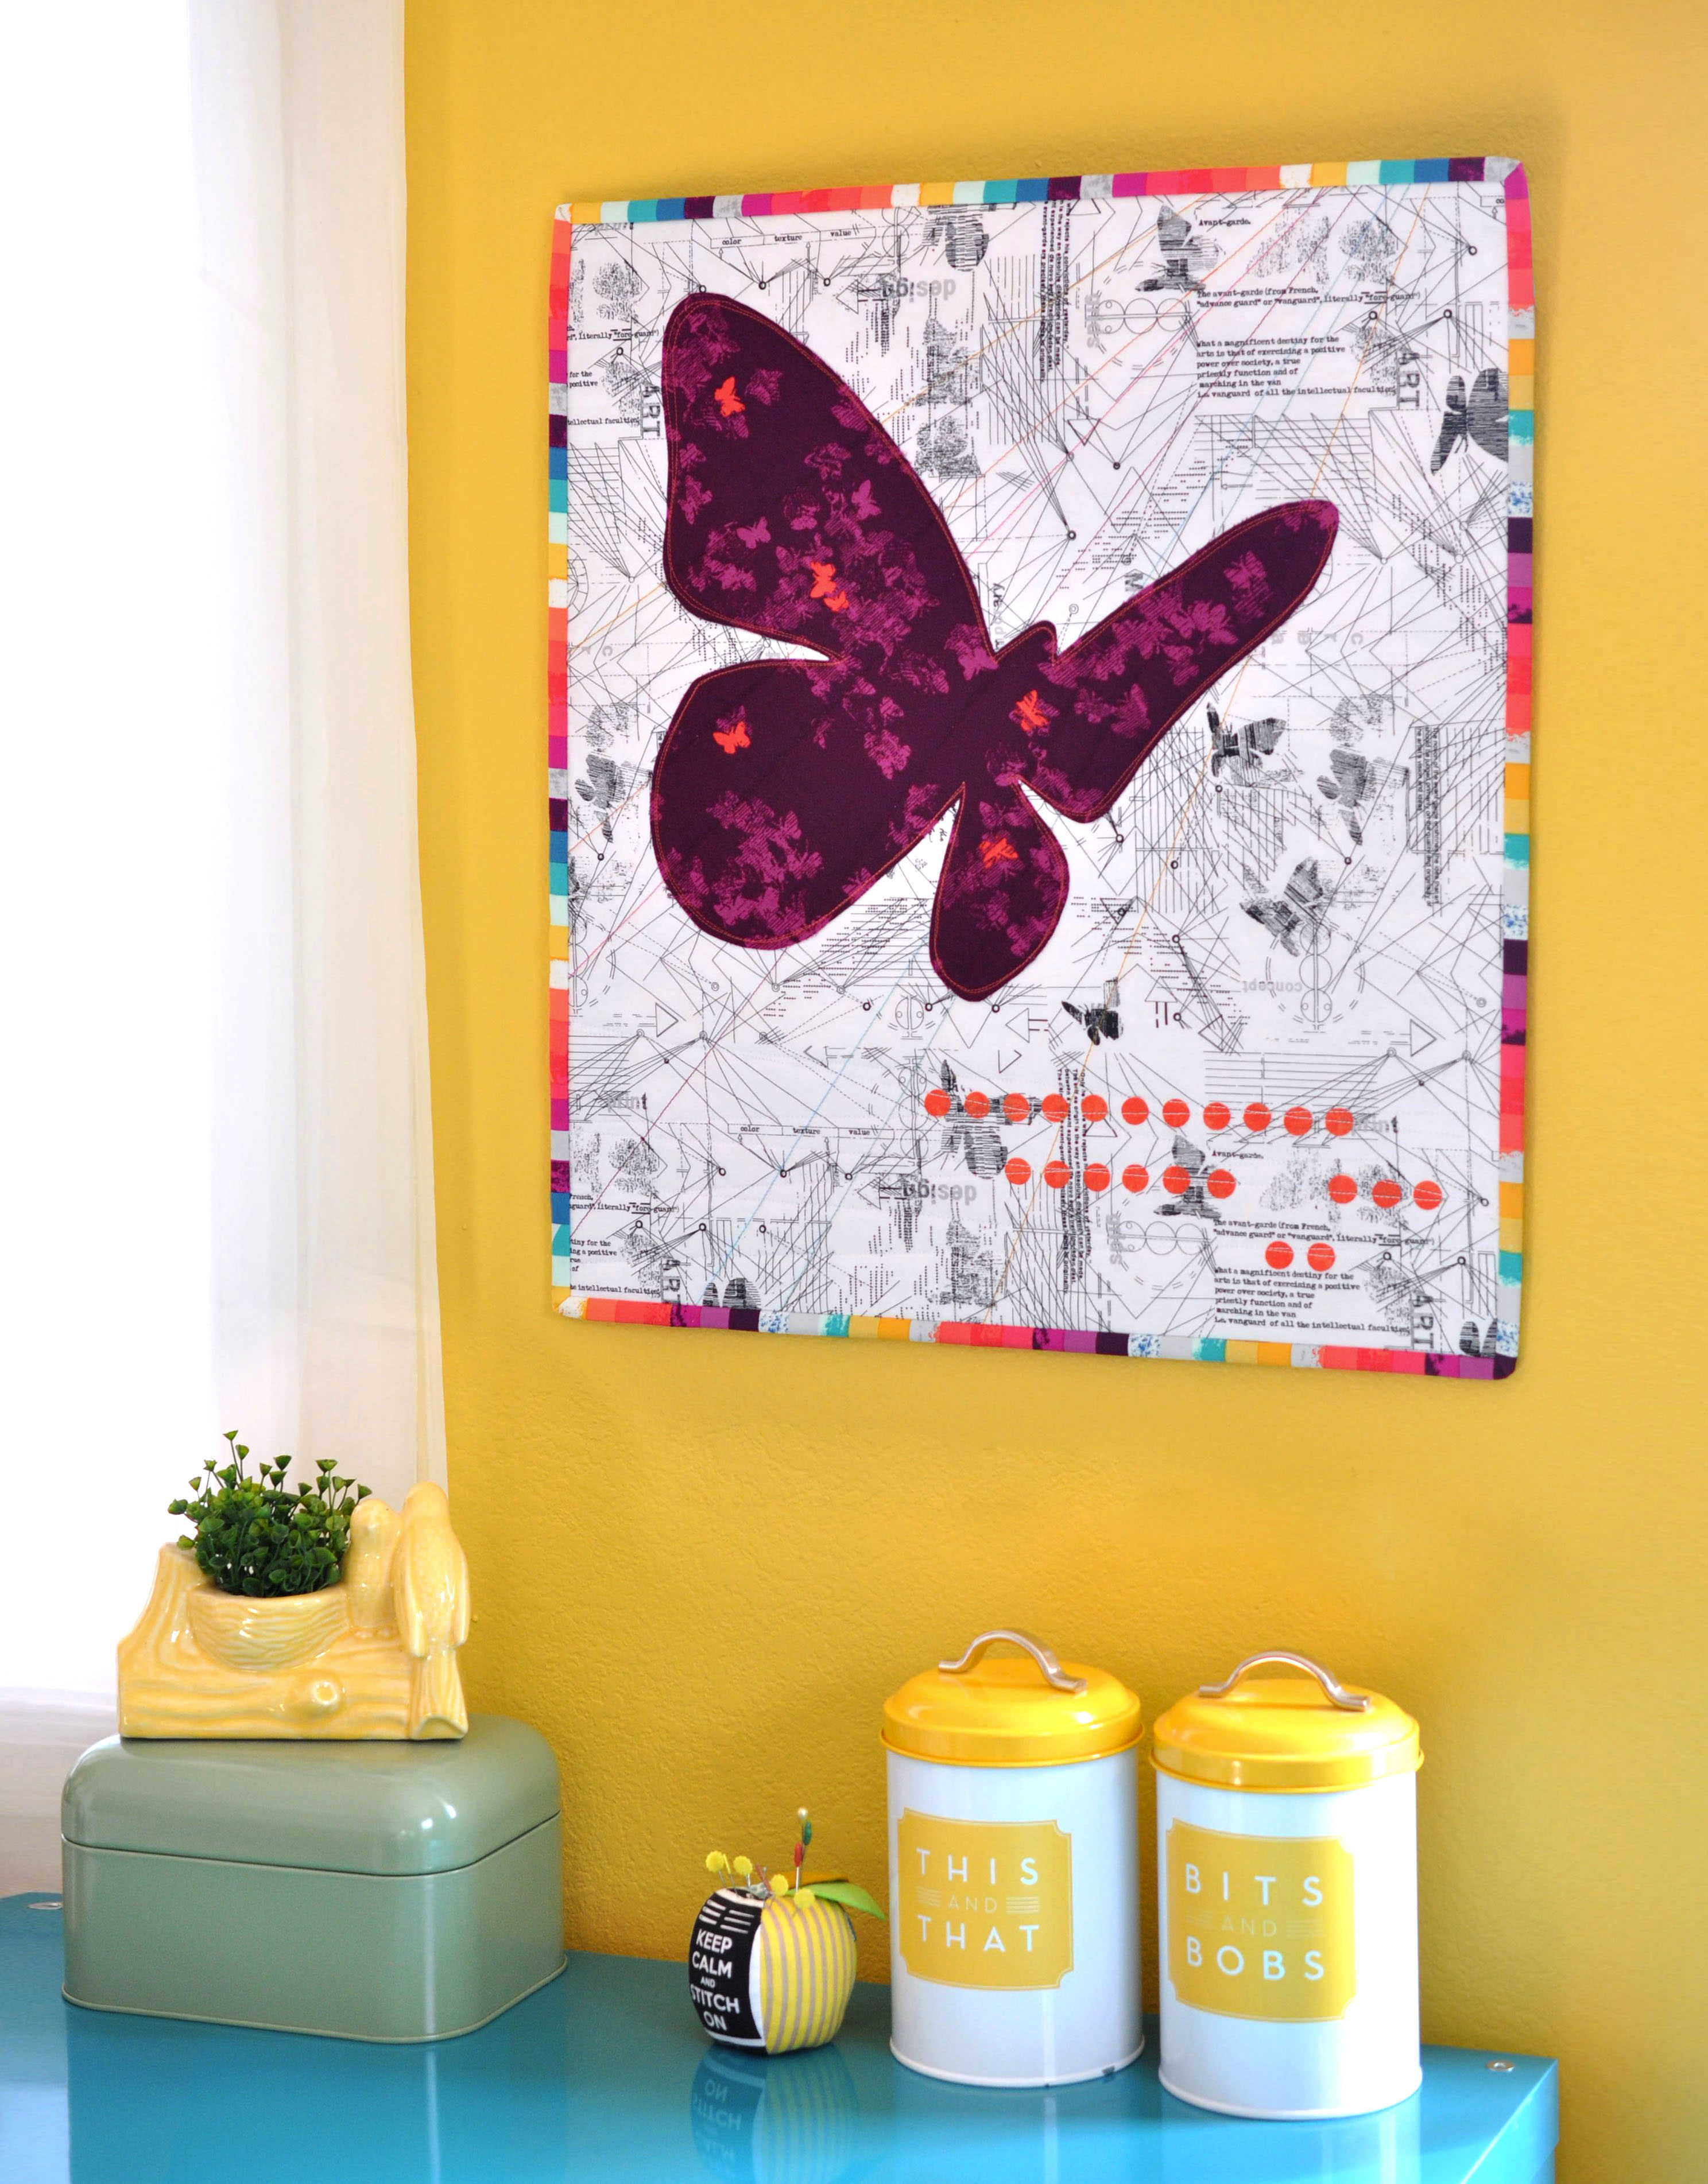
This is NeoVol. Simple appliqué lends itself to a beautiful 18×20 mini quilt that is quick to sew and allows you to showcase a fun print. It also makes a darling pillow (shown a couple photos down) and can be resized to create a variety of different designs (another of which you’ll see used in the quilt reveal tomorrow).
I kept the quilting simple (but awesome!) on this mini with a little rainbow explosion coming from the top corner. I continued the lines through the butterfly, but switched to a dark purple, and then picked the rainbow color up again on the other side of the butterfly.
I also did some random angled lines horizontally across the bottom and the dots to help hold them in place. My favorite part, by far, is the striped binding!
Another panel from the quilt design is NeoBurst, which will be part of the quilt pattern and also available separately as an 18×20 mini quilt pattern. It will include an 18″ square variation, which is shown here made into a pillow.
NeoBurst is another quick-sew block with simple paper piecing and the opportunity to really have fun with fabric placement. Together with the NeoVol pattern, shown above as a pillow, you have a perfect set.
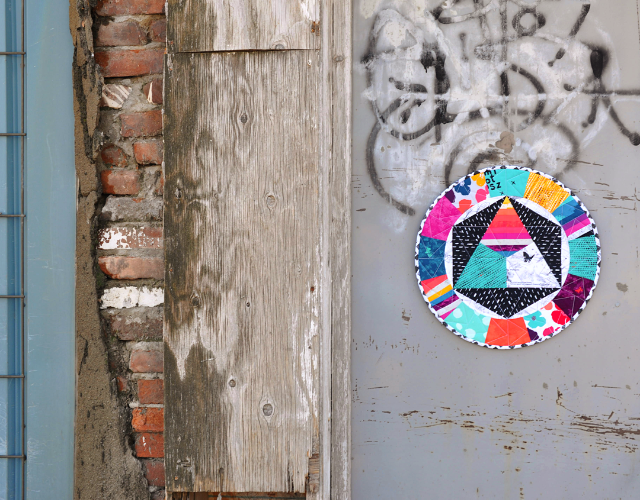
Last, but certainly not least, from me for today is NeoSphere. My favorite piece from the Neo Series changes every few minutes, but this circle has a special place in my heart! How can you not love it?!
The pattern will include directions to make this 18″ circular mini, as well as a box edge pillow. It will also include an option to finish the block as a square to use in a quilt or simply as a square mini or pillow.
My favorite thing about this pattern is that it looks complex, but goes together quick and easy. Don’t fear the curves! The center is created using simple paper piecing and the curved border is cut with templates. the final piece goes together in six wedges.
You can also change the design of the center by placing the templates in a different order, or how about an appliqué NeoVol butterfly in the center of the triangle? So many possibilities!
Sari has informed me that she has an open spot on her wall reserved for this one, so it will be headed off to hang out with Hazel, Luminaria and the rest of the gang out in WV! But I’ll be there to visit it soon, for the Sariella Retreat, Appalachian Edition!
Sari and I have had so much fun creating these patterns and working with this amazing line. You can see how these fabrics really add such a fun pop of color and life to a space. It’s impossible to not be drawn to them.
I really need a whole cloth quilt with those stripes!
I can’t wait to hear what you think of the designs and show you all the fun variations our testers create over the next few weeks.
Be sure to stop by Sari’s blog tomorrow for more about the Neo Series and the Neoteric Quilt reveal! And stay tuned to our personal Instagram feeds (@lillyellasworld and @sariditty), as well as our Sariella feed (@sariellastudios) for updates and giveaways, including the NeoVol mini and a few bundles of Avantgarde fabric!
You can also check out all the other projects from the tour on @KatarinaRoccella or under the hashtag #avantgardefabricsblogtour.
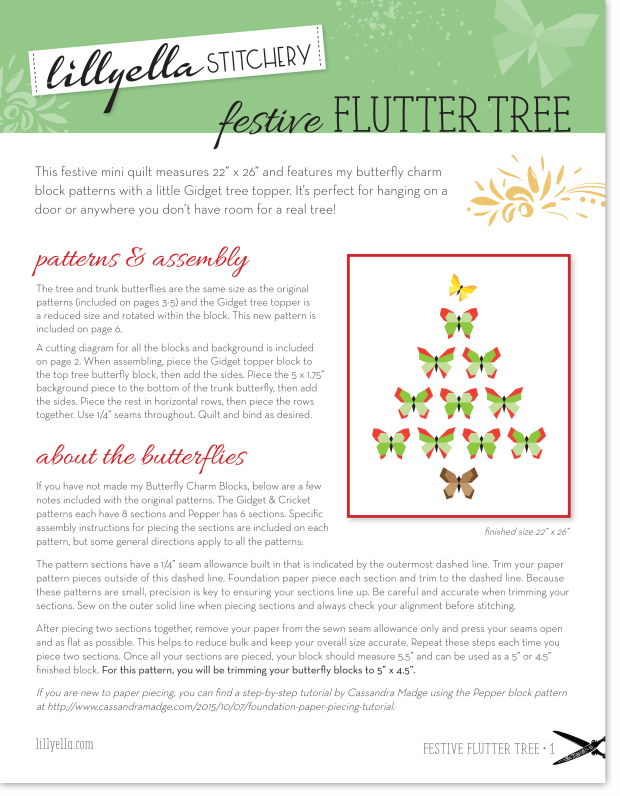
This festive mini quilt measures 22” x 26” and features my Butterfly Charm Block patterns with a little Gidget tree topper. It’s perfect for hanging on a door or anywhere you don’t have room for a real tree!
Click here or the image below to download the PDF pattern.
If you have any questions about the pattern, feel free to contact me anytime. Tag your photos with #festivefluttertree and #butterflycharmblocks so everyone can be inspired!