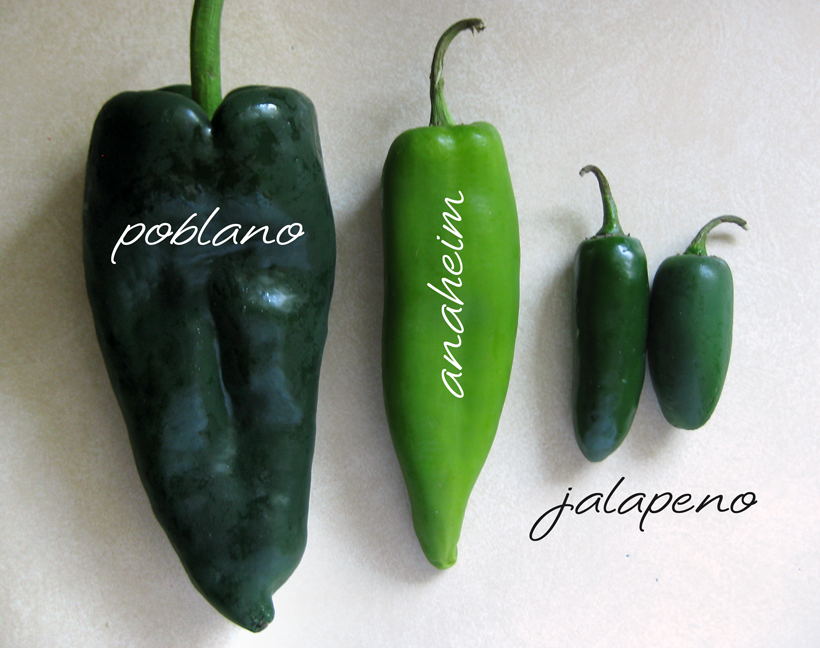
Today’s recipes use three types of peppers, so I’ll begin with a little lesson on chilies. You can find these varieties at most grocery stores with a decent produce section and can certainly find them, plus many many more, at any local market, but if they aren’t labeled properly, it can be hard to tell what you’re buying. Poblanos are large, often bigger than your hand, and have a dark green coloring to them. They rate mildly on the
Scoville scale, falling just below jalapenos.
Anaheim peppers are long and skinny, often the length of your hand or so, and have a bright, yellowy green color. Most rate equal to poblanos on the scoville scale, though some rate above, and I find them to be spicier than most poblanos.
Jalapenos are small and have a dark green color to them. They still fall pretty low on the scoville scale in spiciness, under cayenne and serrano, but will add a good amount of kick to any dish. Later in the post I’ll show you how to roast and peel peppers, which is a common step needed for many recipes of all kinds.
· · · · · · · · · · · · · · · · · · · · · · · · · · · · · · · · · · · · · · · · · · · · ·
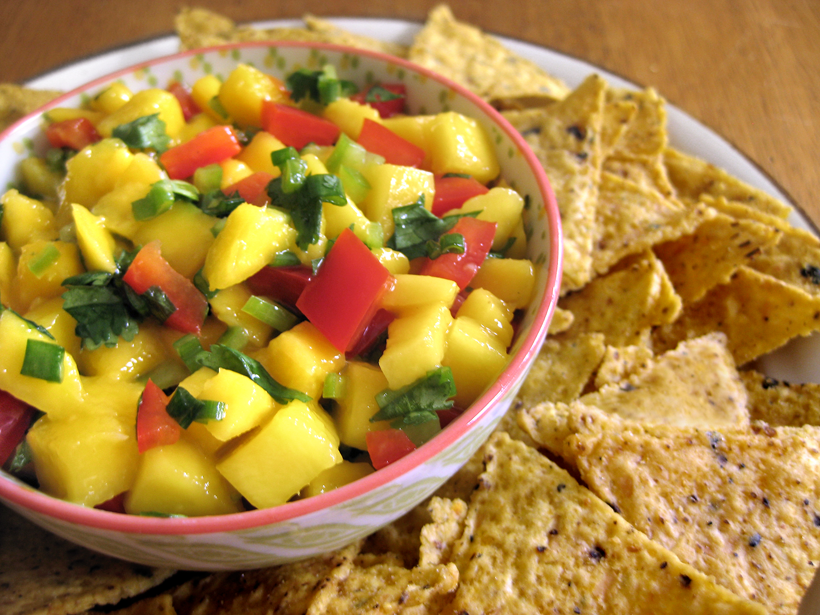
FRESH MANGO SALSA
First up in our fiesta is a delicious
Mango Salsa. I’ll admit, I’ve never been into the fruit salsa kick, but I’m growing by leaps and bounds in my culinary adventures and found this to be exceptionally delicious. It has the perfect blend of sweet and savory and tastes remarkably refreshing. While mango is a very common ingredient for salsa, you can substitute other fruits for the base of this recipe including papaya, pineapple, peaches or plums.
Ingredients1-1/2 cups chopped, peeled mango (or fruit of choice)
3/4 cup chopped red sweet pepper
1/4 cup thinly sliced green onions (about 2 stalks)
1/4 cup chopped fresh cilantro
2 tablespoons lime juice
2 tablespoons finely chopped fresh Anaheim pepper (can also substitute jalapeno or serrano, use 1-2 peppers)
In a medium mixing bowl stir together all ingredients. Cover and chill at least 2 hours before serving to let the flavors infuse!
This salsa is great with chips or fresh vegetables and can also be used as a condiment for tacos, quesadillas, burgers, steaks, chicken, or fish.
· · · · · · · · · · · · · · · · · · · · · · · · · · · · · · · · · · · · · · · · · · · · ·
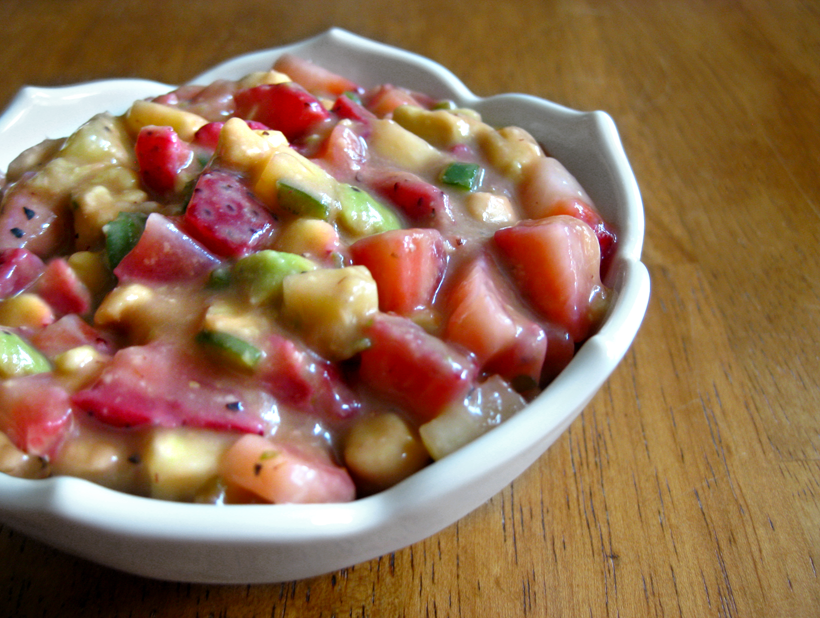
STRAWBERRY AVOCADO SALSA
Here’s another fruit salsa that has a slightly sweeter taste to it accented with the richness of avocado, the crunch of cucumber and the spice of jalapeno.
Ingredients1 cup strawberries, coarsely chopped
1/2 cup avocado, seeded, peeled, chopped
1/2 cup cucumber, coarsely chopped, seeded
2 – 3 teaspoons honey (start with 2 tsp, add more if desired)
1/2 teaspoon lime peel, finely shredded
1 tablespoon lime juice
1 tablespoon jalapeno pepper, seeded, finely chopped
1/4 teaspoon coarse black pepper
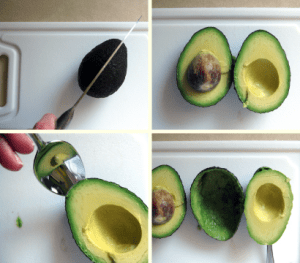
I’ll start by showing you the easiest way to cut and peel an avocado. If you’re not used to working with them, they can be confusing and slippery at first, or maybe it was just me…
Using a sharp knife, carefully cut lengthwise around the avocado until you hit the pit. Using two hands, twist the two halfs of the avocado in opposite directions and separate. Using a spoon, separate the meat for the skin, it peels away very easily leaving you with a nice piece that you can then chop up.
To make the salsa, combine all ingredients in a medium bowl. Cover and chill for 2 to 24 hours. Serve with chips or as a condiment for grilled chicken, fish or pork.
Before I move onto the last recipe, let’s talk chips. There are about 12 million varieties available these days and everyone has their favorites. Whether you like them white, gold or blue or flavored with lime and salt, many people believe they are healthier than your standard potato chip, but you have to be careful with your choices if you’re trying to be health conscious. Read the labels and look for products made with natural ingredients that have a low sodium content or are salt free. A little salt or flavor won’t kill you, of course, but when you make delicious, flavorful salsas like the two above, keep the delivery vehicle simple.
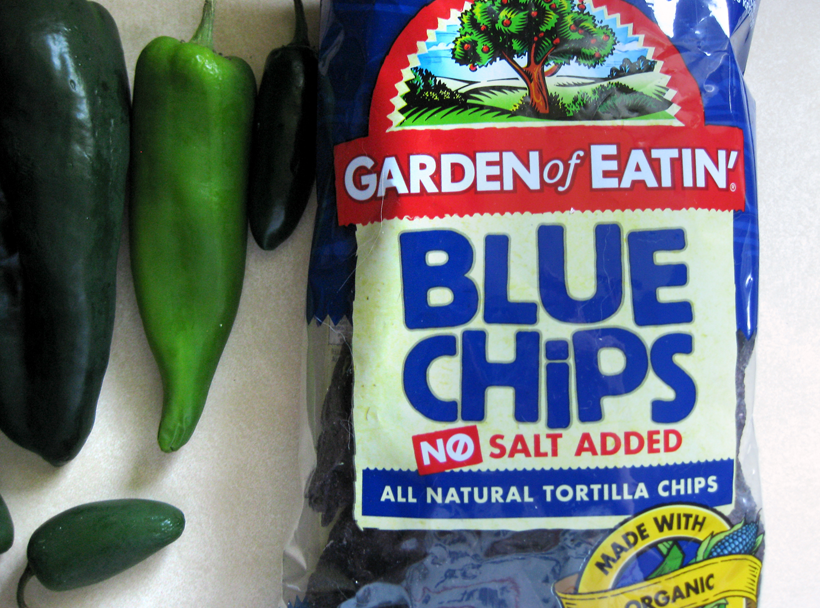
Here are my recommendations for the two recipes above. I love the Frontera Lime + Sea Salt with the Strawberry Salsa and the Garden of Eatin’ Black Bean with the Mango Salsa. They each accent the flavors nicely and happen to be healthy choices while still tasting great. I’m a big fan of both of these brands in general, all flavors.

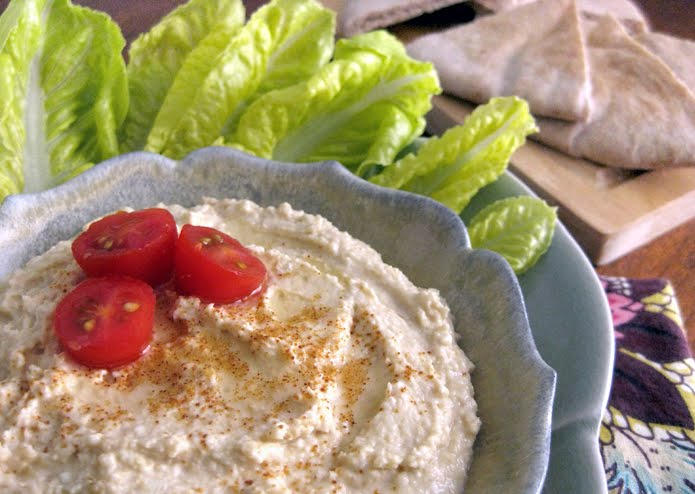
The Garden of Eatin’ no salt added Blue Chips are my tortilla chip staple. Some may find them bland, but I think they are quite yummy for being salt free. They don’t work well with everything but I especially love them on
homemade guacamole.
· · · · · · · · · · · · · · · · · · · · · · · · · · · · · · · · · · · · · · · · · · · · ·
QUESO FUNDIDO WITH CORNBREAD DIPPERS
Last but not least I have a delicious, hot Queso Fundido that is sure to please everyone. Who doesn’t love dipping things in hot cheese? As with salsa, there are a million and one ways to make Queso Fundido, but this is how I like it – without sausage, with crunchy jicama and just the right amount of spice.
Ingredients
2 fresh roasted poblano peppers
1 small fresh roasted red sweet pepper
12 ounces Monterey Jack or Pepper Jack cheese
2 tablespoons flour
1/3 cup finely chopped onion
1 tablespoon butter or margarine
3/4 cup half-and-half or light cream
1/3 cup finely chopped jicama
When a recipe calls for fresh roasted peppers or says to roast, skin and peel peppers, this is how you do it. It’s really quick and easy and makes the peppers smell and taste just delicious.

Start by quartering the peppers, discarding the seeds and cutting away any membrane inside. Lay them flat, skin side up, on a foil lined baking sheet. Broil on low for about 5 minutes until all the skin blisters and browns.
Remove them from the oven and wrap them in the foil. Let stand for about 15 minutes then open the foil and let them cool for a couple minutes.

You’ll now be able to easily peel away the skin and chop up your peppers! For this recipe, you will do the same thing with the sweet red pepper. You can do them all at the same time or separately, then chop them coarsely.
If you read the ingredients for this recipe and said, what the heck is jicama? You’re probably not alone. This mystery ingredient is actually in the legume family and can also be referred to as the mexican potato, yam bean or chinese turnip. It’s increasing in popularity and if you’re a big veggie or salad eater, it’s about to become your best friend.
I would personally describe it as a cross between a potato and an apple. There is no pit or core, so you can use the whole thing and the meat has the same texture and consistency of an apple. It is delicious eaten raw alone or in salads and has a semi-sweet flavor and light crunch to it. It’s high in vitamin C, low in sodium and has no fat, and one cup has only 45 calories.
You can find it at more and more grocery stores and usually at any farmers market.
For this recipe, you will chop it semi coarsely. You’ll want some chew in your dip, but not huge chunks. Next chop the onion finely, you will saute it later.
I use a mix of monterey jack and pepper jack cheese, just for a little extra kick. Shred it and toss with the flour in a bowl.
Saute the onions in a medium saucepan with butter until tender. Stir in the half and half or cream and then begin adding the cheese, a little at a time, stirring until melted over medium-low heat.
Once all the cheese is melted, add the chopped peppers and jicama and stir until heated through. Serve immediately or transfer to a fondue pot and keep warm for up to 2 hours.
If you’re a meat eater, add 1/4 lb cooked, crumbled chorizo when you add the peppers.
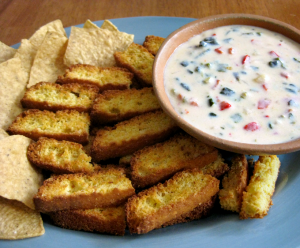
This recipe is delicious with tortilla chips, cubes of bread, even veggies or meat, but I especially love it with crunchy sticks of cornbread.
To make the cornbread dippers, prepare a batch of your favorite cornbread and cook it in a 8″ or 9″ square pan according to the directions. I always recommend making cornbread from scratch, it’s amazing what they sneak in those mixes. It’s easy and you can control the flavor by adding your preferred amount of salt or sugar, but I find a less sweet cornbread is best for this recipe. I usually use a coarse, stone ground cornmeal but for this I recommend a finely ground cornmeal, or it will be too crumbly.
When the cornbread is done cooking, place on a wire rack and cool completely. Using a long serrated knife, cut the bread into 1/2 lengths, then into halves or thirds to create the dippers. Yes, it will crumble a bit and they won’t be perfect, but it doesn’t matter!
Place them in a single layer on a large, ungreased baking sheet and cook for 5 minutes at 400°. Flip them over and cook for another 5 minutes. Let them cool and store in an airtight container for up to 4 days. Great part is you can make these ahead of time!
You can store any leftover dip in an airtight container in the fridge and reheat on the stove or in the microwave as needed, but it’s much creamier and delicious when enjoyed fresh.
I hope you give one of these recipes a try and let me know what you think – Feliz Cinco de Mayo!


