In the Kitchen: Pumpkin Cream Cheese Truffles

I have to say, I impressed myself with this one. Words can hardly describe the deliciousness of these heavenly bites, though I was reluctant to eat them because they just looked so darn cute on the plate. Make them as a special dessert, take them to a party or package them as gifts – trust me, your friends will be impressed, too. The recipe is surprisingly easy (though you can pretend you slaved for hours) and you’ll find a link to a printable recipe card at the end of this post.

Prep time: 30 min | Makes 30 truffles
Ingredients:
1/2 cup white chocolate chunks, wafers or chips
2 cups white and/or milk chocolate chunks, wafers or chips
1/3 cup gingersnap cookie crumbs, plus more for garnish
1/4 cup graham cracker crumbs
1/4 cup canned pumpkin
1 tablespoon confectioners sugar
1/2 teaspoon orange zest
1/8 teaspoon ground cinnamon
pinch of salt
2 ounces cream cheese, softened
This recipe calls for 1/2 teaspoon of orange zest which is simply shavings from the skin of an orange. You can use a zester or the smallest part of your grater and scrape the outside of the orange against it. Do not go too deep, as you only want the orange skin, not the white layer underneath.

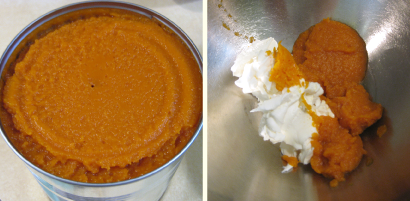
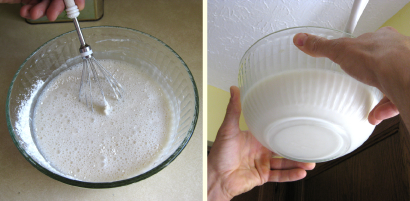
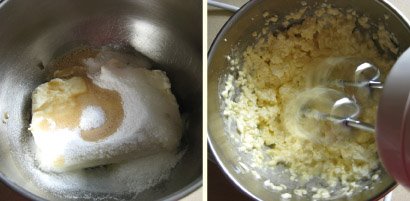
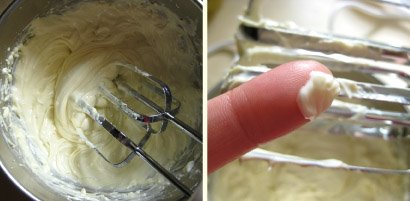
Now onto the recipe! In a large bowl add the pumpkin, softened cream cheese and orange zest.
Melt 1/2 cup white chocolate in a double boiler over medium heat or in a small bowl in the microwave as instructed on the package and add to the pumpkin mixture.

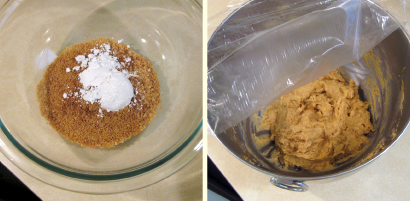
In a small bowl mix the gingersnap crumbs, graham cracker crumbs, sugar, cinnamon and salt. Add to the pumpkin mixture and beat with an electric mixer until smooth.
Cover and chill until solid enough to roll into balls, about 2 hours.

Line two baking sheets with parchment paper. Scoop 1 teaspoon pumpkin mixture at a time and roll into balls. Set them on one of the baking sheets. It seems like there is not much filling in the bowl but don’t make the balls too big, a little bit goes a long way when you eat them. I used a melon ball scoop to size mine and it worked great.
Set some gingersnap crumbs nearby to sprinkle on top.

Melt the remaining chocolate in a double boiler or in the microwave, transfer to a small, deep bowl. Drop one pumpkin ball into the chocolate at a time, gently spoon chocolate over to coat. Using a small spoon or fork, lift the truffle out of the chocolate, let any excess drip off and transfer to the other baking sheet. Sprinkle a few crumbs on top. Once finished, chill truffles until chocolate is completely set, about one hour.
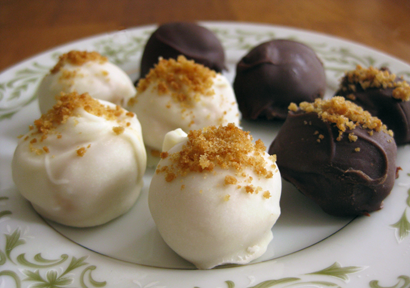
This recipe originally called for only white chocolate but I decided to try some with milk chocolate and they were equally delicious! I was amazed at how different the two tasted. I’d love to hear if you give this one a try, enjoy!

Find more easy and delicious recipes here.

In the Kitchen: Chicken Stroganoff

This recipe is one of the most complicated I make, but only because it strays from my usual ‘throw everything in one pan and let it cook’ method of making dinner, though the little extra time spent is well worth it. This dish is nice and hearty for the fall weather ahead and can be made a little healthier by using margarine or olive oil, low sodium broth and fat free sour cream, all of which I use. You will find a printable recipe card at the end of this post.

Cook time: 30 min | Serves about 4 – 6
Ingredients:
8 ounces egg noodles
6 tablespoons all-purpose flour, divided
1 teaspoon salt
1/2 teaspoon pepper
1 – 1 1/2 pounds chicken tenderloins
4 tablespoons butter, divided
mushrooms, cut into quarters
1 chopped onion (optional)
1/2 teaspoon dry mustard
1 can chicken broth
1 cup sour cream

Cut the chicken into bite sized pieces. Mix 4 tablespoons flour with the salt and pepper in a small bowl. Add the chicken and toss to coat.

Heat two tablespoons of butter in large skillet over medium heat until melted. Cook the chicken, stirring often, until browned.

Cut the mushrooms into quarters (I like to use a lot!). If you are using onion, also add it now. I use a bit of onion powder instead. Heat until mushrooms are cooked through then remove the mixture from the pan and set aside.

In the meantime, cook the noodles according to package directions.
Add remaining two tablespoons butter to the skillet along with remaining two tablespoons flour and the dry mustard, mix well.

Gradually stir in broth, then sour cream and continue cooking, stirring frequently, until smooth. Return chicken and mushrooms back to pan and cook until heated through.

Serve over noodles with a side of veggies and some crescent rolls – yum!


You can find more easy and delicious recipes here.

In the Kitchen: Zucchini Bread

It’s that time of year again when we’re all harvesting our gardens, scratching our heads wondering what to do with all those tomatoes and all that zucchini, wondering why we grew so much again. Am I right? Chances are most of you will make some bread with it and out of all the recipes I’ve tried, this one is my favorite. It’s basic, simple and easy – just the way I like it! You will find a printable recipe card toward the end of this post.

Prep Time: 15 min | Bake Time: 50 min | Serves 16
Ingredients:
1 1/2 cups all-purpose flour (also good with whole wheat flour!)
1 teaspoon ground cinnamon
1/2 teaspoon baking soda
1/2 teaspoon salt
1/4 teaspoon baking powder
1/4 teaspoon ground nutmeg
1 egg, beaten
1 cup sugar (I use Splenda, and a little less than 1 cup)
1 cup finely shredded, unpeeled zucchini
1/4 cup cooking oil
1/2 chopped walnuts or pecans (optional)

Since I’ve been so busy this week, I do not have step by step photos for you today, but here are the directions:
Preheat oven to 350°. Grease the bottom and 1/2″ up the sides of an 8″ loaf pan, set aside.
In a medium bowl combine the flour, cinnamon, baking soda, salt, baking powder and nutmeg. Make a well in the center of the flour mixture, set aside.
In another medium bowl combine egg, sugar, zucchini and oil. Add this mixture to the flour mixture and stir until just moistened (batter should be lumpy). Fold in nuts. Spoon into pan and bake for 50 to 55 minutes or until toothpick inserted in center comes out clean.
Cool in the pan on a wire rack for about 10 minutes, remove from pan and cool completely. Wrap and store overnight before slicing.


This recipe also works for apple bread, substitute 1 1/2 cups shredded, peeled apple for the zucchini. Great for using those apples from fall apple picking! (Ill be sharing a delicious apple cake recipe soon, too).

If you still have plenty of zucchini left even after making 5 loafs of bread, try this salad for another yummy way to use it up!

You can find more easy and delicious recipes here.

In the Kitchen: Spicy Corn Dip

Today’s recipe is so easy I don’t even need how-to photos, but that doesn’t mean it isn’t delicious! This cool and refreshing dip is perfect for a summer party or just to have on hand for snacking. Jalapenos and green onions give it a little kick but you can easily customize it to your own tastes. You will find a printable recipe card at the end of this post.

Prep Time: 10 min | Serves about 32
Ingredients:
8 oz sour cream (I use fat free)
1 cup mayonnaise (I use low fat)
2 cans (11-15 oz) mexican style corn (drained)
4 green onions, finely chopped
3 jalapeno peppers, seeded and minced
6 oz can diced green chilies
1 1/4 cup shredded cheddar cheese
Mix all ingredients in a medium bowl and chill for about 30 minutes before serving. Garnish with extra shredded cheddar, green onions or even some fresh cilantro and serve with tortilla chips – enjoy!

You can find more easy and delicious recipes here.

In the Kitchen: Sausage Gravy

I have a guest chef in the kitchen today as my fiance, Tyler, exposes his roots and shares his hand-me-down Sausage Gravy recipe with us! There are no fancy ingredients and it’s not hard to make, but the key to its deliciousness lies in the technique and, most importantly, the pan you use. Put away the non stick teflon, pull out the stainless steel and get ready to clog a few arteries! You will find a link to a printable recipe card at the end of this post.

Prep Time: 5 min | Cook time: 20 – 30 min | Serves about 4 – 6
Ingredients:
1 lb pork sausage (we use the kind that comes in a tube)
3 cups of milk
heaping 1/2 cup of flour
salt and pepper to taste

Cut the sausage into 1″ slices and begin cooking over medium heat in a stainless steel skillet. A NON STICK SKILLET WILL NOT WORK! You want the meat to stick to the bottom of the pan so just let it sit.
In the meantime, pour the milk into a mixing bowl and add the flour.

Mix with a whisk until well blended. We use a glass bowl so it’s easy to check for lumps that may be hiding on the bottom!

Now back to the sausage… continue cooking over medium high heat without stirring or moving the sausage until a thin layer sticks to the bottom of the pan. You will then begin to break up and brown the sausage, leaving a thin layer stuck to the bottom of the pan.

As the rest of the sausage is cooking, move it to one side of the pan, letting exposed grease simmer and brown onto the surface of the skillet. Move the sausage again and repeat until most of the skillet surface is covered with browned grease. This is where you get most of your flavor and the grease will not simmer down while under the sausage, it needs to be exposed in the pan.
Once the sausage is cooked, add the milk and flour mixture along with salt and pepper to taste. Cooking over medium heat, scrape the burnt sausage and grease off the bottom of the pan as it softens up. Continue cooking and stirring until gravy thickens to your liking.
If it is too thick or you would like more gravy, you can add more milk.

Serve over biscuits or toast with a side of Hashbrown Casserole and cinnamon rolls and you have a stick-to-your-ribs breakfast that is sure to please! It’s also delicious over scrambled eggs, omelets and potatoes.


You can find more easy and delicious recipes here.

In the Kitchen: Zebra Brownies

We’re back to the best part of any meal this week, dessert! An easy, delicious twist on the classic brownie, cream cheese lovers get your aprons on because you are going to love this one. You will find a link to a printable recipe card at the end of this post.
Prep Time: 20 min | Bake time: 30 min | Serves 24
Filling Ingredients:
2 pkgs cream cheese, softened
1/4 cup sugar
1/2 teaspoon vanilla
1 egg
Brownie Ingredients:
22.5 oz pkg fudge brownie mix
1/3 cup very hot water
1/3 cup oil
1 egg
Heat oven to 350°. Generously grease the bottom only of a 13×19 pan.

In a small bowl, blend all filling ingredients.

Beat at medium speed until smooth, about 1 minute. Set aside. But I first recommend a little taste test 🙂

In a large bowl, combine all brownie ingredients, beat 50 strokes with a spoon.

Spread half of the brownie batter in prepared pan. Spoon cream cheese mixture over batter, speading to cover.

Place spoonfuls of remaining batter on top of cream cheese and marble with a butter knife.
Bake at 350° for 30 to 35 minutes. Cool and refrigerate for about one hour before serving.

If you have even the tiniest lack of self control, I recommend you turn your eyes away from the brownies and forget you ever saw them, because I dare you to eat just one! Otherwise, eat up and enjoy! I’d love to hear what you think if you give this yummy treat a try.

You can find more easy and delicious recipes here.

In the Kitchen: Cheesy Shell Lasagna

I’ve mentioned this recipe a few times and finally, here it is! I thought 
it was a little odd the first time I was cooking it but the results were surprisingly delicious and now I crave it. I’m not a fan of traditional lasagna, ricotta cheese kinda freaks me out, plus it’s such a pain cooking those noodles, so this easy variation was perfect for me. You can modify the ingredients to suit your tastes (or make it meatless) and will find a link to a printable recipe card at the end of this post.
Prep Time: 30 min | Cook time: 40 min |  Serves 12
Ingredients:
1lb ground meat (beef or turkey, meat optional)
1 medium onion, chopped
1 garlic clove, minced (I used minced garlic from a jar)
1 can (15 oz) diced tomatoes
1 jar (14 oz) meatless spaghetti sauce
1 cup sliced mushrooms
8 ounces small shell pasta
16 oz sour cream
10 slices provolone cheese
1 cup shredded mozzarella cheese

In a large/deep skillet, brown the meat (I use half turkey and half beef), onions and garlic until cooked through. Drain well.
Stir in the diced tomatoes, spaghetti sauce and mushrooms. Bring to a boil, reduce heat and simmer, uncovered, for 20 minutes. 
Meanwhile, cook the pasta according to package directions, drain.
Place half the pasta in an ungreased 13×9 deep baking dish and top with half the sauce mixture. 
Next spread half the sour cream on top of the sauce and then 5 slices of provolone.
Repeat the layers of pasta, sauce, sour cream and provolone and add the mozzarella last on top. 
Cover with foil and bake at 350° for 30 minutes. Uncover and bake an additional 10 minutes or until the cheese begins to brown. Let stand about 10 minutes before serving.
Add a side salad and some garlic bread and you’d be hard pressed to find someone who wouldn’t gobble this right up. If you’re a fan of pasta and cheese, I definitely recommend you give this one a try. I’d love to hear what you think!


You can find more easy and delicious recipes here.

In the Kitchen: Banana Pineapple Cake

As promised, here is this week’s recipe just a few days off schedule! Today I have a delicious cake that I especially love during the warmer months because it is light and refreshing and a bit tropical. Most of the recipes I share with you are very easy to make, but this one really takes the cake. Yep, pun intended. You’ll find a link for a printable recipe card at the end of this post.

Prep Time: 20 min  |  Cook time: 30 min  |  Serves about 18
What you’ll need:
1 box yellow cake mix
3 bananas
1 large can crushed pineapple
1 tub cool whip

Prepare the cake mix as directed on package and bake in a 13×9 pan. Set aside to cool for about 20 minutes or so. You can also put it in the fridge to cool faster, if you are impatient like me.
In the meantime, drain the crushed pineapple well, reserving the juice in a bowl.
Slice the bananas into thin strips. I find it easiest to cut the banana in half first. You should need about 3 bananas but if they are smaller or you like thicker slices, you may need 4.
Soak the bananas in the pineapple juice (they don’t need to soak for long). This prevents the bananas from browning. (This also works on other cut fruit, too, as does lemon juice)
Lay the sliced bananas in a single layer across the cake. You can cut them or tear them into pieces to fill gaps if needed.
Next layer the crushed pineapple on top, followed by the cool whip and you’re done! Easy, right?
And since I’ve had such incredible luck lately (italics = sarcasm), I lost all the lovely pics I took of a finished slice of cake, so all you get to see is this whip cream. The inside shall remain shrouded in mystery, so you’ll just have to make it yourself!
This cake is perfect for a summer picnic and stores well for some time in the fridge. I actually find it gets better over time as the juices soak down into the cake. It’s also fun to make with the kids because its so easy. If you’re really adventurous, you can make this as a double layer cake with the fruit and whip cream in between and on top. Whoa doggy. I hope you give it a try and enjoy! Find more easy and delicious recipes here.

In the Kitchen: Mexican Lasagna

I was going to share an easy and delicious recipe for banana pineapple cake with you today, but after a slight banana mishap, I am now sharing an easy and delicious recipe for Mexican Lasagna instead! Mostly basic ingredients, one skillet, a baking dish and 30 min in the oven makes you a hearty pan of stick to your guts goodness that is sure to please. You can easily customize this recipe to suit your tastes by adding or changing ingredients and any leftovers reheat well in the oven or microwave. You will find a printable recipe card at the end of this post.

Prep time: 20 min | Cook time: 30 min | Serves 6-8

What you’ll need:
1 lb. ground beef or turkey (I use turkey)
2 cans (8 oz) tomato sauce
1 can black beans, drained and rinsed
1 can whole kernel corn, half drained
1 small can chopped green chilies or jalapenos
2 Tbsp chili powder
2 Tbsp minced onion
1 tsp ground cumin
1 tsp garlic salt
1/2 tsp oregano leaves
6 small flour tortillas (soft taco size)
2 cups shredded cheddar cheese

Preheat oven to 350°. Brown the meat in a deep skillet, add the tomato sauce, beans, corn and chilies. Stir in the five seasonings. Bring to a boil and reduce heat. Simmer uncovered for 15 minutes.
In a 2 quart baking dish, coated with cooking spray, line the bottom with three tortillas. I place one whole tortilla in the middle then I tear about 1/3 off the other two, place the larger pieces on either end, tear the small strip in two again and fill the gaps. 
Top with half of the meat mixture.
Next top with half of the shredded cheese and repeat with another layer or tortillas, the remaining meat mixture and the remaining cheese.
Bake at 350° for about 30 minutes until mixture begins to bubble and the cheese melts. Let stand for about 10-15 minutes before serving to allow the center to cool and set. 
Though I’ve never made this recipe with chicken, I imagine it would be equally as delicious. You can also leave the meat out completely for a vegetarian dish. I serve it with my Fiesta Breadsticks and occasionally a side of spanish rice though it’s hearty enough to stand alone. It’s also good with a dollop of sour cream on top. Enjoy!

> Click here for a printable recipe card.

In the Kitchen: Corn Casserole

This week we’re cooking up delicious Corn Casserole. It’s like cornbread with a twist and is really easy to make. Just a few basic, inexpensive ingredients cook up a big pan that’s sure to please. It’s a great side dish and perfect for a holiday meal or potluck. The leftovers also store well and can easily be reheated in the microwave or oven. You can even mix it up ahead of time and leave it in the fridge until your ready to bake. You will find a printable recipe card at the end of this post as well as some variations to spice up the dish.
Prep time: 15 min | Cook time: 45 min | Serves: About 8 – 12
What you’ll need:
1/2 C (1 stick) margarine, melted
2 eggs
1 tsp salt
1/2 tsp pepper
8 oz sour cream
15 oz can whole kernel corn, drained*
15 oz can creamed style corn
1 box corn muffin mix (I use Jiffy)
In a medium/large bowl, soften/melt the margarine, add the eggs, salt and pepper. Stir until mostly blended.
Next add the sour cream and both cans of corn. Mix again until blended.
Last, add the corn muffin mix, fold in slowly and mix until blended.
Pour into a greased baking dish of your choice. One batch will fill a 13×9 pan or you can use two round dishes, fluted pie pans, smaller rectangles etc. The baking time is usually the same regardless of what shape pan you use.
Bake at 350° for about 45 minutes. Top will begin to crisp and brown and the underneath will remain softer. Let stand about 10 minutes before serving for inside to set a bit. 
*If you would like this dish a little gooier inside, more of a ‘corn pudding’ with a bready top, do not drain the whole kernel corn. I make it both ways, and both are delicious. 
Aside from being easy and super yummy, what I love about this recipe is the versatility. Eat it as a side dish with herb grilled chicken or ham or top it with country gravy (yummmm). It’s also a great, hearty vegetarian dish when served with a salad or fruit. 
You can easily spice up this recipe or make it a meal in itself by adding ingredients such as cheese (cheddar or swiss work great), cubed ham, bacon, or cut veggies before baking. Just be sure any meat or veggies you add are precooked. Even simply adding additional seasonings such as garlic and onion powder or crushed red pepper will give it a different taste. I’d love to hear about what creative ways you find to change up this recipe or if you enjoy it just the way it is!

Looking for more yummy recipes? Click here to see all my previous In the Kitchen posts.