This week I’m going to be talking about tips and tricks for planning, starting, and assembling your Take Wing butterfly! Today I’ll be covering the preparation of your pattern pieces including a couple paper piecing tips that I use and love. Tomorrow I will cover planning, layout and fabric selection (which will probably be a really long post!) and then a few assembly tips and finishing options.
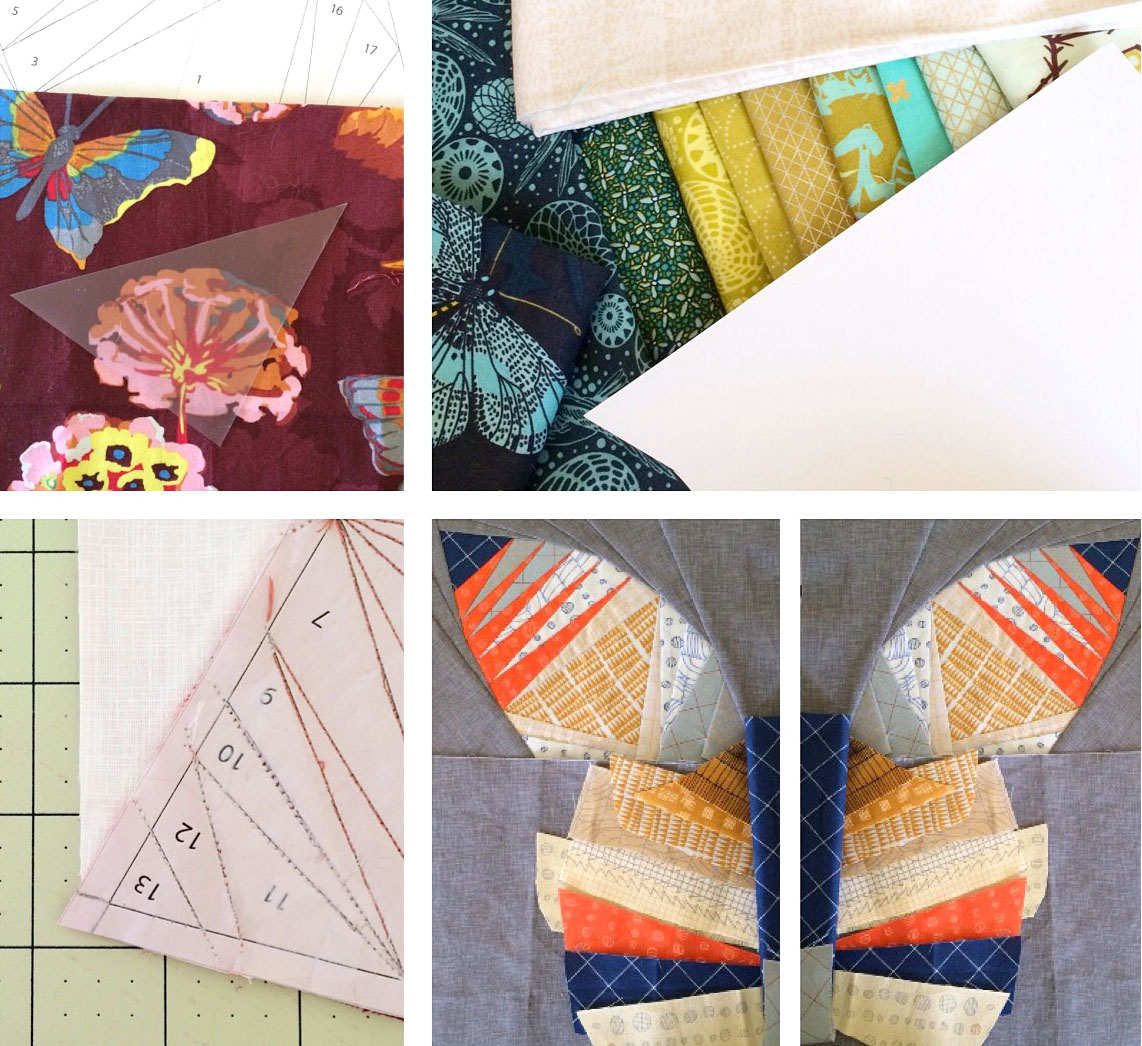
Many people use basic printer paper for paper piecing, and it works totally fine! I prefer to use Carol Doaks Foundation Paper. It is inkjet and laser printer friendly and really thin, so it’s easy to sew through and easy to remove. The biggest benefit in using it in a project like this is when it comes to piecing together the sections. Some areas have a lot of bulk along the seam, and thinner paper makes sewing them together much smoother! Alternatively, you can remove the paper from the seam areas before sewing the sections together.
Many paper piecing patterns are small and do not require the piecing together of pattern pieces. I touch on this in the pattern directions a bit, but still get a lot of questions about it, so here’s a little bit more detail on the subject.
You can use a glue stick or tape to connect your pieces, and it’s really a matter of personal preference. Regardless of which method you choose to use, after printing out your pattern pieces, be sure to leave one from each section uncut. We’ll refer to Wing A for example here.
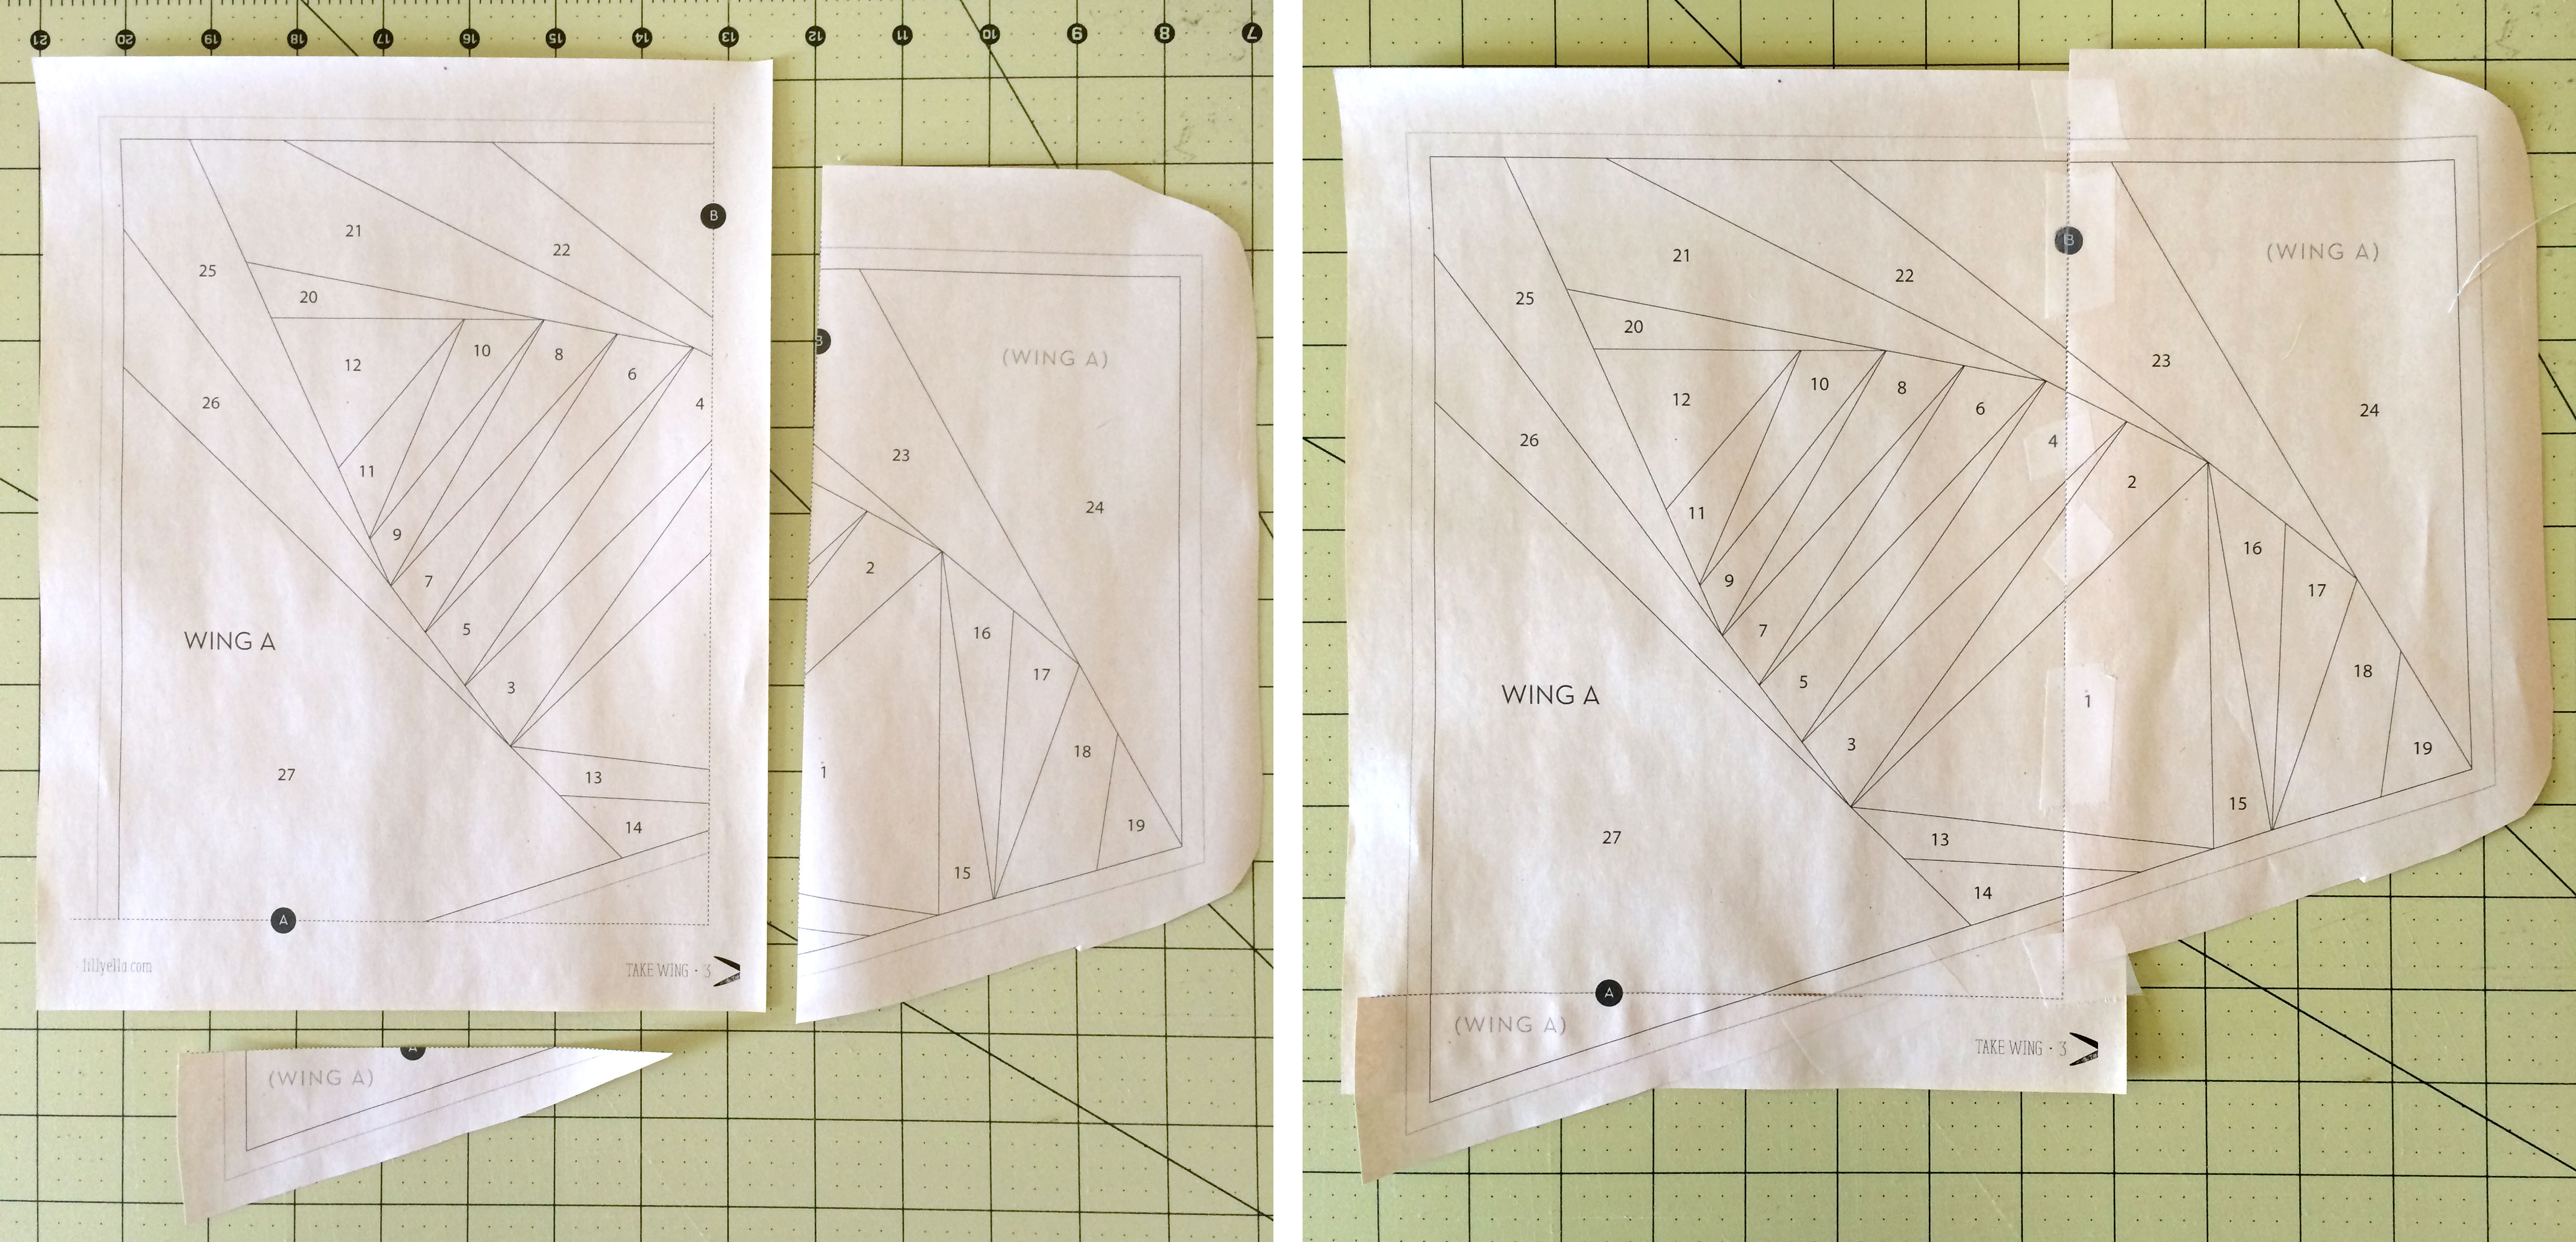
Wing A has three sections. I leave the largest section uncut and then I cut along the dotted line of the two smaller sections. Then you will lay them on top of the uncut piece, lining up the cut edge with the uncut dotted lines, and glue or tape.
The advantage to using glue is that you are not sewing through tape! The disadvantage to glue is that sometimes it comes loose and it can also cause a little bit of rippling in your paper.
The advantage of tape is that it is easy and sticks together well. The disadvantage is sewing through tape OR possibly ironing over tape, which is a mess, trust me. That being said, I often use tape. I just try to tape inside large areas and not cross over any sewing lines. I also tape on the back side along the loose edge from the overlap of the uncut piece, but you have to be extra careful to not iron over the tape.
Once your pieces are together, you can then roughly trim the entire piece down outside of the outer seam line. Do not cut the paper pattern to the outer seam line, as you’ll want that for trimming your sections later.

The next step I recommend is tracing the pattern lines onto the back side of the pattern pieces. This step is not necessary, but even as an experienced paper piecer, I find it extremely helpful and worth the little bit of time it takes. You can use a window, your computer screen or a lightbox, if you have one. The tracing doesn’t have to be perfect, as it’s just a reference.
Doing this allows you to easily cut your fabric, double check your work, adjust placement on fussy cuts and check the size of your pieces as you sew. All these things mean less time with your seam ripper!

Stop back in tomorrow when I’ll be talking way too much about inspiration, layout, fabric selection, fussy cutting and more – see ya then!