EPP Preparation and Organization

Today we’re talking EPP organization! I don’t know about you, but preparing for a project is my favorite part. Selecting fabric, cutting, sorting, organizing. It is MY JAM. I always slow down a bit when it comes to the execution :P!

UPDATE: Butterfly Effect Supplies (templates, papers and printed patterns) are now available from Paper Pieces HERE. Thank you!

Whether you are participating in the Butterfly Effect Sew Along (kicking off May 3!) or simply working on your own, today I’m talking about how I organized and prepared to begin my project. Tips in this post will apply to both supplies ordered from Pink Door fabrics (preorders now shipping!) and for those printing and cutting their own papers.

This will be the only post I share here before the Sew Along kicks off on May 3. All other posts and tutorials will be shared through the Sew Along newsletter, so you’ll have to sign up if you’d like to follow along! You can do so here.

If you’re printing and cutting your own papers, you can skip down to the next section. If you ordered a laser cut paper piece set from Pink Door Fabrics you will receive 16 sheets as shown above. There are four each of four different sheets. This includes all the pieces needed to create the full Butterfly Effect Pattern plus some extras of each piece.

The pieces are perforated and pop out easily, though take care with extra pointy corners as to not tear them. The pieces are laser cut and etched, so there may be some light residue on the sheets. It is not harmful and can be lightly brushed off with a paper towel, if desired.

One of each different sheet has the paper piece letters etched into every piece as a guide for helping to familiarize you with the shapes and assist with direction and placement. The letters and placement on the paper pieces match all the diagrams in the pattern file. Each subsequent sheet has only one of each piece labeled to assist with sorting which we will discuss next.

As you sew, I recommend keeping at least one paper piece with a letter unused to use a reference for orientation as you go. You can also always reference the template pages in the pattern PDF if you get confused on the orientation of a shape. Some shapes are very similar to others, such as H and I, P, S & K. Also pieces A and R look symmetrical but are ever so slightly unsymmetrical, so you need to be sure you are using them in the proper orientation for all your pieces to fit together.

· · · · · · · · · · · · · · · · · · · · · · · · · · · · · · · ·

ORGANIZING YOUR PIECES

The first step is to separate and organize your paper pieces and my favorite way to do this is with plastic bags and alphabet stickers! Who doesn’t love an excuse to play with stickers, right?!

I like to create two sets of labeled bags – one for holding all my paper pieces and a second for holding my templates, fabric cuts and basted pieces.

I used 3″x4″ bags and small stickers for holding my paper pieces. This pattern has 19 shapes labeled A thru S, so I first affixed the stickers to the bags and then punched out my paper pieces and bagged them accordingly.

For the second set of bags to hold my templates, fabrics and basted pieces, I used larger 4″x6″ bags because they will need to hold more, and big, fun stickers that are easy to see.

I purchased my bags and stickers at Hobby Lobby, though you can find them in many stores such as Walmart with a craft section, Joanns, Michaels or your local craft store. Small bags can be found in the jewelry supply section.

I’m working on a few different versions of this pattern at once, so I created multiple sets of bags and used different stickers for each version to help keep them sorted. My free Mini Maker Case pattern is perfect for storing all your baggies and parts, too! You could also punch a hole in each bag and put them on a binder ring or in a cute pouch. I have some oil slick vinyl that is calling my name and I may need to make some!

I hope you find this post fun and helpful! You can sign up for the Butterfly Effect Sew Along here and be sure to follow me on Instagram for a chance to win some awesome SAL prizes!

Butterfly Effect launch day!

Today is the day! Butterfly Effect is out in the world and I’m SO DARN EXCITED! This pattern has been a really long time in the making. I started and stopped and started and stopped and almost gave up on it a few times. I sketched dozens of options and fought with geometry for too many hours to count, but… TOTALLY WORTH IT!

Download the Butterfly Effect Pattern here

The pattern finishes at 24” square as written (shown above), making it a perfect mini quilt or pillow, but you can continue to grow your piece to any size or use small sections of the pattern for other applications.

The pattern includes printable templates and pattern papers so you have everything you need to jump right in or you can order laser cut paper packs and acrylic templates at PinkDoorFabrics.com.

**UPDATE: Butterfly Effect Supplies (templates, paper packs and printed patterns) are now available from Paper Pieces HERE. Thank you!

• • • • • • • • • • • • • • • • • • • • • • • •

SUPPLIES

**UPDATE: Butterfly Effect Supplies (templates, paper packs and printed patterns) are now available from Paper Pieces HERE. Thank you!

• • • • • • • • • • • • • • • • • • • • • • • •

I believe that any level sewist can create this pattern, even EPP beginners! Complete instructions on EPP are not included, but many tutorials can be found online. You can also check out my  Beginners Guide to EPP. Even if you are experience with EPP, you may find some helpful information in this post, plus links to all my favorite tools!

I will be hosting a Butterfly Effect Sew Along that will kick off May 3 where will we work step-by-step together, so if you’re a newbie but want to give this a try, I hope you’ll sew along! You can sign up by clicking here.

I hope you love creating this pattern as much as I have. Remember to share your projects and find inspiration with the hashtag #ButterflyEffectPattern on social media!

Mini Maker Case Sew Along Schedule and Details

It’s T-minus two days ’til we kick of the Mini Maker Case Sew Along and today I want to share a few more details, as well as the sew along schedule.

There are at least 2200 friends sewing along over the next couple weeks and many of them have never participated in a sew along, so I first want to cover all the specifics of how this sew along will work.

A sew along is essentially just what the name implies, a group of people sewing through a specific pattern “together” virtually over a set time period. Sometimes a SAL is very structured with a set schedule and specific prompts for sharing your work on social media etc, and sometimes a SAL is very loose with nothing shared along the way but what others choose to share as they work their own project. Sew alongs are typically most active on social media, such as Instagram, where people share photos of their progress using specified hashtags so everyone participating can view each other’s work, answer questions, share tips & inspiration and more. The best part about a sew along is that it often gives someone the motivation to start or stick with a project and it’s also a fabulous opportunity to learn new skills and make new friends!

If you haven’t yet joined the email list for this sew along, please do so by clicking here. I will be sharing information through this email list and will also have posts here on my blog and on my Instagram account here.

For this SAL, I will be following a casual schedule which you can see posted above. On each day specified on the schedule, I will share information about the parts of the pattern we will be working on via the sew along email list and through social media. This will include some basics from the pattern as well as additional tips, photos, video tutorials and more. Everyone then sews at their own pace through these steps, sharing progress photos as they go. I will also share some prizes that will be up for grabs and how to be eligible for a chance to win them!

This is not a live event or class, all information if sent via email on the mornings of the dates posted above and everyone works at their own pace until the next steps.

SCHEDULE

Sept 14: We will cut all our pieces and begin preparing the handle and top & bottom of the case. I will be sharing some tips on fussy cutting!

Sept 17: We will begin piecing the main body panel with the zipper and the back panel. Don’t fear the zipper, we’ll help you through!

Sept 21: We will begin assembling the case. I will share some video tutorials on these steps.

Sept 24: Sew inside binding

Sept 28: Share your finished case and be eligible to win a Mini Oliso Iron!

If you haven’t yet downloaded the pattern, you can find it here and start pulling your supplies, then stay tuned for our kick off email on Monday, September 14!

Mini Maker Case Sew Along!

It’s time for the Mini Maker Case Sew Along! We’ll kick things off on September 14 and it will run through September 28. You can download the free Mini Maker Case pattern here.

Whether you’re a Sew Along fanatic or have never participated in one before, I hope you’ll join in! It’s great motivation to complete a project or try something new and there’s always oodles of help and inspiration along the way – not to mention new friends and fun prizes!

This little case is designed specifically to store and transport the Oliso Mini Project Iron with padded sides and a reinforced top and bottom, but it’s perfect for so many other things too, from notions or a small project to cosmetics, toys, and most importantly, snacks!

· · · · · · · · · · · · · · · · · · · · · · · ·

SEW ALONG SIGN UP

I’m going to try something new with this SAL and have an email sign-up so it’s easier to communicate with everyone. Emails will only be sent during the sew along and the list will be deleted after it’s over. Please click here to join in! I will select three winners at random from the email list on Monday to receive an interfacing kit for making their case.

I will be following a schedule, but you are welcome to join in at anytime and sew at your own pace. During the first week of the sew along, we will work on preparing all the pieces of the case and the second week we will work on assembly. The pattern contains all the information you need to complete the project, but throughout the SAL I will be sharing additional tips, tutorials and videos to help.

If you’re new to sewing and wondering if you can complete this project, the answer is yes! I am always happy to give additional help where needed and you’ll find a great community amongst the participants who also love to help through blog post comments and on social media. We will have a SAL hashtag and share our progress photos along the way, as well as our finished pieces at the end.

Everyone who completes their case by the end of the Sew Along will be eligible to win a pink Mini Oliso Iron! I will select one winner at random from all finished project photos posted on social media or sent to me via email. I’ll share more specifics on that later and I’ll also have a few more surprises along the way, too!

Alright, gang… sign up on the email list above, download the pattern, start your fabric pull and stay tuned for more information!

Maker Mat SAL: Pocket Panel Tips & Tutorials

Hello, Hello! If you are just joining the sew-a-long, please scroll down a few posts to find the kickoff and all the tips shared in previous posts or scroll to the bottom of this post for direct links.

So far we’ve worked on the main body of the mat and how to add a machine handle opening, and today I’m going to talk about the pocket panels. If you’re just getting started on your mat, don’t worry, there’s still plenty of time!

Before you begin your pocket panels remember that if you changed the size of your main body, you will need to also adjust the size of the pocket panels! You can do this by changing the size of one pocket or adjusting all the pockets equally. Don’t forget to think about seam allowances when calculating cutting sizes.

One thing to note about the pocket panels is that there are SO many ways you can customize this entire project, but especially this part. You can adjust the sizes, add more or less pockets, you can piece them all with any block you love or you can eve use one solid cut of fabric to make it really quick and easy. Be sure to check out the #undercovermakermat hashtag on social media to see tons of creative inspiration!

pockets

Above you can see just a few variations from mats that I’ve made in the past. The top left follows the pattern as written, which the bottom left follows the same sizing and layout, but uses full cuts of fabric (rather than piecing) with cute fussy cuts! On the right, there is a little mix of both. I substituted my Love Story pattern block for the butterfly and then used solid fabric cuts for the other pockets with some added lace trim details.

First I’m going to share some tutorials and tips on creating the accent pocket panels which are the paper pieced butterfly and the selvedge pockets, then I’ll cover a bit more details on piecing the panels and trim options.

All the information you need to create the accent pocket pieces is included in the pattern (including a link to a tutorial on making the butterfly for beginner paper piecers), but I will go into a bit more detail here and include some additional tips and photos, as well as design variation ideas.

•  •  •  •  •  •  •  •  •  •  •  •  •  •  •  •

PAPER PIECING TIPS

You can find the pattern for my Butterfly Charm Blocks here. All three butterfly designs are the same size and any can be used. The foundation paper piecing tutorial link included in the pattern is from Cassandra Madge and you can find it here. It was so sweet of her to use my pattern as the example for her tutorial!

Our methods of paper piecing are very similar, with just a few differences. I like to use the Add-A-Quarter Ruler, rather than a standard quilting ruler. It does the same job, but is just one of those tools that takes away some room for error. Another paper piecing tutorial I often direct people to is this video from Connecting Threads. You can see the Add-A-Quarter ruler being used.

paper piecing tips | lillyella stitchery

When I paper piece, especially small blocks, I like to use Foundation Paper. You can buy one from Carol Doaks or you can use any thin newsprint. Someone recently mentioned they found this pack from Dick Blick, and you can’t beat the price! I also apologize that I don’t remember who tagged me on that, please let me know if it was you! It is essentially just a thinner paper that creates less bulk and allows for easier removal. You can use any paper for paper piecing, but the thinner you can find, the easier it will make the process.

Another thing I ALWAYS do is to trace the pattern onto the back of the sheet. It does not have to be perfect because you will only be using it for reference, but it helps in a multitude of ways. I use a lightbox, but you can also use a window. Since this is the side where you will place your fabric, you can use these lines as a guide for cutting your fabric pieces. You can still use the printed side, but you have to work with your fabric upside down at that point, and I like to see the prints and placement.

After tracing and selecting fabrics, I also note my fabric selections or color accordingly on this side. Then I always know I’m placing the correct piece. These lines also help you as you sew to make sure a fabric cut will cover a segment. Place the fabric where you would for your next seam, but before sewing, hold the fabric approximately where your seam will be and fold the fabric over as you would when pressing it after sewing. You can then see if your piece is large enough to cover everything it needs to. You can then sew your seam with confidence, because unpicking a paper pieced seam is NO FUN!

Lastly, I find having these lines helps prevent you from missing a segment, which is something I see a lot in paper piecing. When you have the pattern lines on the side where you are placing fabric, you will notice if you’ve missed a piece. You still have to pay attention, but it’s definitely better than flying blind!

paper piecing tips | lillyella stitchery

In Cassandra’s tutorial, you will see her talking about adding some basting stitches to you sections to help when piecing them together. This is important and something I always do as well, however, I put my stitches in the seam allowance as you can see above in the left photo.

Another tip is that when trimming sections to the seam allowance after piecing, do not trim any sides that are on an outer edge (above right). This way you can trim your final block to size after it is completely pieced. It is not uncommon to lose a little bit in each seam, so this ensures you can have the correct sized block in the end, and also lets you trim the block to a slighty larger size, if desired.

After piecing sections, I always remove the paper from the seam allowance only before sewing sections together. This just helps with bulk and allows you to press a flatter seam before adding the next section. You can also see this in the above right photo.

•  •  •  •  •  •  •  •  •  •  •  •  •  •  •  •

SELVEDGE POCKETS

For those who are new to sewing or do not know what a selvedge is, it is the finished edge on a bolt of fabric. There are finished edges on both sides along the width of the fabric, but only one will contain printing and this is the side I use on this project. I cut my selvedges off with about one half inch to one inch or so of the fabric print included, just to make sure I always have enough extra to work with them. The directions on how to work with the selvedges to create the pockets are included in the pattern.

selvedges

•  •  •  •  •  •  •  •  •  •  •  •  •  •  •  •

VARIATIONS

Below are more variations from makes on Instagram to help inspire you!

examples5

•  •  •  •  •  •  •  •  •  •  •  •  •  •  •  •

TRIM

This pattern uses trims or ribbons for securing the secondary pockets and hiding the raw edges, and also for creating the side ties when using it as a machine cover. Below are some trims from my collection that I’ve found at Joanns, Hobby Lobby and even Walmart. Anything between 1/4″ to 3/8″ width is best. If it is too small then you will have trouble enclosing the raw edge of the pocket, any thicker and you cut into your pocket space. Trims that are more solid are best to hide the raw edges, but some lacier style trims can work ok, too.

ribbons

If you don’t have any trims on hand, you can also use a thin bias binding strip instead. Start with a 1″ or 1.25″ cut strip, fold the raw edges into the center, then fold in half and press and use this as you would a piece of ribbon. You can also you another selvedge with the cut side pressed under. Lots of possibilities!

trims

•  •  •  •  •  •  •  •  •  •  •  •  •  •  •  •

Undercover Maker Mat | lillyella stitchery

POCKET BINDING

I like the look of the binding on the pocket because I think it balances the piece nicely, but if you prefer, you can eliminate this step and instead attach the lining to the pocket panel just as you did on the small secondary pockets. Just lay your lining piece, RST, on top of your finished main pocket panel and sew across the top with a 1/4″ seam. Flip the lining to the back, press, and top stitch along the top edge. You can include the fusible fleece when you do this, add it after tucked up to the seam, or skip it all together and use some lightweight interfacing on one or both pieces instead.

pocket-binding

Above are a couple examples I saw on the #undercovermakermat hashtag on instagram that demonstrate this variation. If you have any questions about doing this instead of the binding, just let me know and I’m happy to help!

•  •  •  •  •  •  •  •  •  •  •  •  •  •  •  •

Once your full pocket panel is complete, you will baste it to your mat body and bind the entire piece as covered in the pattern. BE SURE TO ADD YOUR SIDE TIES BEFORE BINDING! If you do not plan to use your mat as a cover, you can leave them off. I did forget to add them once and just had to unpick a little bit of my binding and tuck them in, which was not hard to do, so it’s not the end of the world if you forget, or even decide to add them later!
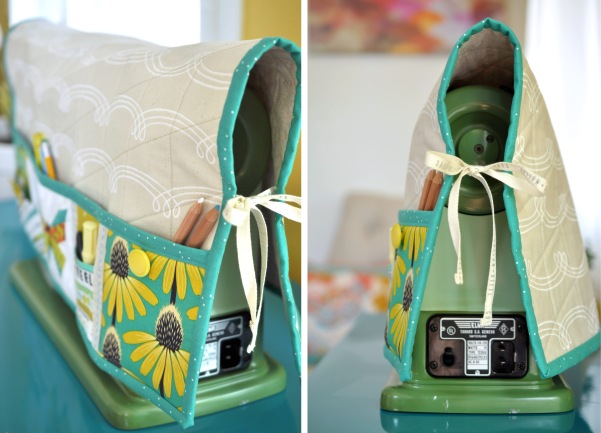
tie double

Just as with trim used to secure the secondary pockets, you can instead use a binding strip for your side ties, or even additional selvedges. If using a binding strip, simply top stitch along the folded edge to close it up. You can tie knots on the ends or stitch them closed.

cover

cover1

Stay tuned next week for one more post talking about the thread catcher before we wrap things up on October 28!

ADDITIONAL POSTS:

Undercover Maker Mat Sew-a-long: All the details

PART ONE: Kickoff! Sizing your mat and tutorials for beginners

Sponsors and Prizes!

PART TWO: Adding a machine handle opening

Maker Mat SAL Kickoff – Sizing your Mat & Tutorials for Beginners!

It’s time to kick off the 2019 Undercover Maker Mat Sew Along! I’m thrilled that so many of you are joining in. This is my favorite sew along because I love seeing all the personality that people put into their projects, plus it’s just awesome when I hear how much everyone loves having it and using it!
If you’re just tuning in, you can download the free Maker Mat pattern here. This sew along is open to everyone, there’s no sign up or obligation and anyone is free to join in at any time. I’ll be following the schedule outlined here sharing tips along the way, but you are welcome to sew at your own pace. There will be some amazing prizes up for grabs, too, and everyone who posts their progress photos and finished pieces on social media with the #undercovermakermatsal2019, #undercovermakermat and @lillyellastitchery will be eligible to win! Every post counts as an entry and winners will be drawn at random.

This week we’re pulling fabric and sewing up the main body of the mat. Today I’m going to talk about how to customize the size of the Maker Mat to fit your specific machine and then later this week I’ll be sharing a tutorial for adding a machine handle hole to the body. This is also something you can do to any finished mat if you’ve made one previously.

· · · · · · · · · · · · · · · · · · · · · · · · · · · · · · ·

SIZING YOUR MAT

The finished mat as it is designed in the pattern measures 20″ wide by 23″ long. This size was based off a couple machines I had on hand and what felt good to fit on a variety of tables. This size can be easily changed if you find that you need a larger or smaller mat to cover your machine or fit on your work surface. I just got this adorable little travel machine, so I’m making a tiny mat to fit it. Aside from determining the size of your main body, the only other change you’ll need to make to the pattern is adjusting the width of the pocket panel, which I will cover next week.

A couple things to consider when sizing your mat. If you plan to use it as a mat under your machine and also a cover, you will follow the steps below for measuring your machine, but you will also want to think about the table you’ll be on when using the mat under your machine. You may need 25″ or more to fully cover your machine, but may find this leaves too much mat on your table that you don’t have room for. If this is the case, perhaps consider a happy medium. The cover does not need to fully cover the machine to be functional.

To customize the size of your mat, start by measuring the width of your machine and deciding if you’d like any “extra”. The base of my machine measures 13″ across, but since the hand wheel sticks out a bit farther, I’m going to make my body 13.5″ wide.

Next you will measure up and over your machine. You will want to leave a little slack in your tape or add a bit to your measurement to account for a little bulk in the body once it’s quilted. I left some slack in my photos above, so I’m going to make my mat 24.5″ long. If you do not plan to also use your mat as a cover, then you do not need to worry about this measurement and can stick with the original 23″ length in the pattern, or measure your table and decide what size you like.

I’m a visual person so I like to make diagrams of my measurements. Above you will also see my handle hole measurements, but I’ll cover that in more detail later this week. So, to fit my machine, I’ll be making the main body of my Mat 13.5″ wide by 24.5″ long vs the 20″ x 23″ specified in the pattern. (I may choose to add a bit more to the width, just to have some extra pocket space, but I don’t want the sides too “floppy” when it’s covering the machine since I’ll be traveling with it.)

As I mentioned, if you change the width of your mat, you will need to equally add or subtract measurements when making the pocket panel pieces. I will cover this in more detail next week, but for those who like too work ahead, an easy way to do this is to simply add or subtract from one of the end pockets and keep the inner pocket dimensions the same, but you can, of course, adjust them any way you like.

· · · · · · · · · · · · · · · · · · · · · · · · · · · · · · ·

FABRIC PULL

This is a piece to have fun with! I usually go with a subtle background so that I can really have fun with the pocket panels, but I’m going to change things up this time. Since my mat will be smaller for this machine, I’m going to make my pockets a little simpler. I will use some prints and perhaps piece one panel of stripes, but I’m going to use that super fun focal print from Alison Glass Handiwork as the body with the bright blue mariner cloth binding.

This is pretty much how I make decisions on fabrics, I try to lay things out as best I can and just step back to take a look. This time when I stepped back, I tripped right over my space heater and conked my head, but I don’t really need ALL of my scalp anyway.

· · · · · · · · · · · · · · · · · · · · · · · · · · · · · · ·

TUTORIALS FOR BEGINNERS

If you’re a sewist, but new to quilting, don’t fear! The body of the Maker Mat is a great first project to dip your toes into the world of quilting!

To create the main body of the Maker Mat, you will need basic knowledge of how to layer your top, batting and backing and how to do the quilting stitches. This tutorial from Suzy Quilts covers all the basics. It applies to a large quilt, so working with your main mat body will simply be a smaller and simpler version! Straight line quilting is a great design for beginners, or a crosshatch is a always a nice option, too. I’m not sure its mentioned in the tutorial, but I love using a Herra Marker (a bone folder or scoring tool also works similarly) to mark my quilting lines, especially for something like a crosshatch. Here is a video on using a Herra Marker.

Another quilting technique you will need to know comes at the end of the body and that is binding. This is the little edge “wrap” that goes around the entire piece and seals everything up. Here is a helpful tutorial from Bluprint.

· · · · · · · · · · · · · · · · · · · · · · · · · · · · · · ·

So this week share photos of your fabric pulls and your main body progress and be sure to use #undercovermakermatsal2019, #undercovermakermat and @lillyellastitchery when posting! Tomorrow I’ll start sharing some of the amazing sponsors and prizes I have lined up!

Mini Maker Station SAL 2019 Kick Off!

DSC_1933

Good morning, friends! It’s time to kick off the 2019 Mini Maker Station Sew Along! I’m thrilled that so many of you have said you’re finally making the time to sew this up for yourself or for holiday gift. Sew Alongs always give me the motivation to create something that I’ve been wanting to.

If you haven’t downloaded the FREE pattern yet, you can find it here. This pattern requires some basic knowledge of sewing and quilting, but any beginner can tackle it! I’ll be including helpful tips, tutorial links, videos and more along the way for every step and I’m always happy to give personal assistance when I can. You can reach out to me anytime through social media or email.

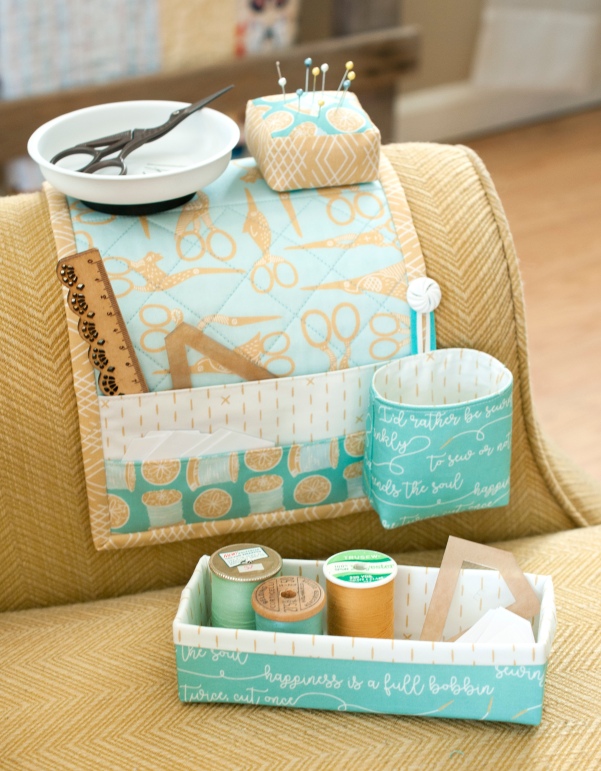
This SAL will run three weeks, ending on October 4, but you are welcome to join in at any time and sew at your own pace. In today’s post I’m going to talk just a bit about selecting fabrics and go over some of the other materials you need. I’m also going to share some tutorial links on basic quilting and binding for those who may be new to quilting, and a couple tips about thread catcher placement. This week we’ll be working on the main body of the Maker Station and the thread catcher. Next Monday I’ll have a new blog post with some tips about creating the fabric basket and working with the magnets.

Share your progress photos on social media with the hashtags #minimakerstationSAL2019 and #minimakerstation to inspire and encourage others, and have a chance to win some fun prizes!

If you haven’t picked up a hardware or are waiting for yours to arrive, don’t worry! You can still begin your project as there is plenty you can do without it, especially during the first week. You can create the entire body and just wait to sew the last bit of binding down until you have the metal, and you can create the thread catcher. There is also quite a bit you can do on the pin cushion and basket next week before you need to add the magnets. You can find hardware kits in my Etsy shop here.

· · · · · · · · · · · · · · · · · · · · · · · · ·

FABRIC & MATERIALS

I want to quickly touch on why I don’t often include “fabric requirement” sections in my patterns, including this one. There are endless ways to layout and customize this project. I never want to lock someone into fabric placements by specifying what you should use where. One person may use three fabrics for the whole project, while another may use thirteen! Also, the cuts on a project like this are all small, so a fabric requirement list would simply be the same as the cutting instructions. The specific sizes of all the pieces you need for each part of the pattern are included at the beginning of each labeled section.

DSC_0845 edit

Now, onto materials! If you have not already purchased a hardware kit or sourced your own materials, you can find more information about those materials needed here, including my sources.

IMG_9046 edit

All fabrics used are standard quilting cotton. You could use some lightweight linens or blends, but thicker materials, such as canvas, may be too bulky for the pin cushion, basket and thread catcher, as they’re all pretty small. In addition to your fabrics, you also need a couple different interfacings. Sometimes these can be optional, as they are often used for added durability, but in this project they are required as they hold the magnets in place and create the basket.

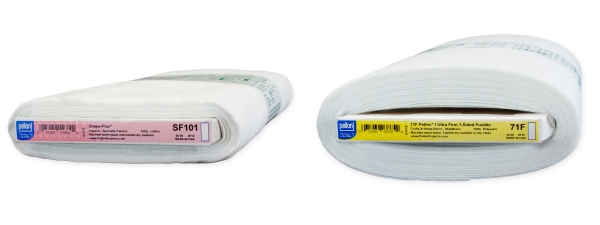
The first is Pellon brand SF101, also known as ShapeFlex. You can find this at any fabric store or Walmart with a craft section. You can also order it online. This can be substituted with another featherweight or lightweight fusible interfacing if you wish, but the SF101 is my preference.

interfacing

The second interfacing you need is Pellon brand Peltex 71F, ultra firm single sided fusible interfacing. I do not recommend substituting this with anything else as it creates the main structure of your fabric basket. Be sure that you get the 71F and not the 70 (sew in) or 72 (double sided fusible). This interfacing is very thick, it should look and feel similar to a piece of cardboard. It should not fold without “creasing” itself. You can also find this interfacing at fabric stores, Walmart (or the like), or online. Next week I’ll share some helpful tips for keeping the basket edges nice and crisp!

walnut

For filling the pincushion, I like to use ground walnut shells because I love the weight and feel, especially with the square shape. It’s like an adorable little bean bag! I purchase mine at a local quit shop, but Plum Easy (the brand I get) also sells online here. If you’re making this for a gift, just avoid the shells if someone has a nut allergy! I have also used polyester stuffing in the cushion, which works perfectly fine!

The last little “extras” you need are some thin ribbon or trim and buttons to hang your thread catcher (which is optional!).

· · · · · · · · · · · · · · · · · · · · · · · · ·

CREATING THE BODY & THREAD CATCHER

If you’re a sewist, but new to quilting, don’t fear! The body of the Maker Station is a great first project to dip your toes into the world of quilting!

To create the main body of the Maker Station, you will need basic knowledge of how to layer your top, batting and backing and how to do the quilting stitches. This tutorial from Suzy Quilts covers all the basics. It applies to a large quilt, so working with your main mat body will simply be a smaller and simpler version! Straight line quilting is a great design for beginners, or a crosshatch is a always a nice option, too. You can see how this looks on my sample below. I’m not sure its mentioned in the tutorial, but I love using a Herra Marker (a bone folder or scoring tool also works similarly) to mark my quilting lines, especially for something like a crosshatch. Here is a video on using a Herra Marker.

mmshome

Another quilting technique you will need to know comes at the end of the body and that is binding. This is the little edge “wrap” that goes around the entire piece and seals everything up. Here is a helpful tutorial from Bluprint.

The body and thread catcher are fairly straight forward and the pattern includes detailed instructions and diagrams on creating these pieces, but if you have questions at any point, feel free to contact me.

DSC_1933 edit crop

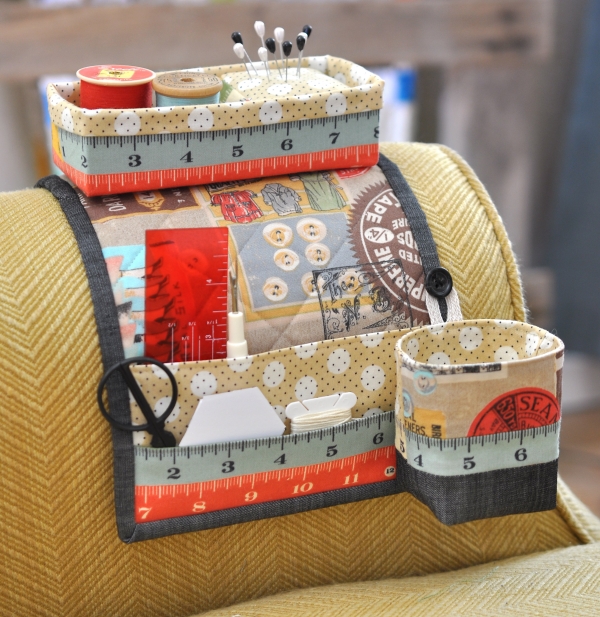
When it’s time to sew the buttons for hanging your thread catcher, think about where you will be using your Maker Station. I prefer to hang my thread catcher on the side farthest away from me so my leg doesn’t hit it and it’s not in the way of my pockets, so this placement will vary if you place the station to your right or your left. Also keep in mind it’s “reversible” in a sense, you can place either set of pockets on the inside of your seat or the outside. I sew at least two buttons on my body, but you can sew four buttons (one on every outer edge) so you’re fully versatile!

As I mentioned, this little thread catcher is an optional piece, but I love it. If you don’t use it for scraps, you can use it for extra storage. It’s also a handy design to use elsewhere, like on your sewing machine!

DSC_2046 blog

Those are all the basics for this week as we create our main body and thread catcher. I will be posting some photos of your projects on Instagram through the week, as well as sharing some of the SAL prizes, so I hope you follow along! Remember to use the tags #minimakerstationSAL2019 and #minimakerstation, and share with a friend!

{Click here for the MINI MAKER STATION SAL PART 2}

Upcoming Sew Along Schedules

Welp, it’s September already, so let’s get this party going! It’s time for the 2019 Mini Maker Station and Undercover Maker Mat Sew Alongs! More specifics on each will follow soon, but I wanted to get the initial schedule out there so you can start planning. Both of the FREE patterns are available here.

You don’t have to do anything to join in either or both Sew Alongs. There’s no sign up or obligations, you simply sew along with others and have fun! This is a perfect opportunity to make something for yourself that you’ve been putting off or to whip up some holiday gifts! Sew Alongs always give me the motivation I need to get something done and I love being inspired by everyone else along the way.

The SALs will be casual and while I will loosely follow a schedule to share tips and help those who need structure,  you are free to join in at any time and work at your own pace. We will share photos on social media with SAL hashtags as we go and there will be fun prizes and giveaways, too.

First up will be the Mini Maker Station and we will kick things off September 16. Since this project requires hardware, please read through the pattern and source your materials or purchase a hardware kit from my shop here. You will not need the hardware in hand to start the project and can actually get very far on most of it without the hardware, so don’t worry if you don’t have yours by the kickoff.

MINI MAKER STATION SAL SCHEDULE

September 16 – 24: Sew Along Kick Off! Start pulling and share your fabrics. Work on the Maker Station Main Body and Thread Catcher.

September 25 – October 3: Blog post with tips about making the fabric basket and pin cushion. Work on basket and pin cushion.

October 4: Share your finished Maker Stations!

· · · · · · · · · · · · ·

DSC_0428 edit B

Next, the Undercover Maker Mat Sew Along will kick off on October 7 and run thru October 23. You can find the free pattern here. I will be following the schedule below but again you are welcome to sew at your own pace and join in any time! There are many ways to customize this project and adjust it to your skill level, so please note that many specifics indicated in the schedule are optional. Before the SAL begins, I will share a blog post discussing some of these options, variations and customizations to help  you plan! You can also check out the hashtag #undercovermakermat on social media to oodles of inspiration!

UNDERCOVER MAKER MAT SAL SCHEDULE

October 7: Kick off! Make main body panel

October 11: Make paper pieced butterfly and selvedge pocket panels

October 14: Make full pocket panel, assemble to body

October 18: Make optional thread catcher

October 23: Share your finished projects!

Stay tuned here and on social media for more information to come, but in the meantime, download the patterns and get ready! See you soon!

~ Nicole

Good Vibes Only Blog Tour

DSC_0541 edit

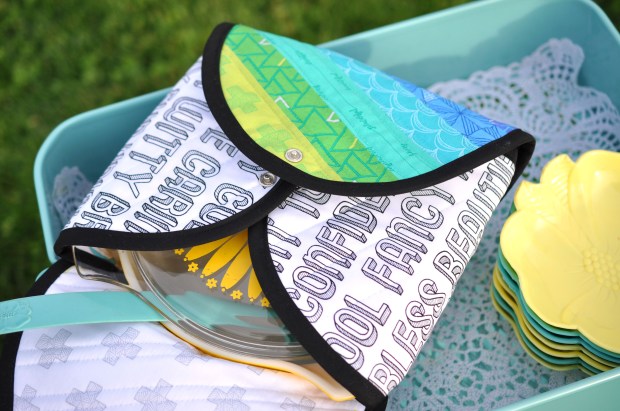
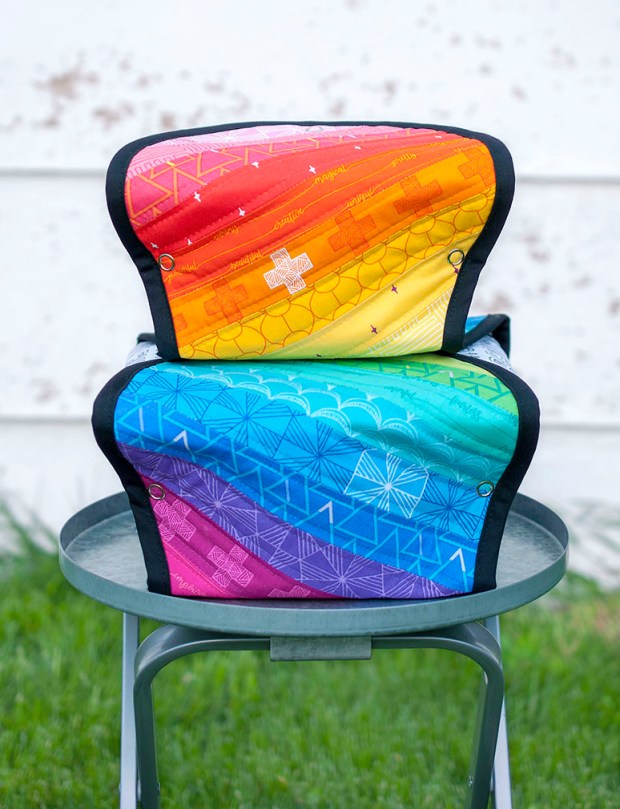
When Shayla Wolf of Sassafras Lane showed me her newest collection, Good Vibes Only, I knew it would be absolutely perfect for some summertime Wrap and Go Cozies! If you’re new to my blog or a recent follower, you may not have seen this pattern before, while I know many others are so patiently waiting!

DSC_0556 edit

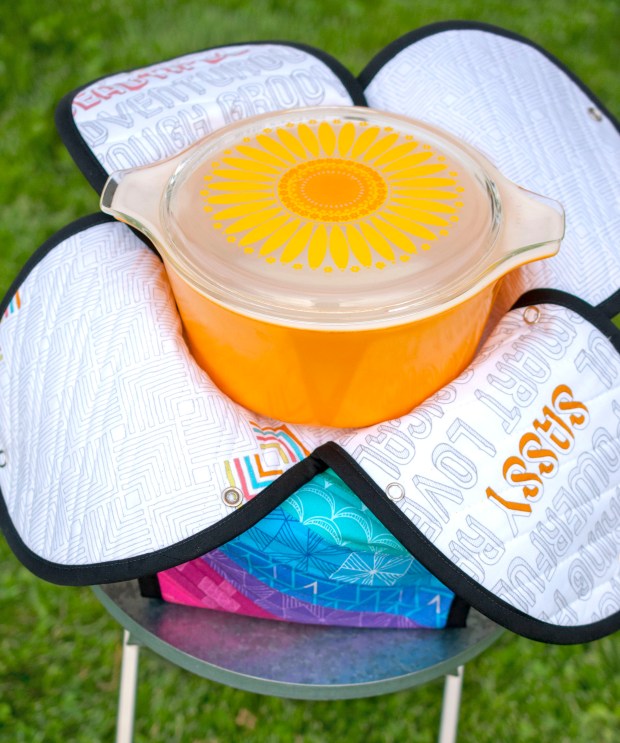
One of my obsessions is vintage Pyrex casserole dishes, collecting them AND using them. I take them everywhere! Parties, potlucks, picnics. Decades ago, Pyrex created  a promotional fabric cozy that came in three patterns with three different dishes, and it was GENIUS! I have no idea why it didn’t become a staple, but after I saw one, I knew I had to recreate it – and improve upon it!

IMG_4143

IMG_4165

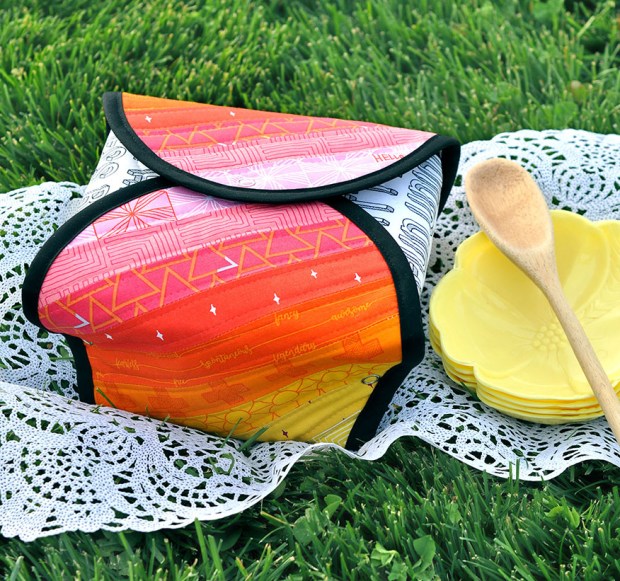
So I began designing patterns for easy-to-sew cozies to fit all the vintage Pyrex shapes and sizes that are large enough to be worth wrapping. They’re insulated and have optional straps (which I’ll be adding to these later this week!) and can also be easily customized to other similarly shaped casserole dishes.

IMG_4167

DSC_0574 edit

DSC_0609 edit

I’ve been procrastinating on these patterns for YEARS (what the heck, Nicole!), but the first set of patterns in what will be a large series will be available later this month, so stay tuned if you’re interested! The first pattern sizes released will be for Pyrex 473, 474 and 475.

DSC_0639 edit

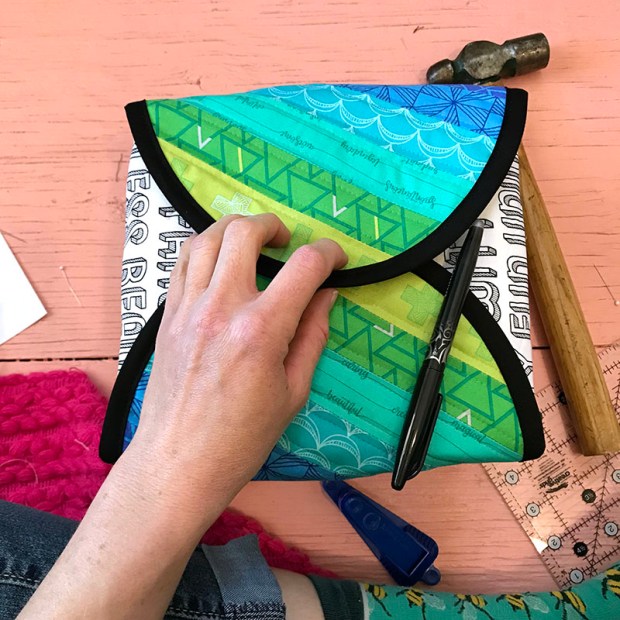
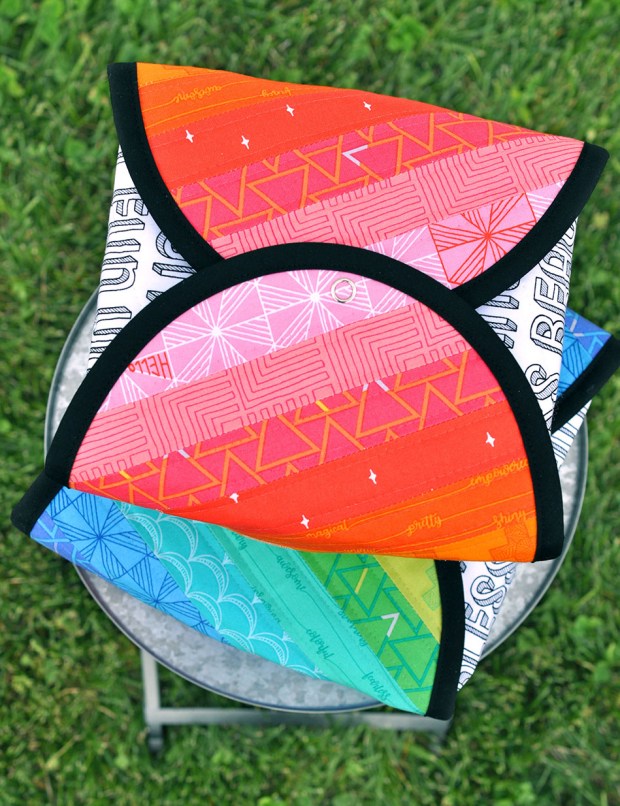
When I saw the COMPLETELY PERFECT rainbow gradient of this line, I instantly knew how I’d use the collection. I created a bias stripe rainbow gradient between two cozies and used the awesome text prints for the side panels, insides, and will also use a black and white text for the handles.

IMG_4095

IMG_4073

There are even four additional colored prints I didn’t use in my stripes (plus many more LV prints in white, gray and black), so you can really see how full and versatile this line is! Plus, it just makes you happy! Literally, nothing but GOOD VIBES here!

DSC_0658 edit

DSC_0685 edit

DSC_0684 edit

You can see more amazing projects using Good Vibes Only during the three week Blog Tour (details here!) and in the Good Vibes Only lookbook. Also be sure to visit me on Instagram for a chance to win some Good Vibes Only fabric for yourself!

Here is the Blog Tour lineup for you to check out all the amazing makers and have more chances to win some fabric!

Monday, June 3rd: Shayla Wolf | Sassafras Lane Designs

Tuesday, June 4th: Emily Dennis | Quilty Love

Wednesday, June 5th: Nichole Vogelsinger | Wild Boho

Thursday, June 6th: Irene Sytema | Sugaridoo

Friday, June 7th: Sylvia Schaefer | Flying Parrot Quilts

Saturday, June 8th: Robin Long | Robin Ruth Design

Sunday, June 9th: Jessica VanDenburgh | Sew Many Creations

Monday, June 10th: Nicole Young | Lillyella

Tuesday, June 11th: Sherry Shish | Powered by Quilting

Wednesday, June 12th: Tara Curtis | Wefty Needle

Thursday, June 13th: Jo Westfoot | The Crafty Nomad

Friday, June 14th: Janet Nesbitt | One Sister Designs

Saturday, June 15th: Natalie Barnes | Beyond the Reef

Sunday, June 16th: Elisabeth Hardy | Elisabew Quilts

Monday, June 17th: Sarah Sharp | No Hats in the House

Tuesday, June 18th: Joanne Hart | Unicorn Harts

Wednesday, June 19th: Elise Baek | Elise & Emelie

Thursday, June 20th: Kaitlyn Howell | Knot and Thread Design

Friday, June 21st: Nicole Daksiewicz | Modern Handcraft

Saturday, June 22nd: Sarah Thomas | Sariditty

Sunday, June 23rd: Shayla Wolf | Recap

DSC_0649 edit

Mini Maker Station SAL Kick Off!

DSC_1933

Good gravy, how is it February?! I still have a Christmas tree in my studio, but hopefully I can get it down this week :)! I’m SO SO excited to kick off the Mini Maker Station Sew Along (SAL) today! This pattern was in the works for SO long, because A) I’m slow, B) I’m busy, and C) it was a ton of computer work, which I loathe! However, it’s a pretty easy sew, even for beginners. If you haven’t downloaded the pattern, you can find it here.

This SAL will run for a bit over two weeks, ending on February 18. In today’s post I’m going to talk just a bit about selecting fabrics and go over some of the other materials you need. I’m also going to share some tutorial links on basic quilting and binding for those who may be new to quilting, and a couple tips about thread catcher placement. This week we’ll be working on the main body of the Maker Station and the thread catcher. Next Monday I’ll have a new blog post with some tips about creating the fabric basket and working with the magnets.

You are free to work at your own pace and in any order you’d like! Share your progress photos on social media with the hashtags #minimakerstationSAL and #minimakerstation to inspire and encourage others, and have a chance to win a couple fun prizes!

If you haven’t picked up a hardware or are waiting for yours to arrive, don’t worry! You can still begin your project as there is plenty you can do without it, especially during the first week. You can create the entire body and just wait to sew the last bit of binding down until you have the metal, and you can create the thread catcher. There is also quite a bit you can do on the pin cushion and basket next week before you need to add the magnets.

· · · · · · · · · · · · · · · · · · · · · · · · ·

FABRIC & MATERIALS

I want to quickly touch on why I don’t often include “fabric requirement” sections in my patterns, including this one. There are endless ways to layout and customize this project. I never want to lock someone into fabric placements by specifying what you should use where. One person may use three fabrics for the whole project, while another may use thirteen! Also, the cuts on a project like this are all small, so a fabric requirement list would simply be the same as the cutting instructions. The specific sizes of all the pieces you need for each part of the pattern are included at the beginning of each labeled section.

Now, onto materials! If you have not already purchased a hardware kit or sourced your own materials, you can find more information about those materials needed here, including my sources.

IMG_9046 edit

All fabrics used are standard quilting cotton. You could use some lightweight linens or blends, but thicker materials, such as canvas, may be too bulky for the pin cushion, basket and thread catcher, as they’re all pretty small. In addition to your fabrics, you also need a couple different interfacings. Sometimes these can be optional, as they are often used for added durability, but in this project they are required as they hold the magnets in place and create the basket.

The first is Pellon brand SF101, also known as ShapeFlex. You can find this at any fabric store or Walmart with a craft section. You can also order it online. This can be substituted with another featherweight or lightweight fusible interfacing if you wish, but the SF101 is my preference.

interfacing

The second interfacing you need is Pellon brand Peltex 71F, ultra firm single sided fusible interfacing. I do not recommend substituting this with anything else as it creates the main structure of your fabric basket. Be sure that you get the 71F and not the 70 (sew in) or 72 (double sided fusible). This interfacing is very thick, it should look and feel similar to a piece of cardboard. It should not fold without “creasing” itself. You can also find this interfacing at fabric stores, Walmart (or the like), or online. Next week I’ll share some helpful tips for keeping the basket edges nice and crisp!

walnut

For filling the pincushion, I like to use ground walnut shells because I love the weight and feel, especially with the square shape. It’s like an adorable little bean bag! I purchase mine at a local quit shop, but Plum Easy (the brand I get) also sells online here. If you’re making this for a gift, just avoid the shells if someone has a nut allergy! I have also used polyester stuffing in the cushion, which works perfectly fine!

The last little “extras” you need are some thin ribbon or trim and buttons to hang your thread catcher (which is optional!).

· · · · · · · · · · · · · · · · · · · · · · · · ·

CREATING THE BODY & THREAD CATCHER

If you’re a sewist, but new to quilting, don’t fear! The body of the Maker Station is a great first project to dip your toes into the world of quilting!

To create the main body of the Maker Station, you will need basic knowledge of how to layer your top, batting and backing and how to do the quilting stitches. This tutorial from Suzy Quilts covers all the basics. It applies to a large quilt, so working with your main mat body will simply be a smaller and simpler version! Straight line quilting is a great design for beginners, or a crosshatch is a always a nice option, too. I’m not sure its mentioned in the tutorial, but I love using a Herra Marker (a bone folder or scoring tool also works similarly) to mark my quilting lines, especially for something like a crosshatch. Here is a video on using a Herra Marker.

Another quilting technique you will need to know comes at the end of the body and thatt is binding. This is the little edge “wrap” that goes around the entire piece and seals everything up. Here is a helpful tutorial from Craftsy.

The body and thread catcher are fairly straight forward and the pattern includes detailed instructions and diagrams on creating these pieces, but if you have questions at any point, feel free to email me through my website or contact me on social media. I’m always happy to help!

When it’s time to sew the buttons for hanging your thread catcher, think about where you will be using your Maker Station. I prefer to hang my thread catcher on the side farthest away from me so my leg doesn’t hit it and it’s not in the way of my pockets, so this placement will vary if you place the station to your right or your left. Also keep in mind it’s “reversible” in a sense, you can place either set of pockets on the inside of your seat or the outside. I sew at least two buttons on my body, but you can sew four buttons (one on every outer edge) so you’re fully versatile!

As I mentioned, this little thread catcher is an optional piece, but I love it. If you don’t use it for scraps, you can use it for extra storage. It’s also a handy design to use elsewhere, like on your sewing machine!

DSC_2046 blog

So those are all the basics for this week as we create our main body and thread catcher. I will be posting photos of my progress on Instagram through the week, so I hope you follow along! I’ll also be sharing the prizes.

Remember to use the tags #minimakerstationSAL and #minimakerstation, and share with a friend!