
Happy Monday, friends! The sew-a-long hashtag is showing me that many of you made great progress on your projects over the weekend and I hope you’re having fun! Some of you have already finished your mats and some are just beginning, and that’s ok!
As I mentioned before, there’s no rush. I will talk about the last step (the optional thread catcher) later this week, but I will wait until the end of next week to draw winners for the prizes. This will give everyone some extra time to keep working (including myself!).
—–
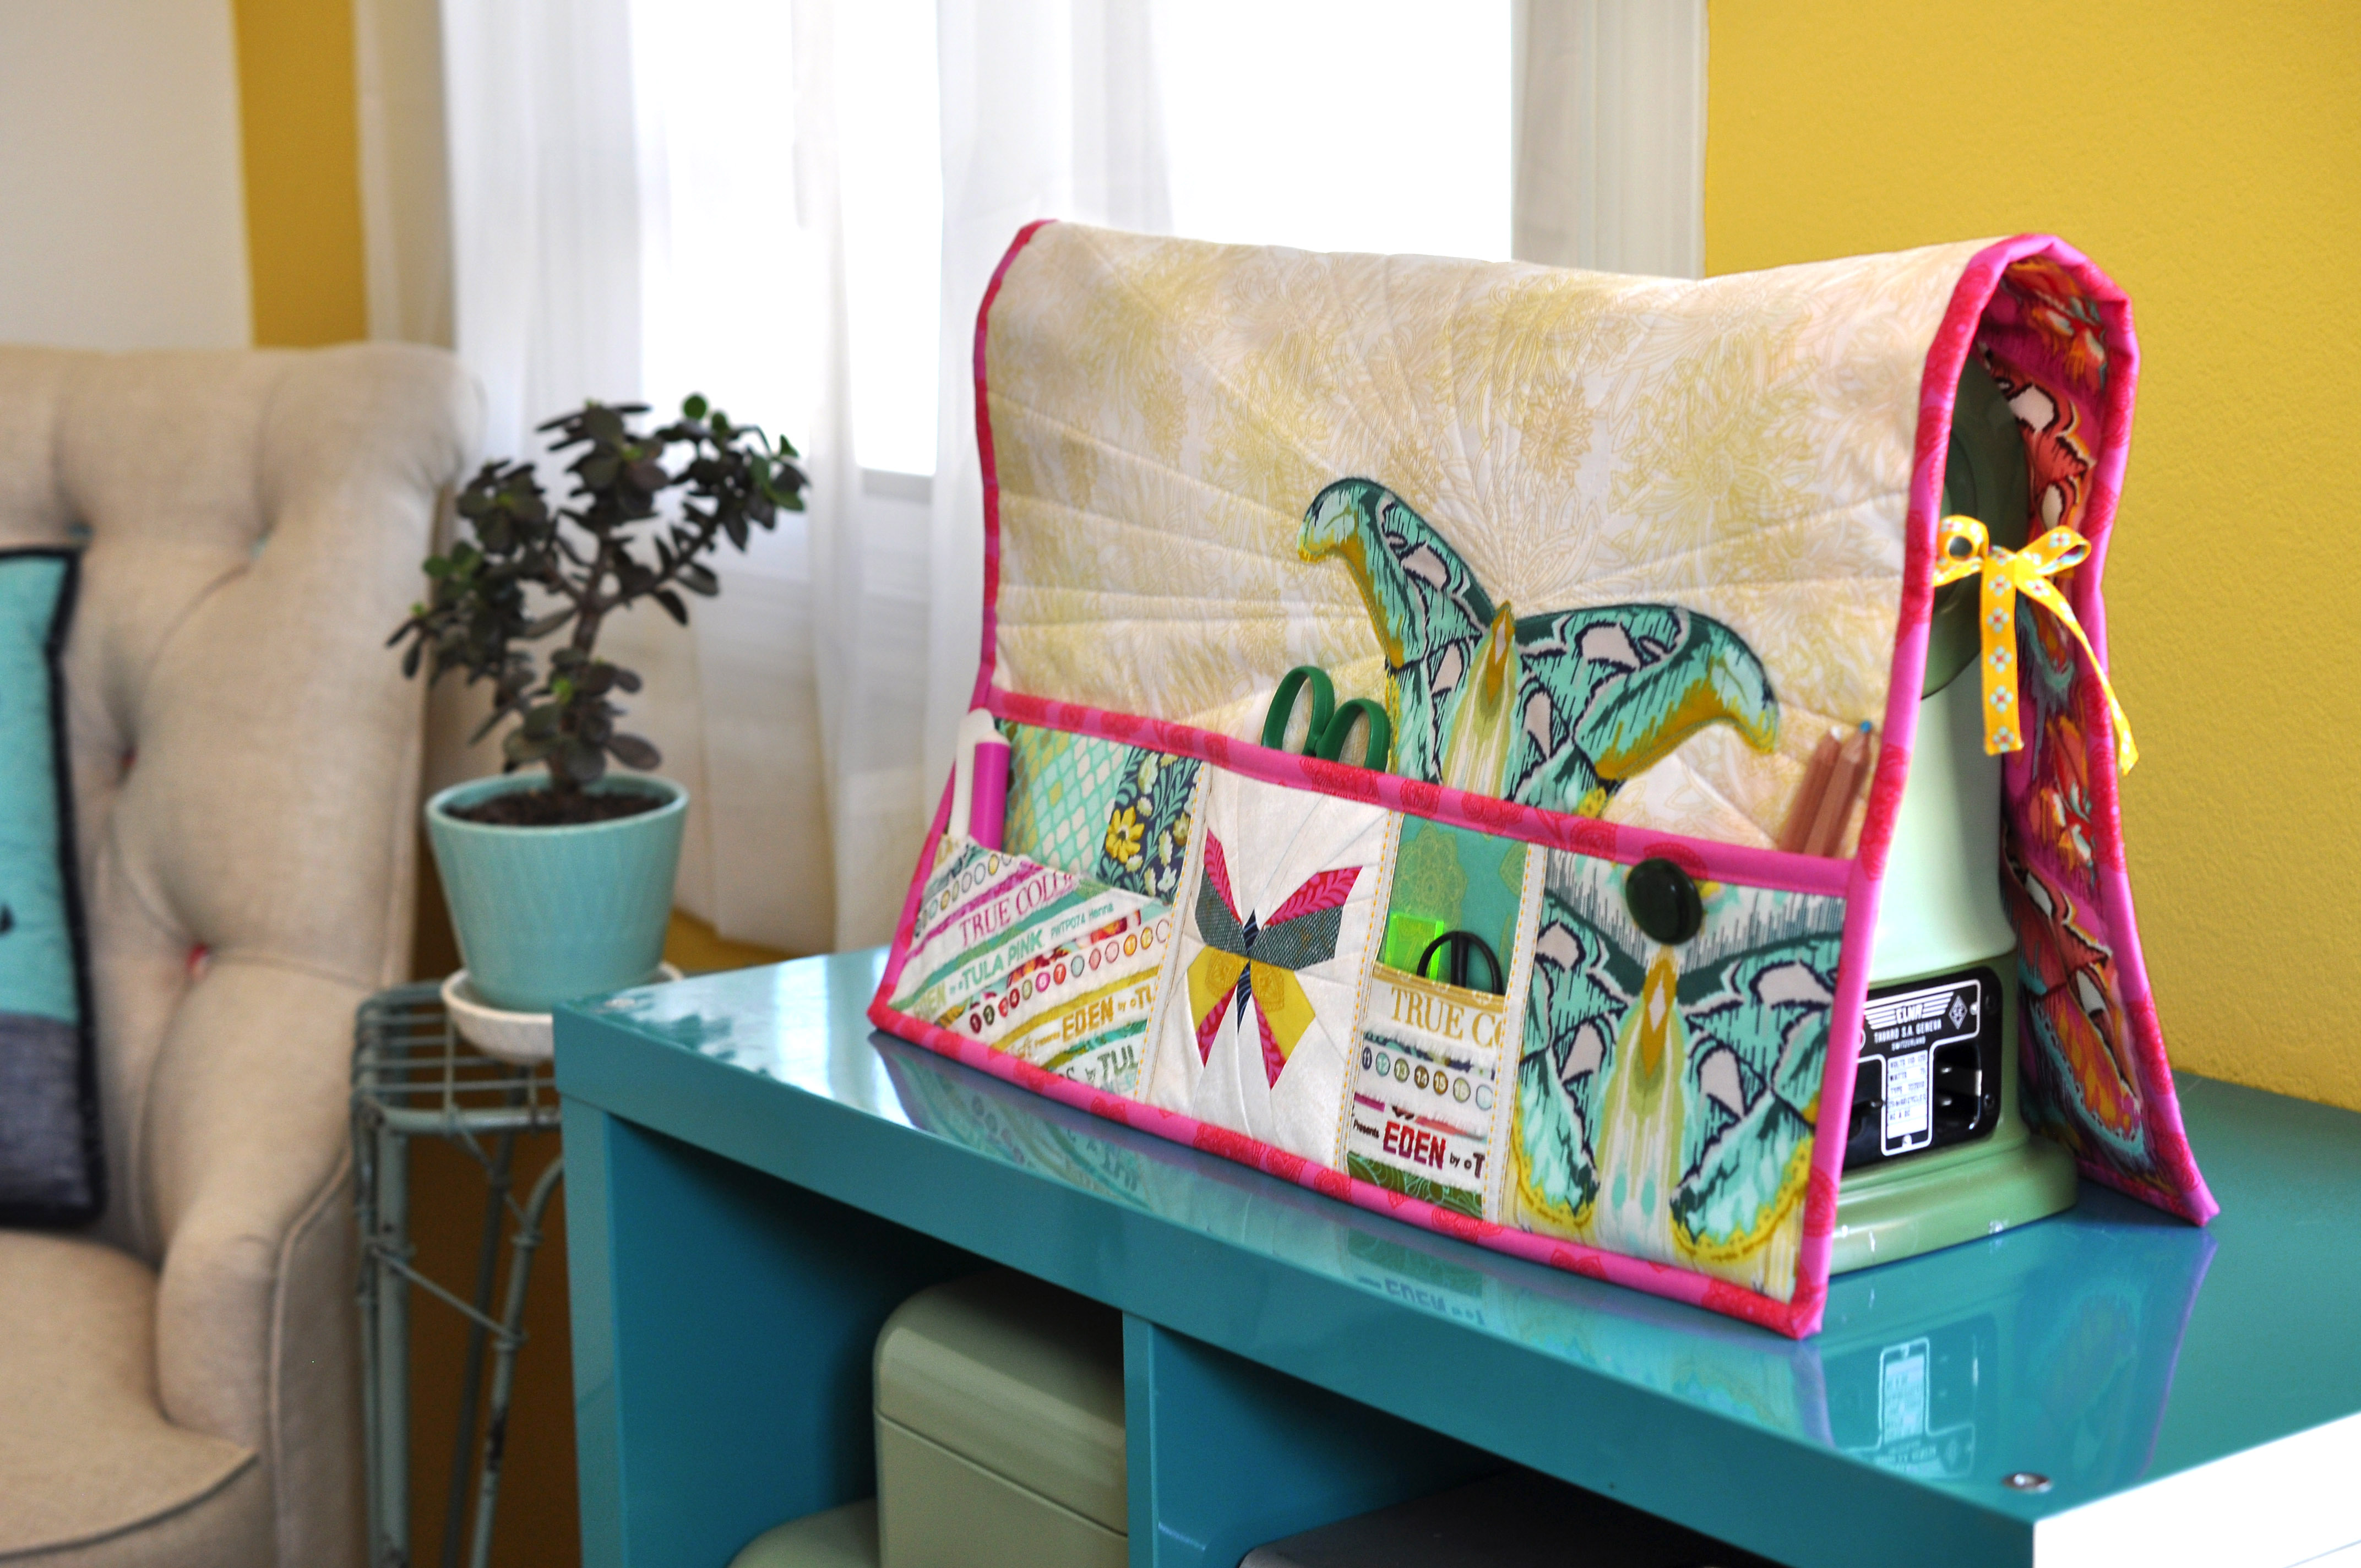
Last Thursday I talked about creating the accent pocket pieces and this week we are onto piecing the full pocket panel and attaching it to the mat body. After this, your mat will be complete (woohoo!) and all that’s left is the optional thread catcher, which I will post about on Wednesday.
I have already covered some options and variations for the trim used when attaching the secondary pockets to the main pocket panel (you can read about them in my initial and third posts), but if you have any questions about this or need any help, just send me a message! I will, once again, include some example photos at the end of this post so you can see some of these variations in action.
I do have one additional design variation for the pocket panel that I want to cover today, and that is the binding across the top of the pocket panel.

I like the look of the binding on the pocket because I think it balances the piece nicely, but if you prefer, you can eliminate this step and instead attach the lining to the pocket panel just as you did on the small secondary pockets. Just lay your lining piece, RST, on top of your finished main pocket panel and sew across the top with a 1/4″ seam. Flip the lining to the back, press, and top stitch along the top edge. You can include the fusible fleece when you do this, add it after tucked up to the seam, or skip it all together and use some lightweight interfacing on one or both pieces instead.

Above are a couple examples I saw on the #undercovermakermat hashtag on instagram that demonstrate this variation. If you have any questions about doing this instead of the binding, just let me know and I’m happy to help!
—–
Once your full pocket panel is complete, you will baste it to your mat body and bind the entire piece as covered in the pattern. BE SURE TO ADD YOUR SIDE TIES BEFORE BINDING! If you do not plan to use your mat as a cover, you can leave them off. I did forget to add them once and just had to unpick a little bit of my binding and tuck them in, which was not hard to do, so it’s not the end of the world if you forget, or even decide to add them later!
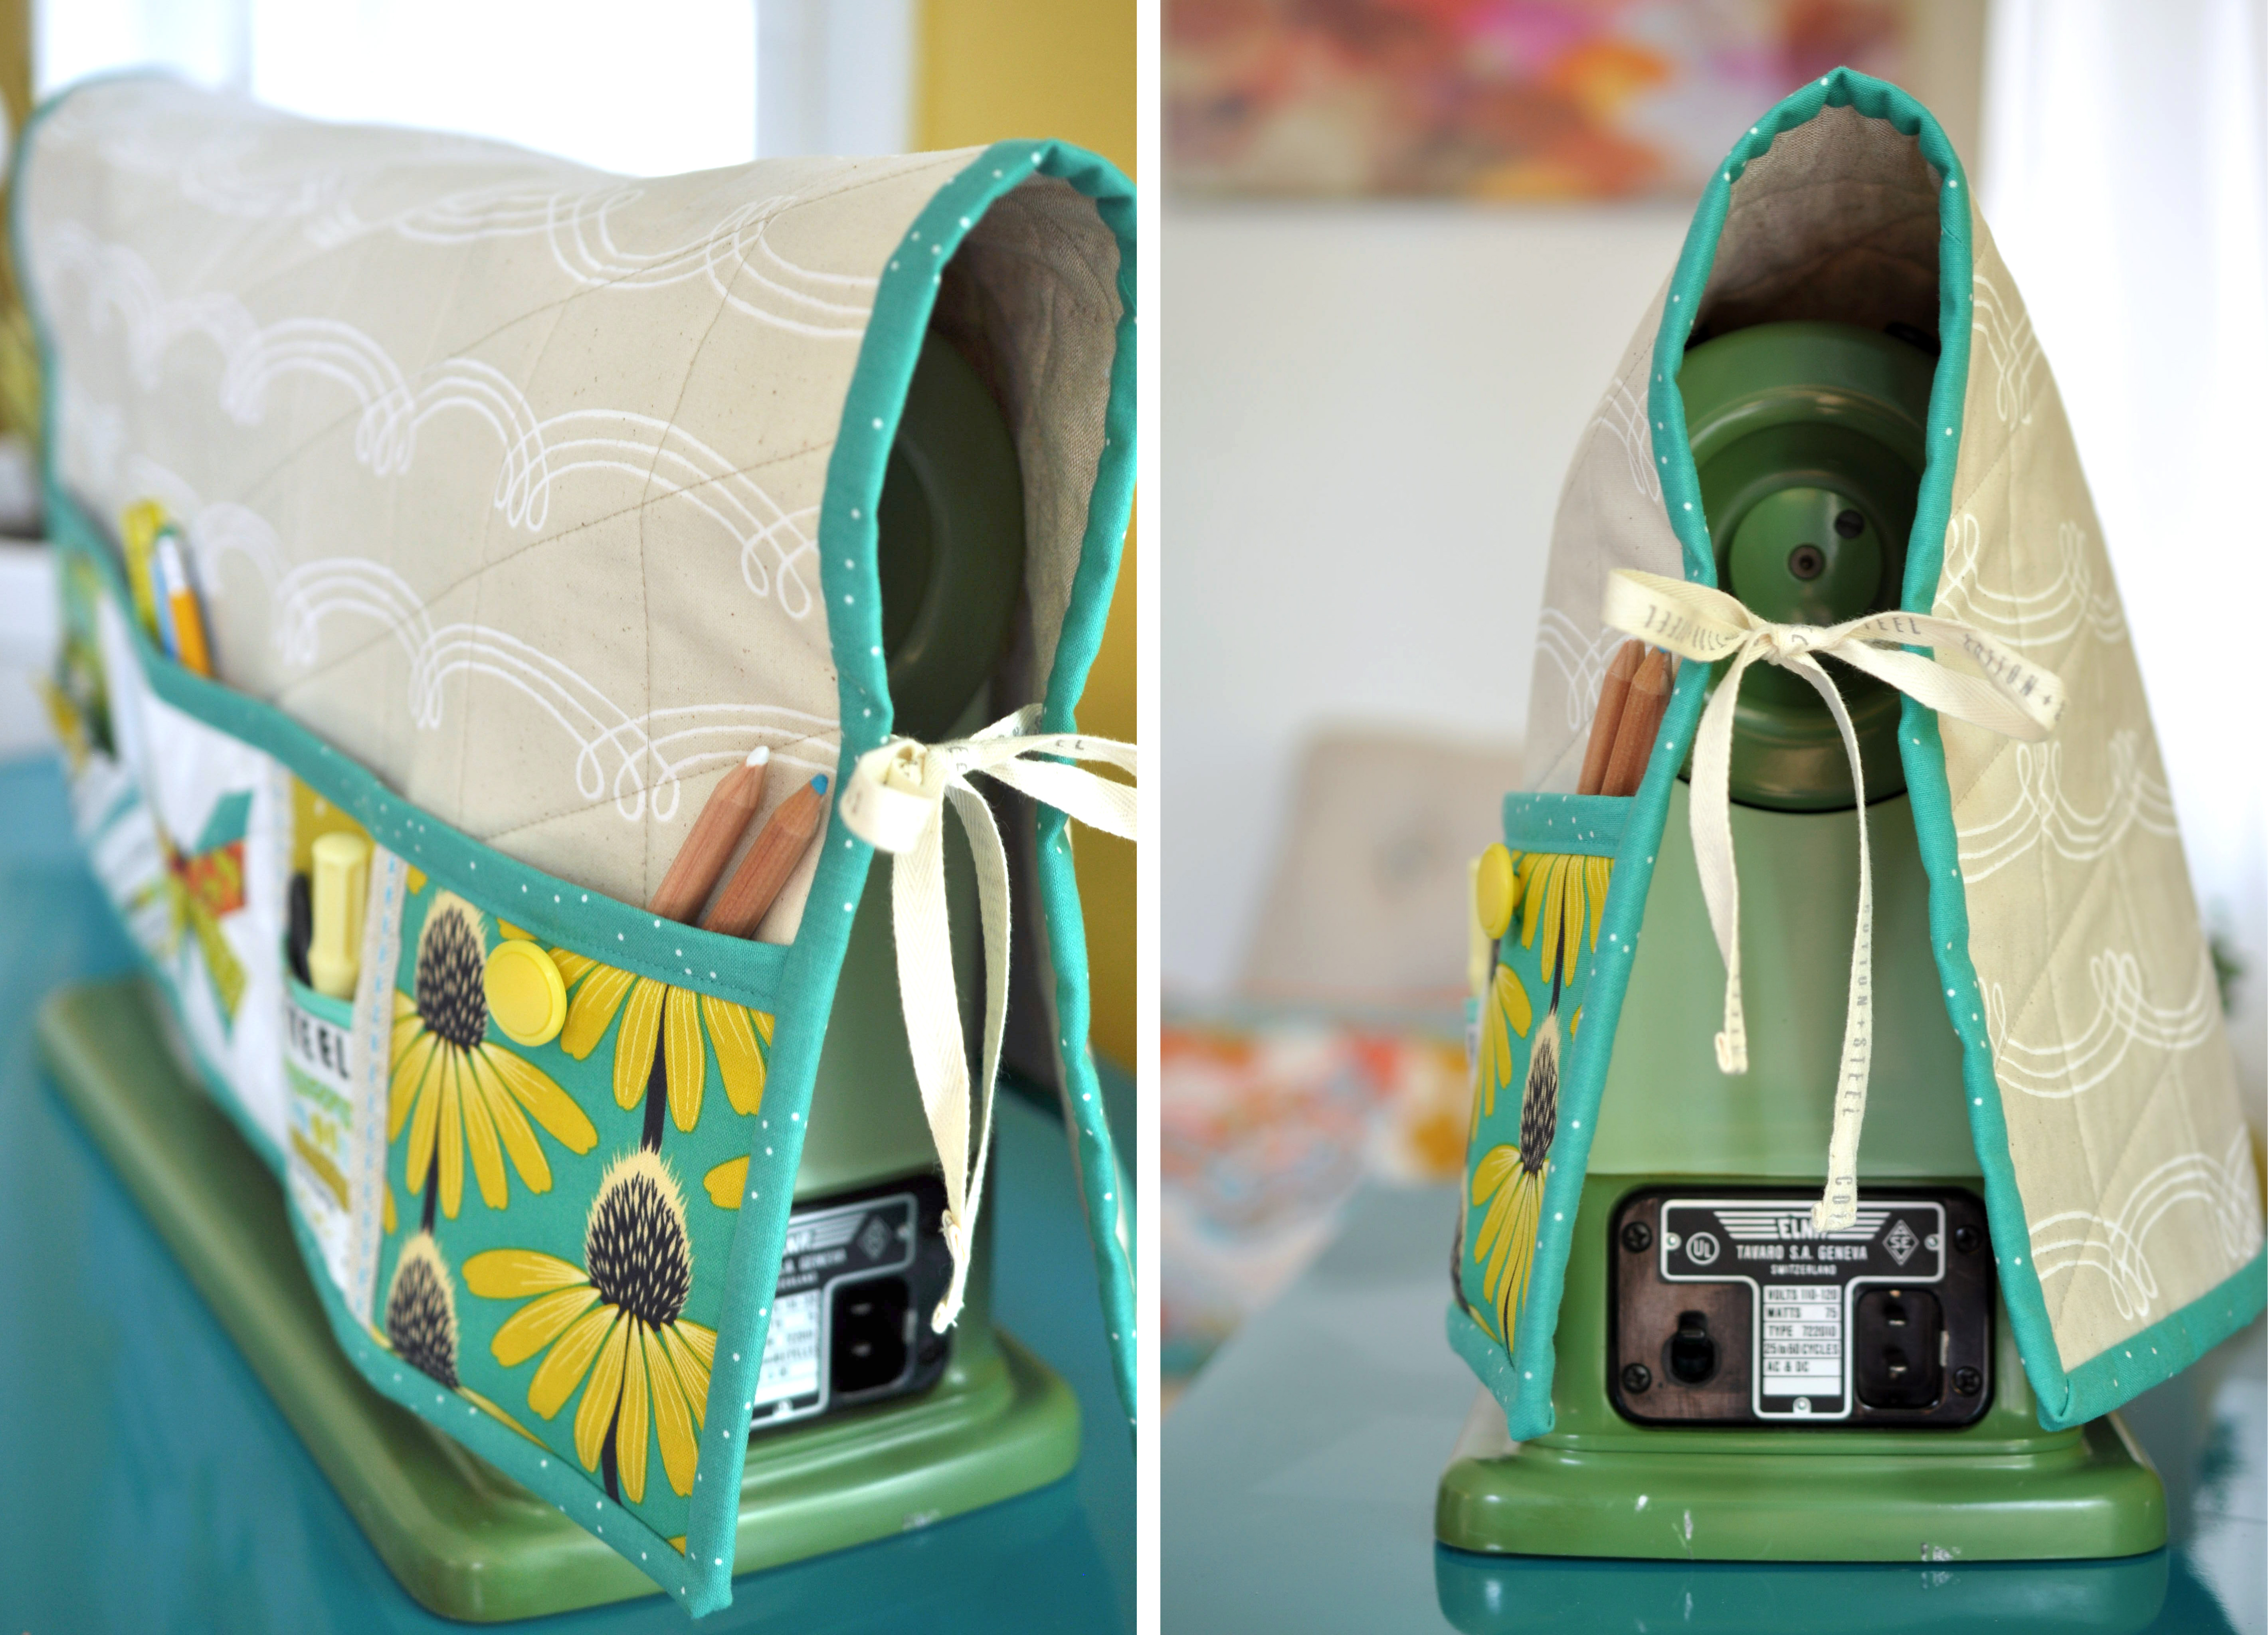
Just as with trim used to secure the secondary pockets, you can instead use a binding strip for your side ties, or even additional selvedges. If using a binding strip, simply top stitch along the folded edge to close it up. You can tie knots on the ends or stitch them closed.

—–
I’m going to wrap up today’s post with a few more photos from the sew-a-long hashtag, you guys are KICKING BUTT!!

ADDITIONAL POSTS:
Undercover Maker Mat Sew-a-long: All the details
PART TWO: September 6 – Kickoff, prizes and main body panel variations
