

Hello again! If you’re just joining in to the Sew Along or looking for information about cutting and preparing all your pieces, please see my previous post here.
Today I’m going to be covering the assembly of the body panel with the zipper and back panel. This is pages four and five of the pattern. I have updated the pattern to correct a couple updates and you can download the newest file here.
In this post I’ll be sharing tips on working with zippers, a pattern hack for adding zipper tabs and a video for adding the back panel which is quite easy to do, but hard to explain in photos and words. So, let’s get started!
The below video shows FIG H from the pattern, the first step in installing your zipper.
If you’re new to sewing zippers, there are several ways to do it! You don’t necessarily need a special foot or anything fancy, though every machine is different so it’s hard to generalize these tips. In this pattern, you will need to use a 1/4″ seam allowance. I typically sew my zippers on with my standard 1/4″ piecing foot. The thing you need to account for is having enough clearance to the left of your foot so that you are not running the zipper teeth under your presser foot.
Many of you know I always sew on older machines, but many of the same principals apply. Below is a short video explaining the feet I use and how I adjust for my seam allowance.
If you have questions about your specific machine or using a specific foot on your machine, I recommend doing a google search for your machine model and “sewing a zipper”, “zipper foot” etc. There are endless tutorials and videos out there!
Also, don’t forget to visit the Sew Along Facebook group, it’s the best place to ask questions and get personalized help!
Below you can see me piecing my zipper using the setup previously explained.
You will continue through the directions on page four to finish the zippered body panel.
• • • • • • • • • • • • • • • • • • • • • • • • • • • • • • • •
Now we’re on to the back panel and the zipper tab hack! The zipper tab is just a handy little addition that gives you something to hold onto when opening and closing your zipper. Truth be told, I intended to add this to the pattern, but was rushing and forgot. So, here it is! You can see the little tab in action in the back panel video farther down in this post.

To create the zipper tabs, cut four pieces 1.5″ wide x 1.25″ high (Note, my tabs are an extra 1/4″ wide in the photo above, but I decided they were too long and trimmed them down). Place two pieces right sides together and piece them together with a 1/4″ seam allowance along the top, bottom and one side. This will leave one side open. Turn your piece right side out and press. Repeat with the other two pieces to create two tabs total.

The zipper tabs will be added when piecing on the back panel. The above photo shows the first step of piecing the back panel both with and without the tabs in place. This is FIG N in the pattern. If adding the tabs, place one tab with the raw edge along the left raw edge of the body panel, centering the tab across your zipper (see above right). Pin or glue in place and continue with the back panel directions for FIG N as written.
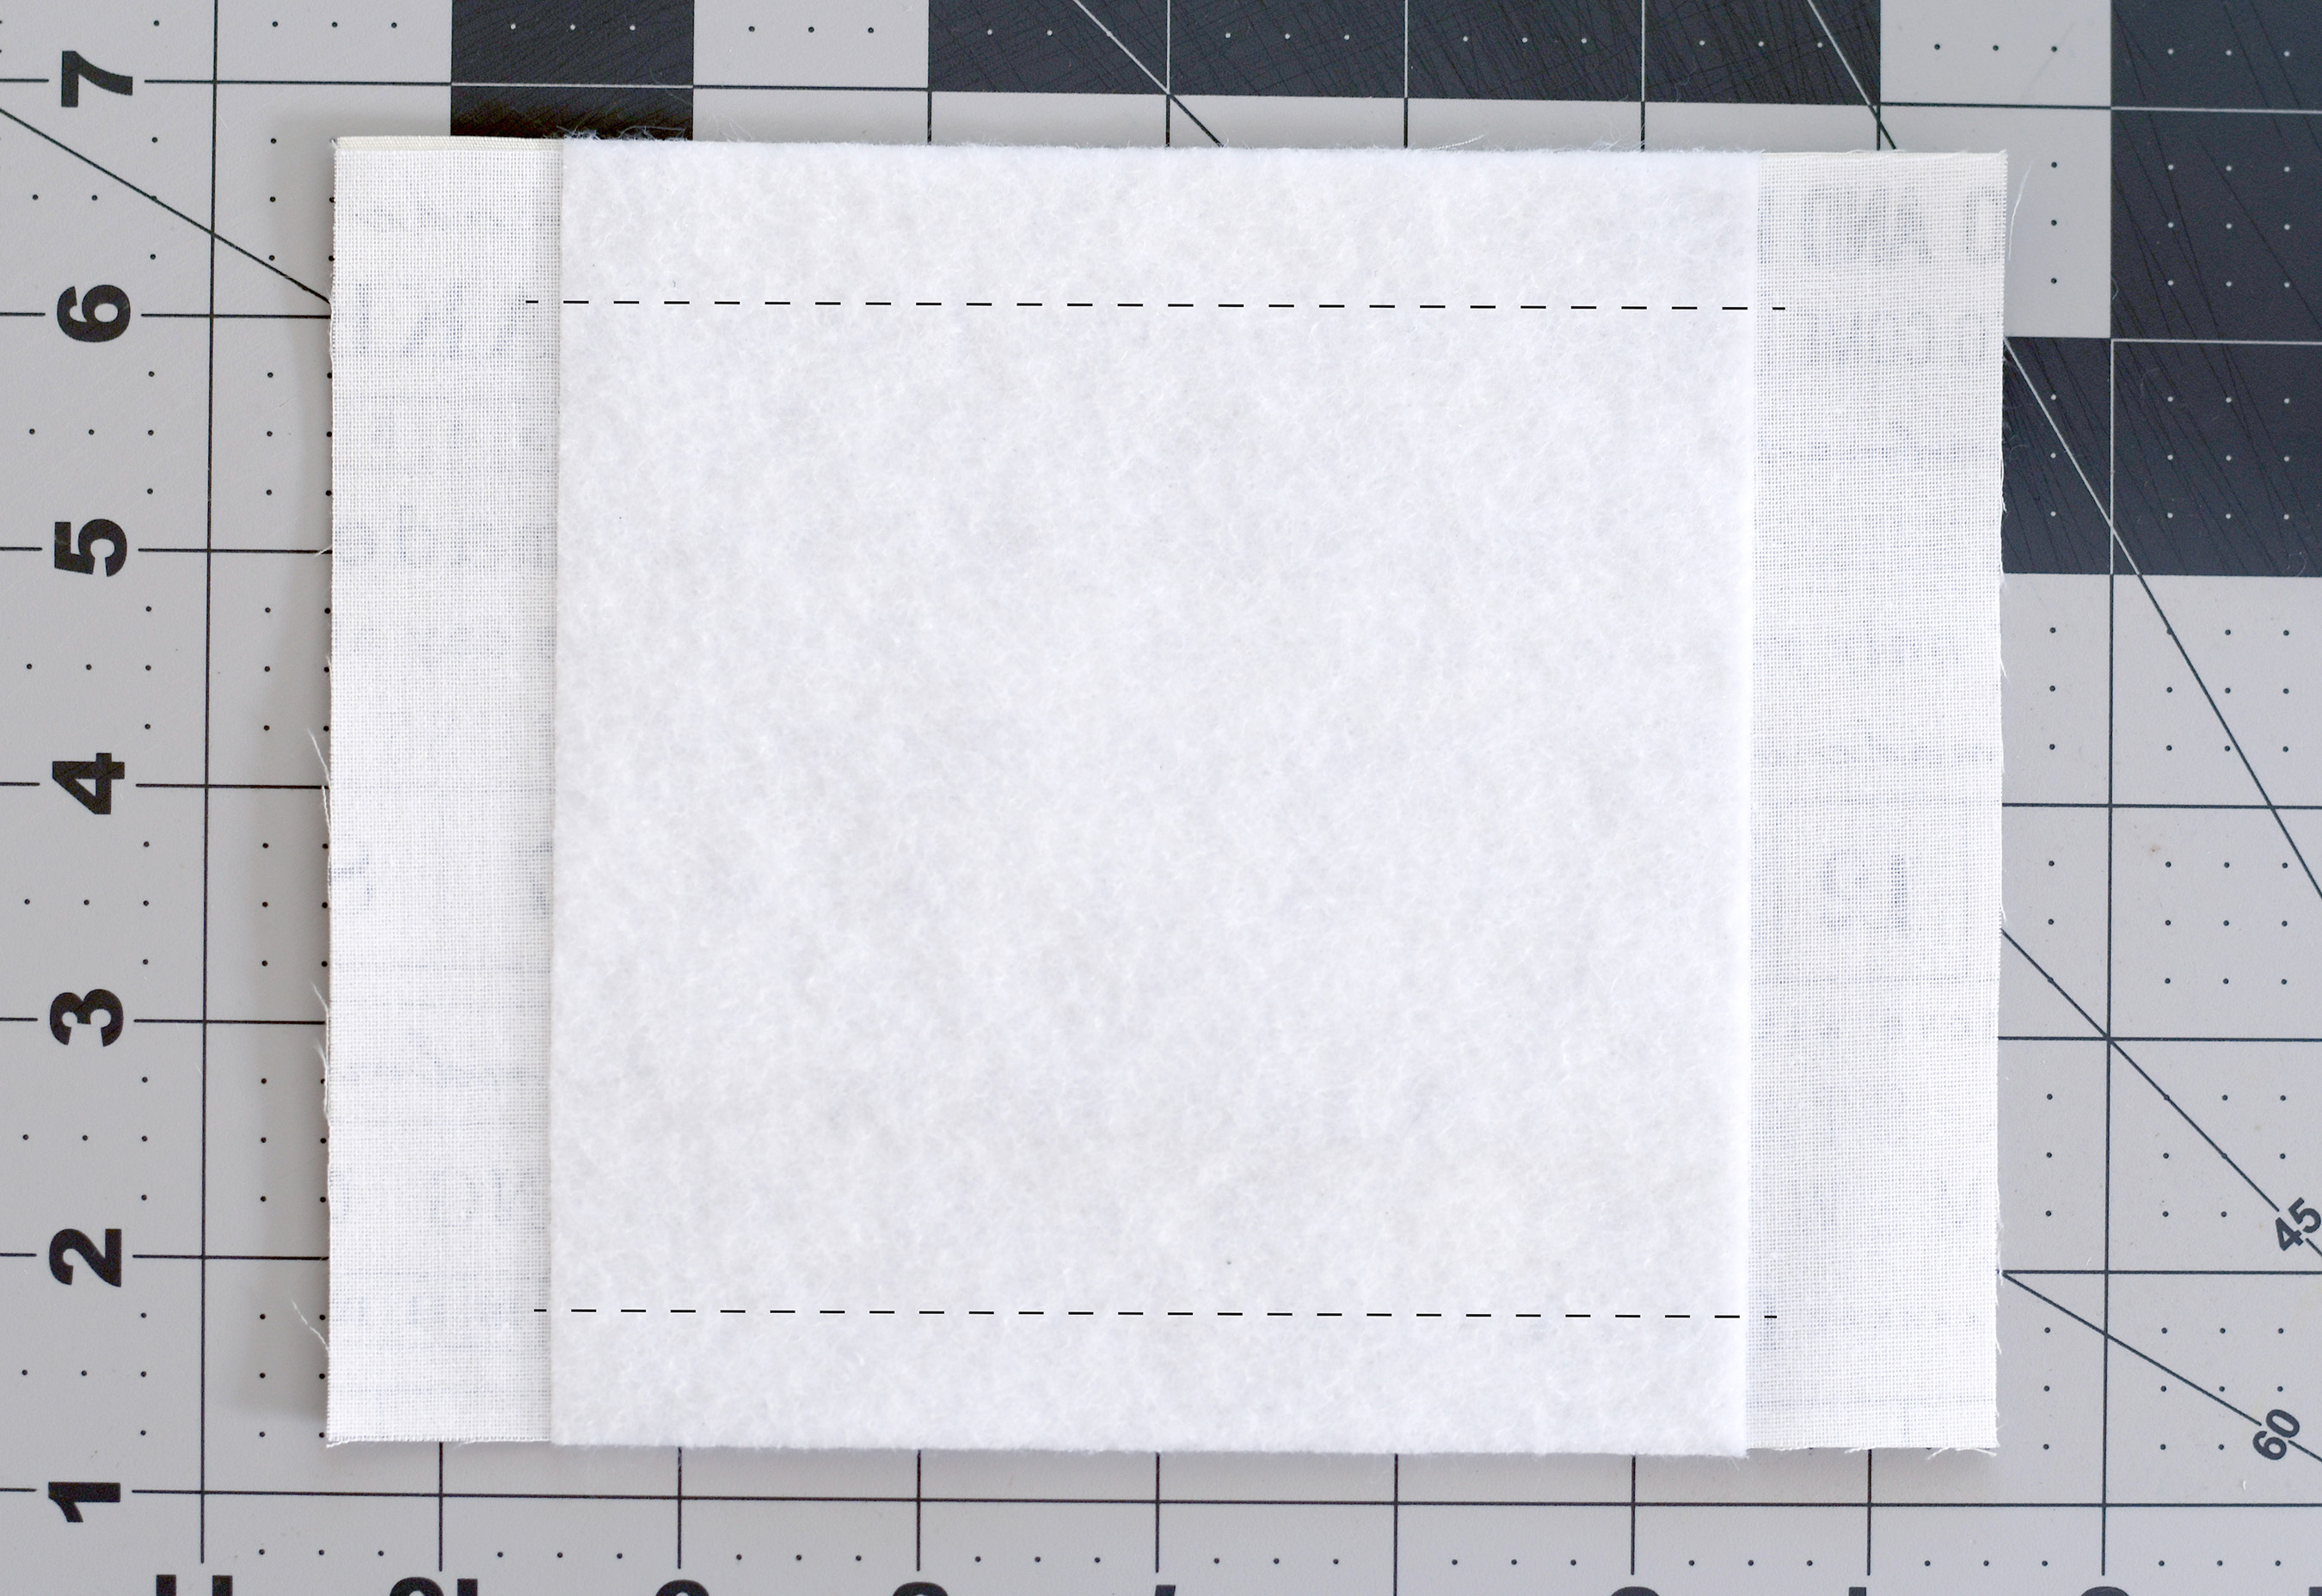
A quick note about a pattern update. The fusible fleece for the back panel lining piece had a discrepancy in the original pattern. It read 5.5″ in one place and 4.5″ in another. The pattern has been updated and the correct size is 5.5″. If your piece is cut to 5.5″ it will look like the photo below. If you cut your piece to 4.5″, you fleece will be a half inch short on the top and bottom indicated by the dashed lines below and this is no problem at all, it will not affect the finished piece!
The next step in piecing the body panel is to connect it to the other side. This step is easy, but difficult to illustrate in photos. Below is a video showing the steps from FIG O through FIG R in the pattern and I hope it helps!
This video also shows how to place the second zipper tab and how they function.
One more quick note – the fusible fleece on the lining IS intentionally 1″ shorter on either side, despite the seam allowance being 1/2″. This is to account for bulk when the 1/2″ seam allowance is folded over on itself filling the extra 1/2″ gap.

I hope these tips and videos have been helpful! You will now continue working through these steps at your own pace until next week when we will begin the final assembly! Continue to share your progress photos on social media with the sew along hashtags AND stay tuned to my feed on Instagram for some prizes!

The videos really help. Thank you for doing them. 👏🏻
LikeLike