
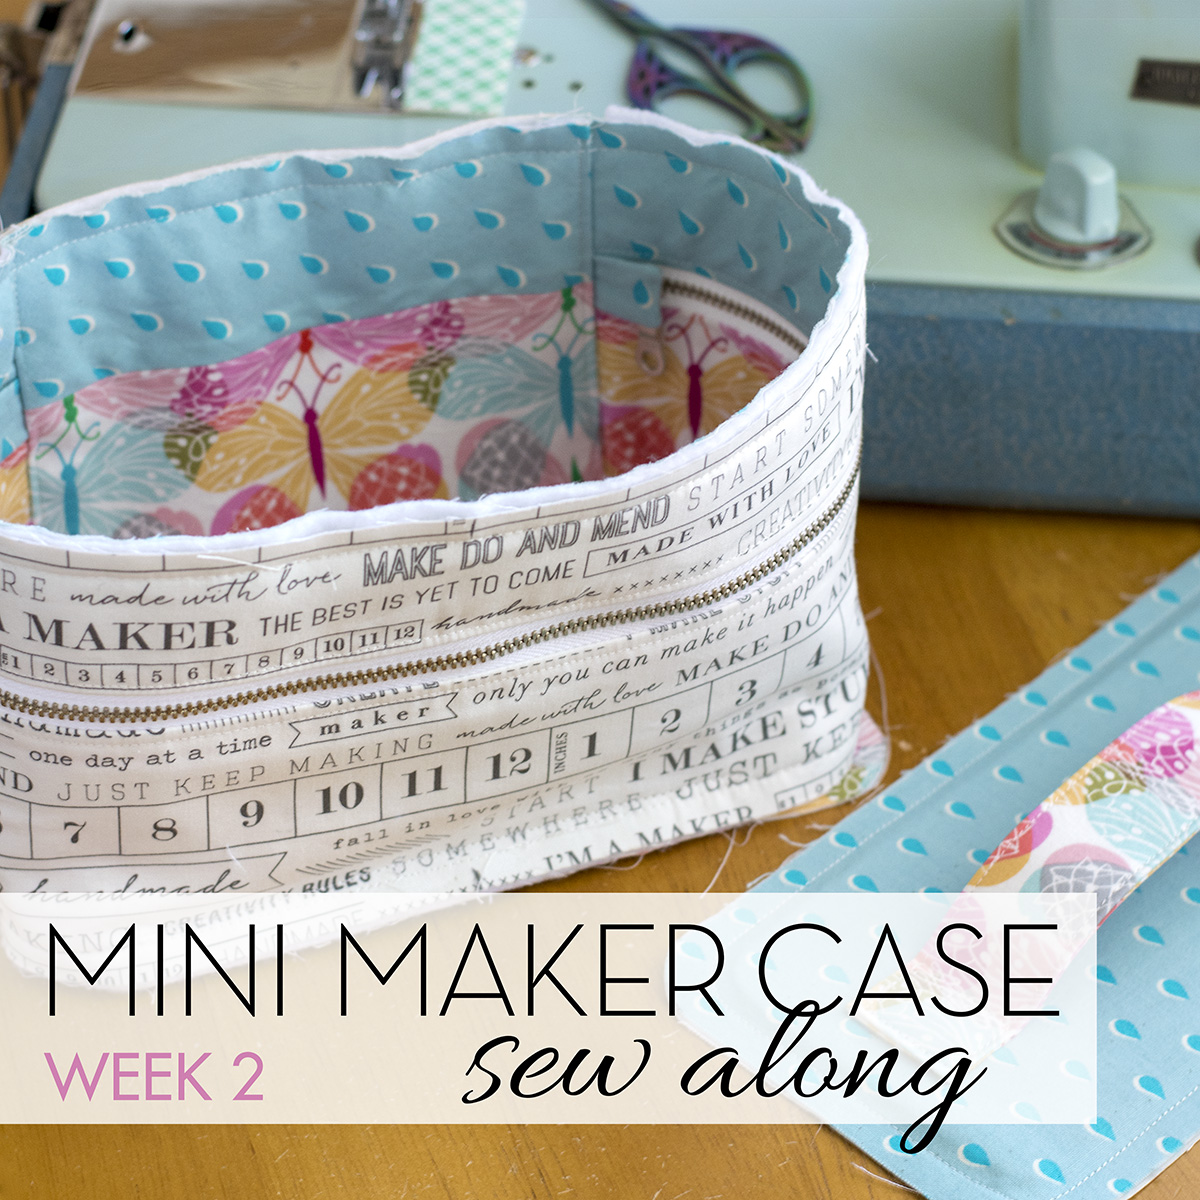
Hello, friends! We are now in week two of the Mini Maker Case Sew Along and it’s time to assemble our case! Today I have one video, a couple mistakes to avoid, and a few additional tips for attaching the top and bottom to your body panel.
There are many notes and photos for this step outlined in the pattern, so please be sure to read through them thoroughly before beginning. I’ve seen a couple errors pop up in the SAL hashtag feed and I want to mention them here. Be sure to center your back panel on the back of your case. A few people have placed it on the side, so the case opens like an alligator mouth. It’s still completely functional and also could perhaps be intentional, but just a note! I’ve also seen a couple people sew the body panel upside down, so the handle ends up on the bottom of the case. Always double check your work before sewing! Lastly, remember to open your zipper before sewing on your second piece or you won’t be able to flip your case right side out.
I recommend using a denim/leather needle (100-110) for this step because of the bulk. I also like to start with the bottom of the case that is less visible to get more comfortable with the curved corners, then sew the top. Sewing bulky curves is always a little awkward no matter how you slice it, but just take it slow and use your hand wheel if needed. I also recommend practicing on scraps if you’re uncomfortable or want to check your machine settings and get a feel for it.
Many of you asked for a video specifically showing how I sew the corners, so in the video below you can see my case placement under the presser foot and how I work through the curve. I hope you find this helpful!
This step is gratifying because your case now has shape and is practically finished! The last step is sewing the inside binding and I’ll be covering that on Thursday. Several people had questions about making bias binding, the measurements needed for the bias cut, etc, so be sure to check out all the previous SAL blog posts and the Sew Along Facebook Group if you also have questions.
· · · · · · · · · · · · · · · · · · · · · · · · · · · · · · · · · · · · · · · · · ·
I have one last thing to share before I go for today. Many of you know that creating awesome FREE patterns to share with this community is a passion of mine. It’s something I’ve always done and will continue to do. Several people who use my free patterns have asked for a way to donate to help support me in continuing to grow the free content I offer, so I have a setup a PayPal donation link and you can find it here. There is no obligation, my free patterns will always be free, and I always appreciate all of your support in any form!
Alternatively, you can purchase any of the patterns I have for sale as another way of supporting me and my work or simply share my website and patterns with your friends. Lastly, I am in the process of setting up a Patreon page where I plan to offer membership tiers with oodles of exclusive content, free patterns and more, so stay tuned for that next year!

This is such a fun pattern! Thank you for doing this🧡
LikeLike
Thank you for your beautiful pattern and generous contributions to the quilting community!! I have so enjoyed the mini case SAL.
LikeLike
I started this SAL thinking “would I finish the case?” So very glad to have participated & made the case, it was fun plus I rose to the challenge to make the curved edges of the top & bottom without too much issue. Thanks much for the free pattern -it was good & I now have a holder for my mini iron; a total win-win in my book!
LikeLike
Jumping in a bit late for another fab sew along pattern. I appreciate the free patterns and do share your site with friends. But am also very excited for the Patreon membership and look forward to signing up!!
LikeLike