In the Kitchen: Hummus

Chances are you fall into one of three categories when it comes to hummus — you love it, you hate it or you’re too freaked out to try it. I know, the consistency can get to some people. That’s why I never loved guacamole, until I made it myself and left it chunky. But hummus, I dig me some hummus. I eat it almost everyday, in fact.

What’s so great about hummus anyway, you ask? I’ll give you three simple reasons, it’ll make you healthy, wealthy and wise. Really, it’s true! Let me break it down…

Healthy: The two main ingredients in hummus, chickpeas and tahini, are both good for you. Chickpeas do not contain any cholesterol or saturated fats and they are rich in protein, making hummus a favorite among vegetarians. Chickpeas are also known to be effective in preventing build up of cholesterol in the blood vessels. Tahini is also high in protein and is an excellent source of calcium.

Wealthy: Ok, so it won’t technically make you money, but it will save you money! Buying hummus at a grocery store can add up quickly, but if you make it yourself using dried beans and fresh ingredients, it’s insanely inexpensive!
Wise: Two more ingredients found in most hummus recipes are garlic and lemon juice. Both are filled with antioxidants that reduce stress in the body. They also work to improve immune functions and fight off bacteria and viruses. Hummus contains plenty of Omega 3 fatty acids, which are great for improving intelligence and maintaining a healthy heart. On top of that, it also has iron, vitamin B6, manganese, copper, folic acid and amino acids that can promote good quality sleep and uplift one’s mood.
Ready to give it a try? Here’s the recipe…
Ingredients
15 oz chickpeas (garbanzo beans), cooked & chilled*
1/3 cup tahini (ground sesame paste)**
4 Tbsp fresh lemon juice
3 large cloves of garlic, peeled
1/2 tsp salt
1/2 tsp ground cayenne pepper
1/2 cup water
2 Tbsp extra virgin olive oil (soybean or canola will work, too)
You’ll also need a large food processor to make this. And by large I don’t mean gigantic, I just mean bigger than those mini cuisinart choppers. I imagine you can also use an immersion blender or Vitamix, if you have one. In fact, the Vitamix would probably work best of all!
*I generally always cook with dried beans. Aside from being super cheap, I like that they are naked — no added salt or any other funny business. You can find dried chickpeas at most grocery stores and will pay about $1 for a one pound bag, which will make you about two batches of hummus.
**You may be wondering what tahini is and where the heck you can find it. This is the only ingredient you may have trouble locating. You probably won’t find it at most local grocery stores, though you should be able to find it at any whole foods or natural grocer. You can also find it at a mediterranean market, which is where I purchase mine. It looks like natural peanut butter, with the separated oil sitting on top. Just be sure to stir up it really well before using it.

If you are using dried beans, soak and cook them according to the package directions, then weigh out 15 oz. I’m kind of a nut about weighing food and a little kitchen scale is really a very useful tool. When I’m trying a new recipe or baking something precise, weighing helps you get exact amounts or help you judge amounts that you can later eyeball. I meant to measure 15 oz chickpeas in cups for those without a scale, but I forgot, so I’m sorry! I’ll update the post next time I make a batch (which will be soon, Im sure).
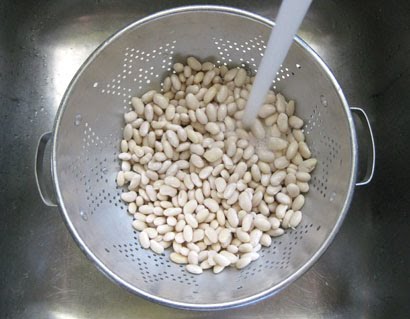
If you are in a hurry, just can’t deal with dried beans or can’t find them, you can use canned beans. Just be sure to drain and rinse them well before using. I’ve never weighed a 15 oz can after it was drained and rinsed, but it should be close enough to 15 oz to do the trick.
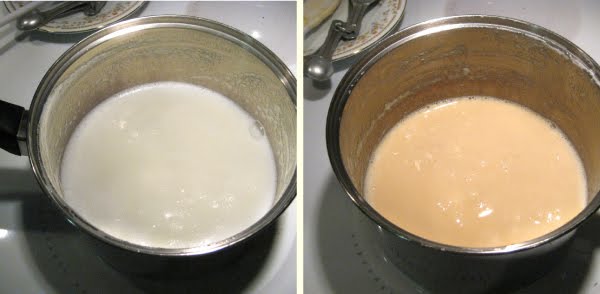
A couple things to note for those using dried beans. I always soak them overnight, as opposed to a quick soak method, and I also add a little baking soda to both the soaking and the cooking water. It allows the water to penetrate the chickpeas more easily, which reduces the cooking time and produces a better hummus. I also find that chilling the cooked beans, as opposed to pureeing them warm, makes a big difference in the creaminess of the finished product.
Another element that affects this is the chickpea skins. Did you just imagine yourself sitting around peeling popping hundreds of chickpeas out of their skins just pop into your head? Yeah, that’s what I’m talking about. It takes a little time and patience, but the result is worth the effort. After cooking the soaked beans, chill them until cold and the skins will just pop right off most when you squeeze between your fingers. This is not a mandatory step, just one that creates a smoother, richer and better tasting hummus.
· · · · · · · · · · · · · · · · · · · · · · · · · · · · · · · · · · · · · · · · · · · · ·
I’ll continue now by saying this is one of those flexible recipes. Aside from the chickpeas and tahini, the other ingredients can be adjusted to suit your personal taste and texture preferences. And really, even the tahini is adjustable. A little more will give you a little creamier result, but also more of a sesame taste. Adding additional lemon juice will help balance this out.
I’ll tell you that I like my hummus pretty middle of the road when it comes to flavors. I’m not a huge fan of garlic, I don’t love it too lemony and I definitely don’t love spicy foods. Perfecting hummus to your taste preferences is kind of an art. The measurements I provided here are how I love it, but they can all be adjusted. If this is your first time making hummus, I suggest you stick with the recipe and then add more or less of any seasonings to suit your taste. Other spices you can include or swap out for the cayenne are cumin, coriander and paprika. There’s lots of flexibility!
Start by blending the chickpeas, tahini, lemon juice, oil, garlic, salt and cayenne pepper in the food processor until well mixed, but not entirely smooth.
Next add the water and blend until smooth. If you’d like it thinner, you can add more water. This is also when you can give it a taste and decide if you’d like more lemon or other spices.
· · · · · · · · · · · · · · · · · · · · · · · · · · · · · · · · · · · · · · · · · · · · ·
You can get creative and add other flavors when pureeing, such as hot sauce, green onions or fresh herbs like parsley. Pine nuts and pureed roasted red peppers are also popular additions to hummus. You can buy jars of roasted red peppers packed in oil at most grocery stores. Simply drain the oil, reserving it, and puree the peppers in a food processor or blender until smooth, adding oil as needed/desired. If you want to make your own (which I recommend!), quarter red peppers, discarding seeds and stems, and place them skin side up on a baking dish lined with foil. Place them under the broiler until the skins begin to blister and peel. Remove them from the oven and wrap them in the foil or seal them in a zip top bag. Once cool, the skins will peel off easily leaving you with roasted red pepper flesh which you can then puree (add your favorite oil when processing if needed).
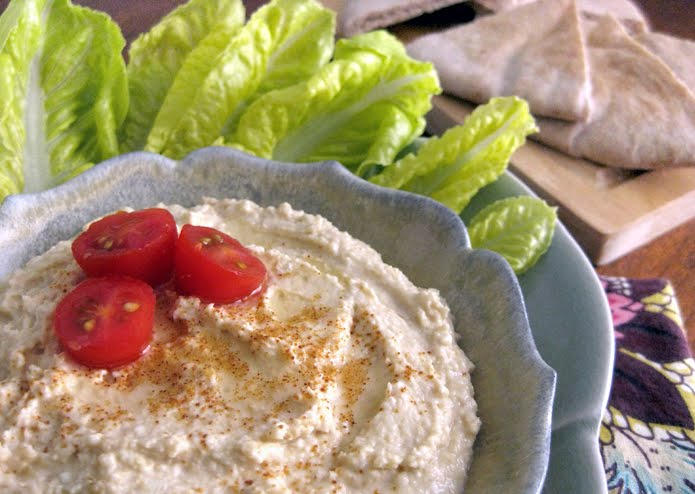
However you like it, humus is a delicious and versatile snack that is loaded with nutrients. Serve it as a dip with pita, flatbread, crackers or veggies such as sliced cucumbers, carrots and baby romaine or bok choy leaves. It’s also delicious as a spread on sandwiches and wraps or for topping a salad.
If I’ve inspired you to try hummus for the first time, I’d love to hear about it! Alternatively, if I’ve inspired you to make it homemade for the first time, I’d love to hear about that, too. If you’re still scared of it, well, better luck next time.
And find more easy and delicious recipes here.

In the Kitchen: Whole Wheat Apple Cinnamon Pancakes

Nope, they aren’t buttermilk pancakes (which are always the best), but these cook up so fluffy and delicious, no one will ever know the difference. The best part is you don’t need any special ingredients. If you keep whole wheat flour in your pantry and have an apple on hand, you’re all set. No buttermilk, no needing to make your own buttermilk, no yogurt — just the basics. Easy-weasy-japanesey, as my high school geometry professor used to say.
Ingredients
1 large apple, finely chopped
1 1/2 cups whole wheat flour
2 tablespoons raw sugar*
2 teaspoons baking powder
1 tablespoon ground cinnamon
1/4 teaspoon salt
1 egg
1 1/2 cups milk
3 tablespoons oil or melted butter
*I like to use raw sugar when baking, but regular granulated sugar will work as well. If you prefer a slightly sweeter pancake or like to eat them without syrup, increase the sugar to 3 or 4 tablespoons.

In a small bowl, lightly beat the egg, milk and oil. Set aside. In a large bowl, mix all the dry ingredients. Add the egg mixture all at once to the flour mixture and stir until just moistened (the batter should be a little lumpy). Gently stir in the apples until all are coated. The key to keeping these light and fluffy is not overmixing the batter.

Pour 1/4 or 1/3 cup of batter onto a lightly greased skillet over medium heat. This is a thick batter so you may need to spread it out a little.
Cook for about 2 minutes on each side or until pancakes are golden. You know they are ready to flip when bubbles begin to rise to the surface and the edges begin to look dry.
Keep cooked cakes warm in a 200° oven if making a large batch at once. Serve warm with butter and pure maple syrup, mmmm mmmm!
This recipe makes about 16 4-inch pancakes, so it’s enough for a crowd, but you can also store the batter covered in the refrigerator and cook them up throughout the week like I do. You can also half the recipe if desired. For the few tricky measurements, here’s a couple guidelines: 1 tablespoon = 3 teaspoons; and for the egg, you can beat one egg and use half or use a small egg. Either works just fine.
And find more easy and delicious recipes here.

Oh yeah, I found it.

You all know a lot about me, but one thing you probably don’t know is that I’m an avid cross stitcher, always have been. I pick it up and put it down every now and then, as with most hobbies, but it’s something I’ve always enjoyed. As my Dad’s illness progressed, my interest increased again and I’ve been stitching like crazy.
{Prepare for sudden subject change}
Any Mad Men fans out there? I know, I know, I’m waaaaay behind on this one. Everyone’s told me how much I’d love the show, but I just never never had the time to watch it, until recently. I finally picked up season one from the library and, of course, was instantly hooked. I spent 11 years in advertising and design, and have always felt like I should have been spending my prime in the late 50s/early 60s, so aside from all the smoking (sheesh!), that totally could have been my life.
I plowed through seasons one and two in less than a week’s time, but it was during the finale of season 2 that my little heart skipped a beat. Anyone remember this opening shot of the scene with Betty at the doctor’s office?

It was much clearer on the TV but that’s a cross stitch. A mighty big one, too. And really, could it be any darn cuter?

From that moment on it became my goal to find that pattern! With the beauty of the internet these days, I figured I could do it with no problem. My hunt proved to be a little more difficult than I first anticipated but after three weeks of super sleuthing, I had that little number in my crafty little hands!
When you think about, three weeks to find a pattern from the 40s is pretty darn amazing. But we’re so used to instant results that it felt like an eternity. It did take quite a bit of detective work, but it was really fun. All that matters now is that I’m ready to start stitching!

The original piece was 2 feet wide, but was stitched on 7 count fabric! I generally use 16 or 18 count fabric, so my finished piece will be quite smaller, but still big enough to really be a stunner. Best part is, this pattern has a partner, a matching buck! You bet I’m making both.
They will definitely take me some time to complete, but I’ll be sure to share some progress photos and, of course, the finished pieces!
So aside from my Mother and Fawn obsession, I stitched up many cute pieces for holiday gifts using patterns I found on Etsy and am also currently working on a few for myself, with a long wishlist to follow.

I purchased this fox pattern from andwabasabi on Etsy and stitched it up for my cousins out in Seattle.

I stitched this home sweet home up from a ChezSucreChez pattern I also found on Etsy.

I’m a big fan of single color work and silhouettes, and these entomology patterns by What Delilah Did are just too cool! I purchased the bee pattern but haven’t tackled it yet.
She has some fabulous photos on her flickr page here of her pieces on display. Definitely inspiring!

I also purchased these patterns a little while back from kattuna on Etsy. I’ve been working on them to hang in my workspace, but I’ve only finished the bird so far. In mustard yellow, of course 🙂
I stitched a couple initials from patterns from andwabisabi for holiday gifts as well. You really can’t go wrong with simplicity! The one shown above is a photo from her shop and you can find patterns for almost the entire alphabet there.

These flower patterns from Artecy are on a whole different level, but something I can’t wait to take on. Aren’t they beautiful?
A few of my other favorite pattern sites outside of Etsy are:
Cross Stitch Art — I absolutely love their art nouveau patterns. I have four in my to-do pile.
Stitch Alley — They have a fabulous collection of letter monograms.

Pinoy Stitch — They have a huge selection of anything under the sun! This pattern is also in my to-do pile. Crazy? Just a little.
And last but not least, I have two favorite books I have to recommend for nature lovers. The first is Roses and Flowering Branches in Counted Cross Stitch. Amazing! It’s on the pricier side because it’s hard to find, but totally worth it. I want to stitch every pattern in the book. (I have some photos if anyone wants to see more before purchasing it!)
The second is a book I picked up from the library yesterday, Four Seasons in Cross Stitch. I don’t love every pattern in the book but the four images on the cover plus some adorable mushrooms inside make it worth the $4 for a used copy.
So, who else shares my passion? And, more importantly, did anyone else out there have the same reaction when seeing that piece on Mad Men?!
happy weekend, everyone ~ xo

saying goodbye

It was almost two years ago exactly that my Dad discovered what he thought was a bug bite on his leg. He was diagnosed with Metastatic Melanoma just shy of two months later. I officially gave up my hope that he would win the fight this past December 23 and he finally lost his battle today at 7:20 am. He was 59.

The house was quiet and dark. My mom and husband were sleeping, I was at his bed side holding his hand as he took his last breath. The last two years have been hard. The last eight months have been harder. The last two weeks have been the hardest and there just aren’t words to describe the last few days. But it’s over, and that’s what we’ve been hoping for. Once you know you’re out of options, you just want the pain to end.
I’ve had a long time to prepare for this moment, and I know it’s helped immensely, but it’s still harder than anything really should be. I know there will be times I forget that he is gone. I’m sure to hit speedial 6 on my cell phone at least half a dozen times before it really sinks in. This has been the focus of my life for so long now, I know I’ll feel some confusion in the weeks ahead. It will take some time to get into a new routine, but I have lots to keep me busy and so much to look forward to.
I have nothing but good memories though. My Dad was a super cool guy and no one would protest that. It’s been really nice to get messages from school day friends remembering how cool he always was to them. I’ve always been thankful to my parents for helping to mold me into the person I am. They set a perfect example for me to learn the important things like a strong work ethic, how to be a good person, how to cook and how to love. Most importantly they let me figure out who I was going to be, and then let me be that person.
The services are Thursday and Friday at a beautiful memorial park near my house. Dad said he wanted it to be a party, so I hope we can make it one. I’m wearing a yellow dress, figured that was a good place to start.
I honestly would have fallen apart through all of this without the amazing support from all of you. You saved me, and I think about that every day.
I’ll be back in action full steam ahead once the dust settles. Soon though. I’m ready.
xox ~ nicole
My Dad and I, 1980

In the Kitchen: Meat & Mushrooms

With my parents move into my house came many things — two more bodies, two more cats, a lot more stuff and a new presence in the kitchen. While I mostly handle the household chores (cooking, cleaning, laundry, etc), my mom does make an occasional dinner. It’s usually a “childhood favorite”, a meal I grew up on but just never bothered to make myself. Today, I bring you one such meal, one we creatively call Meat & Mushrooms.

If you are a regular follower of my recipe posts, you may have caught on that I am not a beef eater. There are two occasions when I eat it, and this is one. This meal is the epitome of simple, hearty goodness. Beef, onions, mushrooms — that’s about it. It feels like it was transported from my grandma’s kitchen in 1960 and dropped onto my counter.
Ingredients
1.5 – 2 lbs boneless top round beef steak
1 large onion, sliced
8 – 12 beef bouillon cubes
12 oz mushrooms, sliced
Flour
Water
Pepper to taste
In an electric skillet (we swear by a 30 year old Lifetime brand one), place the raw beef, sliced onion, bouillon cubes and one bay leaf (if desired). Add enough water to just cover the meat and simmer, covered, for about 4 – 5 hours or until the meat is cooked to your liking. By the way, don’t be scared of the onions if you’re usually not a fan. They cook away into nothing but flavor which isn’t oniony and gross, but essential and delicious!
Beware, this dish will make your house smell amazing all day, therefore making you really, really hungry and possibly driving your dog (and maybe your husband) crazy.

Once the meat is done, add the mushrooms and continue simmering until the mushrooms reach your desired tenderness.
When the mushrooms are done, remove the meat and thicken the liquid to make a gravy. Mix about 3 Tablespoons flour with 1/2 cup water and add to the pan. Continue adding additional flour/water until the gravy is as thick as you’d like. Add pepper to taste, and salt if you wish, but the bouillon has enough salt to last you a lifetime! This is definitely not for those on a low-sodium diet 🙂

Add the meat back to the pan to heat up and you’re ready to eat!

We prefer to serve this over rice with some veggies, but it’s delicious with mashed potatoes, too. The gravy is so good you’ll want to keep any leftovers to spoon in your morning coffee, err… well, you get it.

And find more easy and delicious recipes here.

In the Kitchen: Glazed Lemon Cheesecake

If I could eat only one dessert for the rest of my life, anything involving peanut butter and chocolate would win hands down, but this cheesecake would be a close second. There’s just something about lemon that I find irresistible no matter what the form.

This creamy, lemon-flavored cheesecake is topped with a homemade lemon curd glaze that is truly just too delicious for me to express, especially considering it requires only seven basic ingredients and is quick and easy to make.
Crust
2 1/4 cups honey graham cracker crumbs
1/4 cup sugar
2/3 cup butter, melted
Filling
3 8oz packages cream cheese, softened
1 1/4 cups sugar
3 eggs
4 Tablespoons fresh lemon juice*
1 heaping Tablespoon grated lemon peel
1 teaspoon pure vanilla extract
Glaze
2 eggs
1 cup sugar
1/4 cup fresh squeezed lemon juice
2 Tablespoons grated lemon peel
6 Tablespoons butter
*You will need a total of 3-4 medium to large lemons. Zest all the lemons before squeezing.
Combine the crust ingredients in a medium bowl and press onto the bottom and 2″ up the sides of a 9″ springform pan. Set the pan on a baking sheet and bake at 350° for 10 minutes. Let sit on a wire rack while you prepare the filling. Keep the oven at 350°.
For the filling, in a large bowl, beat cream cheese and sugar until smooth. Add eggs and beat on low until combined. Stir in the lemon juice, lemon peel and vanilla until just blended.
Pour slowly into crust, return pan to baking sheet and bake for 40 – 45 minutes or until edges are set and center is almost set. Cool on a wire rack for 10 minutes. Carefully run a knife around the edge of the pan to loosen the crust, cool for another hour then refrigerate overnight before serving.
For the glaze, in a small heavy saucepan, whisk the eggs, sugar, lemon juice and peel until blended. Add butter and cook, whisking constantly, until mixture thickens and coats the back of a spoon. Transfer to a small bowl and cool for 10 minutes. Cover and refrigerate until chilled.
Spread glaze on cheesecake before serving or serve it on the side with slices – yum! You will have about twice as much curd as you need to glaze the cheesecake but if you don’t just eat it with a spoon (trust me, you will want to), it’s delicious on toast, biscuits, scones, ice cream and sugar cookies!
This dessert is rich and decadent but still feels and tastes light and refreshing because of the lemon making it the perfect ending to a heavy holiday meal or a backyard BBQ on a hot summer day.
And find more easy and delicious recipes here.

Lillyella’s Secret Santa Gift Exchange!

The thing I love most about the holidays is giving gifts. I get so darn excited I can hardly contain myself! I haven’t been involved with a secret santa gift exchange in quite some time, but after joining in on the one Team Etsy Project Embrace organized this year, I though it would be fun to organize one myself amongst blog friends! Most of you are total strangers but you do have one thing in common, you either like my jewelry or enjoy reading my blog. Good enough, right?!

So here’s how it will work — From now until this Friday, I will collect the names and addresses of anyone who would like to participate. I will then randomly assign each participant the name of a person you are to send a gift to and you will receive a gift from someone else. Only myself and your secret santa will have your information and everything will be secret until gifts are received!
Gifts can be handmade or purchased, should be valued around $20 (before shipping) and gift wrapped. Please keep in mind you will also need to ship the item and I’ll ask that items be shipped by December 17. (If you’ve never shipped anything internationally, don’t be scared! It’s easy, you just have to go to the post office and they will help you. It’s not even necessarily more expensive, unless you are shipping something heavy.)
TO PARTICIPATE:
Please email your name and address to nicole@lillyella.com, subject: Secret Santa. Please also include whether or not you are willing to ship internationally. Feel free to include information about yourself — likes, dislikes, favorite colors, favorite Etsy shops, your personal style, hobbies, interests etc, or you can just leave it up to your secret santa to totally surprise you!
I will email you the name of your gift recipient, along with all the important details, by Monday, December 8.
Feel free to contact me anytime with any questions. I think this is going to be tons of fun, and maybe even a new tradition! Happy Holidays, everyone!
p.s. If you leave a comment on this post, please be sure to ALSO send me an email with all the info specified above. thanks!
photos © Anthropologie

In the Kitchen: Pumpkin Bread Pudding with Bourbon Caramel Sauce

Tired of traditional pumpkin pie or looking to shake things up this Thanksgiving? Then I have just the recipe for you. Best part is you could practically make it with your eyes closed, though I wouldn’t necessarily recommend it. I’m just sayin’, it’s really easy! My mom described it as ‘orgasmic’, so I guess that means it’s also pretty darn tasty, and I’ll second that.
Ingredients
10 oz bread*
15 oz pumpkin puree (canned or fresh)
1 1/4 cup whole milk
1/2 cup heavy cream
2 large eggs
1/4 cup light brown sugar**
1/4 tsp salt
3/4 tsp pure vanilla extract
1 1/2 tsp cinnamon
1/2 tsp fresh grated nutmeg
1/4 tsp ground allspice
1/2 cup pecans, optional
Bourbon Caramel Sauce
3 cups whole milk
3/4 cup sugar
1/8 tsp salt
3/8 tsp baking soda
2 Tbsp Bourbon, optional

*When it comes to bread just about any will work and you want it to be a little stale, so whatever kind you use, let it sit out uncovered for about a day. I first tried this recipe with sourdough, then with whole wheat and italian, and all three were delicious. A brioche or french would also work nicely or you can get extra fancy by using croissants or cinnamon raisin bread.
You shouldn’t need more than 10 oz of bread, maybe less depending on what kind and the shape you use, you’ll just want to fill your pan nicely. You can either use 1/2″ slices as shown on the left (quick and easy!) or you can cut or tear 1″ cubes from an unsliced loaf and scatter them in your pan.
When you’re ready to make the dish, preheat the oven to 350° and place the bread in a buttered 2qt baking dish.

To make the custard, whisk all the wet ingredients and spices together in a large bowl then pour the custard over the bread in the baking dish. Be sure to stir it around or lift the slices to spread it in between and under, making sure all the bread is thoroughly coated.
**If you’re not planning on serving this dish with any kind of sweet sauce, I recommend doubling the light brown sugar in the custard to 1/2 cup total.

Next, toss the pecans in a bowl or plastic bag with 1 Tbsp brown sugar and 1/2 tsp cinnamon then spread them evenly over the pudding, if desired.
Bake until set, about 40 – 45 minutes. You’ll need to cut into the middle to check the doneness as the top will set faster.
In the meantime you can make the sauce.

In a large saucepan, whisk together the milk, sugar and salt and heat to a simmer over medium heat.
When it begins to bubble, remove from heat and stir in the baking soda. It will foam up a bit.

Return to simmer and cook over medium heat, stirring occasionally and skimming off foam as needed. Sauce will begin to thicken and turn golden brown within 30 – 45 minutes.

Continue cooking until sauce is thick enough to lightly coat a spoon. When the sauce is almost finished, add the Bourbon if desired, and continue cooking until it reaches the desired consistency. If you’re concerned about liking the flavor, start by adding one Tablespoon, then add the second if desired.

Serve scoops or slices of warm pudding topped with warm sauce and enjoy! The pudding and sauce can both be stored, covered, in the fridge for up to two weeks and you can definitely make this ahead of time for Thanksgiving dinner. Just reheat it in a low stove or microwave before serving and fill your gravy boat with the warm caramel sauce!

I’d love to hear what you think about this one and if it graces your dinner table this Thanksgiving.
p.s. It’s also really good for breakfast!
And find more easy and delicious recipes here.

In the Kitchen: Spicy Sweet Potato Chili

Do you know that sweet potatoes are a better choice nutritionally than white potatoes because they are lower in calories and higher in vitamins, nutrients and fiber? They leave you feeling fuller longer and are a good choice for diabetics as the high soluble fiber content helps lower blood sugar as opposed to white potatoes, a.k.a. blood sugar bombs.

If you’ve never been a fan of sweet potatoes, don’t give up on them yet. Their expected taste is surprisingly transformed when cooked up with the other ingredients in this hearty autumn dish. Not a fan of the spice? You can leave out the jalapeno or substitute it with a mild poblano. You can also leave out the chicken and use vegetable stock to make this meal vegan friendly. You’ll find a printable recipe card at the end of this post.

Ingredients
1 medium onion, chopped
2 medium red peppers, seeded and chopped
2 large cloves of garlic, minced
1 pound boneless, skinless chicken, chopped
15 oz cannellini beans*
1 cup chicken stock
2 cups cold water
3 large or 4 medium sweet potatoes, peeled and diced
2 teaspoons cumin
1 Tablespoon chili powder
pinch red pepper flakes
1 jalapeno, minced or 6 oz can diced green chilies
Optional garnish
scallions
sour cream
crumbled bacon
cheddar cheese
*You can use dried or canned beans for this dish. If using canned, drain and rinse them. If using dried, soak, rinse and cook them until partially tender before adding.
In a large pot, heat 1 Tablespoon olive oil over medium heat and saute the onion, red pepper and garlic until slightly tender.
Add the chicken and saute until opaque. Add the beans, stock, water, potatoes, jalapeno and spices. Bring the mixture to a boil then reduce the heat and simmer uncovered for about 30 minutes or until the potatoes are tender.
Couldn’t get much easier!

I enjoy this dish topped with sour cream, fresh scallions, a little cheddar cheese and when I have it on hand, some crumbled bacon — all of which alone or together work really well with the flavor of the chili. Serve it up with some maple pecan muffins or whole wheat cornbread and you have a hearty dish that’ll warm you up through the winter months ahead!
And find more easy and delicious recipes here.

In the Kitchen: Parmesan Mushroom Stuffed Peppers

This is my healthy, vegetarian spin on a classic crowd pleaser. Made with brown rice, fresh veggies and a little cheese, you’ve got just about all your food groups stuffed into one yummy little package, or should I say pepper. This dish is easy to make and can even be whipped up the night before and then popped into the oven to bake when you get home from work. You’ll find a printable recipe card at the end of this post.
Ingredients serves 2
2 large bell peppers (any color, I use green and red)
3/4 cup cooked brown rice
2 large cloves garlic, minced
1/4 cup red onion, finely chopped
1 cup sliced fresh mushrooms
1/2 cup broccoli florets, chopped (fresh or thawed frozen work)
1/4 cup low sodium vegetable broth (can also use chicken)
1/4 tsp salt
1/4 tsp fresh ground pepper
2/3 cup salt free tomato sauce (just plain, not spaghetti sauce)
1/3 cup fresh parmesan cheese, grated, plus extra for topping
Preheat oven to 375°. Slice the tops off your peppers and clean out any seeds and membrane from inside. If desired, you can chop up the pepper top (discarding the stem) and add it to your stuffing mixture. Brush the outside of the peppers with a little olive oil and set aside.
Depending on what type of brown rice you are using, you’ll want to cook this ahead of time. I use Minute brown rice, which is easy and works well, so I start cooking it when I start making the filling, as it only takes about 5 minutes.
To prepare the filling, saute the minced garlic and red onion with a little olive oil over medium high in a large skillet until tender. Add the mushrooms, broccoli and chopped pepper tops (if desired). Once the veggies are almost cooked through and soft, reduce the heat to medium, add the rice, chicken broth, salt and pepper and simmer until most of the broth cooks away and is absorbed into the mixture.
Remove from heat and stir in the tomato sauce and parmesan cheese until thoroughly mixed and melted. I recommend tasting the filling at this point before you stuff the peppers in case you want to add any additional salt or seasonings.
Spoon the filling into the peppers, stuffing them tightly. I cook mine in a glass loaf pan so if they want to tip over they don’t have far to go, but any glass baking dish will do and you can always stabilize them with some foil around the bases.
Cover the dish with foil and bake for 40 – 45 minutes until the peppers start to get soft. I like my peppers slightly al dente, so to say, but you can cook them a bit longer if you’d like them really soft. Remove the foil and sprinkle a little shredded parmesan on the top of the peppers, return to the oven and bake or broil until melted. Serve and enjoy!

Don’t like parmesan? Try cheddar. Don’t like mushrooms or broccoli? This recipe is very versatile and you can substitute just about any veggies or cheese you wish. For a mexican spin, try using black beans and chopped roasted poblanos instead of the mushrooms and broccoli along with pepper jack cheese.
You can easily double this recipe to serve four or make it as is and stuff four small peppers instead of two. They also reheat well in the microwave or oven for a hearty lunch or second dinner. Enjoy!
And find more easy and delicious recipes here.