Butterfly Effect launch day!

Today is the day! Butterfly Effect is out in the world and I’m SO DARN EXCITED! This pattern has been a really long time in the making. I started and stopped and started and stopped and almost gave up on it a few times. I sketched dozens of options and fought with geometry for too many hours to count, but… TOTALLY WORTH IT!

Download the Butterfly Effect Pattern here

The pattern finishes at 24” square as written (shown above), making it a perfect mini quilt or pillow, but you can continue to grow your piece to any size or use small sections of the pattern for other applications.

The pattern includes printable templates and pattern papers so you have everything you need to jump right in or you can order laser cut paper packs and acrylic templates at PinkDoorFabrics.com.

**UPDATE: Butterfly Effect Supplies (templates, paper packs and printed patterns) are now available from Paper Pieces HERE. Thank you!

• • • • • • • • • • • • • • • • • • • • • • • •

SUPPLIES

**UPDATE: Butterfly Effect Supplies (templates, paper packs and printed patterns) are now available from Paper Pieces HERE. Thank you!

• • • • • • • • • • • • • • • • • • • • • • • •

I believe that any level sewist can create this pattern, even EPP beginners! Complete instructions on EPP are not included, but many tutorials can be found online. You can also check out my  Beginners Guide to EPP. Even if you are experience with EPP, you may find some helpful information in this post, plus links to all my favorite tools!

I will be hosting a Butterfly Effect Sew Along that will kick off May 3 where will we work step-by-step together, so if you’re a newbie but want to give this a try, I hope you’ll sew along! You can sign up by clicking here.

I hope you love creating this pattern as much as I have. Remember to share your projects and find inspiration with the hashtag #ButterflyEffectPattern on social media!

A Beginners Guide to EPP


My new Butterfly Effect Pattern comes out TOMORROW (March 3) and I wanted to share ALL THINGS EPP with you today to help you prepare! Whether you are new to English Paper Piecing (EPP) or have dabbled in it before, I hope you find some useful tips and techniques here today. Below I’m sharing all the basics about EPP, as well as my essential (and favorite) tools and a variety of tutorials on basting, stitching and more.


English Paper Piecing (EPP) is a hand sewing technique that uses heavy paper templates to create shapes and stabilize them for stitching. EPP allows you to create intricate designs that would be difficult or impossible to achieve through machine sewn seams. I, personally, find great satisfaction in creating a beautiful quilt with just my hands. Though the process can be slow and meticulous at times, it’s one that people often describe as therapeutic and rewarding. One of my favorite things about EPP is the portability. I like to be busy (you know what they say about idle hands…) and I can take EPP anywhere – on car rides, while waiting for appointments, to the park, on road trips – with minimal equipment. You can toss a few things in a little pouch and always have a project on hand.

Next I will be diving into tools and techniques for EPP. I will be sharing some detailed information and tutorial links, but this is still a surface level intro to help get you started. I will be doing a deep dive into all of this and more with my own photos and video tutorials during the Butterfly Effect Sew Along which will be scheduled later this Spring (probably early May), so stay tuned for that!

· · · · · · · · · · · · · · · · · · · · · · · · 

GETTING STARTED

There are a few tools that are essential for EPP and several others that are simply beneficial and make the process easier, more efficient and more accurate. These tools include papers, templates, needles, thread, a thimble, a glue pen, small scissors, a small rotary cutter, Friction pen, SewTites, washi tape, Clover Clips, and more. You can see many of these items above and I will discuss them all in more detail.

The first thing you need for every EPP project is paper templates. Some patterns have the option of printing the papers yourself on your home printer (or at a copy shop) using card stock and many patterns have pre cut paper packs available. My Butterfly Effect Pattern includes printable paper files if you’d like to print and cut them yourself or you can order precut paper packs from Pink Door Fabrics (shown below). They will be available for preorder March 3.

You baste your fabric to these paper pieces and then stitch them together leaving the papers in place until your project is complete (more on basting later in the post!).

The next tool in the EPP process is templates. These help you cut your fabric pieces to the right size and shape before basting them to your paper pieces. Templates are not essential to the EPP process, but they are extremely handy and helpful. With EPP patterns, you will use either a 1/4″ or 3/8″ seam allowance on your fabric pieces. This is often determined by the size and shape of your pattern pieces. You can use your paper pieces as a guide/template, cutting your fabric 1/4″ – 3/8″ larger all around or you can use templates. EPP templates are  clear acrylic shapes that are the same size and shape as the paper pieces that you baste to, but include a seam allowance and allow you to easily fussy cut fabrics for your pattern, which is one of the great joys of EPP! Some EPP patterns will also include printable template files that you can print and cut from card stock just like the papers. You can use them whole or cut out the centers for easy fussy cutting.

My Butterfly Effect pattern includes printable templates and you can also order acrylic templates from Pink Door Fabrics. There are two options available. One includes a full set of templates for every piece of the pattern and the second is a mini set which includes acrylic templates for the butterfly and moth wings. You would then print and cut the other templates yourself.

Above you can see a set of acrylic templates from Pink Door fabrics. They ship with paper on the back that you peel off.  I *always* fussy cut so I love acrylic templates. They are also beneficial because you can easily use them to cut your fabrics with a small 28mm rotary cutter. If you did this with paper templates, you could cut into your templates, so you would need to trace your shapes and then cut them with scissors. If you choose to trace shapes on your fabric, I love using a Frixion pen that erases with heat.

If you use acrylic templates, you may find No Slip Grip Dots helpful, especially if you’re using a small rotary cutter. You affix these to the back of the acrylic templates to help keep them from slipping around on your fabric when tracing or cutting.

You can also consider an EPP starter kit like this one!

· · · · · · · · · · · · · · · · · · · · · · · · 

BASTING

Basting is the process of attaching your fabric to the paper pieces in preparation for stitching them together. You can baste with thread or glue and this is a personal preference. I prefer glue basting. I find it to be quicker and to hold my fabric to the paper tighter which allows me to more accurately and easily stitch my pieces together. I like to use a Sewline Glue Pen because it’s small and accurate (don’t forget the refills!), but you can also use a glue stick.

Here are three great articles talking about basting that show various techniques. Check them out and experiment yourself to see what works best for YOU!

• The Bating Debate by Tales of Cloth

• 5 Ways To Baste English Paper Piecing – The Little Mushroom Cap

English Paper Piecing Basting – A Little Patchwork

There are also oodles of videos on YouTube at your disposal if you search EPP basting.

· · · · · · · · · · · · · · · · · · · · · · · · 

Stitching supplies & techniques

My preferred basic stitching supplies – needle and thread – are Tulip needles and Invisafil thread. I have used Aurifil thread, but for me it sometimes breaks because I’m a little rough when I pull it. The synthetic thread holds strong and is practically invisible. I love it! I also use a thimble and my favorite is the Clover natural fit leather thimble. I can’t sew without it!

When it comes to stitching your pieces together, there are a variety of methods. None are right,  wrong or better than another, it all comes down to personal preference. I recommend, once again, experimenting and finding what works best for you. Keep in mind, this may change with practice and over time or even with the specific project you are working on, so always be open to trying new things.

My preferred method of stitching is the flat back stitch. This is when you keep your pieces flat, butted up next to each other, and stitch across the seam. This is opposed to other methods where you place your pieces face to face and whip stitch or ladder stitch along an edge.

I like using a flat back stitch because I find it the easiest way to keep everything perfectly lined up and because your stitches are invisible! Above you can see that all my seams are neat, even and have no stitches showing. Below is a shot of the back where you can see my stitches. One thing to note is that invisible stitches is a preference. Sometimes different methods are used to intentionally see stitches.

I learned the flat back stitch from Karen the DIY Addict. She has a short video that I first watched here and she also just released a fantastic master class on the flat back stitch which you can find below. This video also includes ample information about basting.

I will share more videos and details during the sew along, but when I flat back stitch, I use a generous amount of washi tape/painters tape and Clover Clips, but also totally rely on SewTites, specifically when my project gets bigger. They are a game changer!! (You can use code lillyella for 15% off on their site, too!). When I start joining multiple pieces together and have a lot of seams and folded fabric, I use tape, pins and SewTites to move things out of the way as needed.

If you’d like to try a traditional whip stitch method of joining your pieces, here is another great tutorial from Jodi Tales of Cloth.

Another method is the invisible feather stitch demonstrated by Pat Bravo of Art Gallery Fabrics in the video below.

Finally, here is an article by Amira The Little Mushroom Cap talking about five different stitching methods. Once again, you can find endless articles and tutorials with an internet search.

Play around with some basic hexagons or triangles and see what feels right for you!

· · · · · · · · · · · · · · · · · · · · · · · · 

additional tools

There are a few more tools that I use on the reg that really help me with my EPP (and all my sewing projects!). I will talk about them more in depth during the upcoming Sew Along, but here is a quick list with links:

Mini Oliso Iron and wool pressing matsmall and easy to setup next to you on a side table or to take on the road!.

Lap Deskdid you have one of these as a kid for car rides? I use mine ALL THE  TIME! For sketching, cutting, hand sewing on the couch!

Stella two task lampI’m typically stitching in the evenings on the couch and let’s face it, my eyes aren’t what they used to be.

Daylight Wafer Lightboxespecially helpful for fussy cutting without acrylic templates.

· · · · · · · · · · · · · · · · · · · · · · · · 

Last, but not least, I recommend making yourself a Mini Maker Station! This is one of my free patterns and it’s perfect for EPP! You can download the pattern here.

· · · · · · · · · · · · · · · · · · · · · · · · 

I also REALLY love the Sewing Date Traveler pattern  for storing and toting around all my project supplies. You can download the free pattern here. I made this one a few years back and it’s constantly in use!

· · · · · · · · · · · · · · · · · · · · · · · · 

I hope you have found this post helpful and try your hand at some EPP!

I want to add, if you don’t love it at first try or get frustrated with perfection or techniques, don’t give up! Like everything, it can require some practice and finessing.

Stay tuned for my pattern release TOMORROW and I hope you’ll join in the upcoming Sew Along! I will post details here on the blog and you can also stay up to date with everything on my Instagram page and by joining my email newsletter here.

Happy stitching!
~ Nicole

Maker Mat SAL: Pocket Panel Tips & Tutorials

Hello, Hello! If you are just joining the sew-a-long, please scroll down a few posts to find the kickoff and all the tips shared in previous posts or scroll to the bottom of this post for direct links.

So far we’ve worked on the main body of the mat and how to add a machine handle opening, and today I’m going to talk about the pocket panels. If you’re just getting started on your mat, don’t worry, there’s still plenty of time!

Before you begin your pocket panels remember that if you changed the size of your main body, you will need to also adjust the size of the pocket panels! You can do this by changing the size of one pocket or adjusting all the pockets equally. Don’t forget to think about seam allowances when calculating cutting sizes.

One thing to note about the pocket panels is that there are SO many ways you can customize this entire project, but especially this part. You can adjust the sizes, add more or less pockets, you can piece them all with any block you love or you can eve use one solid cut of fabric to make it really quick and easy. Be sure to check out the #undercovermakermat hashtag on social media to see tons of creative inspiration!

pockets

Above you can see just a few variations from mats that I’ve made in the past. The top left follows the pattern as written, which the bottom left follows the same sizing and layout, but uses full cuts of fabric (rather than piecing) with cute fussy cuts! On the right, there is a little mix of both. I substituted my Love Story pattern block for the butterfly and then used solid fabric cuts for the other pockets with some added lace trim details.

First I’m going to share some tutorials and tips on creating the accent pocket panels which are the paper pieced butterfly and the selvedge pockets, then I’ll cover a bit more details on piecing the panels and trim options.

All the information you need to create the accent pocket pieces is included in the pattern (including a link to a tutorial on making the butterfly for beginner paper piecers), but I will go into a bit more detail here and include some additional tips and photos, as well as design variation ideas.

•  •  •  •  •  •  •  •  •  •  •  •  •  •  •  •

PAPER PIECING TIPS

You can find the pattern for my Butterfly Charm Blocks here. All three butterfly designs are the same size and any can be used. The foundation paper piecing tutorial link included in the pattern is from Cassandra Madge and you can find it here. It was so sweet of her to use my pattern as the example for her tutorial!

Our methods of paper piecing are very similar, with just a few differences. I like to use the Add-A-Quarter Ruler, rather than a standard quilting ruler. It does the same job, but is just one of those tools that takes away some room for error. Another paper piecing tutorial I often direct people to is this video from Connecting Threads. You can see the Add-A-Quarter ruler being used.

paper piecing tips | lillyella stitchery

When I paper piece, especially small blocks, I like to use Foundation Paper. You can buy one from Carol Doaks or you can use any thin newsprint. Someone recently mentioned they found this pack from Dick Blick, and you can’t beat the price! I also apologize that I don’t remember who tagged me on that, please let me know if it was you! It is essentially just a thinner paper that creates less bulk and allows for easier removal. You can use any paper for paper piecing, but the thinner you can find, the easier it will make the process.

Another thing I ALWAYS do is to trace the pattern onto the back of the sheet. It does not have to be perfect because you will only be using it for reference, but it helps in a multitude of ways. I use a lightbox, but you can also use a window. Since this is the side where you will place your fabric, you can use these lines as a guide for cutting your fabric pieces. You can still use the printed side, but you have to work with your fabric upside down at that point, and I like to see the prints and placement.

After tracing and selecting fabrics, I also note my fabric selections or color accordingly on this side. Then I always know I’m placing the correct piece. These lines also help you as you sew to make sure a fabric cut will cover a segment. Place the fabric where you would for your next seam, but before sewing, hold the fabric approximately where your seam will be and fold the fabric over as you would when pressing it after sewing. You can then see if your piece is large enough to cover everything it needs to. You can then sew your seam with confidence, because unpicking a paper pieced seam is NO FUN!

Lastly, I find having these lines helps prevent you from missing a segment, which is something I see a lot in paper piecing. When you have the pattern lines on the side where you are placing fabric, you will notice if you’ve missed a piece. You still have to pay attention, but it’s definitely better than flying blind!

paper piecing tips | lillyella stitchery

In Cassandra’s tutorial, you will see her talking about adding some basting stitches to you sections to help when piecing them together. This is important and something I always do as well, however, I put my stitches in the seam allowance as you can see above in the left photo.

Another tip is that when trimming sections to the seam allowance after piecing, do not trim any sides that are on an outer edge (above right). This way you can trim your final block to size after it is completely pieced. It is not uncommon to lose a little bit in each seam, so this ensures you can have the correct sized block in the end, and also lets you trim the block to a slighty larger size, if desired.

After piecing sections, I always remove the paper from the seam allowance only before sewing sections together. This just helps with bulk and allows you to press a flatter seam before adding the next section. You can also see this in the above right photo.

•  •  •  •  •  •  •  •  •  •  •  •  •  •  •  •

SELVEDGE POCKETS

For those who are new to sewing or do not know what a selvedge is, it is the finished edge on a bolt of fabric. There are finished edges on both sides along the width of the fabric, but only one will contain printing and this is the side I use on this project. I cut my selvedges off with about one half inch to one inch or so of the fabric print included, just to make sure I always have enough extra to work with them. The directions on how to work with the selvedges to create the pockets are included in the pattern.

selvedges

•  •  •  •  •  •  •  •  •  •  •  •  •  •  •  •

VARIATIONS

Below are more variations from makes on Instagram to help inspire you!

examples5

•  •  •  •  •  •  •  •  •  •  •  •  •  •  •  •

TRIM

This pattern uses trims or ribbons for securing the secondary pockets and hiding the raw edges, and also for creating the side ties when using it as a machine cover. Below are some trims from my collection that I’ve found at Joanns, Hobby Lobby and even Walmart. Anything between 1/4″ to 3/8″ width is best. If it is too small then you will have trouble enclosing the raw edge of the pocket, any thicker and you cut into your pocket space. Trims that are more solid are best to hide the raw edges, but some lacier style trims can work ok, too.

ribbons

If you don’t have any trims on hand, you can also use a thin bias binding strip instead. Start with a 1″ or 1.25″ cut strip, fold the raw edges into the center, then fold in half and press and use this as you would a piece of ribbon. You can also you another selvedge with the cut side pressed under. Lots of possibilities!

trims

•  •  •  •  •  •  •  •  •  •  •  •  •  •  •  •

Undercover Maker Mat | lillyella stitchery

POCKET BINDING

I like the look of the binding on the pocket because I think it balances the piece nicely, but if you prefer, you can eliminate this step and instead attach the lining to the pocket panel just as you did on the small secondary pockets. Just lay your lining piece, RST, on top of your finished main pocket panel and sew across the top with a 1/4″ seam. Flip the lining to the back, press, and top stitch along the top edge. You can include the fusible fleece when you do this, add it after tucked up to the seam, or skip it all together and use some lightweight interfacing on one or both pieces instead.

pocket-binding

Above are a couple examples I saw on the #undercovermakermat hashtag on instagram that demonstrate this variation. If you have any questions about doing this instead of the binding, just let me know and I’m happy to help!

•  •  •  •  •  •  •  •  •  •  •  •  •  •  •  •

Once your full pocket panel is complete, you will baste it to your mat body and bind the entire piece as covered in the pattern. BE SURE TO ADD YOUR SIDE TIES BEFORE BINDING! If you do not plan to use your mat as a cover, you can leave them off. I did forget to add them once and just had to unpick a little bit of my binding and tuck them in, which was not hard to do, so it’s not the end of the world if you forget, or even decide to add them later!

tie double

Just as with trim used to secure the secondary pockets, you can instead use a binding strip for your side ties, or even additional selvedges. If using a binding strip, simply top stitch along the folded edge to close it up. You can tie knots on the ends or stitch them closed.

cover

cover1

Stay tuned next week for one more post talking about the thread catcher before we wrap things up on October 28!

ADDITIONAL POSTS:

Undercover Maker Mat Sew-a-long: All the details

PART ONE: Kickoff! Sizing your mat and tutorials for beginners

Sponsors and Prizes!

PART TWO: Adding a machine handle opening

Fabric.com Fall Block Party

Print

Fall is officially in the air and I’m closing out the Fabric.com Fall Block Party with my contribution, Flutter By! If you’re just joining the party, you can find all the free blocks shown above on the Fabric.com blog here. This collection of quilt blocks is an excellent skill builder with traditional piecing, foundation paper piecing, english paper piecing, and appliqué.

DSC_0505 BLOG

Though many people typically associate Butterflies with Spring, some of my favorites appear as Fall blows in when the monarchs emerge and the Painted Ladies make their migration. Plus, we all know I love them, so I’m always game to share a new pattern 🙂

My Flutter By block is foundation paper pieced and sews up quickly with just three simple sections. The pattern includes the butterfly as shown and reversed so your butterfly can head East or West!

You can download the free pattern from Fabric.com here!

DSC_0493 BLOG

I wanted to use an unexpected mix of fabrics on my block, with a variety of prints and textures, and am so in love with the result! I started with the focal floral print, which is Liberty of London Lawn. Many people do not think about using Lawn when quilting, but it’s quite dreamy, especially when paper piecing because it is lightweight.

stack2.jpg

The pink stripe fabric is a woven from Loominous by Anna Maria Horner, dotted line coral. The stripes are raised and add such a lovely textural element. The remaining prints are quilting cotton from different designers – Indah Batiks Herringbone Coffee, Dear Stella Trail Mix Feathers Mustard, Dear Stella Honey Bee Scallop Dot Corn, and Cotton + Steel Ombre Pigment Aqua for the background. I love how the gradient of the ombre prints plays subtly in the background. It’s so perfect for sky!

DSC_0606 BLOG

I have a few fun quilt layout and other project ideas in mind for this block, so keep an eye here and on my instagram page for those! I hope you enjoy my contribution to the Fabric.com Fall Block Party! Please share your projects with the hashtags #flutterbypattern and #fabricdotcomblockparty!

DSC_0519 BLOG

Saki Quilt Workshop in Albuquerque · August 12 & 13

saKI5

Calling all my Southwest friends in or around New Mexico! (Or anywhere in the world who may want to get away for a couple days!)

My other half, Sariditty, and I are so excited to announce that we’ll be teaching our SARIELLA Saki Butterfly Quilt Workshop will be at Hip Stitch in Albuquerque, New Mexico on August 12 & 13. During this two-day class, you will learn all the basics of Foundation Paper Piecing and Appliqué, as well as how to tackle these techniques on a large scale, while you make a Saki butterfly quilt of your own. Basic knowledge of quilt piecing is required, all skill levels welcome. The class runs from 9am – 5pm both days. The finished quilt measures 75″ x 58″.

In addition to the workshop, we will also be doing a Trunk Show at Hip Stitch on Friday, August 11 at 6pm. All are welcome! Admission is $10. We will be sharing some of our work, as well as talking about our favorite modern quilting tips, tricks and techniques. There will also be some amazing door prizes!

SAKI2

The cost of the Saki Quilt Workshop is $200 and space is limited to 20 participants. Cost includes paper pattern, pattern templates, and admission to the trunk show. A materials list will be supplied upon registration. Sign ups are now open and you can register by calling the shop, visiting their website, emailing them, or just stopping in!

HIP STITCH
2320 Wisconsin St., NE, Albuquerque
505-821-2739
hipstitchabq.com
Email: HipStitchABQ@gmail.com

If you have any questions, please leave a comment below or contact us here. We hope to see you there!

SakiBridge

Avantgarde Blog Tour – The Neo Quilt Series

Avantgarde Blog Tour

When Sari and I were invited to join Katarina Rocella’s Avantgarde Blog Tour, we had just wrapped our Sariella Retreat, Western Edition, where we started working on our first collaborative patterns, so we knew this was a perfect opportunity to work on some more!

We were both in love with the bold, bright colors and textural patterns in the line and the Bauhaus Dissection print was our favorite, so we decided to use it as inspiration for designing the patterns.

Neo Quilt Series | sariella

The next question was what to make… lap quilt, minis, pillows? In the end, we decided on all, of course! I have come to adopt my husband’s motto, anything worth doing is worth overdoing. I mean, he has a point…

After days (literally) of sketching, texting, facetime and phone calls, we had our plan. We both love versatility, so that’s what won in the end. We created a collection of panels, or blocks, that would go together into a beautiful (and customizable) lap quilt, but could each also be used independently to create mini quilts and pillows. Think of it as a create your own adventure pattern! And because we are mild overachievers and can’t contain all our ideas, we created an additional separate mini quilt pattern, too. Together, we’re calling it the Neo Quilt Series (#NeoQuiltSeries).

I’m so excited to finally share these patterns that we’ve been feverishly working on for weeks! Sari will be sharing the full quilt design on her blog tomorrow, but today I’m showing you some of the mini quilt and pillow patterns. They will all be headed to testers shortly and will be available in March, but we also have a free one for you today! And it is where I will begin…

NeoVolheader

NeoVol pattern | Sariella

This is NeoVol. Simple appliqué lends itself to a beautiful 18×20 mini quilt that is quick to sew and allows you to showcase a fun print. It also makes a darling pillow (shown a couple photos down) and can be resized to create a variety of different designs (another of which you’ll see used in the quilt reveal tomorrow).

You can download the free pattern here. We hope you enjoy it!

NeoVol Pattern | sariella

I kept the quilting simple (but awesome!) on this mini with a little rainbow explosion coming from the top corner. I continued the lines through the butterfly, but switched to a dark purple, and then picked the rainbow color up again on the other side of the butterfly.

I also did some random angled lines horizontally across the bottom and the dots to help hold them in place. My favorite part, by far, is the striped binding!

• • • • • • • • • • • • • • • • • • • • • • • • • • • • • • • • • • • •

NeoBurstHeader

NeoBurst Pattern | sariella

Another panel from the quilt design is NeoBurst, which will be part of the quilt pattern and also available separately as an 18×20 mini quilt pattern. It will include an 18″ square variation, which is shown here made into a pillow.

NeoVol Pillow | sariella

NeoBurst is another quick-sew block with simple paper piecing and the opportunity to really have fun with fabric placement. Together with the NeoVol pattern, shown above as a pillow, you have a perfect set.

• • • • • • • • • • • • • • • • • • • • • • • • • • • • • • • • • • • •

NeoSphereHeader

NeoSphere Pattern | sariella

Last, but certainly not least, from me for today is NeoSphere. My favorite piece from the Neo Series changes every few minutes, but this circle has a special place in my heart! How can you not love it?!

The pattern will include directions to make this 18″ circular mini, as well as a box edge pillow. It will also include an option to finish the block as a square to use in a quilt or simply as a square mini or pillow.

NeoSphere Pattern | sariella

NeoSphere Pattern | sariella

My favorite thing about this pattern is that it looks complex, but goes together quick and easy. Don’t fear the curves! The center is created using simple paper piecing and the curved border is cut with templates. the final piece goes together in six wedges.

You can also change the design of the center by placing the templates in a different order, or how about an appliqué NeoVol butterfly in the center of the triangle? So many possibilities!

Sari's Mini

Sari has informed me that she has an open spot on her wall reserved for this one, so it will be headed off to hang out with Hazel, Luminaria and the rest of the gang out in WV! But I’ll be there to visit it soon, for the Sariella Retreat, Appalachian Edition!

• • • • • • • • • • • • • • • • • • • • • • • • • • • • • • • • • • • •

Neo Quilt Series | sariella

Sari and I have had so much fun creating these patterns and working with this amazing line. You can see how these fabrics really add such a fun pop of color and life to a space. It’s impossible to not be drawn to them.

I really need a whole cloth quilt with those stripes!

NeoVol Pattern | sariella

I can’t wait to hear what you think of the designs and show you all the fun variations our testers create over the next few weeks.

Be sure to stop by Sari’s blog tomorrow for more about the Neo Series and the Neoteric Quilt reveal! And stay tuned to our personal Instagram feeds (@lillyellasworld and @sariditty), as well as our Sariella feed (@sariellastudios) for updates and giveaways, including the NeoVol mini and a few bundles of Avantgarde fabric!

NeoQuilt Series | sariella

You can also check out all the other projects from the tour on @KatarinaRoccella or under the hashtag #avantgardefabricsblogtour.

see ya soon!
~ nicole

Neo Quilt Series | sariella

Festive Flutter Tree Mini Quilt Pattern

This festive mini quilt measures 22” x 26” and features my Butterfly Charm Block patterns with a little Gidget tree topper. It’s perfect for hanging on a door or anywhere you don’t have room for a real tree!

Click here or the image below to download the PDF pattern.

If you have any questions about the pattern, feel free to contact me anytime. Tag your photos with #festivefluttertree and #butterflycharmblocks so everyone can be inspired!

Festive Flutter Tree Pattern | lillyella stitchery

Take Wing Summer Giveaway!

butterfly opener.indd

I am over the moon excited to have sold over 300 copies of my Take Wing and Take Wing Mini Patterns (THANK YOU!!), so to celebrate I’m having a big ‘ol giveaway!

It’s open to everyone who has made or makes my Take Wing Pattern (either the original or the new Mini pattern) and shares photos on Instagram (you can email me photos if you’re not on IG!). All you have to do is post progress photos and/or finished pieces with the hashtag #takewingpattern anytime thru September 1.

Each progress photo you post (limit 3 per piece) gets you one entry and a shot of your finished piece gets you 3 more entries! You don’t have to finish a piece to get entries and you can make as many pieces as you wish. (All photos posted since the pattern release will be entered!)

mainprizeblog

One grand prize winner will be drawn at random to receive the gimungo prize pack of goodies shown above and there will be runner-up prizes as well.

I will also post all the finished pieces on my blog in September for a viewer’s favorite vote to win a gift certificate to the fabric shop of your choice!

The grand prize pack includes:
• 100 sheet pack of Carol Doak’s Foundation Paper
• 6″ Add-A-Quarter Ruler
• 6″x12″ Omni Grid Quilter’s Ruler
• Set of 8.5″ squares of the full Cotton & Steel Basics Line
• Clover Rainbow Wonder Clips
• Graph Composition Notebook
• 72 count Colored Pencil Set
• Handmade Curvy Clutch Pencil Pouch
• 24 count Colored Pencil Set
• Handmade patchwork fabric basket
• Handmade pin cushion and 150 extra fine glass head pins
• Dual Purpose Twin Marking Pen
• Seam Ripper
• Glue Sticks
• Four issues of Quilty Magazine
• and more fun goodies!

close2

If you have any questions, please leave a comment on this post or send me an email – nicole@lillyella.com. As mentioned, if you aren’t on Instagram, just email me your entries!  Check back here or under the hashtag #takewingsummergiveaway on Instagram for updates and more prize photos!

You can download the original Take Wing pattern and the new, beginner-friendly Take Wing Mini pattern in my Payhip shop, on Etsy or on Craftsy.

Have fun! I can’t wait to see all your beautiful butterflies!!

close3

Take Wing Tips: Fabric, Fussy Cutting & More

blog - opener

Yesterday I covered a few tips and tricks for preparing your pattern pieces and today we’re going to get into the hardest part of this pattern — designing your layout and selecting your fabrics. There are a lot of pieces and so many possibilities!

I’ll be covering a few ways to go about choosing and auditioning your fabrics, how to get good symmetry between wings and then I’ll close with tons of examples and inspiration from others who have sewn up the pattern.

I have thus far approached my planning in four different ways – by color scheme, by fabric line, by fabric designer and by using a focal fabric as inspiration.

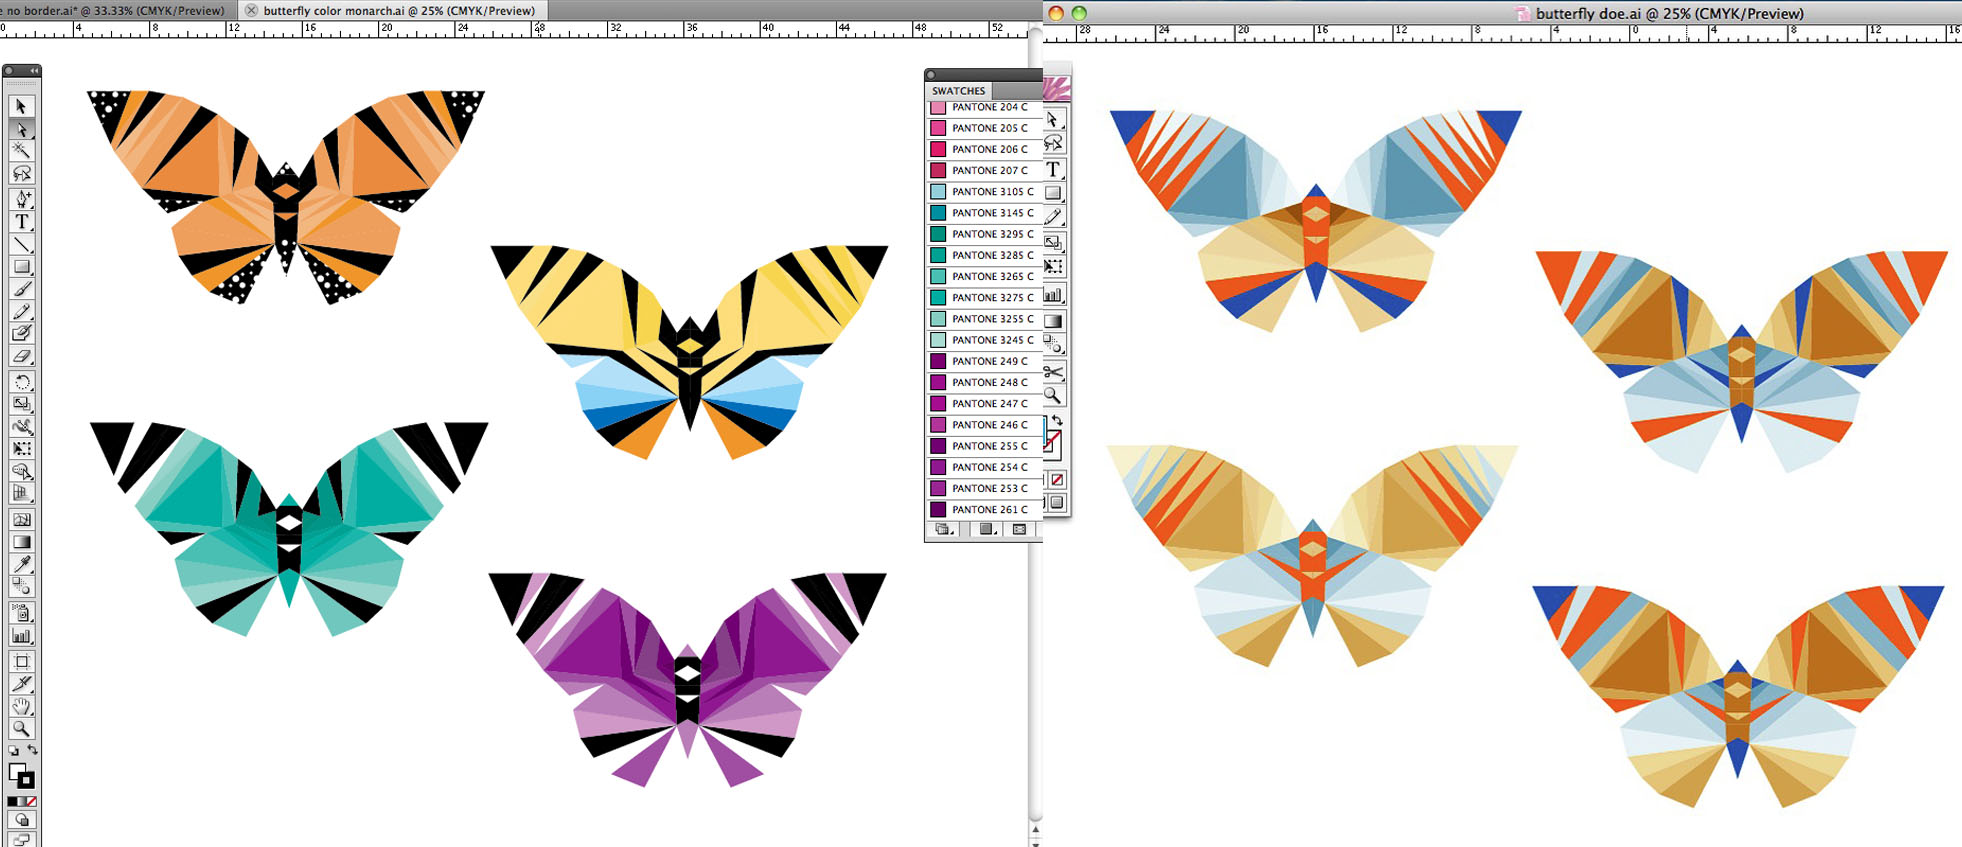
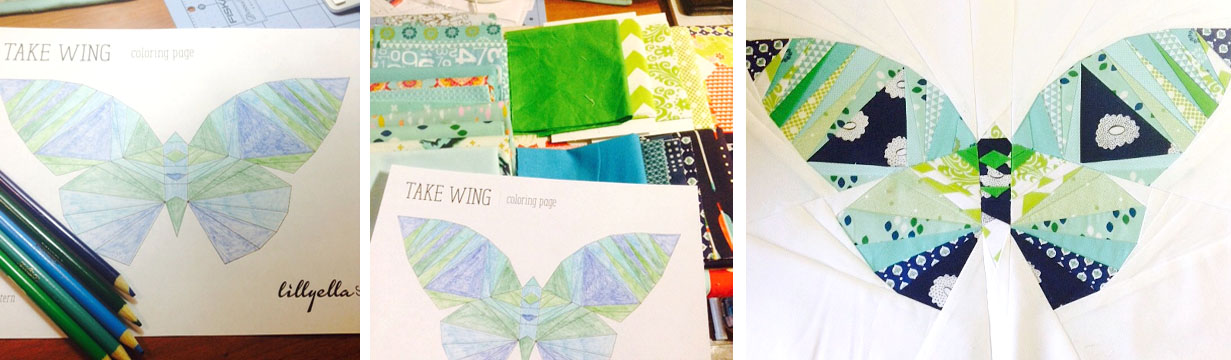
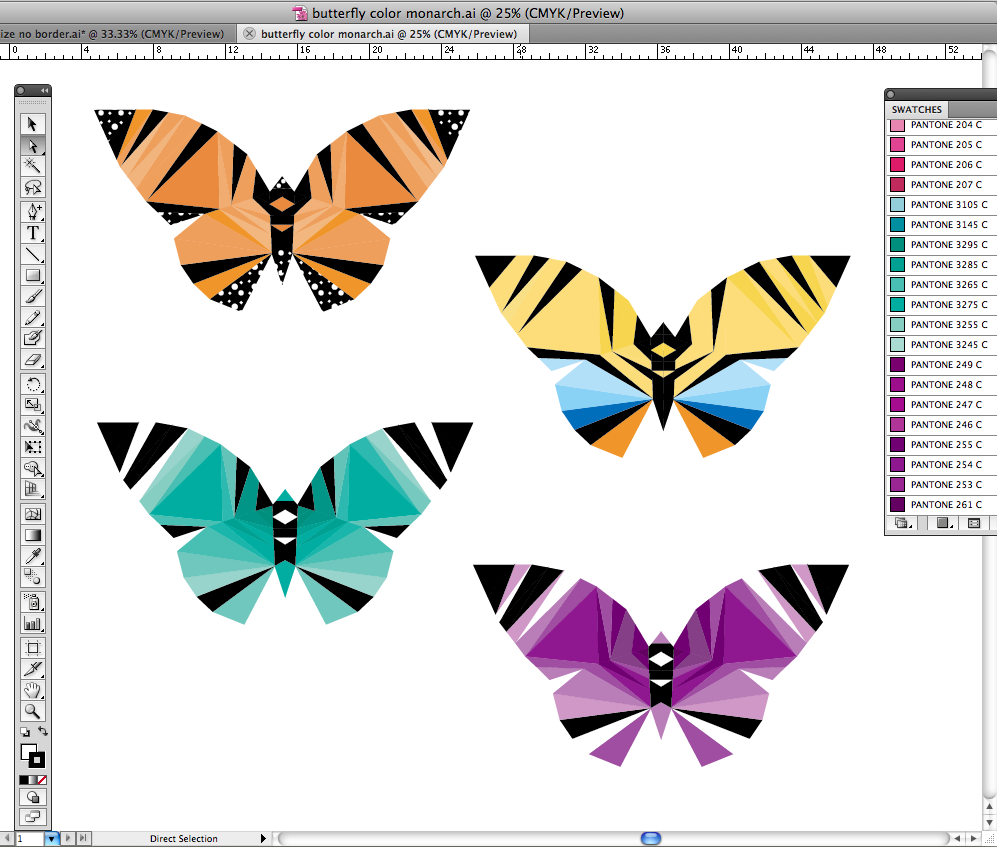
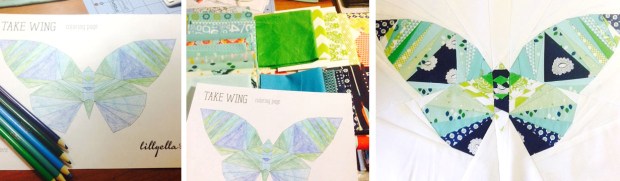
I always find myself gravitating towards color gradients when creating a new butterfly, probably because that is how I originally envisioned and designed the pattern, but I’ve been working on breaking out of that box and experimenting with different layouts. I usually do this on the computer (because I can!) but I also love to sit with a box of colored pencils, especially when I’m on the road or killing time waiting for appointments and such.

blog - mock up 2

I’ve been working on mimicking some real life butterflies such as the monarch and swallowtail (shown left above) and I totally love them! These examples can give you some ideas for colors and different ways you can accent areas of the pattern. Once you have a rough idea in mind, you can start selecting fabrics.

I tend to lean most towards planning with a color scheme because it gives you infinite flexibility, but it also requires a lot of fabric. I don’t have a very large stash of fabric that isn’t reserved for a specific project. I also don’t have a lot of basics, blenders or solids, because what I love about fabrics are the patterns! This makes creating a gradient with 13 different fabrics pretty tough, but still totally doable!

Most of the butterfly requires small pieces of fabric, so it’s easy to pull from scraps or charm pack leftovers. You can also look at fat eighth bundles or layer cakes for a project like this. The cotton + steel basics line is fantastic and I also love the moda grunge basics to add some good blenders into your project.

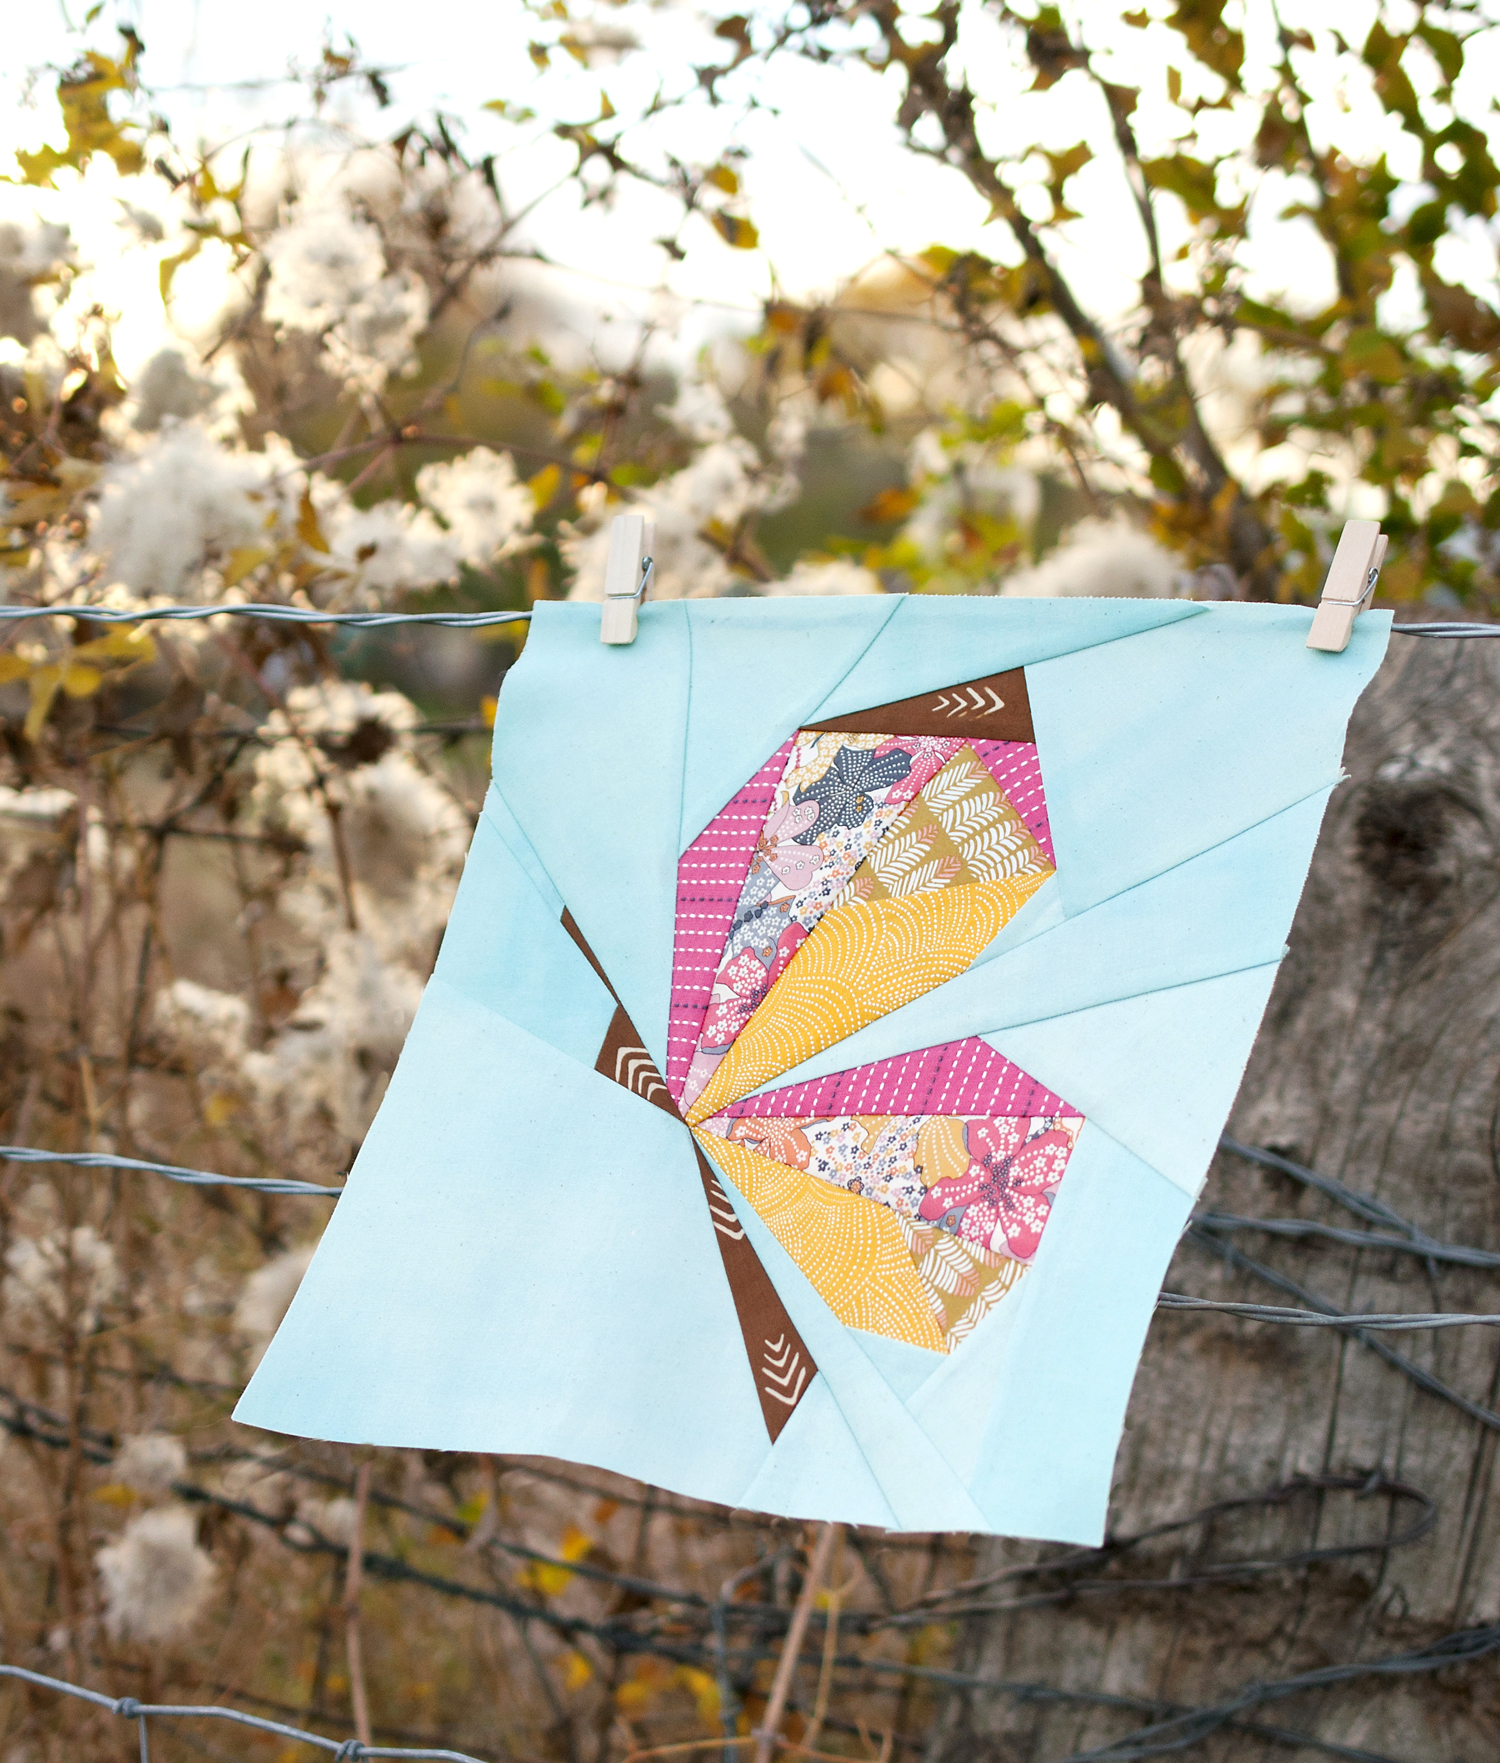
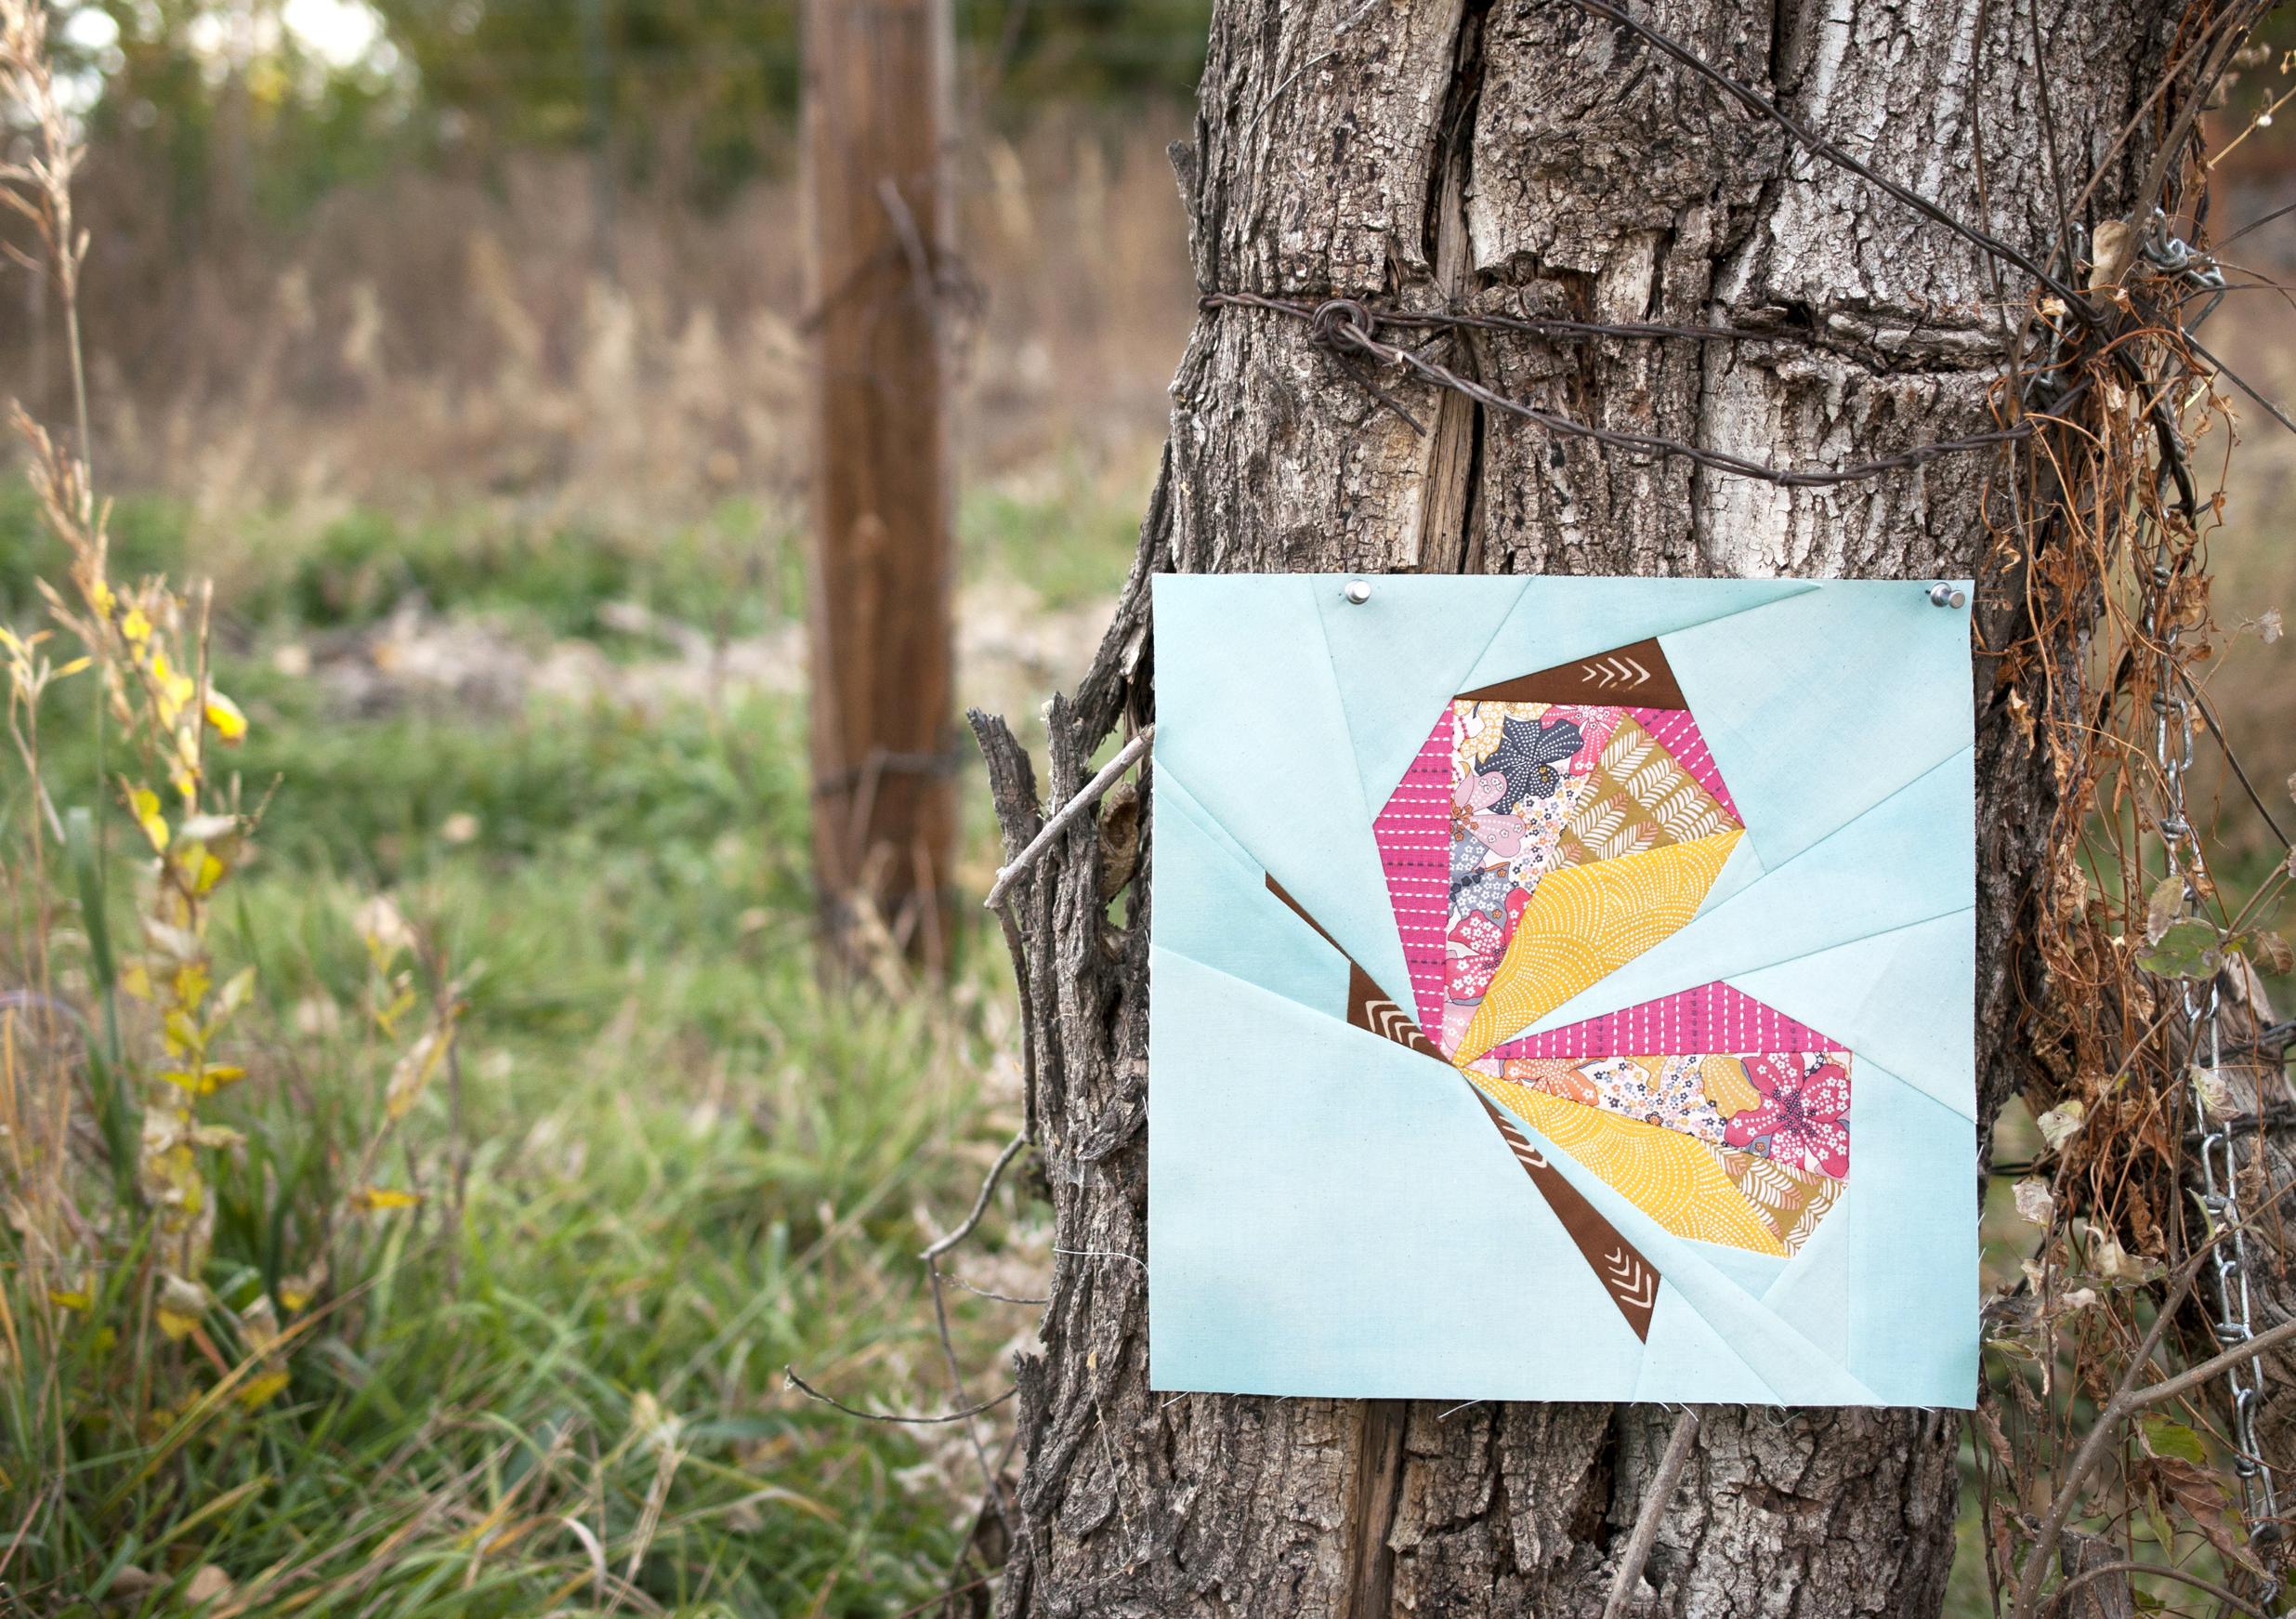
That being said, I decided to try creating some butterflies using a single fabric line and see how it worked. I’ve started this with two lines so far – Doe by Carolyn Friedlander and Fresh Cut by Basic Gray.

blog - doe wing

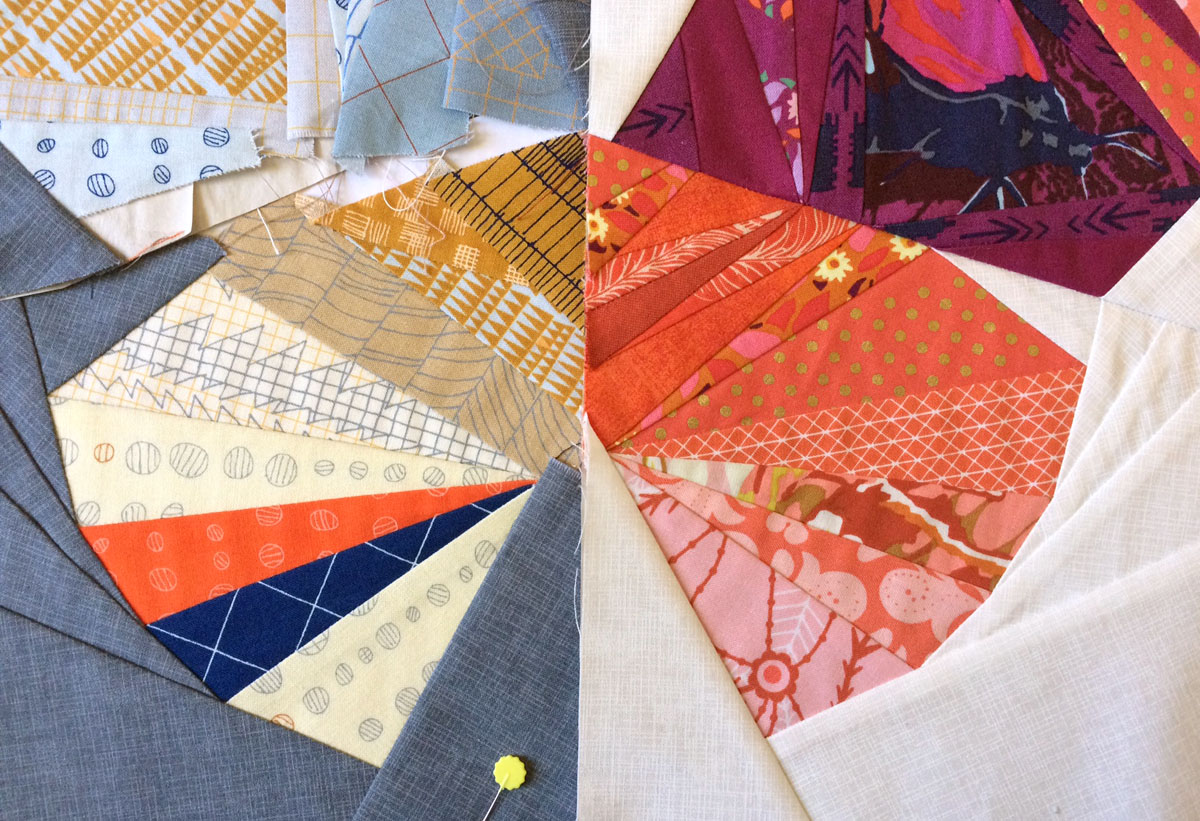
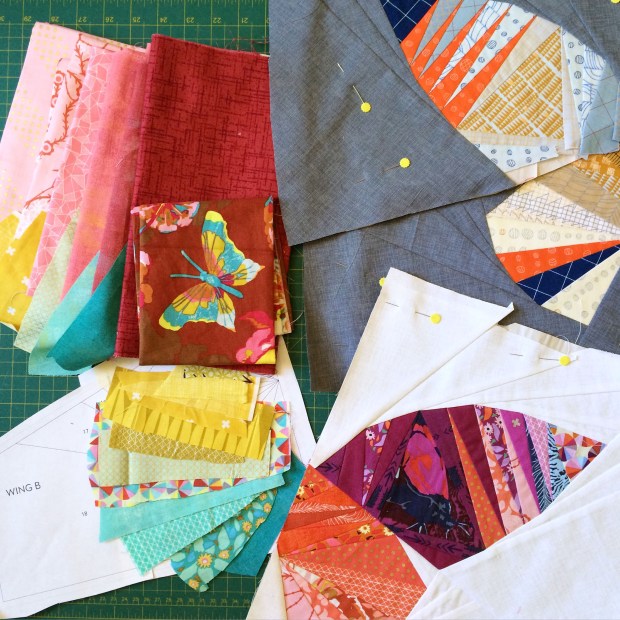
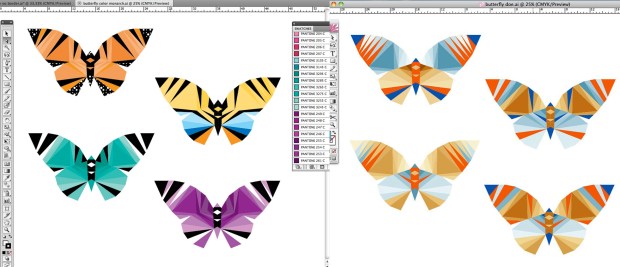
The Doe line is smaller and I actually only used about half of it, but I love the way it’s coming out. You can see my initial computerized color mock ups on the right in the previous photo and how I implemented it (minus the orange accents) in the photo directly above. I decided to use the mockup shown in the upper left corner.

blog - wing pieces

For this layout, I still tried to achieve some gradation in color, but I didn’t have as many fabrics to work with so I decided to carry some fabrics across two or three sections in the bottom wing. Looking at the photo above, you will see the Doe wing on the left has less pieces than the wing on the right. This method is great to keep in mind if you’re working with less fabrics (or want the sewing to go quicker!)

blog - fresh cut mock up

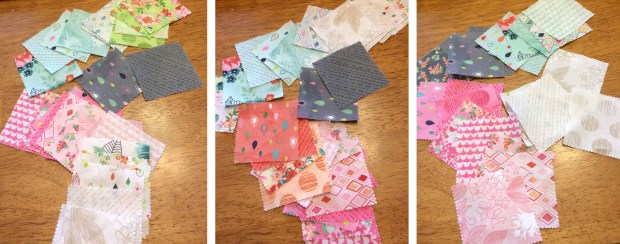
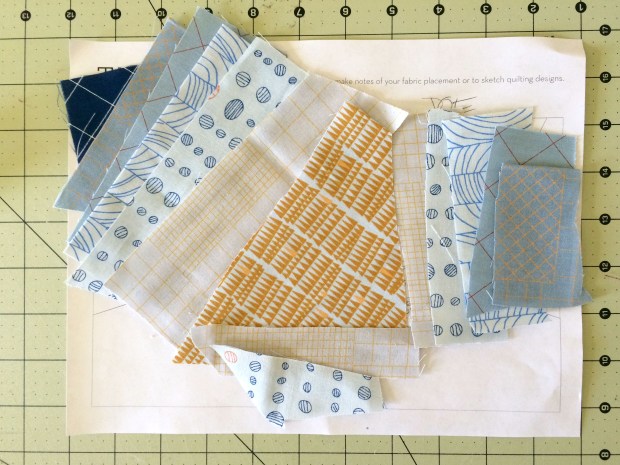
The Fresh Cut line (shown above) is much larger so I have plenty of fabrics to work with. For this layout, I used a mini charm pack to play around with options (seriously, I LOVE mini charm packs!), taking photos of each and comparing them later. In my photos above I’m laying out the top wing and bottom wing, with the background in the middle.

So, while you will have less flexibility when working within one single fabric line, it’s entirely possible! A FE bundle or layer cake would be more than enough fabric to complete the butterfly, with the exception of the background where you need about a half yard.

blog-mock ups 1

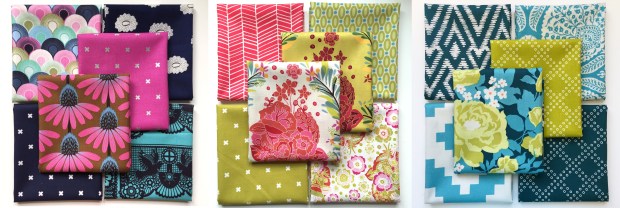
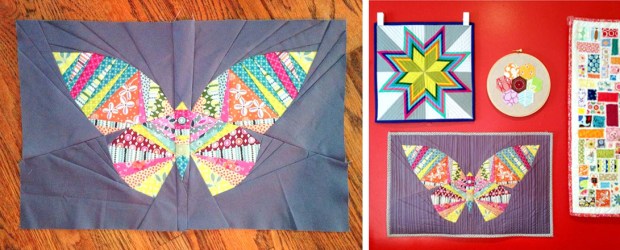
The image above shows a couple mockups I was working on based on color scheme. The one on the left is a great example of all the ways you can change the look of the butterfly with your fabric placement. The ones on the right are similar to my original just using a different color palette. You will see this one implemented further down in the post.

When Im pulling fabric for a layout based on color scheme,  I start by grabbing all the fabrics I have in those color families. I then begin organize them in a row, taking out ones I don’t like, seeing if I have enough pieces and where I need to fill in or rearrange.

blog - purple layout 1

I personally try to avoid using a lot of fabrics with bold prints or strong contrast, which is just a personal preference. However, when I see all the butterflies other people are creating (check the #takewingpattern hastag on IG or the images at the end of this post), I always love them when they are complete, even if I would have never chosen the fabrics myself.

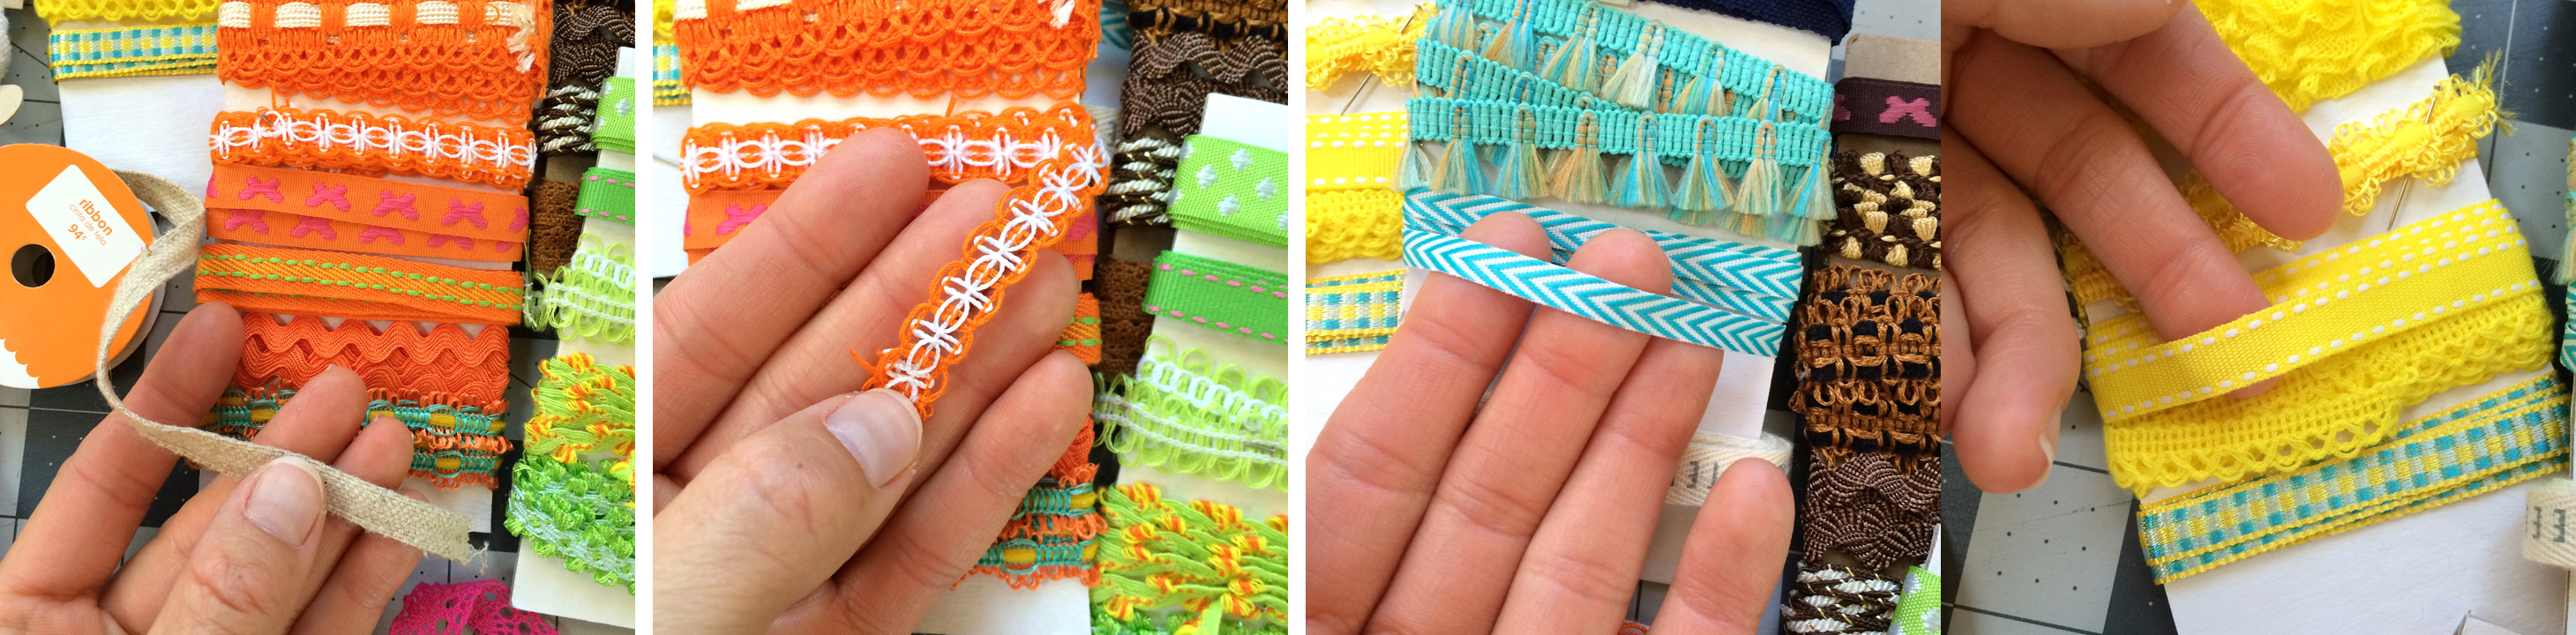
I like to find a few multicolored, patterned fabrics to use as transitions between colors and use more solids, low volume or blenders in between.

blog - wing layout

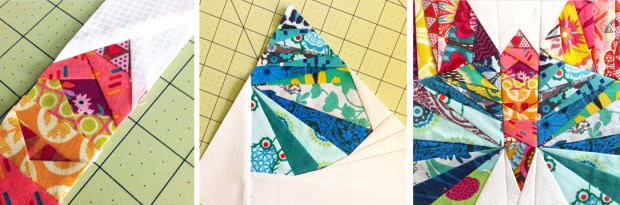
I lay pieces out in an overlapping row and find it helpful to cover the edges with my background fabric in the approximate shape of the wing and take photos to look back at later with fresh eyes.

Snapping pics of your options is also a helpful tool in looking at your overall final layout. Seeing the whole thing in a mock up really makes a big difference versus looking at half. A really helpful tool for doing this easily is a photo app for your phone. I use pic jointer, because it was free and it’s on my phone! There are several out there, and I’m sure there are more sophisticated ones, but that one works great for me. I lay out one wing or half my butterfly and then use a two-up or four-up frame to drop in the pics, mirroring half, and seeing my entire layout (shown a few photos down).

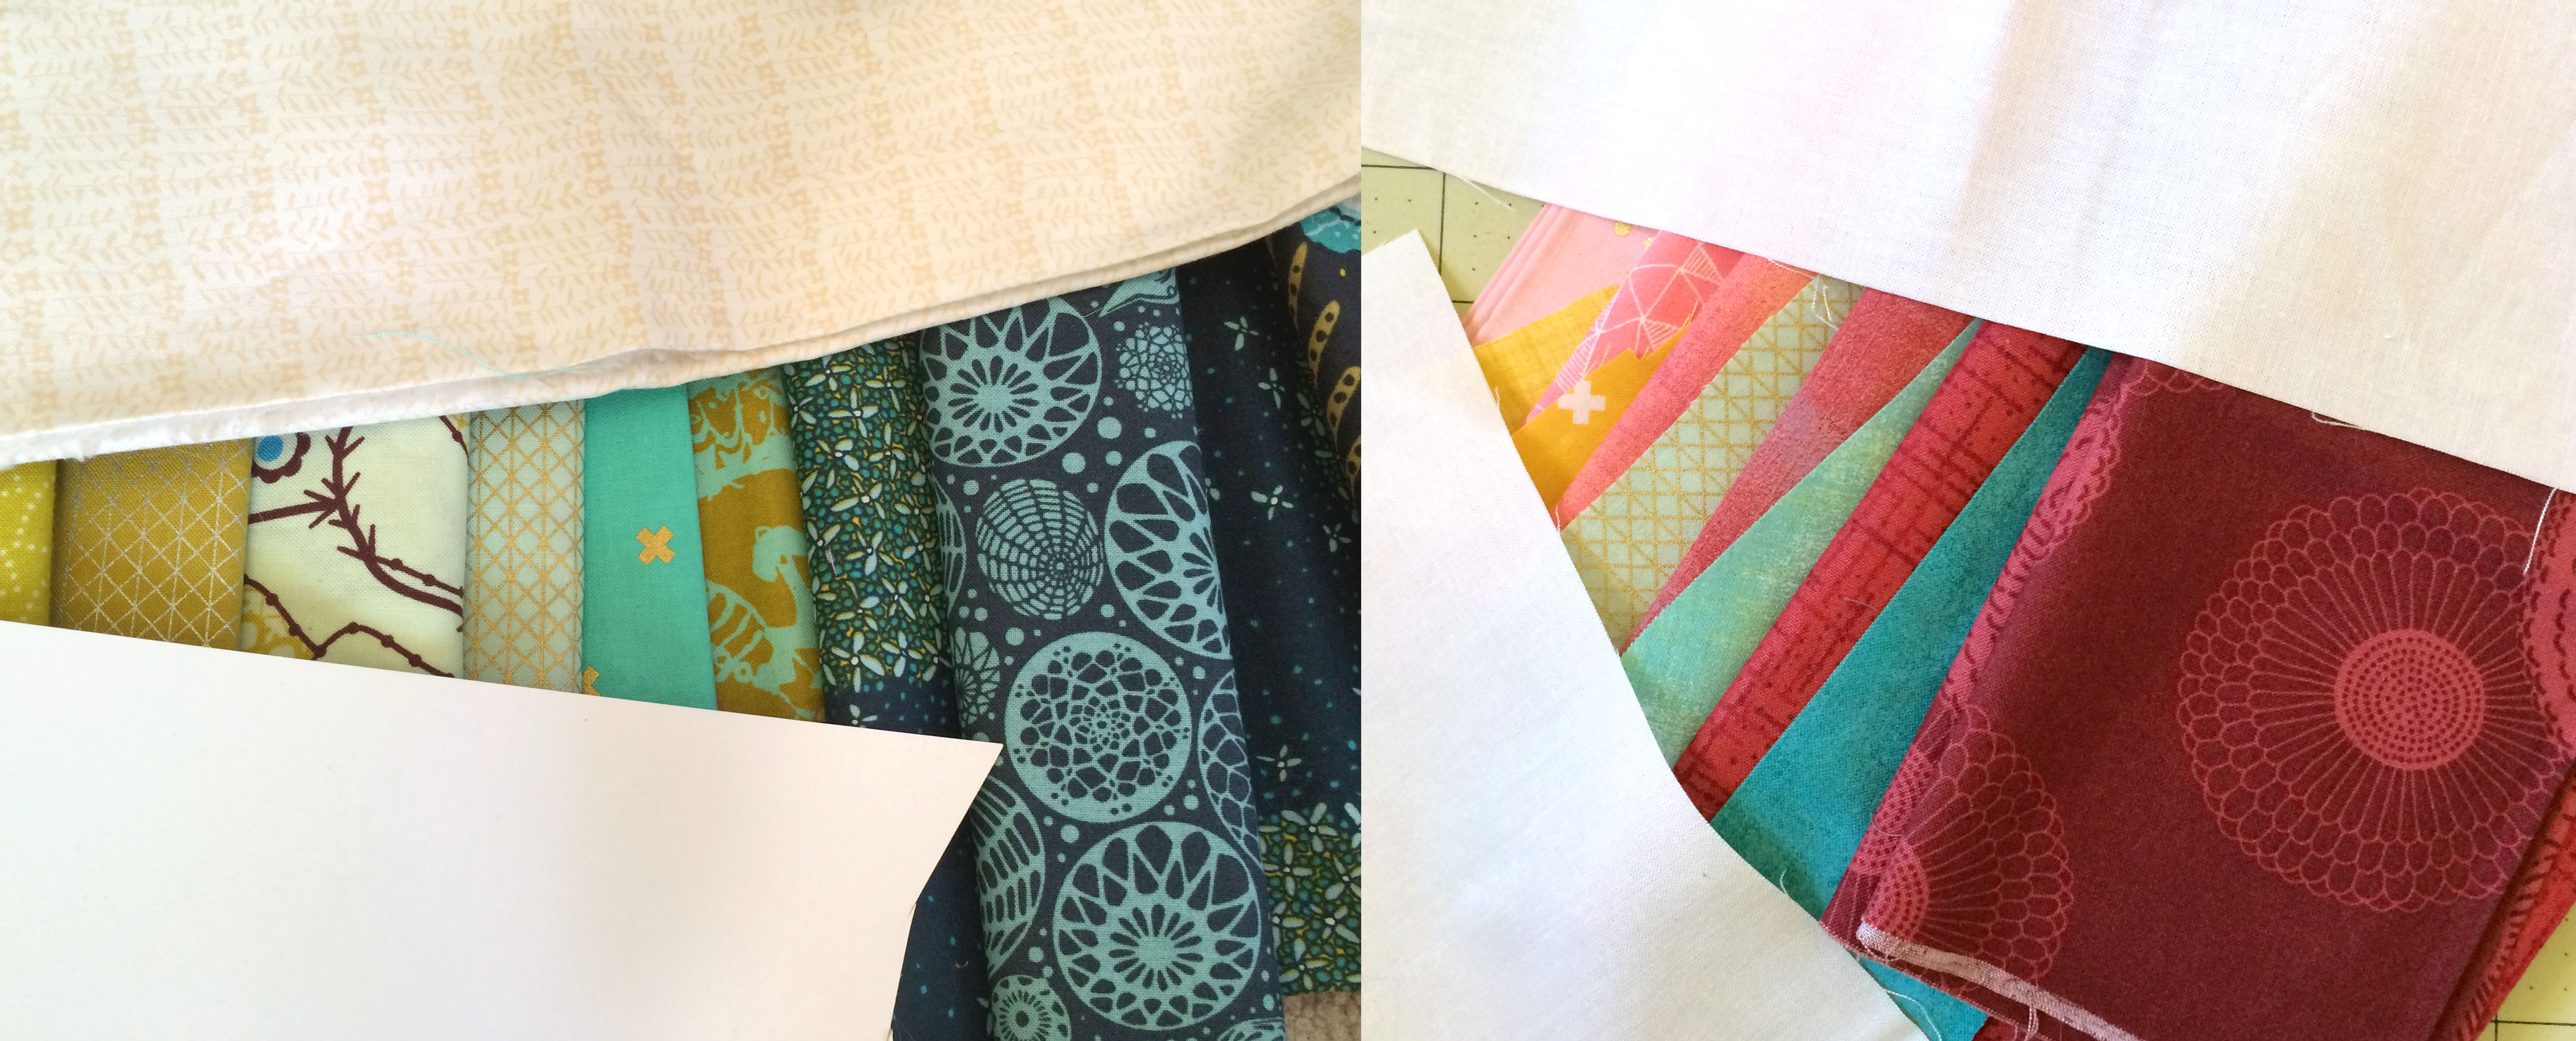
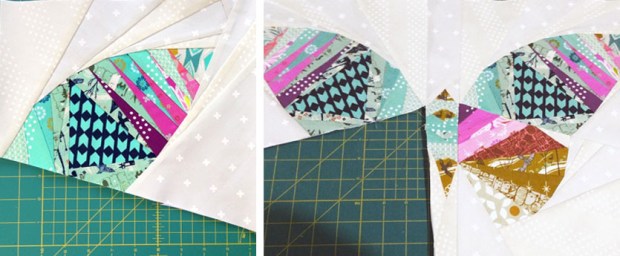
You can also use this method to easily compare multiple options as shown below. Here I’m deciding which focal fabric to use in my top wing and which direction to run the maroon to pink color gradient. Which is your favorite?

blog - amh four up

The large triangle of the top wing lends itself perfectly to a great fussy cut focal image (and I’ll talk about cutting these next). As you can see above, I have trouble deciding! This is often where my inspiration comes from. Look at fabrics you love with great focals as a starting point for your color scheme or fabric layout.

I’m currently planning a bed size Take Wing quilt using all of Tula Pink’s lines and I plan to use her fantastic focals inside this large area — the parisville cameos, birds & bees squirrels, etc. I can’t wait!

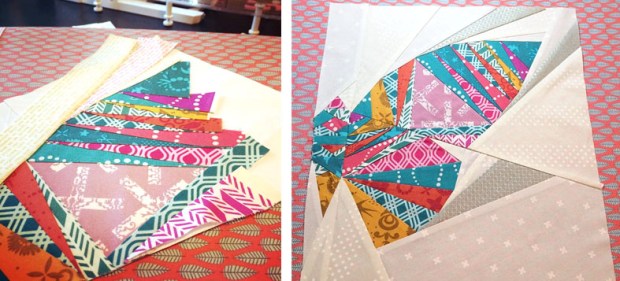
When I’m laying out fabrics, I keep them uncut until I’m fairly certain I like them, and then I cut my pieces roughly to the approximate shape of the pattern areas using the lines I traced onto the back of my pattern pieces (because remember if you use the front, your pieces will be backwards!). Some people prefer to use large pieces of fabric and cut off after they sew, but that’s another personal preference. I find layout and sewing easier and faster when I precut. It may be a tad more wasteful, though not much.

blog - amh mock up 2

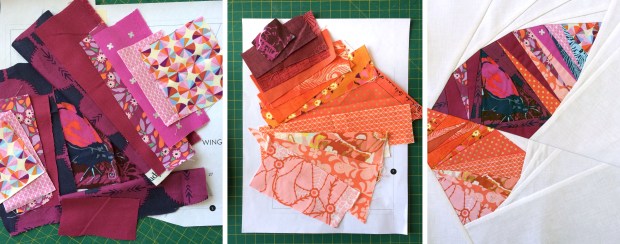
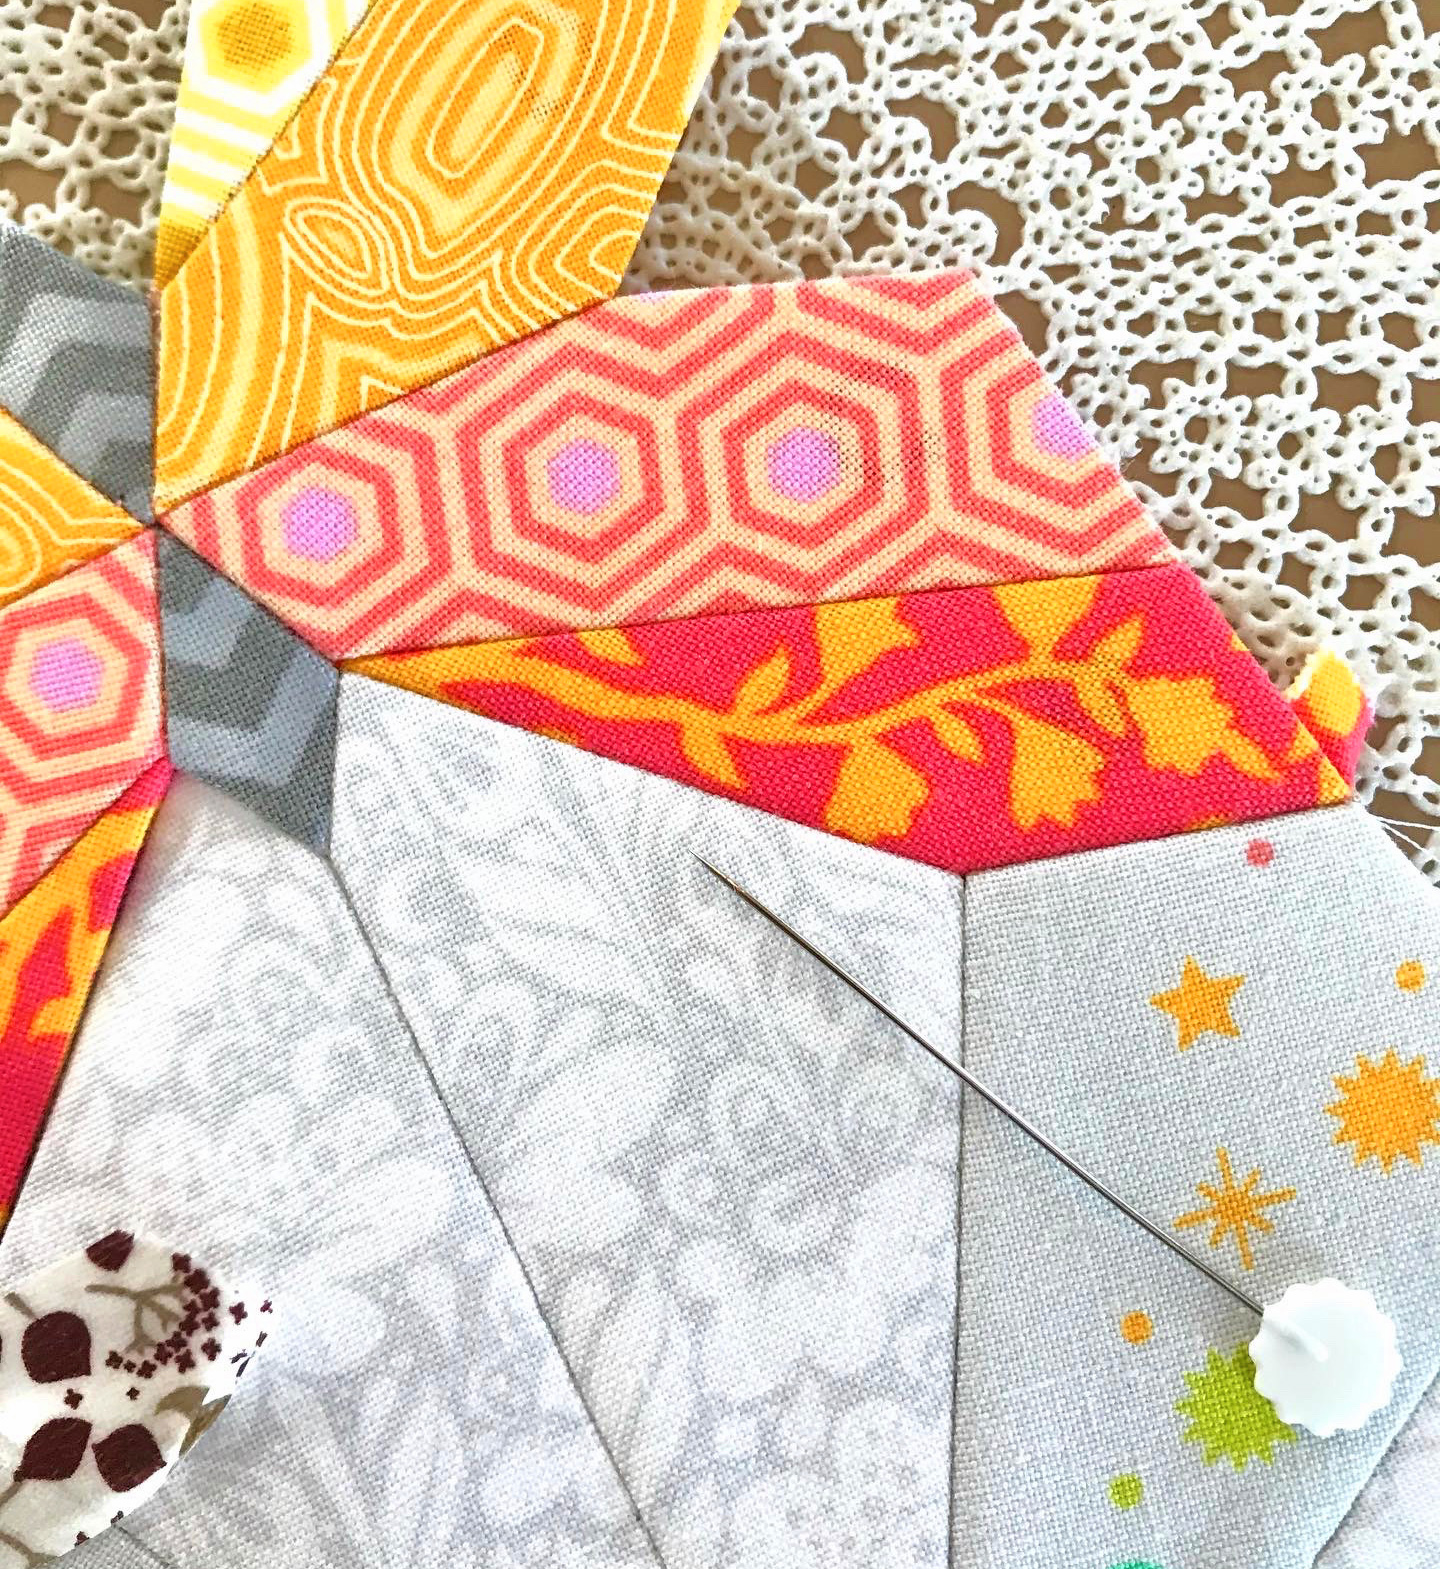
Sometimes I end up changing my mind after cutting up my fabrics and laying them out (or even sewing them!), but I just cut a new piece and save the other for another time. You will see my initial fabric pieces for the wing shown above and then the final wing. After piecing it, I decided to change a few pieces out. This pattern is designed so that you are adding all of the background pieces last, which I find helpful for the indecisive! It’s not impossible to change out pieces of your wings and I also often wait until my wing pieces are sewn before deciding on a background.

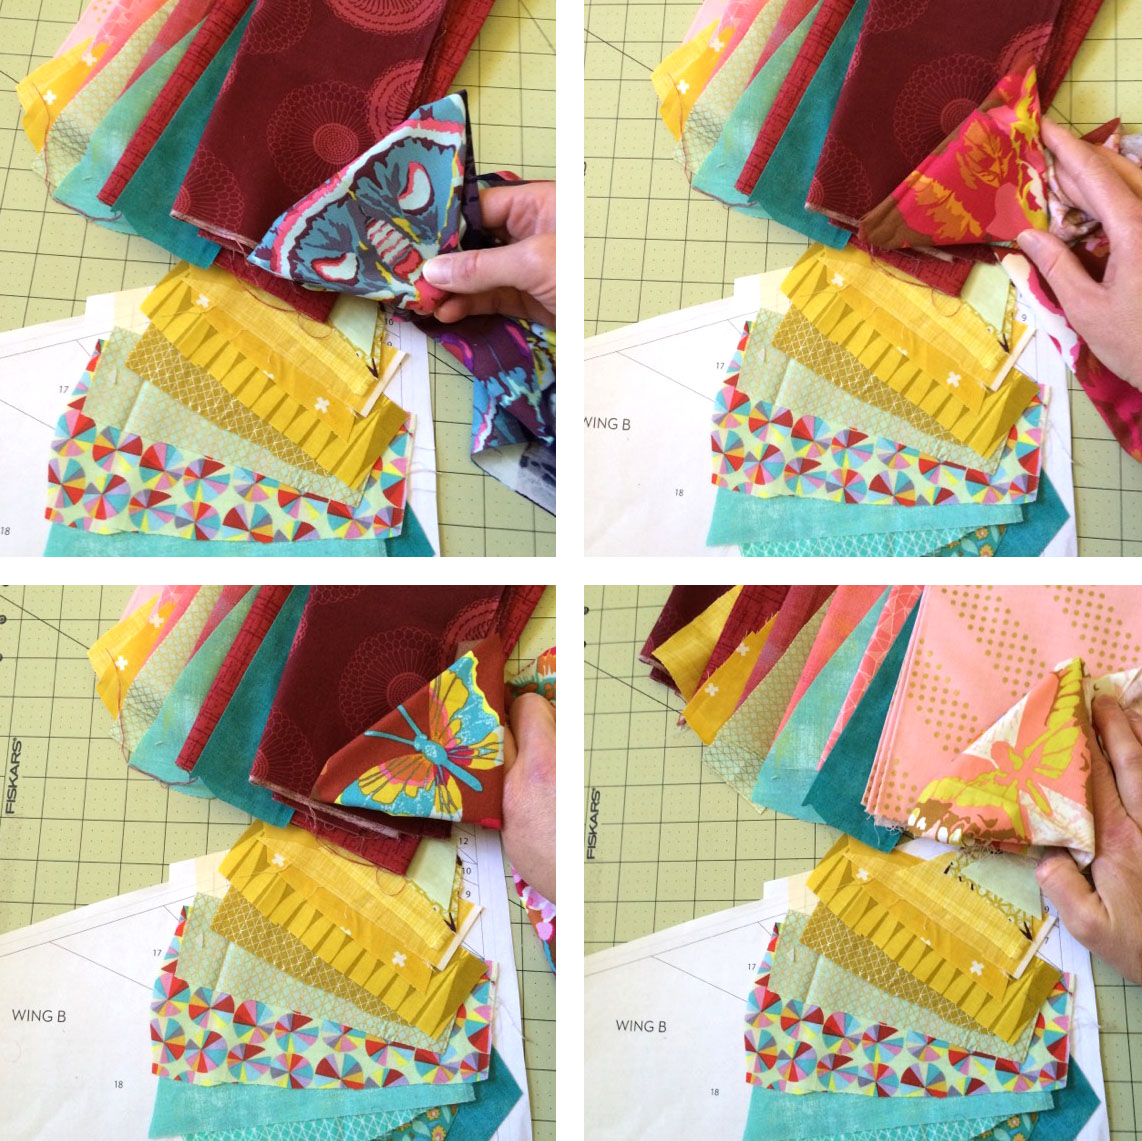
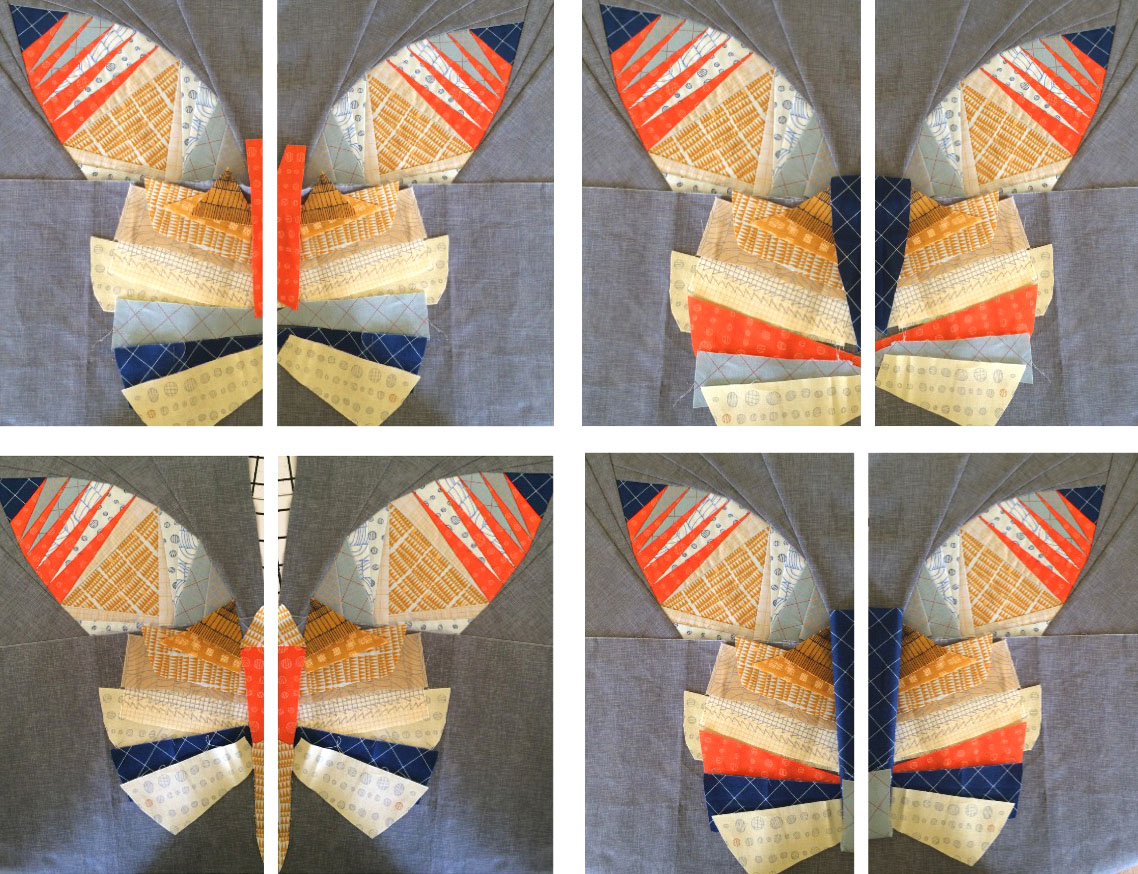
When it comes to the butterfly body, I do sketch out the colors during my initial planning, but I often piece that section last and audition some options after I have the wings pieced. I find it amazing how different the overall design can look by changing this little section. Here you can see the same Doe wings with four different lower wing accents and body options (I went with the bottom right, what do you think?). I used the pic jointer app again to create these mock ups.

blog - doe four mock up

If you’re not using a piece of fabric or a fabric line as inspiration, another great way to find ideas is from social media, especially fabric designers and fabric shops selling bundles. Browse their IG feeds and email newsletters. The pic on the left below was from a fabric shop email newsletter I received (I really meant to remember who it was from and credit them, but I totally failed, so I apologize!) and the pic on the right is from Carolyn Friedlander’s IG feed.

blog - inspiration

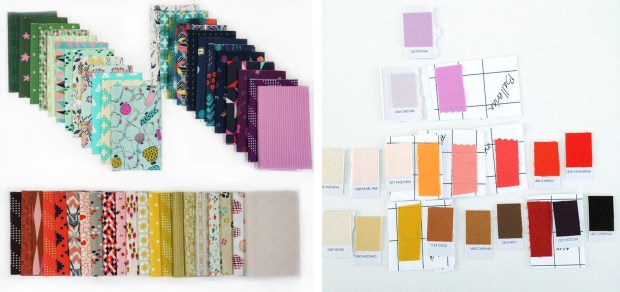
These are helpful in getting ideas for both color schemes AND fabric selections. The fat quarter fun bundles from Stitch Supply Co always give me great ideas, too (shown below)! Mixed bundles like these are perfect for projects like this. You can buy just a few fat quarters, rather than entire bundles, and add in some extras from your own stash. The fabric destash on Instagram (#thegreatfabricdestash) is another great place to find mixed bundles and scrap packs. Fresh Squeezed Fabrics also sells some beautiful mixed bundles that would make fabulous butterfly starters!

blog - stitch supply

I’m not a big fan of using solids typically (no idea why, I just need at least a little texture!), but they do lend themselves beautifully to this project. Kona, RJR and Robert Kaufman all put together some pretty awesome solids bundles with really interesting color combinations. You can pick up charm packs, layer cakes, jelly rolls or FQ bundles at places like Fat Quarter Shop, Craftsy, Missouri Quilt Co and on Etsy. This Patchwork City Winter bundle is especially gorgeous!

•  •  •  •  •  •  •  •  •  •  •  •  •  •  •  •  •  •  •  •  •  •  •  •  •

Now let’s talk about fussy cutting and wing symmetry!

If you are using any fabrics with strong pattern, contrast, or focal images, it’s challenging (but important!) to get good balance between the left and right wings. Here are two ways to make it easier!

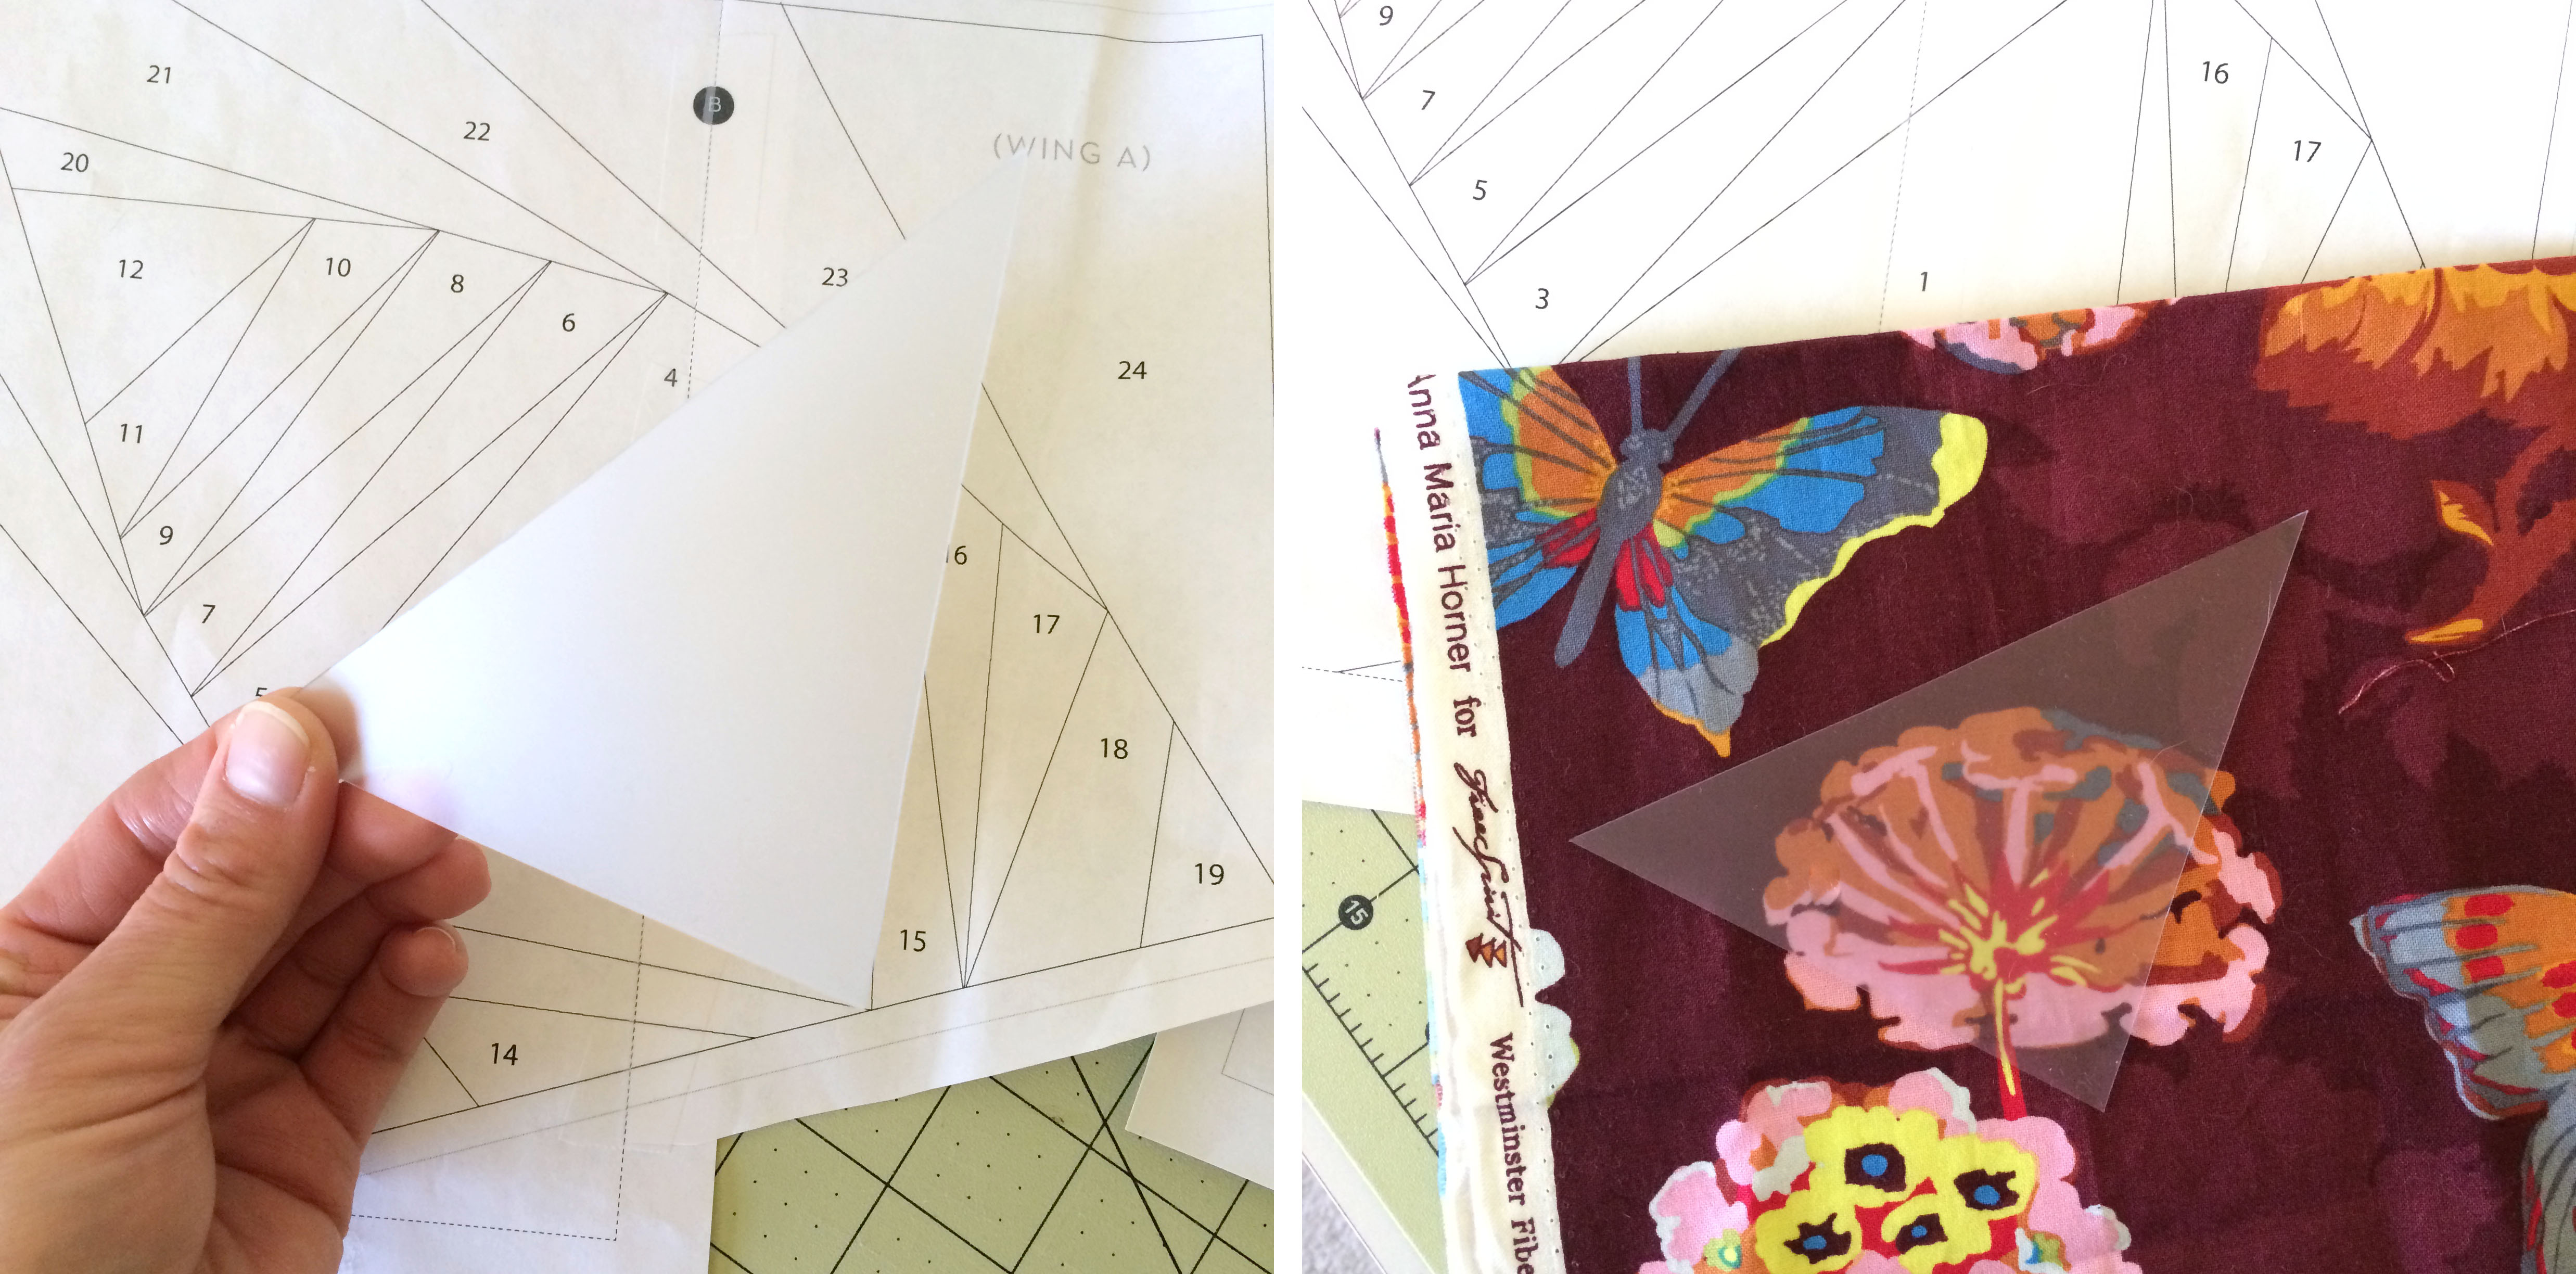
First is to use template plastic. You can find this at many local quilt shops and large fabric stores and it usually comes in 18 x 12 sheets.

blog - plastic 1

Simply lay the plastic on top of your pattern piece, trace around an area and cut the plastic to size. You can then lay this template on top of your fabrics to audition options and you can also use it to trace the shape and cut out your pieces, just be sure to include an extra 1/4″ around your shape for your seam allowances.

log - plastic 2

Also remember that the two wings are mirror images of each other, so flip the template piece over when cutting the second wing! You may find it helpful to mark L and R or something similar on the two sides of the plastic so you don’t end up cutting two of the same.

A second option is to use paper. Print an extra copy of the pattern piece you’d like to use and cut out the specified area, leaving everything around in tact. You can then use this in the same manner as the template plastic. Lay it over your fabric, trace inside your lines, then cut your fabric piece 1/4″ larger than the shape.  Again, remember to flip it for the second wing!

blog - paper 1

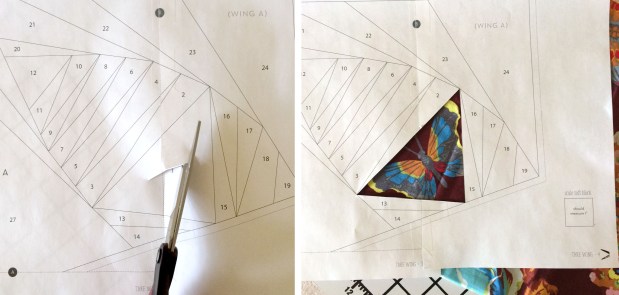
These examples are shown using the large triangle area of the top wing, but this method can be applied to any section in the pattern.

•  •  •  •  •  •  •  •  •  •  •  •  •  •  •  •  •  •  •  •  •  •  •  •  •

I could talk about fabric for days, but ultimately, seeing examples helps more than anything, right? Here are photos that have been sent to me or that I found under the #takewingpattern hashtag on Instagram. I am just blown away by the creativity and variations! Which is your favorite?

blog - chickenjulie

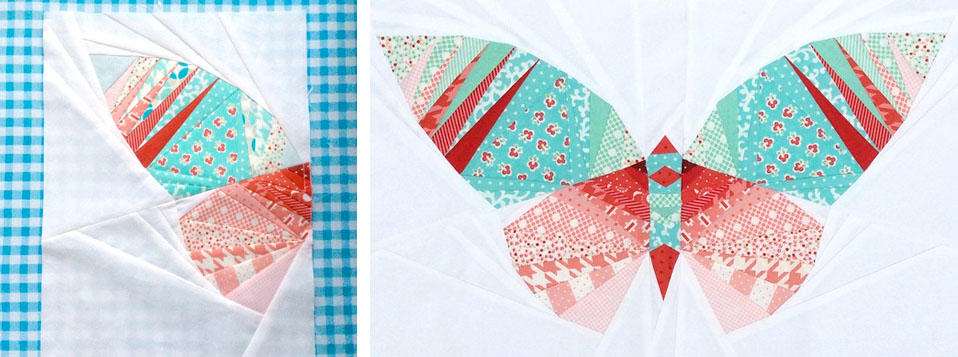
This version, made by chickenjulie, was finished the morning after I released the pattern! I was totally blown away. She made it at 85% and used a FQ bundle of Hope Valley. I would have NEVER ever chosen so many bold patterns, but I fell head over heels in love with it from the moment I saw just the little body pieced.

 •  •  •  •  •  •  •  •  •  •  •  •  •  •  •  •  •  •  •  •  •  •  •  •  •

blog - jeepdog1

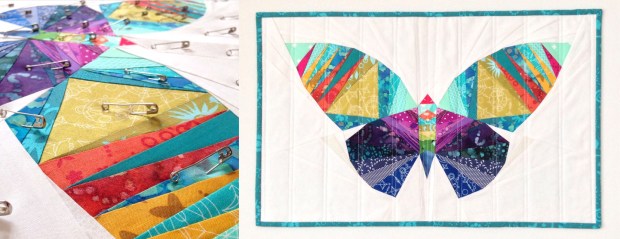
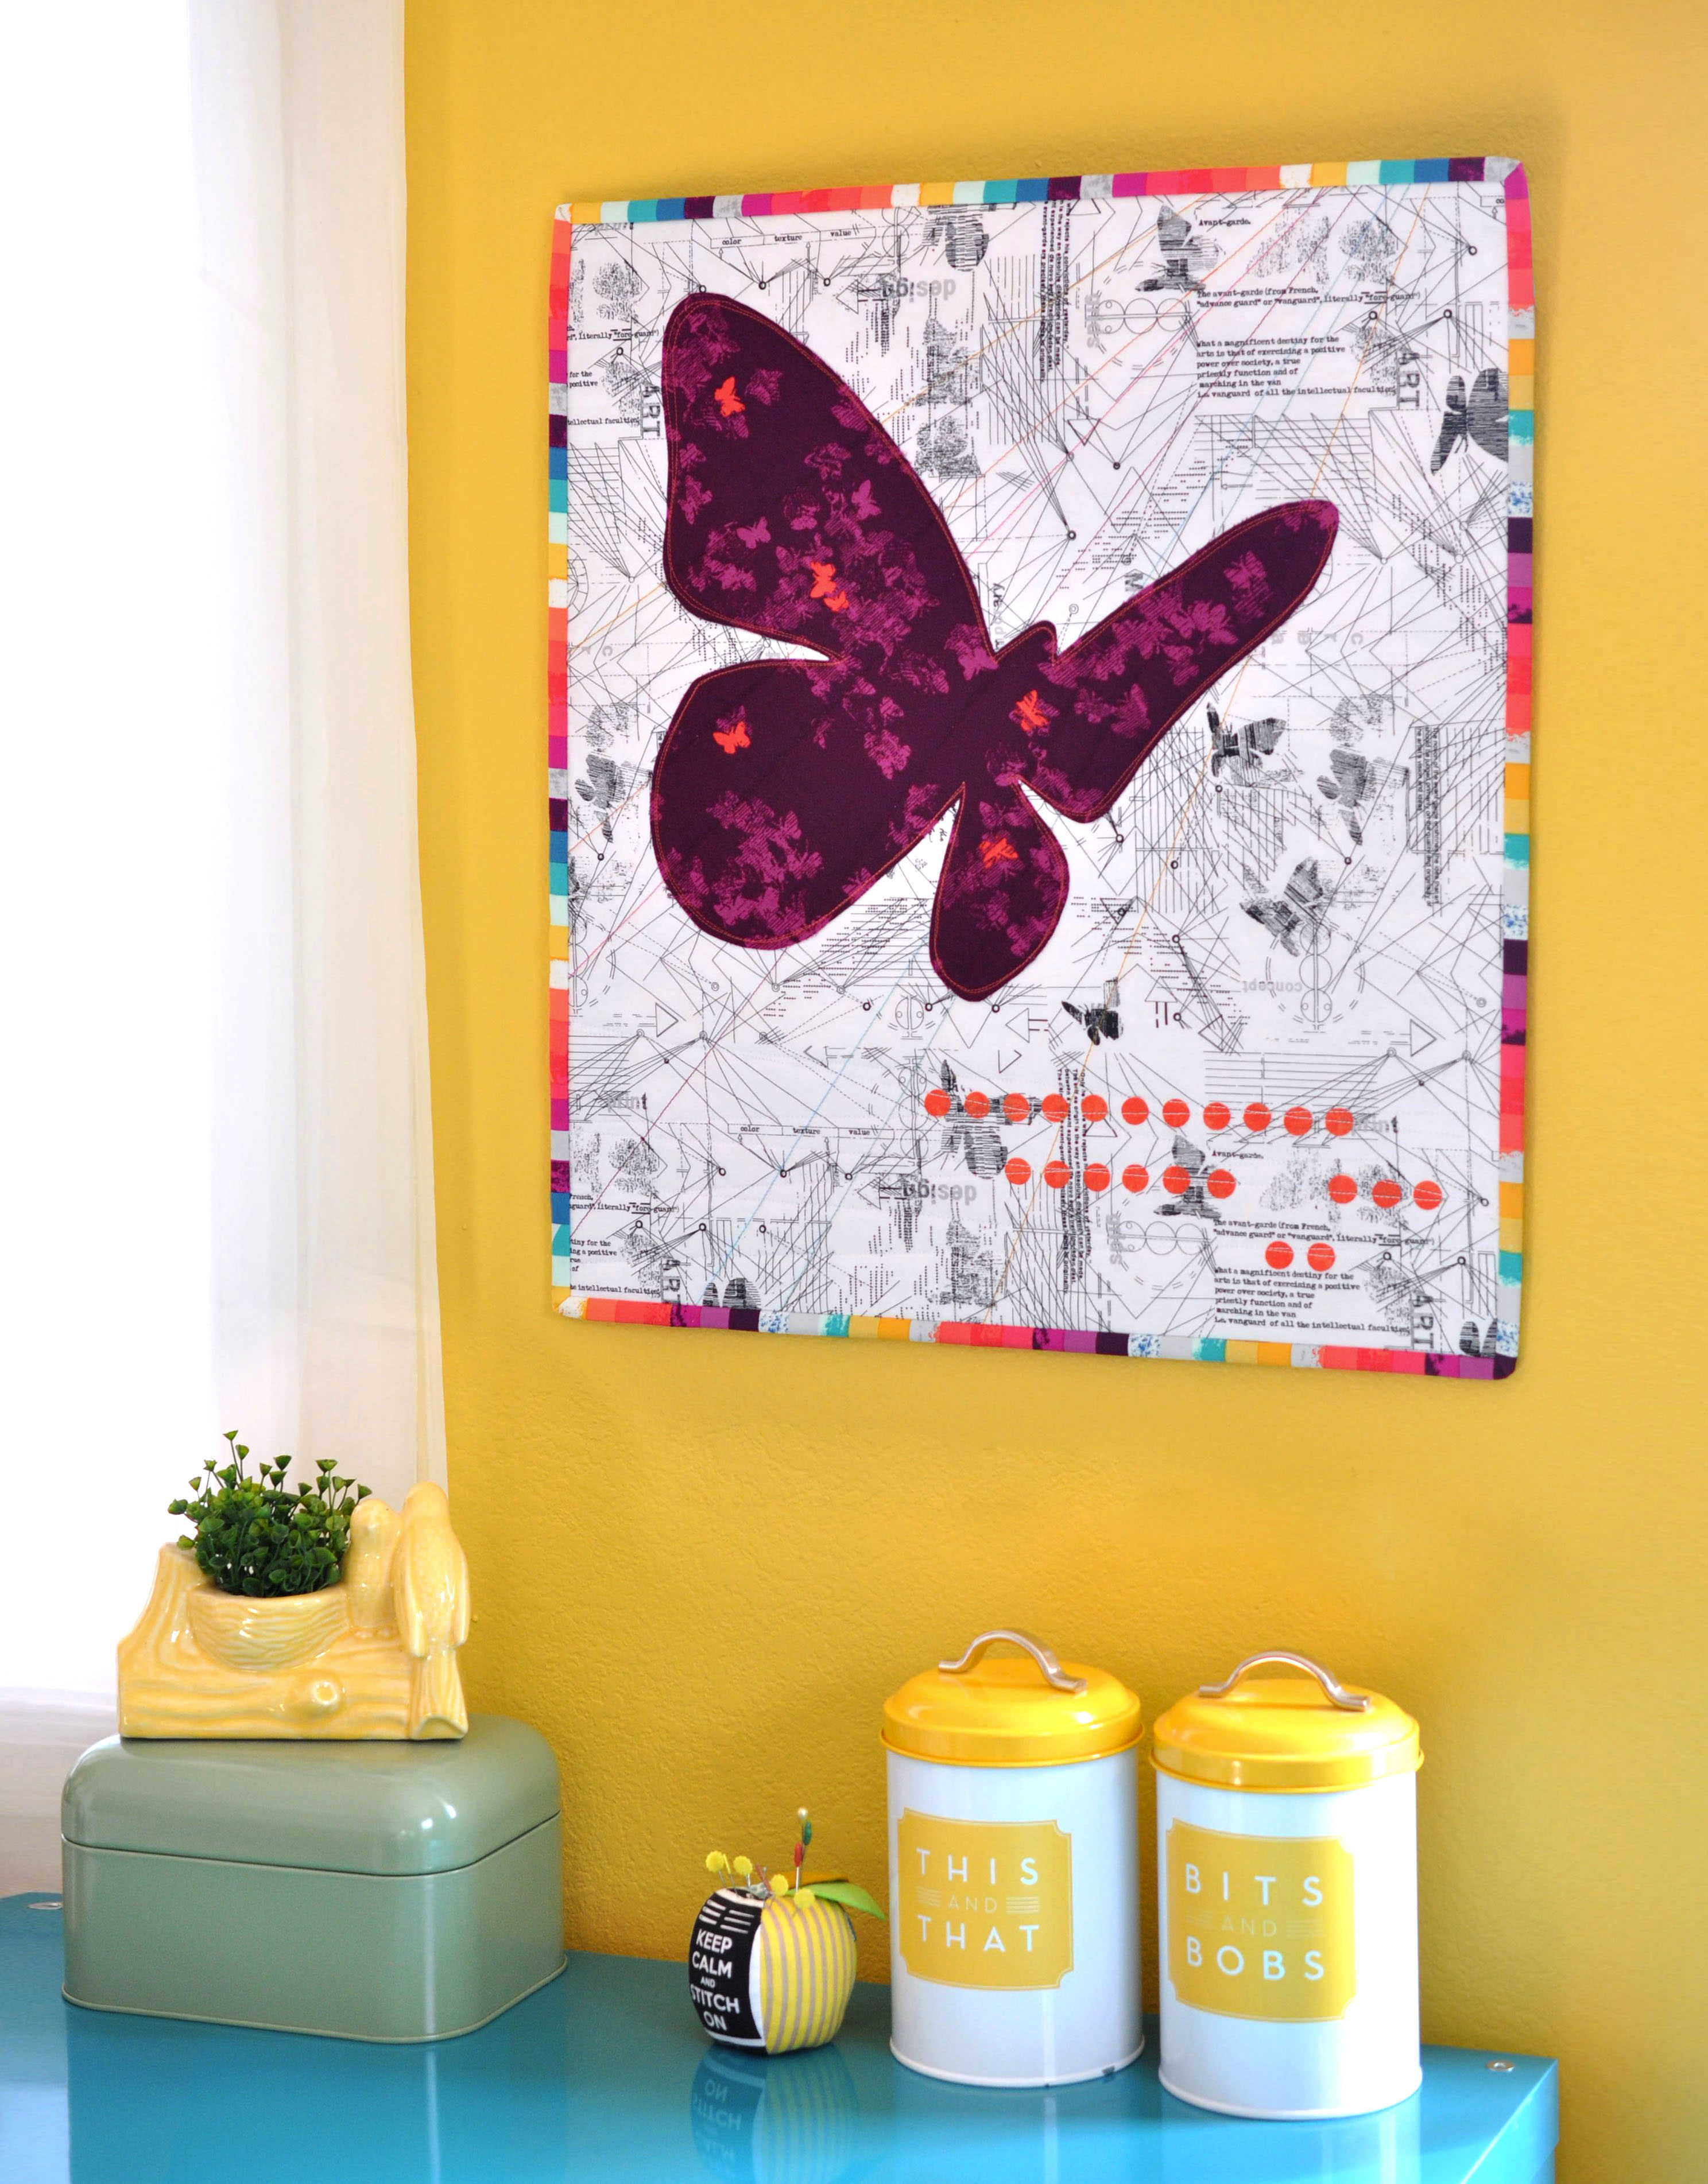
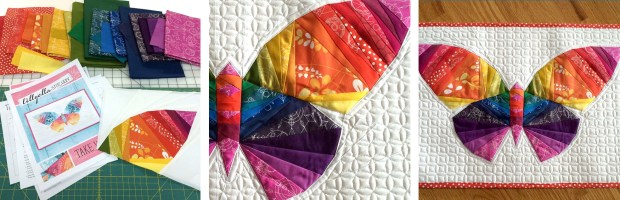
This version was made by jeepdog1 for her partner in a rainbow mini swap. Her partner loved batiks and wasn’t a fan of a traditional rainbow. She totally nailed it! The colors are so gorgeous. I saw a photo of this on the recipients wall and it was perfection.

 •  •  •  •  •  •  •  •  •  •  •  •  •  •  •  •  •  •  •  •  •  •  •  •  •

blog - susansantistevan

This version made by susansanstistevan was also for a rainbow swap. A more traditional rainbow, I love how bold the colors are with the subtle low volume prints. And do I even need to point out that quilting?!

 •  •  •  •  •  •  •  •  •  •  •  •  •  •  •  •  •  •  •  •  •  •  •  •  •

blog-hidehi000

I loved seeing this version made by hidehi000 – I had not seen any Bonnie & Camille or similar style fabrics used on the pattern yet and it was really exciting to see how amazing they worked! It gives the piece an entirely different feel. It’s so soft and gorgeous, I could imagine an entire room being designed around it!

 •  •  •  •  •  •  •  •  •  •  •  •  •  •  •  •  •  •  •  •  •  •  •  •  •

blog - vrrigney

This version was made by vrrigney for an animal themed swap. She had a partner who loves butterflies, and I’m guessing blue and green! I absolutely love the duotone palette and the pops of navy and bright green in her fabrics.

 •  •  •  •  •  •  •  •  •  •  •  •  •  •  •  •  •  •  •  •  •  •  •  •  •

blog - rxquilter

This version is being made by rxquilter and I’m having so much fun watching it come together! Her focal fabric in the top wing is just fabulous and I love how it ties in the hot pink and touch of purple. She is making it for a garden quilt exhibit and I’m dying to see the final photos!

 •  •  •  •  •  •  •  •  •  •  •  •  •  •  •  •  •  •  •  •  •  •  •  •  •

blog - sidneysews

This version is being made by sidneysews using Alison Glass fabrics, which I love for this! her mixed background fabrics are awesome and I LOVE the pop of silver metallic. I’m stalking her feed to see the finished product!

 •  •  •  •  •  •  •  •  •  •  •  •  •  •  •  •  •  •  •  •  •  •  •  •  •

blog-monpetitebiscuit

This version was made by monpetitebiscuit for an Anna Maria Horner swap. These little peeks are killing me! I personally am really drawn to AMH fabrics for this project (probably because she uses a lot of butterflies!) and her colors are so rich and gorgeous. I can’t wait for the full reveal!

 •  •  •  •  •  •  •  •  •  •  •  •  •  •  •  •  •  •  •  •  •  •  •  •  •

blog - mumzy27

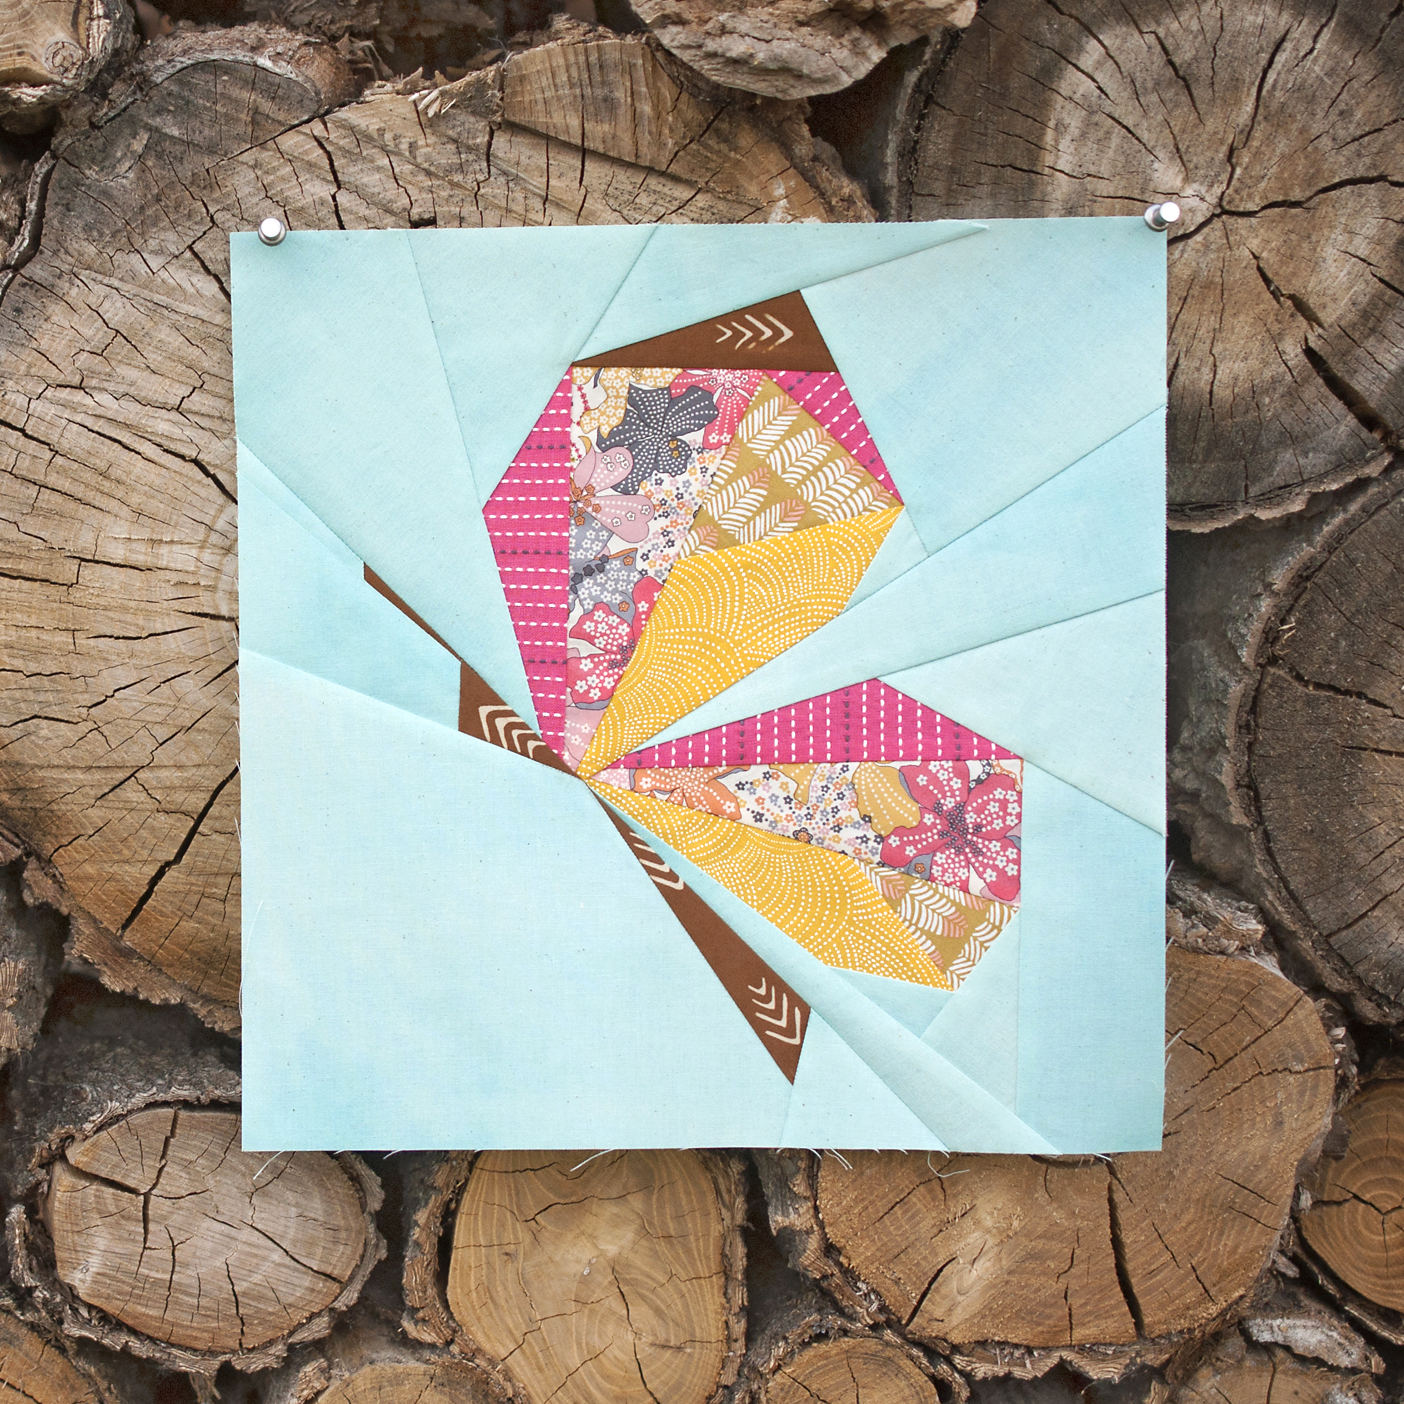
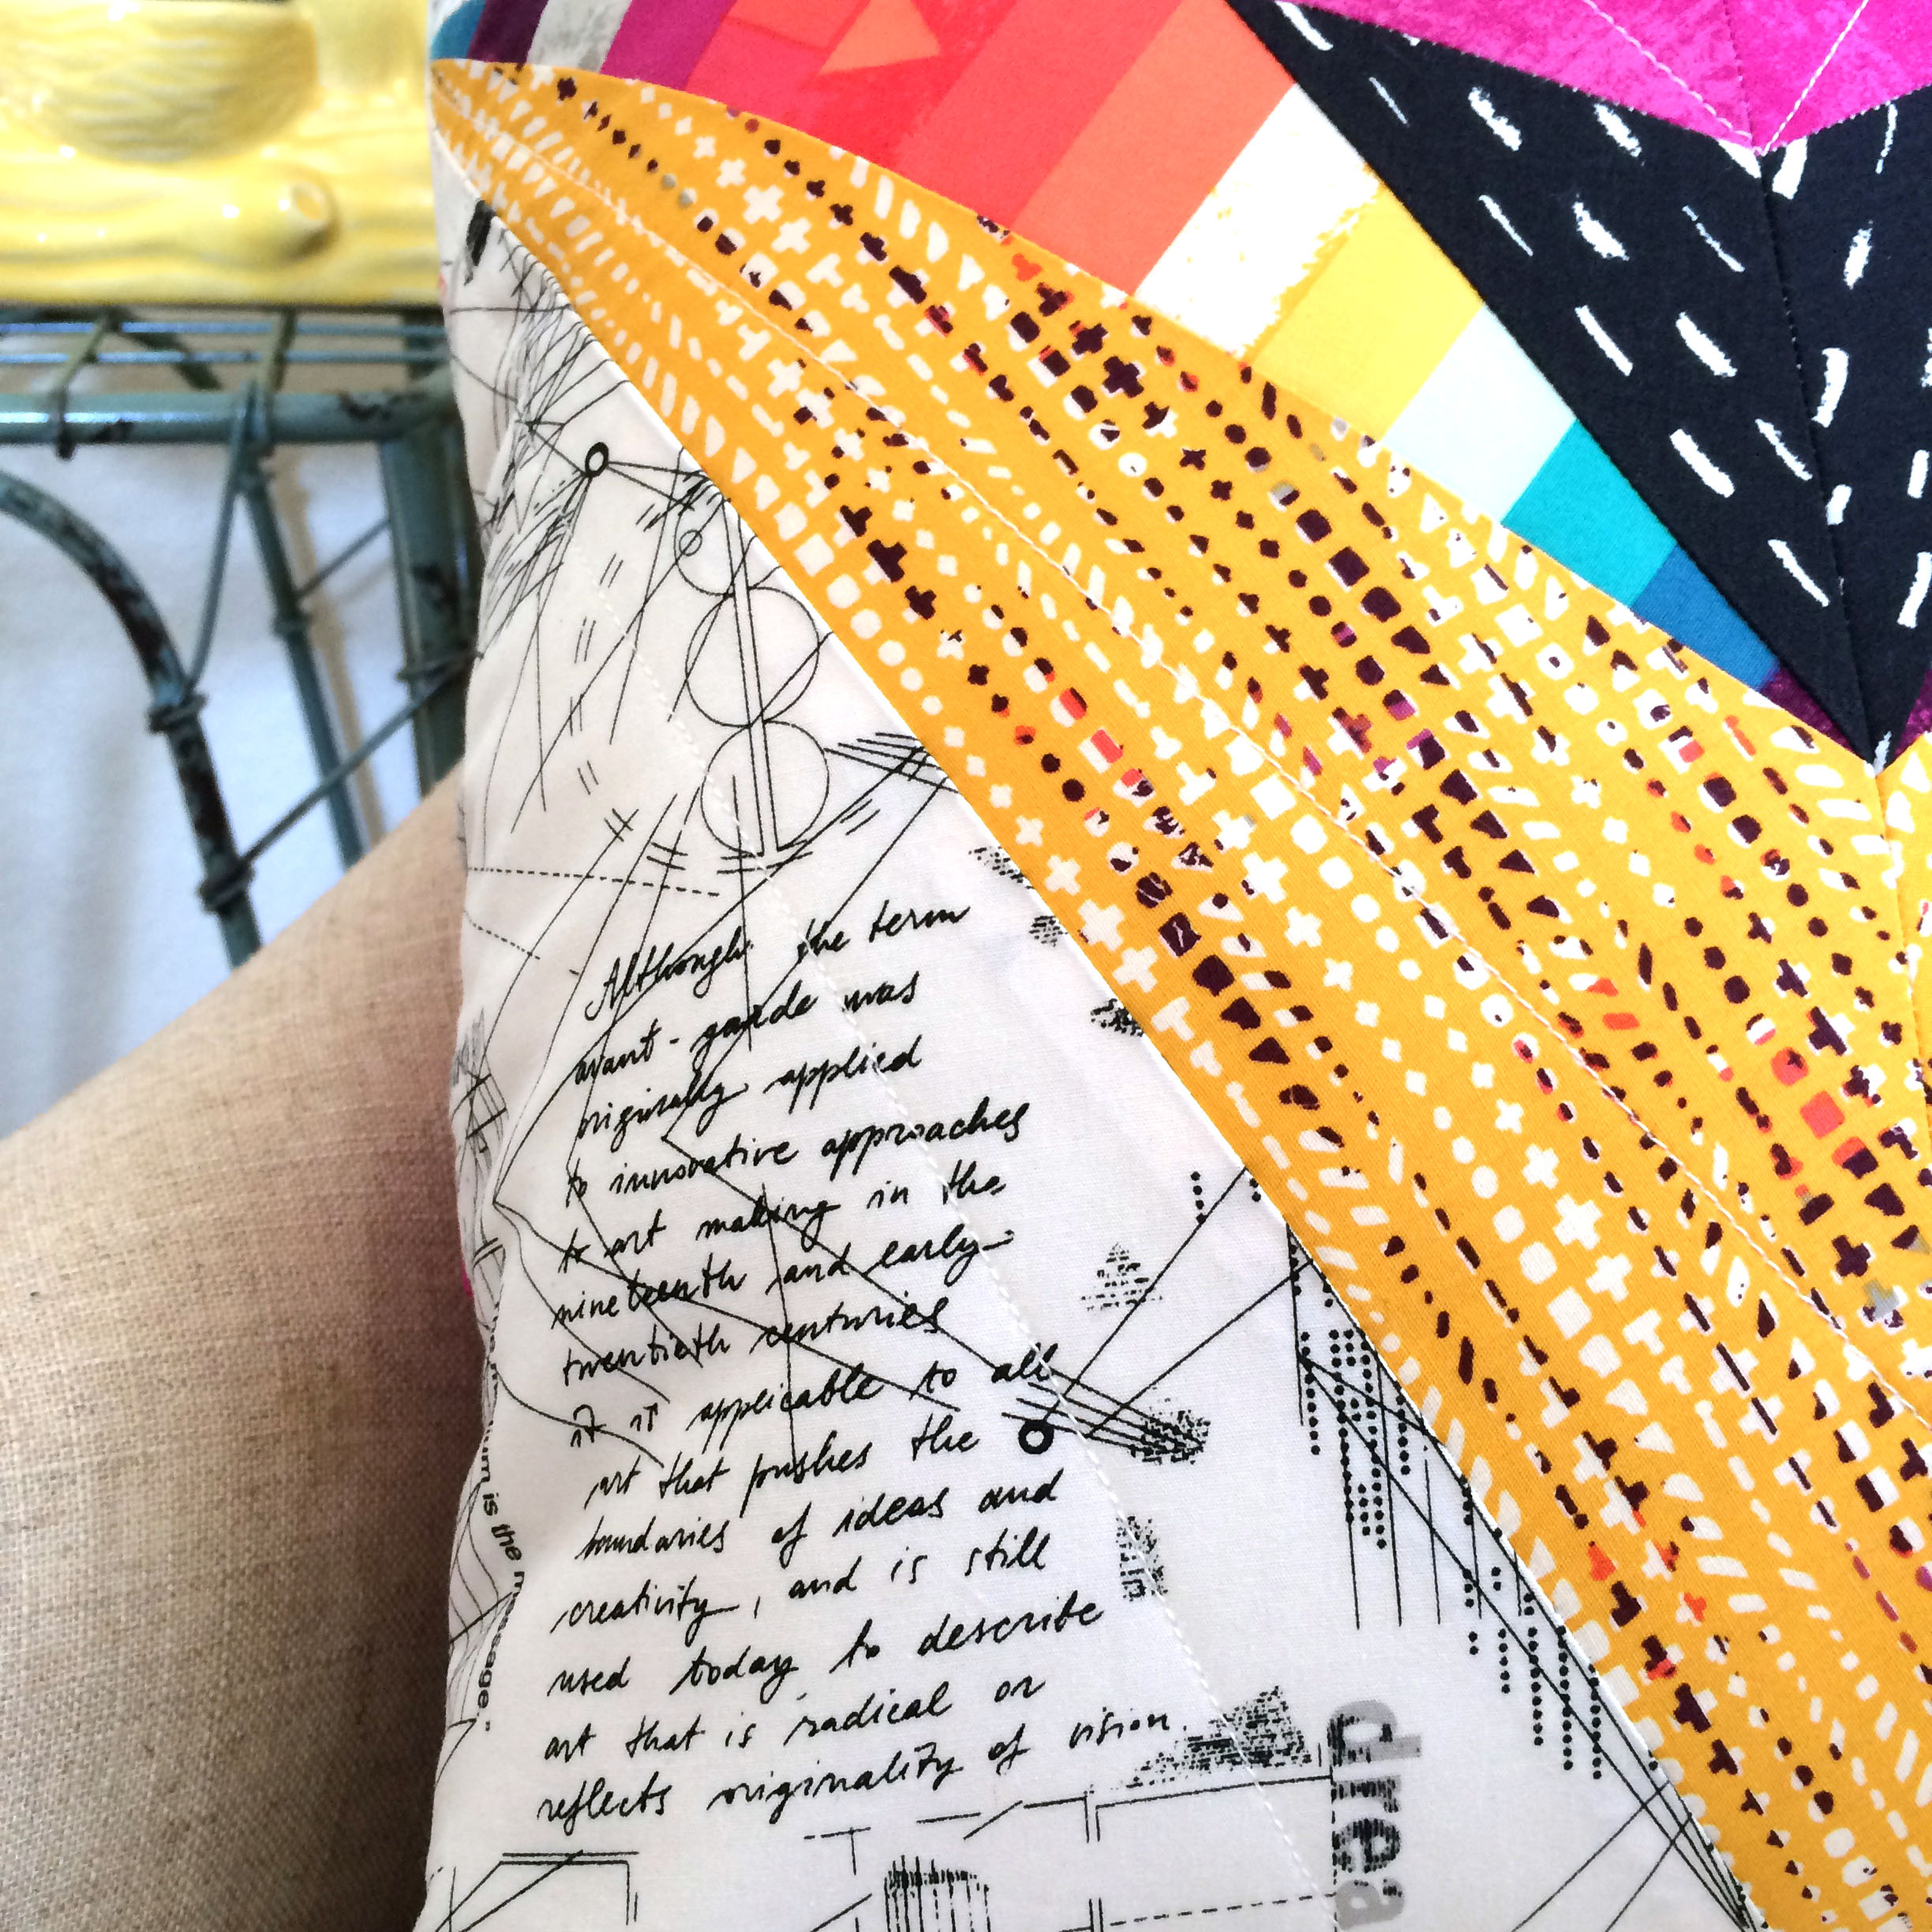
And last, but certainly not least, this version is being made by mumzy27 for a cotton + steel themed swap. I love the rich jewel tone colors and her use of the rich mustards in the bottom wing. The balance is just perfect!

 •  •  •  •  •  •  •  •  •  •  •  •  •  •  •  •  •  •  •  •  •  •  •  •  •

So there you have it! Was this post helpful? Are you feeling inspired? I sure hope so!

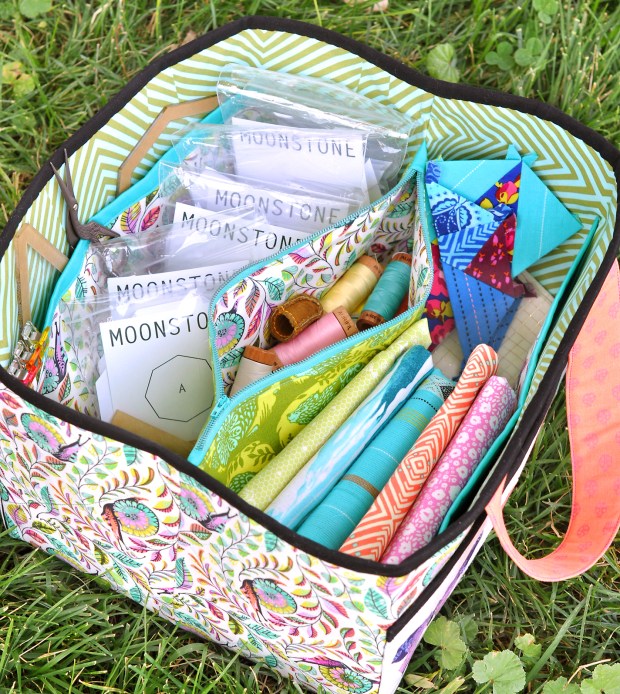
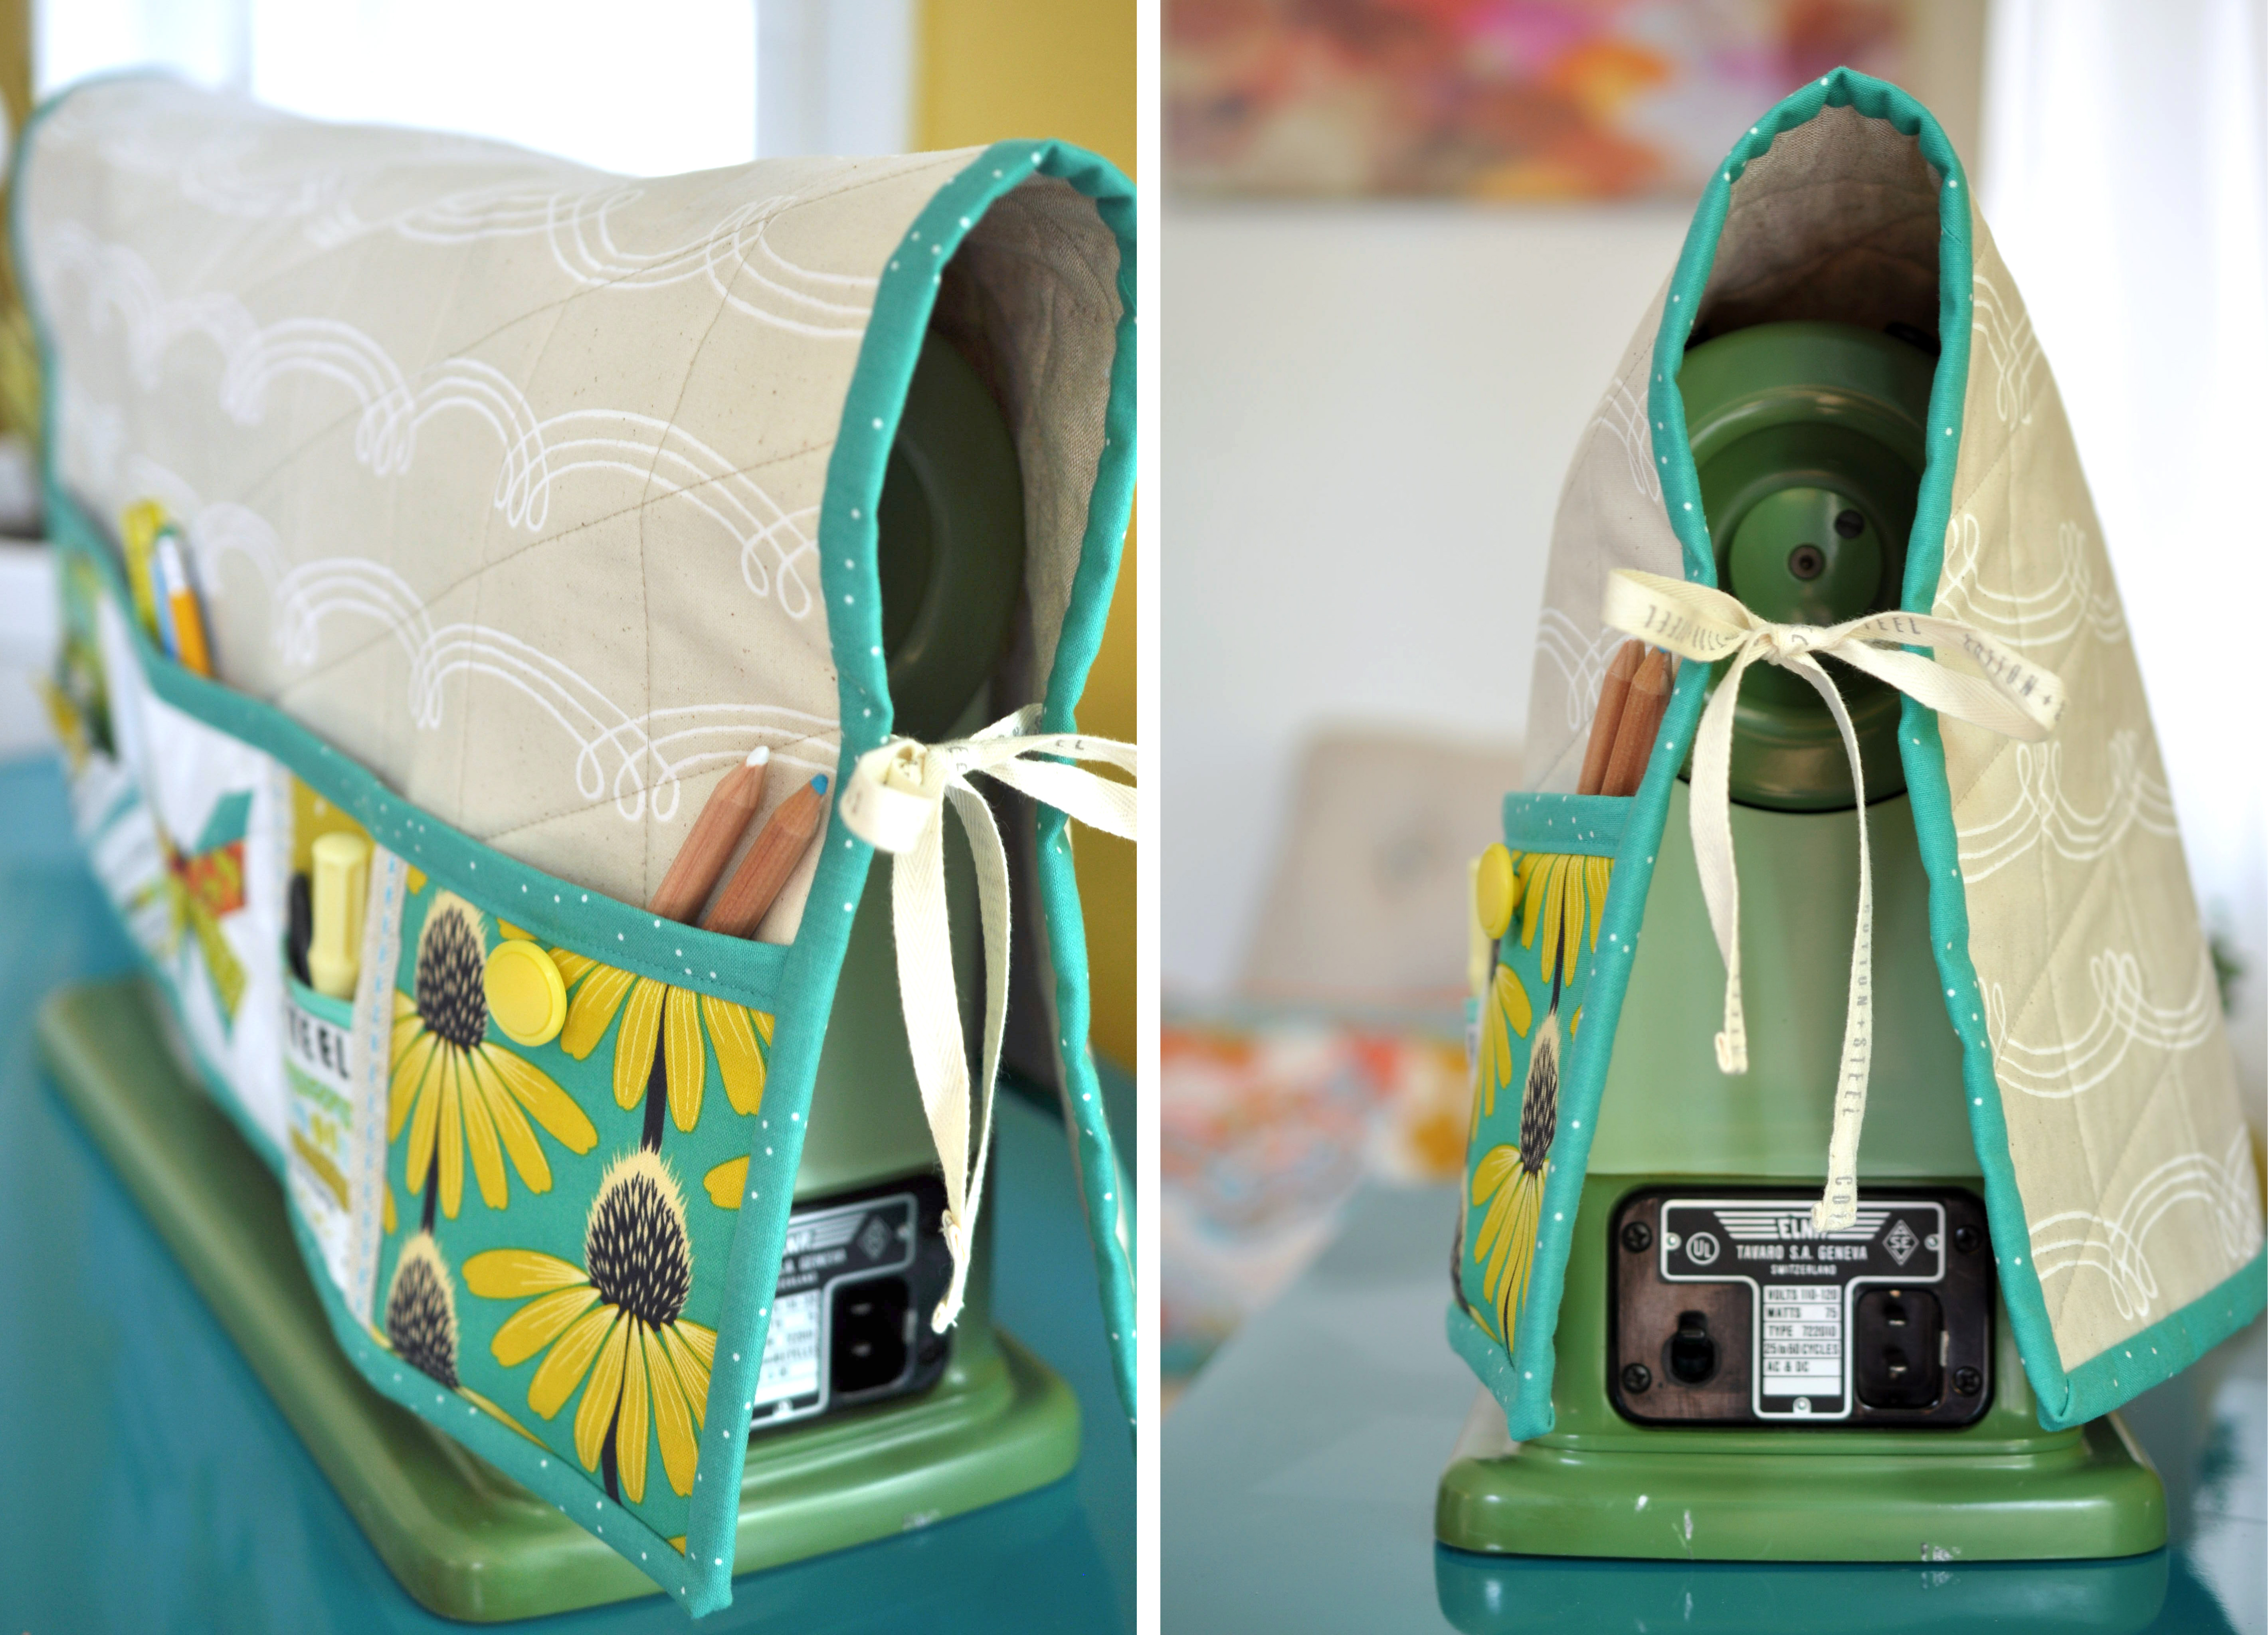
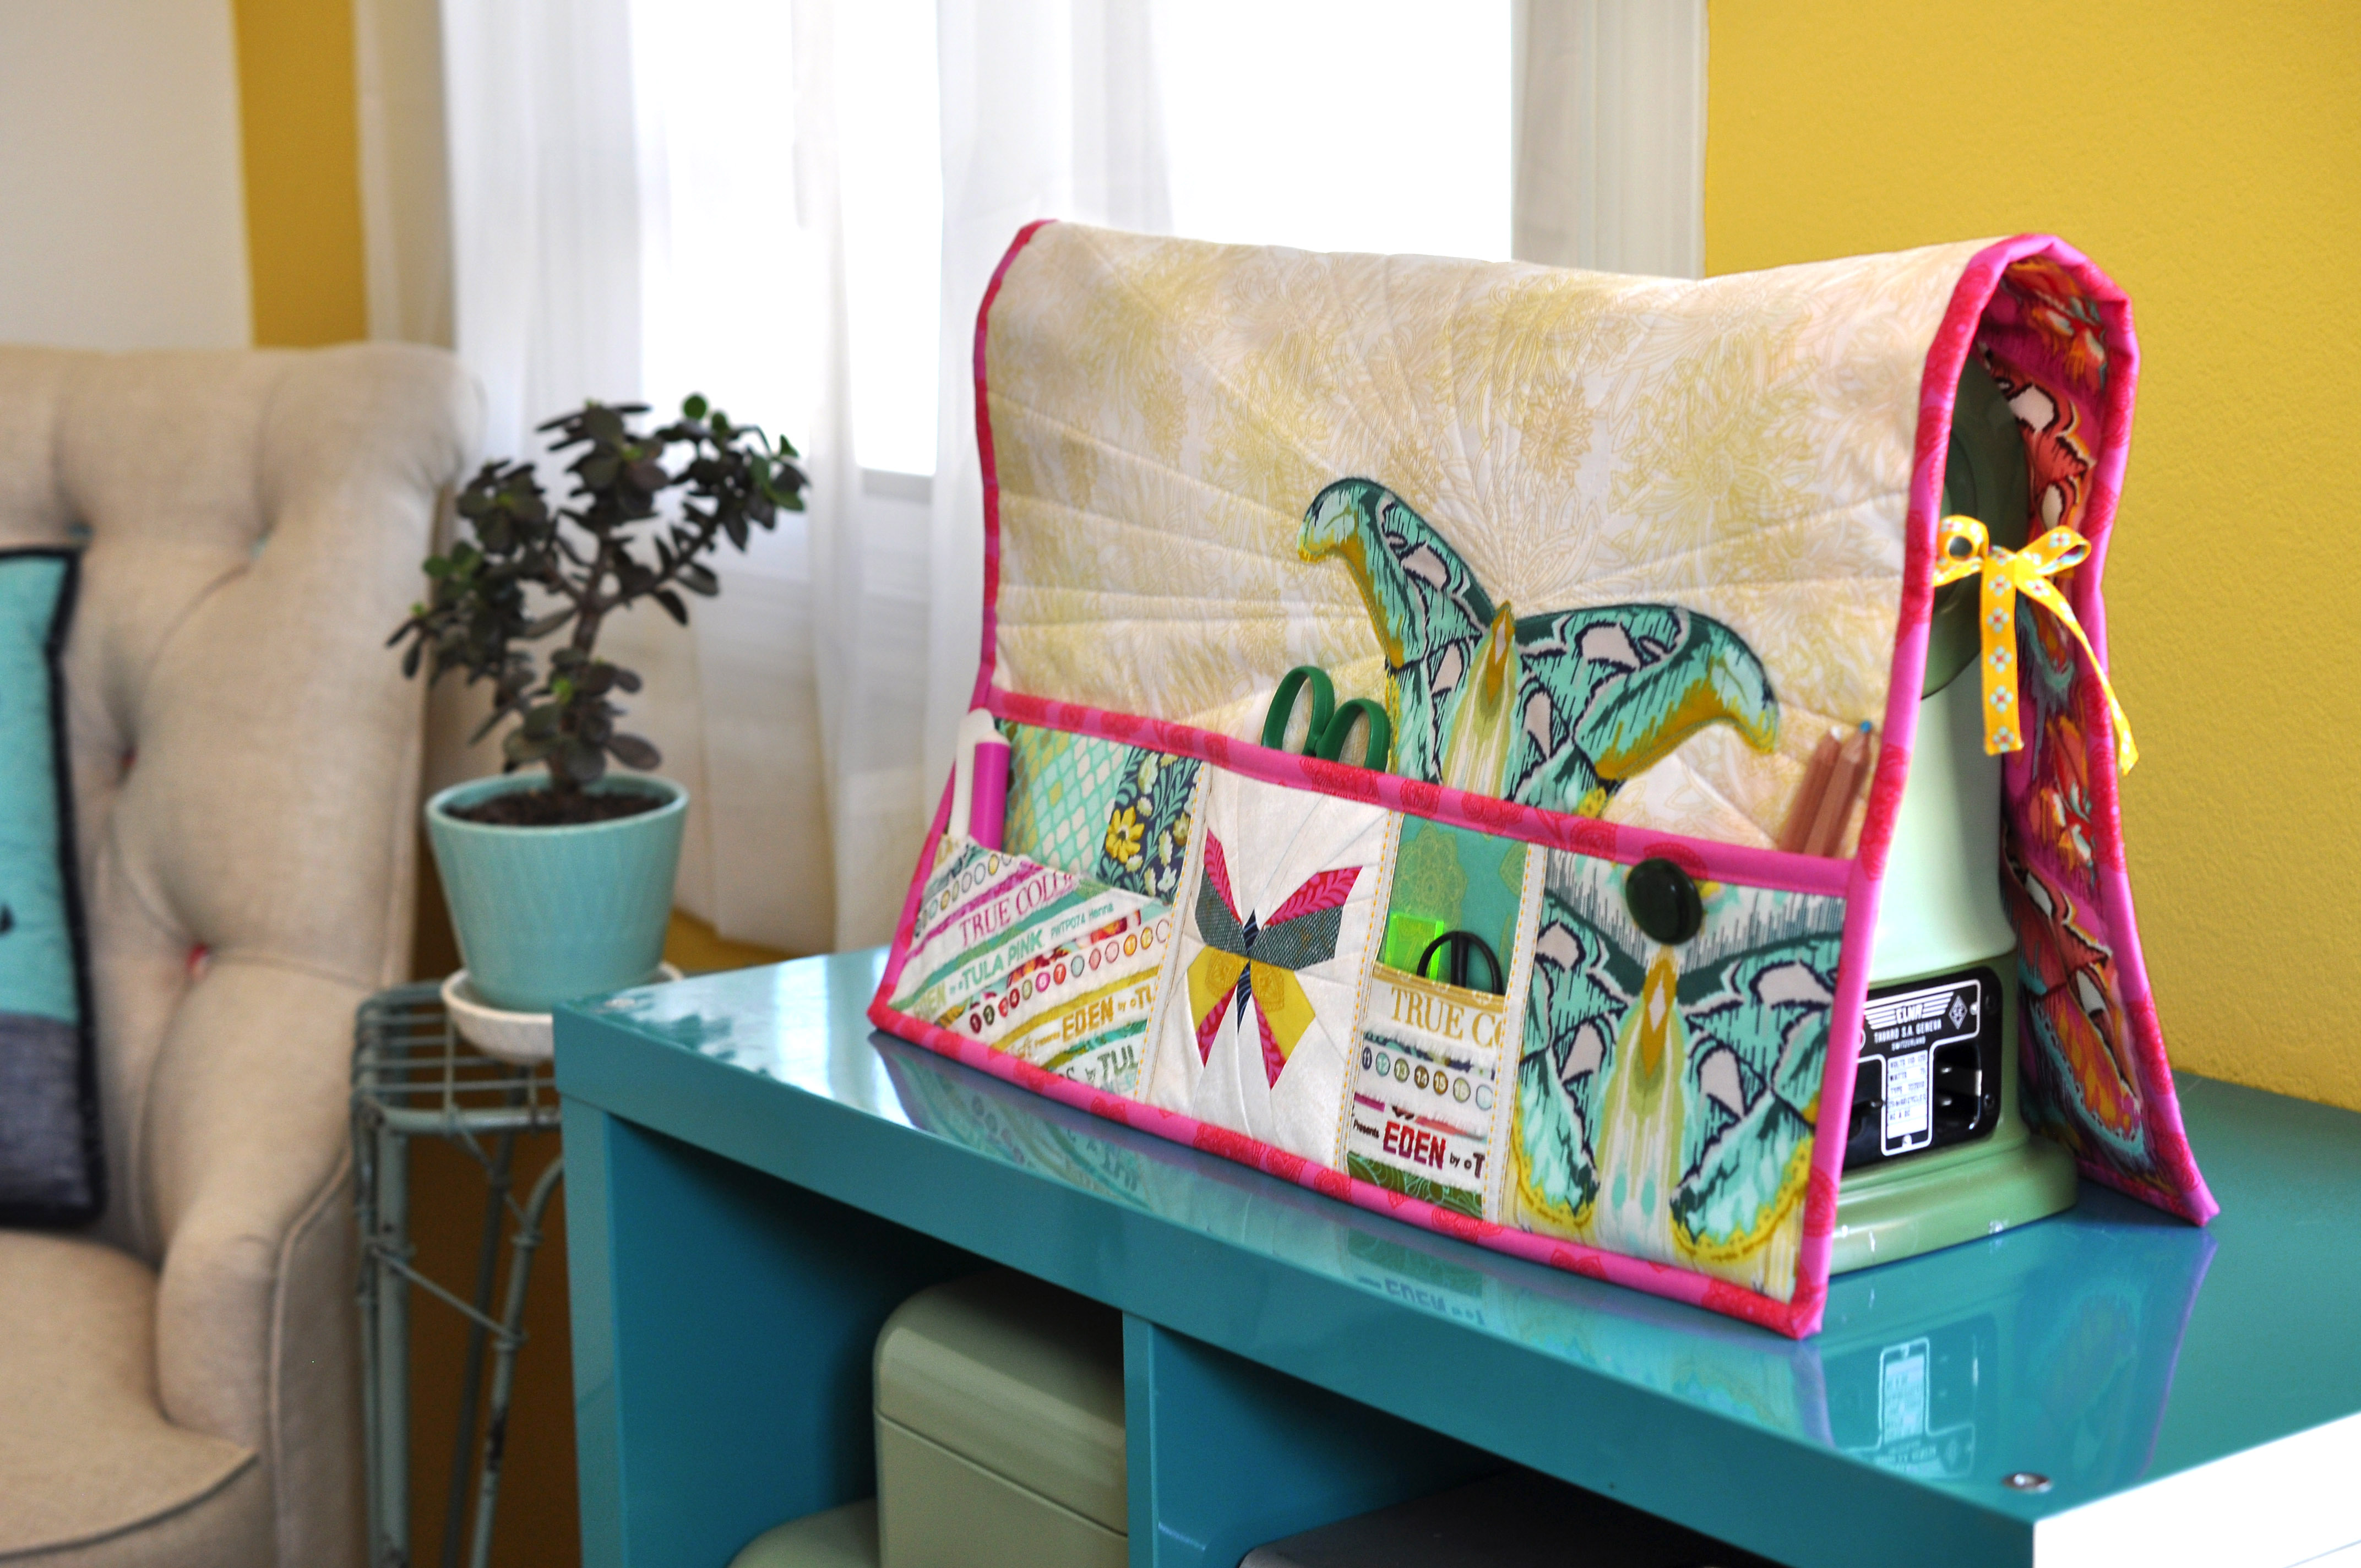
Now get busy creating your Take Wing butterflies and be sure to share your photos with #takewingpattern because I have an awesome giveaway coming up for everyone posting progress or finished photos of their pieces. Up for grabs is a handmade fabric stuffed with over $200 of sewing tools, notions and fabric!

Stay tuned for more details coming soon!

(Take Wing Pattern available for direct download here)

Take Wing Pattern now available!

blog main

Happy Monday, all! I’m so excited to say that my Take Wing pattern is now available for instant download. Are you excited? Or am I just a nerd? I’ve put many hours and lots of love into creating this pattern and I hope you enjoy sewing it as much as I did! (or I should probably say do, because I’ve currently got three more in the works.)

Click here to purchase an instant download PDF from my Payhip shop
(it is international and VAT tax friendly, wahoo!)

You can also purchase the pattern from my Etsy shop here, but because of the VAT tax laws, the PDF will not be an instant download, but will be emailed to you after purchase.

This pattern is for the intermediate sewist with paper piecing experience and the finished size is 24″ x 15″. Ultimately, there isn’t anything too complicated about the piecing or the assembly, but there is a lot of pieces to manage and some angled seams to sew together. That being said, an advanced beginner could probably take on this project as well.

For those who are new to paper piecing, I’m working on a mini Take Wing that will be smaller, simpler, and include full foundation paper piecing directions. It can stand alone but will also include directions on how to combine it with the original for even more fabulous quilt, so stay tuned for that!

I’ll also be posting lots of photos and helpful tips here and on my instagram and facebook pages, so be sure to follow me or check the hashtag #takewingpattern for these and more inspiration from others creating the pattern.

Speaking of inspiration, I’ll wrap this up with a little to get your creative juices flowing! Here are three versions created by my testers, aren’t they amazing?

becca final edit

They really showcase the wide fabric and color possibilities you have with this pattern. The above was created by Becca Cleaver (@cleaverr). The constellations in the background are just amazing!

charlie final

This one was created by Charlie Dunn (@travelingcharlie79). She added a border to the pattern and I love the way it really makes the colors pop.

alissa final

This one was created by Alissa Lapinsky (@alissalapinsky). The splashes of red and chartreuse are so beautiful and the texty background is one of my favorite prints.

And here are some of my colorings for versions I’m working on. As soon as I get a couple more minis made up, I plan to make a quilt with nine butterflies. Honestly though, planning the colors and fabrics for that is kind of making my head spin!

place pink orange

The above shows one color palette, six ways. Which is your favorite? Below you’ll see my version of a monarch, a swallowtail and two monochrome options.

Screen shot 2015-03-09 at 7.59.50 AM

If you have any questions about the pattern or need any help along the way, please don’t hesitate to contact me through my site here or DM me on instagram or facebook. I can’t wait to see all your creations!

take wing on shed edit