

It’s time to kick off the 2019 Undercover Maker Mat Sew Along! I’m thrilled that so many of you are joining in. This is my favorite sew along because I love seeing all the personality that people put into their projects, plus it’s just awesome when I hear how much everyone loves having it and using it!
If you’re just tuning in, you can download the free Maker Mat pattern here. This sew along is open to everyone, there’s no sign up or obligation and anyone is free to join in at any time. I’ll be following the schedule outlined here sharing tips along the way, but you are welcome to sew at your own pace. There will be some amazing prizes up for grabs, too, and everyone who posts their progress photos and finished pieces on social media with the #undercovermakermatsal2019, #undercovermakermat and @lillyellastitchery will be eligible to win! Every post counts as an entry and winners will be drawn at random.
This week we’re pulling fabric and sewing up the main body of the mat. Today I’m going to talk about how to customize the size of the Maker Mat to fit your specific machine and then later this week I’ll be sharing a tutorial for adding a machine handle hole to the body. This is also something you can do to any finished mat if you’ve made one previously.
· · · · · · · · · · · · · · · · · · · · · · · · · · · · · · ·
SIZING YOUR MAT
The finished mat as it is designed in the pattern measures 20″ wide by 23″ long. This size was based off a couple machines I had on hand and what felt good to fit on a variety of tables. This size can be easily changed if you find that you need a larger or smaller mat to cover your machine or fit on your work surface. I just got this adorable little travel machine, so I’m making a tiny mat to fit it. Aside from determining the size of your main body, the only other change you’ll need to make to the pattern is adjusting the width of the pocket panel, which I will cover next week.
A couple things to consider when sizing your mat. If you plan to use it as a mat under your machine and also a cover, you will follow the steps below for measuring your machine, but you will also want to think about the table you’ll be on when using the mat under your machine. You may need 25″ or more to fully cover your machine, but may find this leaves too much mat on your table that you don’t have room for. If this is the case, perhaps consider a happy medium. The cover does not need to fully cover the machine to be functional.

To customize the size of your mat, start by measuring the width of your machine and deciding if you’d like any “extra”. The base of my machine measures 13″ across, but since the hand wheel sticks out a bit farther, I’m going to make my body 13.5″ wide.
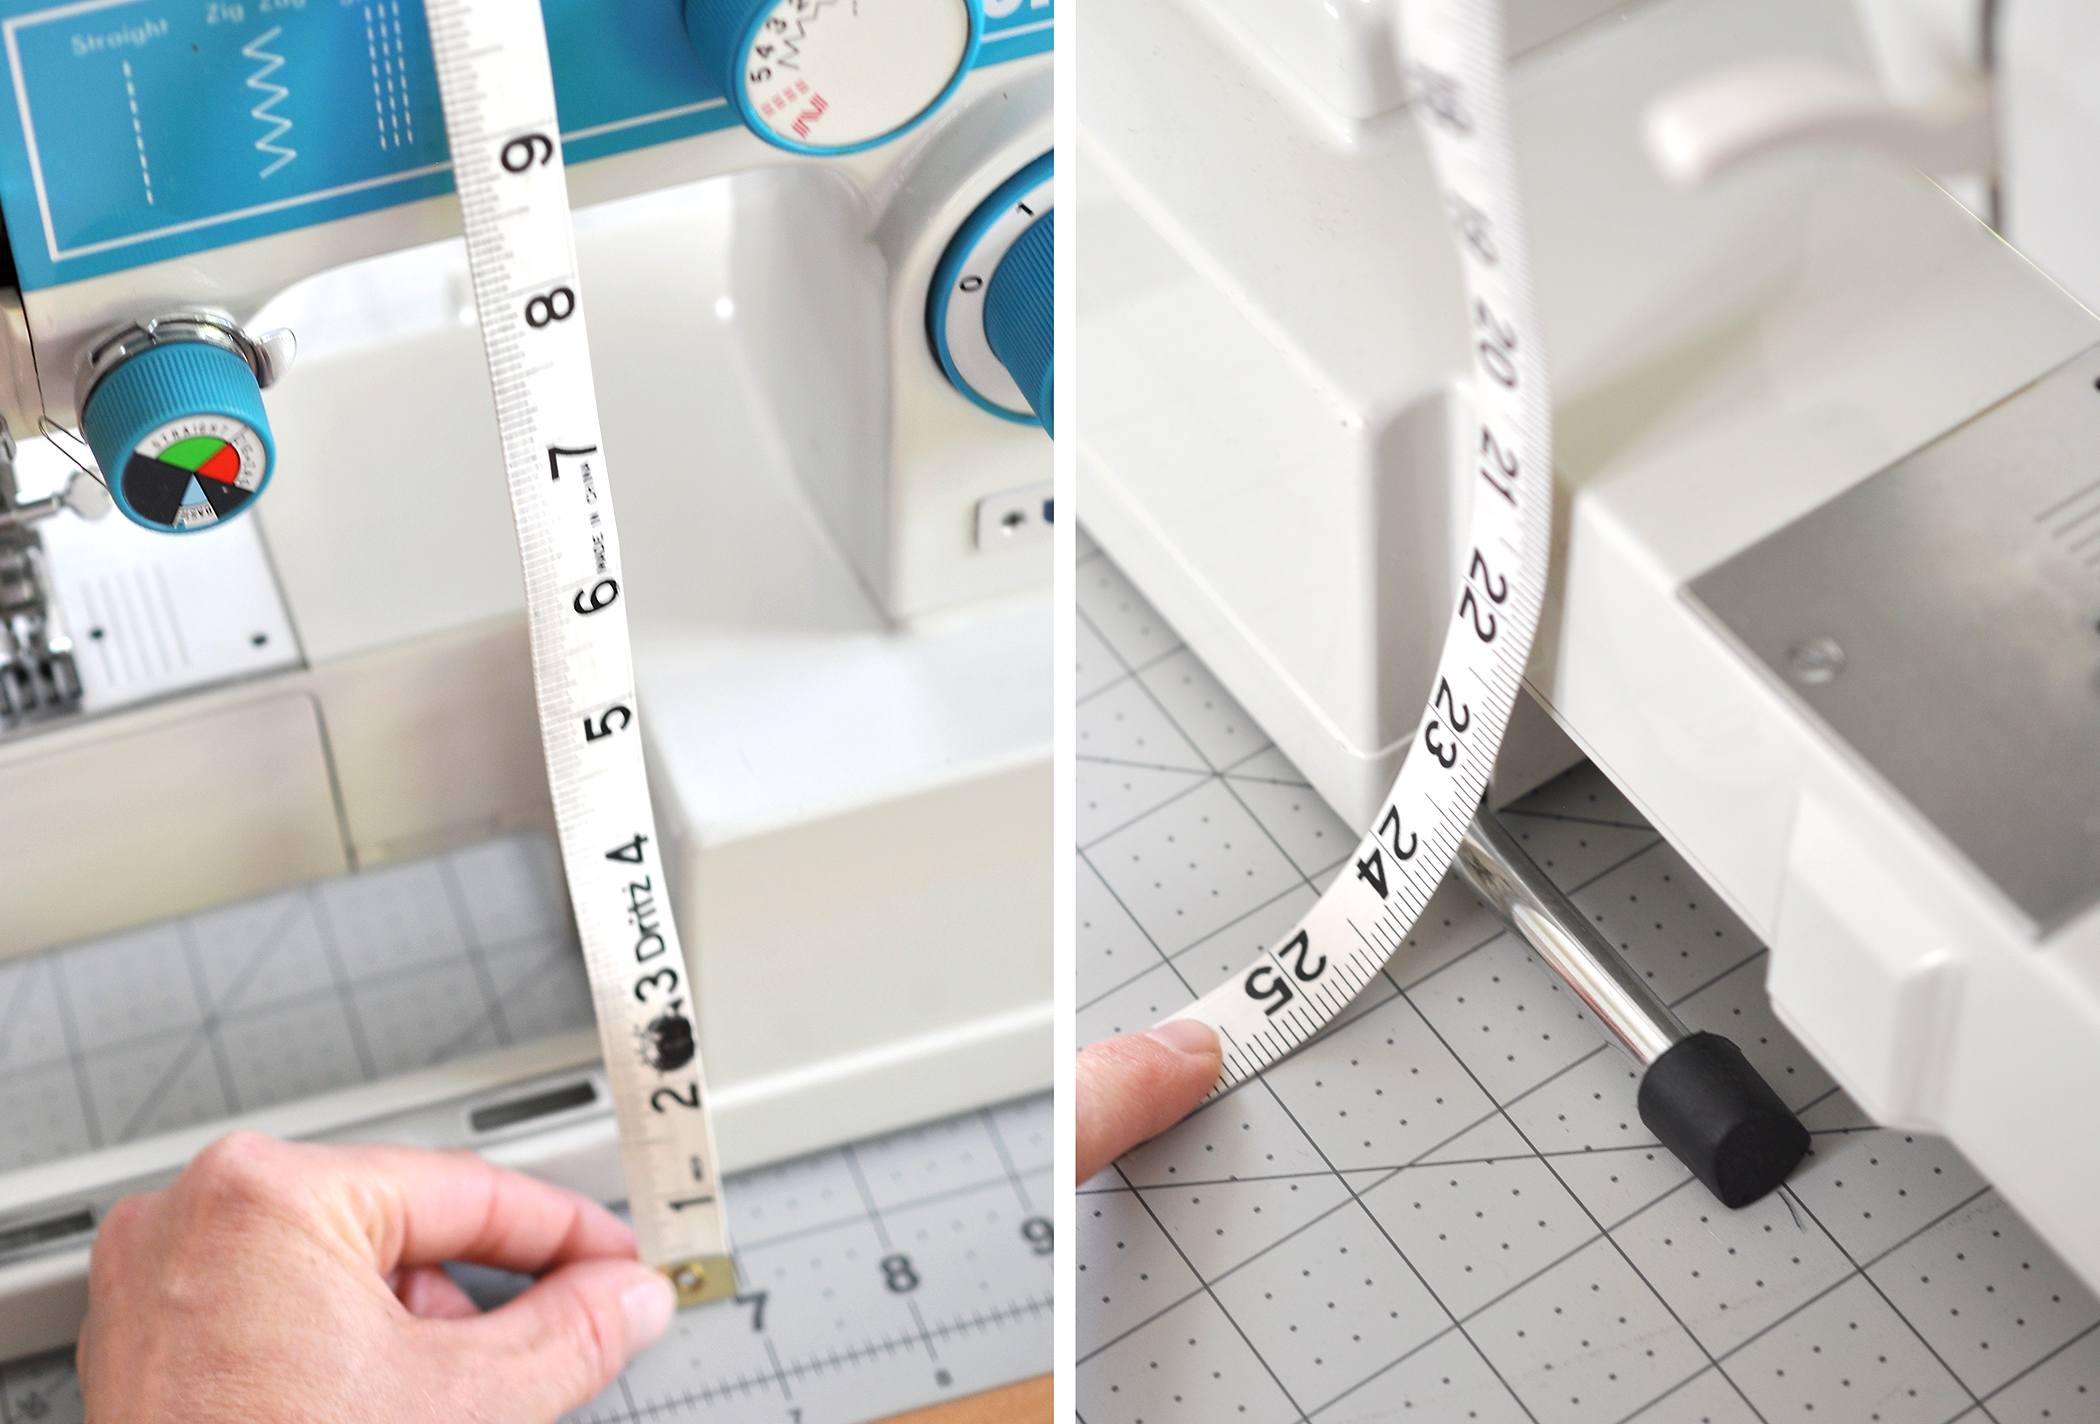
Next you will measure up and over your machine. You will want to leave a little slack in your tape or add a bit to your measurement to account for a little bulk in the body once it’s quilted. I left some slack in my photos above, so I’m going to make my mat 24.5″ long. If you do not plan to also use your mat as a cover, then you do not need to worry about this measurement and can stick with the original 23″ length in the pattern, or measure your table and decide what size you like.
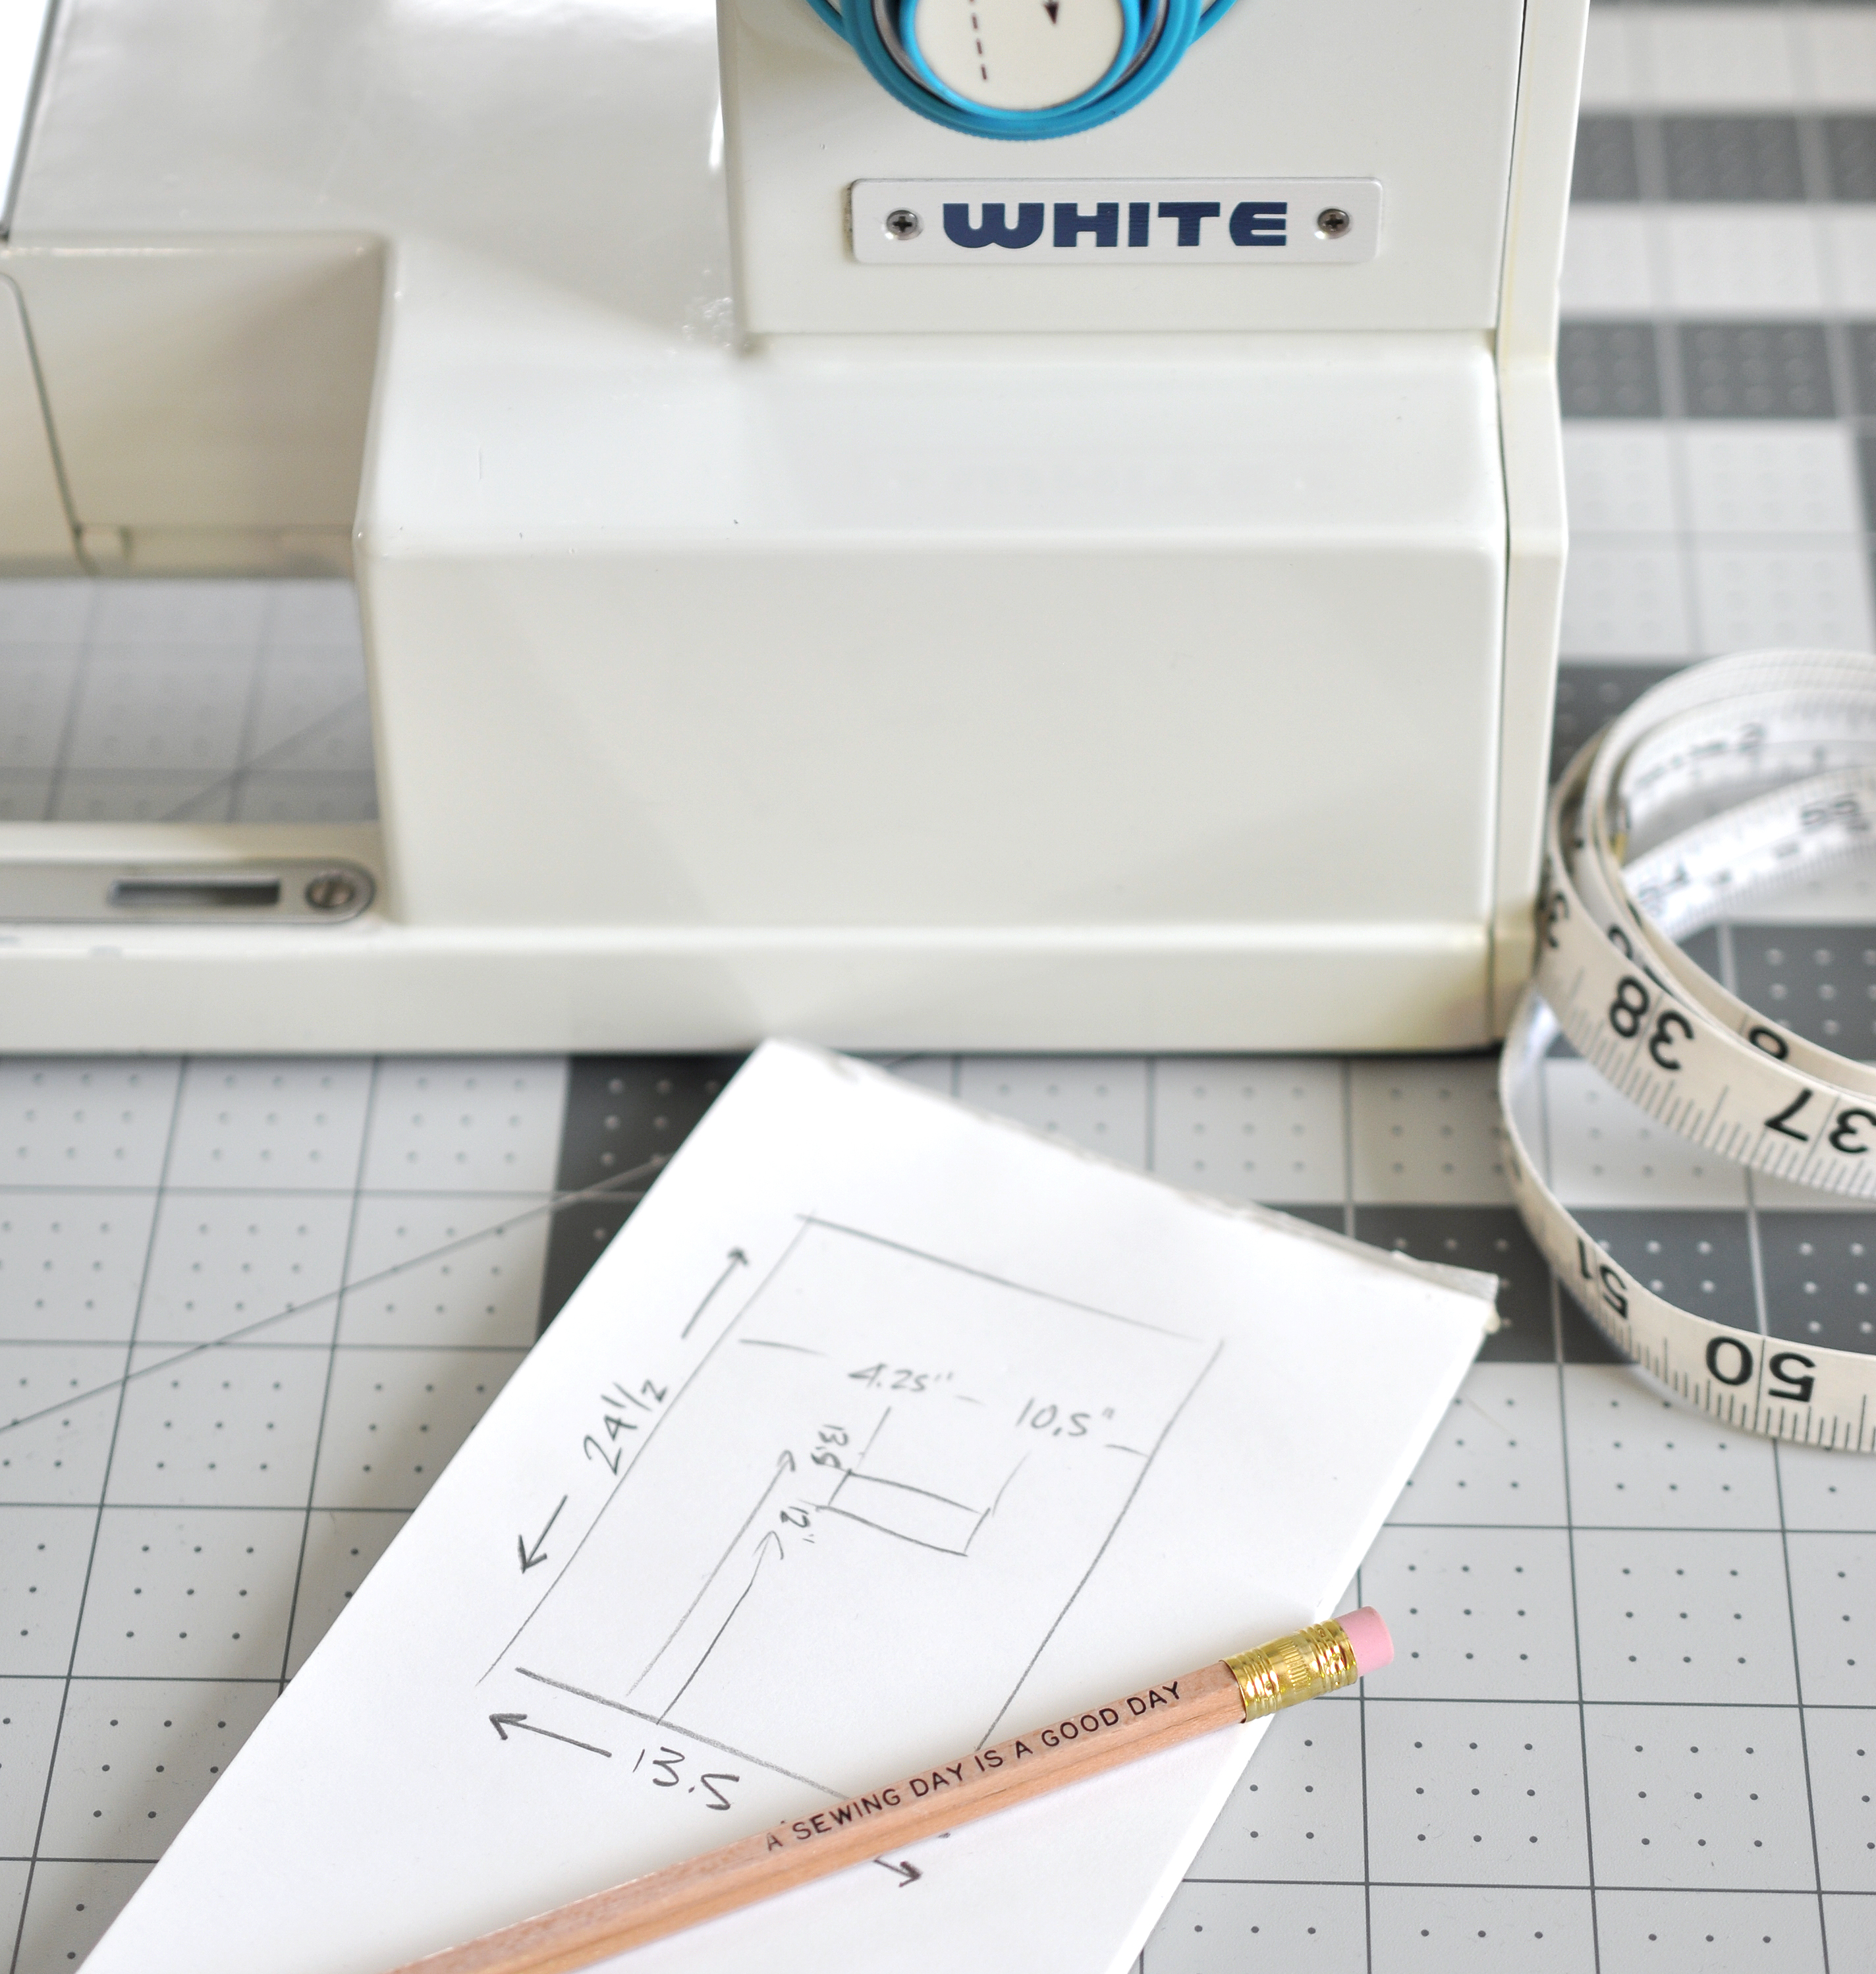
I’m a visual person so I like to make diagrams of my measurements. Above you will also see my handle hole measurements, but I’ll cover that in more detail later this week. So, to fit my machine, I’ll be making the main body of my Mat 13.5″ wide by 24.5″ long vs the 20″ x 23″ specified in the pattern. (I may choose to add a bit more to the width, just to have some extra pocket space, but I don’t want the sides too “floppy” when it’s covering the machine since I’ll be traveling with it.)
As I mentioned, if you change the width of your mat, you will need to equally add or subtract measurements when making the pocket panel pieces. I will cover this in more detail next week, but for those who like too work ahead, an easy way to do this is to simply add or subtract from one of the end pockets and keep the inner pocket dimensions the same, but you can, of course, adjust them any way you like.
· · · · · · · · · · · · · · · · · · · · · · · · · · · · · · ·

FABRIC PULL
This is a piece to have fun with! I usually go with a subtle background so that I can really have fun with the pocket panels, but I’m going to change things up this time. Since my mat will be smaller for this machine, I’m going to make my pockets a little simpler. I will use some prints and perhaps piece one panel of stripes, but I’m going to use that super fun focal print from Alison Glass Handiwork as the body with the bright blue mariner cloth binding.

This is pretty much how I make decisions on fabrics, I try to lay things out as best I can and just step back to take a look. This time when I stepped back, I tripped right over my space heater and conked my head, but I don’t really need ALL of my scalp anyway.
· · · · · · · · · · · · · · · · · · · · · · · · · · · · · · ·
TUTORIALS FOR BEGINNERS
If you’re a sewist, but new to quilting, don’t fear! The body of the Maker Mat is a great first project to dip your toes into the world of quilting!
To create the main body of the Maker Mat, you will need basic knowledge of how to layer your top, batting and backing and how to do the quilting stitches. This tutorial from Suzy Quilts covers all the basics. It applies to a large quilt, so working with your main mat body will simply be a smaller and simpler version! Straight line quilting is a great design for beginners, or a crosshatch is a always a nice option, too. I’m not sure its mentioned in the tutorial, but I love using a Herra Marker (a bone folder or scoring tool also works similarly) to mark my quilting lines, especially for something like a crosshatch. Here is a video on using a Herra Marker.
Another quilting technique you will need to know comes at the end of the body and that is binding. This is the little edge “wrap” that goes around the entire piece and seals everything up. Here is a helpful tutorial from Bluprint.
· · · · · · · · · · · · · · · · · · · · · · · · · · · · · · ·
So this week share photos of your fabric pulls and your main body progress and be sure to use #undercovermakermatsal2019, #undercovermakermat and @lillyellastitchery when posting! Tomorrow I’ll start sharing some of the amazing sponsors and prizes I have lined up!

Great blog youu have here
LikeLike