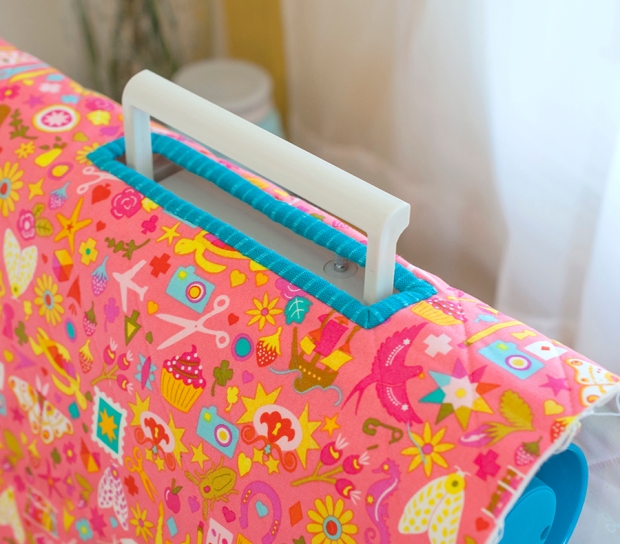
Honestly, I’ve been wanting to do this tutorial for adding a handle opening to the Undercover Maker Mat for YEARS… but I feel like that’s basically the story of my life! For all who have been waiting, I appreciate your patience! Once great thing about this is that you can add it at any time to any mat – finished, or not. It’s sort of an afterthought, per say, and doesn’t affect anything in the pattern.
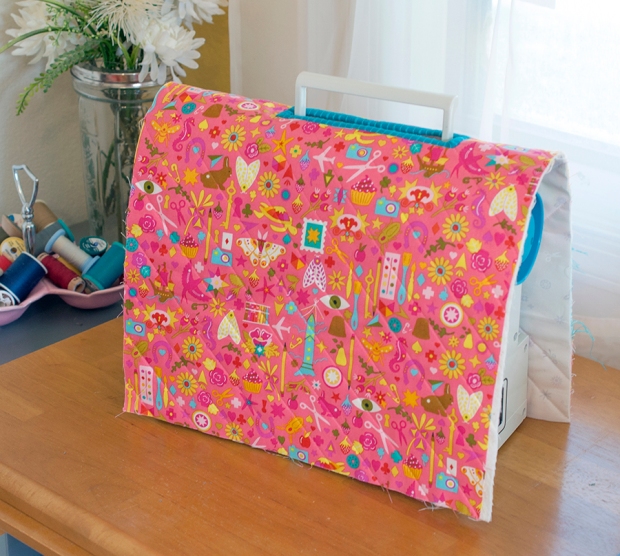
Most of my machines do not have handles, so this new little travel machine came into my life at just the right time! This process hurt my brain just a teeny bit, but in the end it’s really pretty easy! I’ve done my best to capture it in photos and I hope it will all be easy to follow (and I think it will once you’re actually doing the steps), but if you have any questions, never hesitate to contact me here or through social media.
This tutorial is for binding the handle opening, however, if you are familiar with facing, that technique will most certainly work for this!
Just one note, I cannot guarantee that this tutorial is detailed enough for complete beginner sewists who are working on this project. There are no complicated techniques, but you may need to familiarize yourself with basic binding techniques to understand some of the terminology and techniques used.
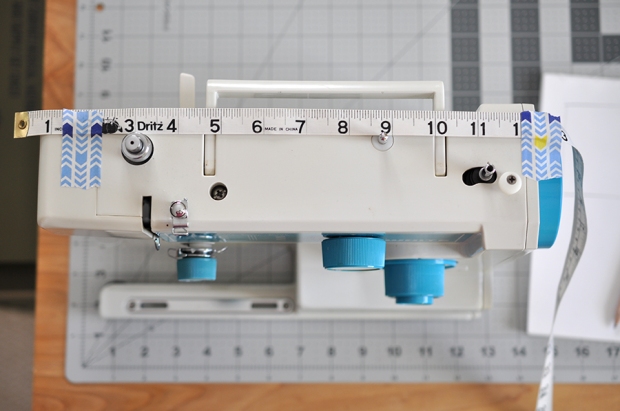
The first step in planning for your opening is to measure, then measure again, then measure about 17 more times. I’ll tell you it is PAINFUL to cut into your precious quilted body, so be sure to check yourself! I took so long doing it that my husband started to make fun of me, but it was worth it. Keep in mind how wide your mat is in relation to your machine and be sure to place your measuring device accordingly. You can see how mine is hanging off the edge a bit. You will need your opening to be just large enough for your handle to slide through. Mine ended up being a little less than 6″ by 3/4″. Your binding will only shrink the opening a very small amount, so you don’t need to take that into account. Also remember, you can always cut the opening larger, but you can’t make it smaller!
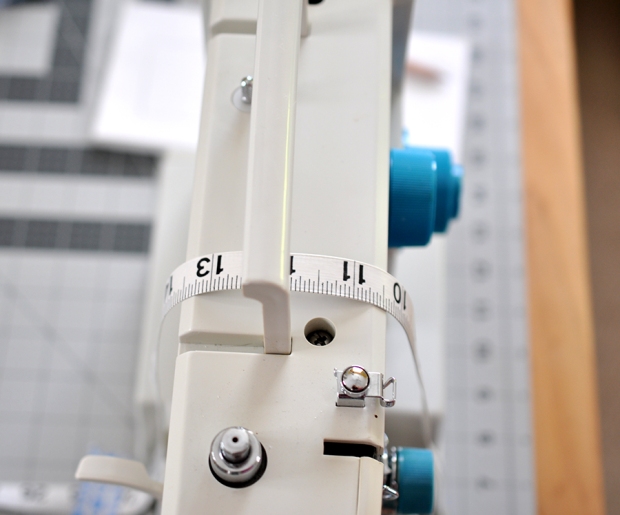
When you measure the placement of the opening around the height of the machine, be sure to leave some slack in your tape to account for the bulk of your quilted body. I used the bobbin winder pin on the top of my machine as a gauge. To double check my measurements, I placed my mat body over my machine and placed the tape measure on my mat. I felt the bobbin winder pin through the mat and noted where the tape measurer hit it. I then removed the mat and placed the tape measure in the same spot on the bobbin winder pin and checked my measurements against the handle. Every machine will be different, so figure out what method works best for you in determining your measurements.
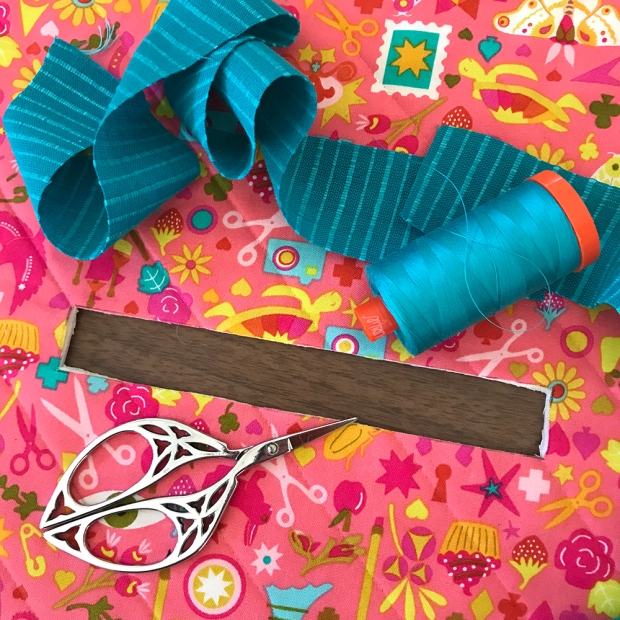
Once you have your measurements, mark them on the body of your mat with an erasable pen or your preferred method and then check your placement again by placing the mat over your machine and feeling through it as best you can to see if the handle is lining up. Then its time to cut! Terrifying, I know. You can do it!
Now will you bind the hole. It’s much like binding the outside a quilt, but you handle the corners differently since they are inside. We will be using a single fold binding method. Cut a piece of binding fabric 1.5″ wide with the length being the diameter of your rectangle plus about 4″.
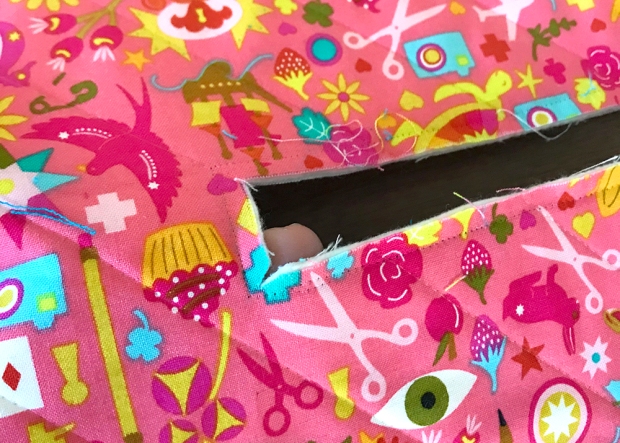
First, you will mark 1/4″ all the way around the outside of your rectangle on the top/outside of your mat. You will see in my photo above that I have stitch lines 1/4″ around my rectangle. This is from my initial failed attempt at binding that I tore out :D! Since I could see the lines, I did not need to use another form of marking, but you can use an erasable pen or you use a basting stitch.
Next you will clip diagonally into all four corners just shy of your 1/4″ marks as show above. You will now sew the binding down.
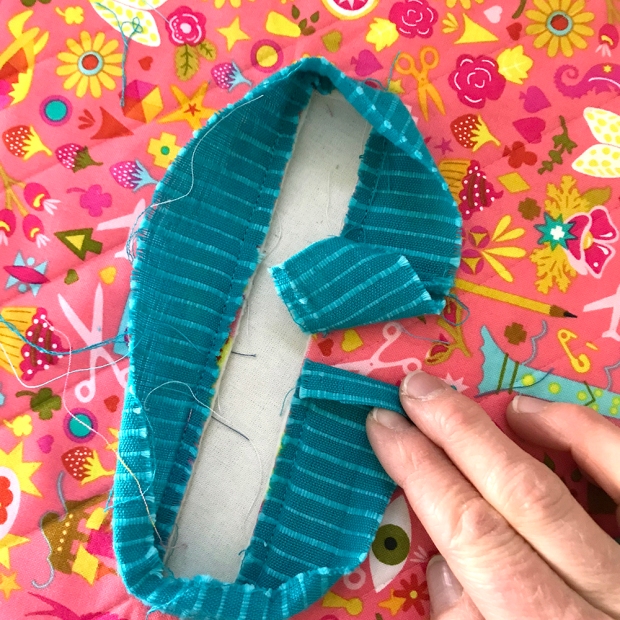
You will begin sewing the binding down along one long edge of your rectangle. I did not get a photo before I started sewing, so we’ll use this photo above as a reference for placement. Leave a small tail of unsewn binding for finishing later.
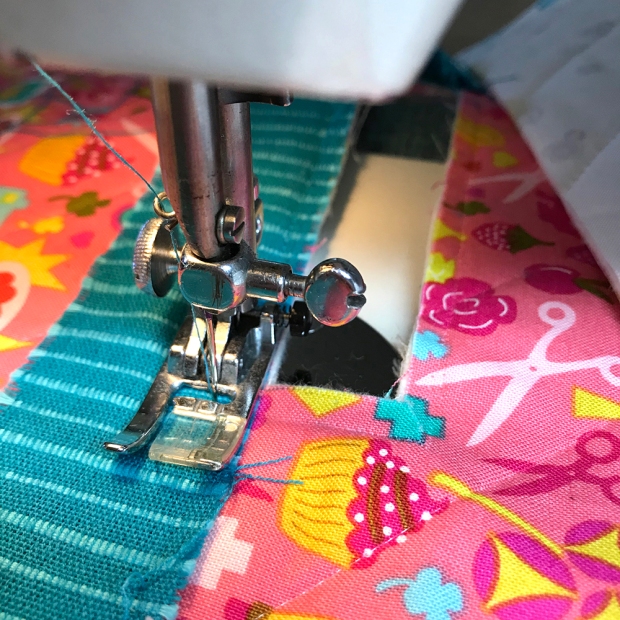
You will place your binding right side down onto your mat body and sew with a 1/4″ seam allowance. When you get to a corner, continue sewing 1/4″ past the opening of your rectangle, which will be indicated by your 1/4″ marks around.
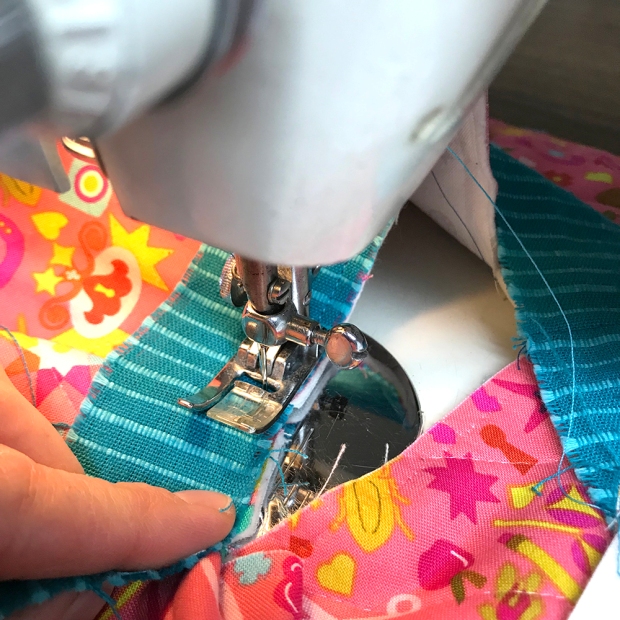
Here’s where it gets just a bit fussy. It’s not difficult, it just takes a bit of finagling under your machine. With your needle down, lift your presser foot and pull the short side of your rectangle opening toward your presser foot so it is in line with the seam you just sewed. The little snips you made in the corners will allow you to do this.
You will then continue sewing your binding strip in a straight line onto this side. If this seems confusing when reading it, I promise it will make sense once you’re sewing. You will continue sewing all the way around your opening, repeating this process on all four corners.

When you get back to where you started, press one end of your binding strip back about 1/4″ and then lay the other end on top of it, trimming it about 1/2″ to 3/4″ past the overlap. Pin in place and finish stitching the seam securely.
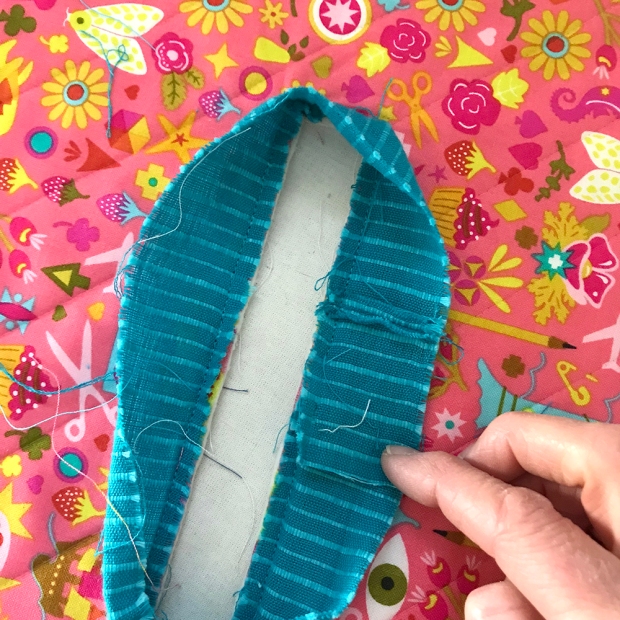
Now it’s time to press and turn the binding to the backside. Once complete, you can hand or machine stitch it in place, just as with an outer quilt binding.
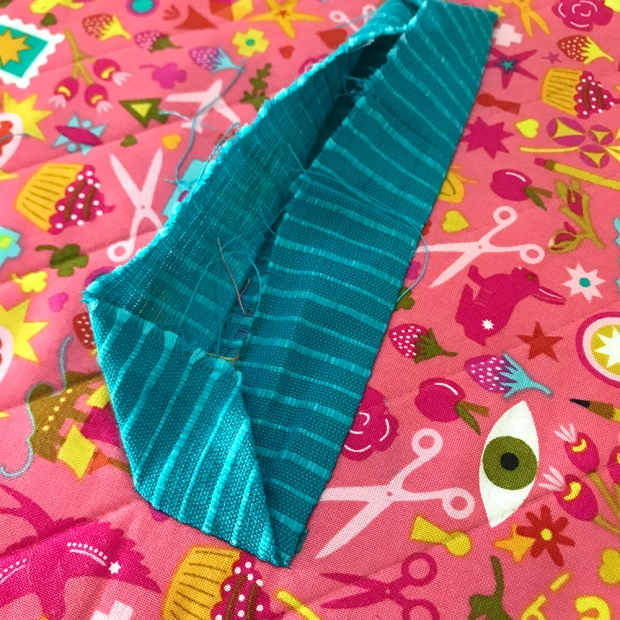
Press your binding along the seam toward the hole opening to help it lay flat. You will now miter the corners working on one side at a time. First press one long edge inward and then miter one corner of a short edge as shown above, folding the outer point in to form a 45° angle and press.
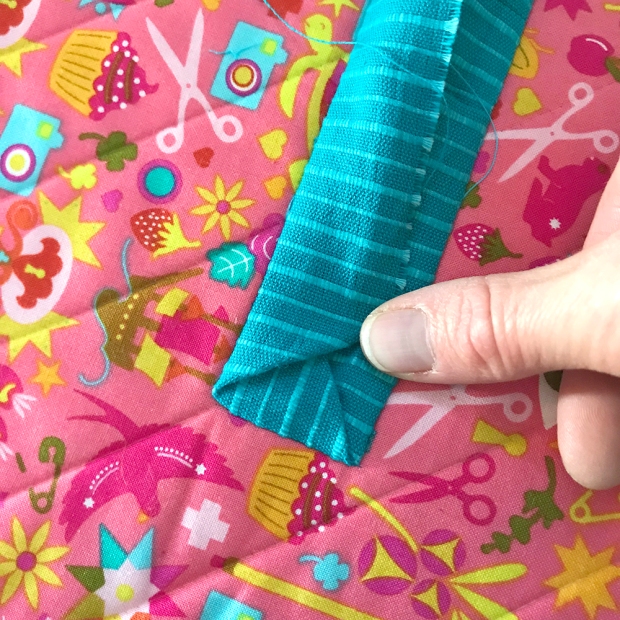
Next, fold the other long edge in mitering the corner in the same way and press. Repeat with the other side of the opening.
You will then turn the binding through the opening to the underside of your mat and you will work on pressing and mitering that side. Don’t worry about your miters staying perfectly in place. Just make sure you gave them a good press before turning and they will fall back into place.
If you’re opening is small (and even if not), you may find the next steps a bit fussy, but just take it one step at at time, and you’ll get it done!
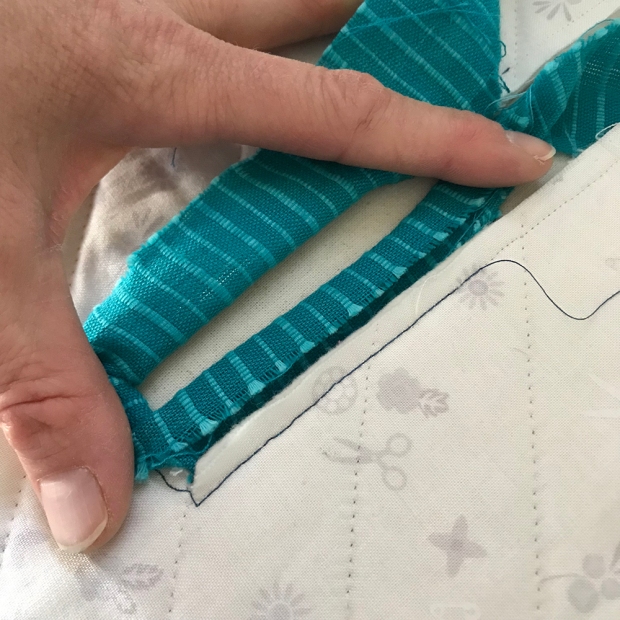
Working along one edge at a time, fold the binding strip onto itself, wrong sides together, up to the edge of your opening and press. Repeat for all four sides and feel free to use some glue to help keep it down!
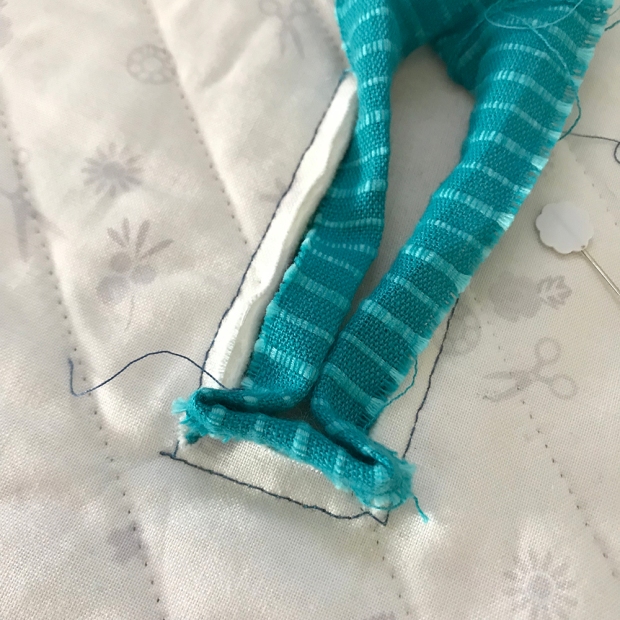
Your piece will now look something like mine above once all sides are pressed. The Mariner cloth I am using was getting a bit frayed because of it’s loose weave, so I had a little trouble keeping things “crisp” for the photos.
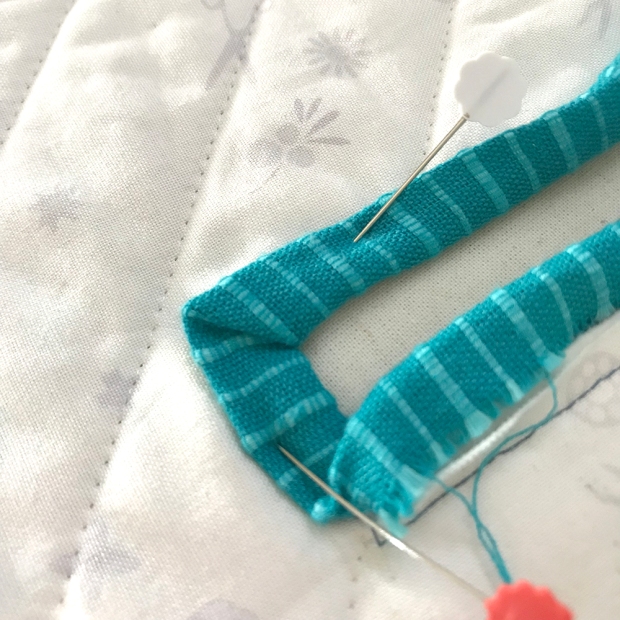
To miter the corners on this side, first press one folded short edge down onto the mat down body. You will see above how the miters start to form with the one sides. Next press the long side down onto the mat, mitering the corner into itself as you can see above.
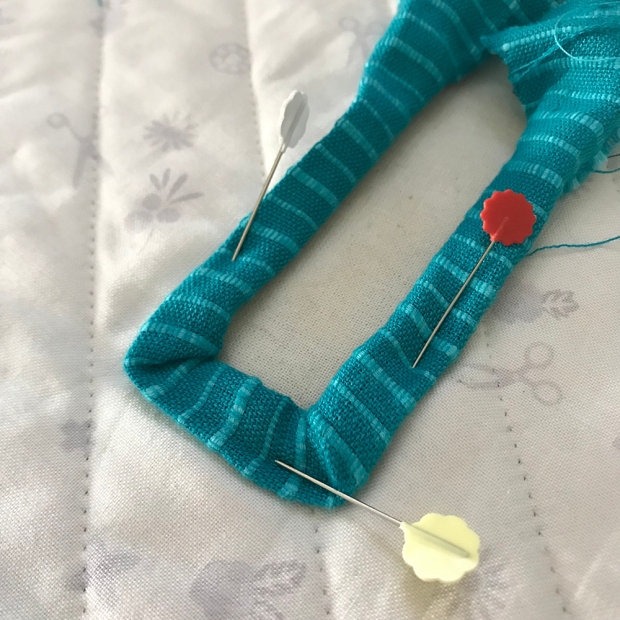
Repeat this step for all four corners, using pins or glue to help keep everything in place. It likely will not be perfect, your corners may be a little sloppy or your wrap around may be a bit uneven, but no one will see it, so don’t stress!
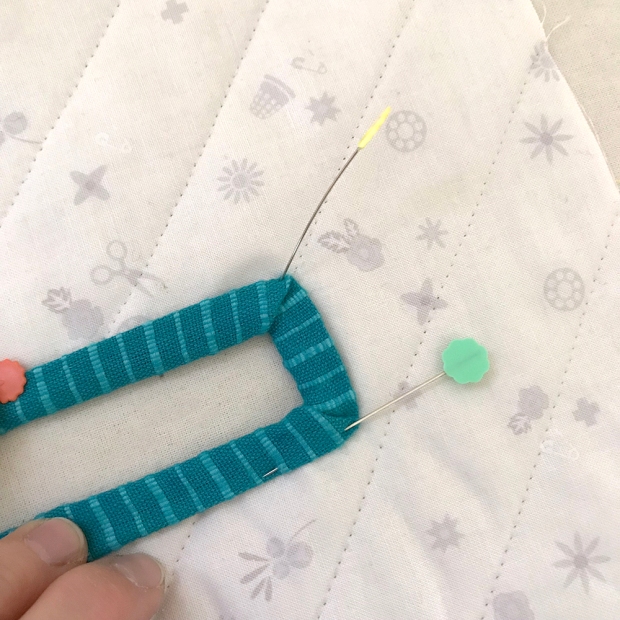
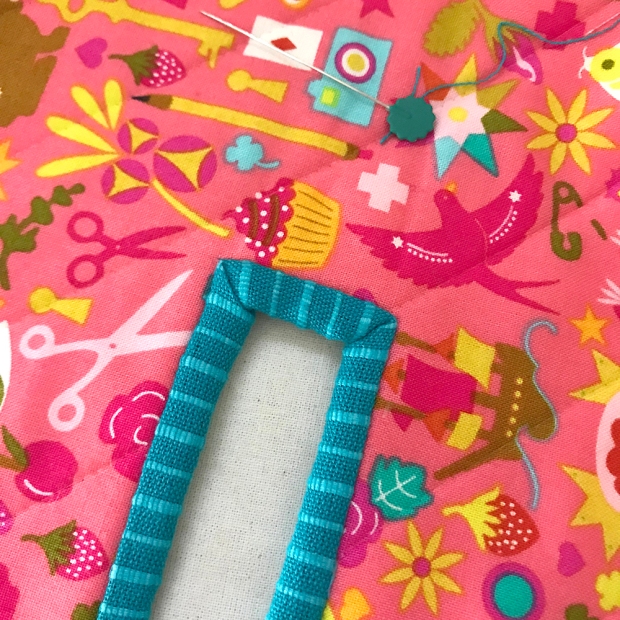
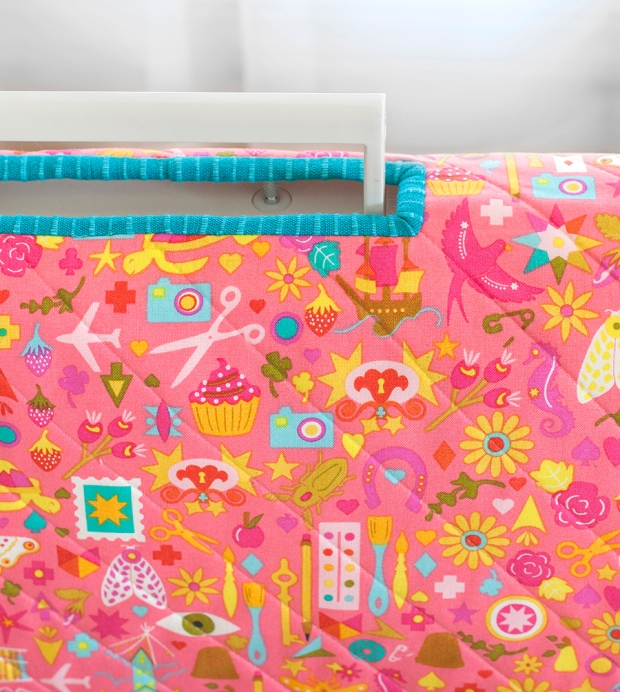
Finally, check that your miters are in place on the front of your mat and hand or machine stitch the binding in place. Now step back and admire your work as you look around for anything else you can cut a hole in!
I hope you have found this down & dirty tutorial helpful and useful! I’m so pleased with how it worked out on my mat and I hope you are, too.
I’m a bit behind schedule on the SAL, but I’ll be sharing some tips on the pocket panels in a couple days so stay tuned! Also, if you’re just joining in, you can find the free pattern and all the details here.


One thought on “Maker Mat SAL – Adding a Machine Handle Opening”