

Howdy, friends! Sheesh, this blog has been neglected. Some days I feel bad and others I don’t because most people have the attention span of a goldfish these days and blogs aren’t what they used to be. Still, I love to have a space to share more than a few words and one photo of something, regardless of who ever reads it!
Life has been extra crazy lately, but I squeezed in a few days of hand stitching recently because I needed to create something beautiful for myself. I stitched up the new Brimfield Meadows block from Brimfield Awakening and HOT DOG! I couldn’t be happier with it. It was quick and fun to sew, it came together like a dream and it’s such a unique and beautiful shape. I used Sleeping Porch lawn to match the bed quilt I’m working on and plan to make a pillow out of this block to go in my bedroom.
While I’m here, I just wanted to share a few things I loved about this pattern and how I sewed up the variation I chose. I’m also going to talk a bit about some of my favorite notions for English Paper Piecing, because I often get questions in my social media posts. I am by no means an EPP expert, but I have experimented with a variety of threads, basting techniques and stitching methods, and definitely have my favorites that I think yield nearly flawless results.

Above are just a handful of the fabric placements I was playing with for this block. My final block matches the top left diagram above. You can see all the separate segments of the pattern and how I chose to combine two or three pieces in areas to create one larger piece. I love how you can do this to change the final look of there block, use larger fussy cuts, and make the stitching go quicker!
I simply taped some of the segments together to create the larger units. Note that the outer most tip of every “petal” is perforated on the paper so you can use them whole or split them as I did. Also, another design variation that isn’t shown above is different arrangement of those center “orange peels”. You can flip them 180° from how I used them, sew them up as one unit or even leave half or all of the segments out completely, letting your background show through. You can check out the hashtag #BrimfieldMeadows on social media to see some beautiful examples of all these variations.


While this photo above may look like someone’s unmade bed, it’s how I audition fabrics. If you look close you can see the method to my madness! I’m a total planner, so even when I say I’ll just “wing it”, I always end up making diagrams and taking pics of piles of fabrics to help me plan things, or at least start in the right direction.
· · · · · · · · · · · · · · · · · · · · · · · · · · · · · ·
TIPS & TOOLS
Basting curves was new to me, and it took me a couple tries to figure out the best order of basting down the sides, but once I did, it was really easy! I basted the concave edge first, then pulled the convex edge as needed to make it smooth, and did the two straight sides last. I cut small notches to help with the concave curves which you can see below. As I mentioned above, I used small pieces of tape to connect the paper pieces and create the larger units, which you can also see below.


When I first started EPP, I would thread baste, mainly because I didn’t have glue basting supplies and didn’t feel like researching how to do it! I tried glue basting because it seemed to save time and it did not work for me AT ALL! The problem was that I was applying the glue all the way to the edge of the paper and I couldn’t grab my fabric to stitch it. I watched some amazing tutorial videos from the queen of EPP Karen the DIY addict and it changed my glue basting life! I watched her apply the glue a bit in from the edges and it was like a “why didn’t I try that?!” kind of moment, but it works like a charm and I’m all glue now! I prefer to use a glue pen (such as Sewline or Fons and Porter).

When it comes to stitching all those pieces together, I also tried many methods and many threads! If you know me at all, you probably see what a perfectionist I usually am, so visible stitches drive me BONKERS! Though I have learned that sometimes this is on purpose to show consistency? Regardless, it’s not for me. Once again, Karen saved my EPP life with her flat back stitching tutorial. You can see in the photos above of the back of my block that my stitches are by no means consistent or perfect, but you can see directly above how they are not visible at all from the front. This is the only stitching method I use and while some people think it’s slower than others, I find it very easy and quick. It helps to line up pieces and I love that the stitches are hidden so well.
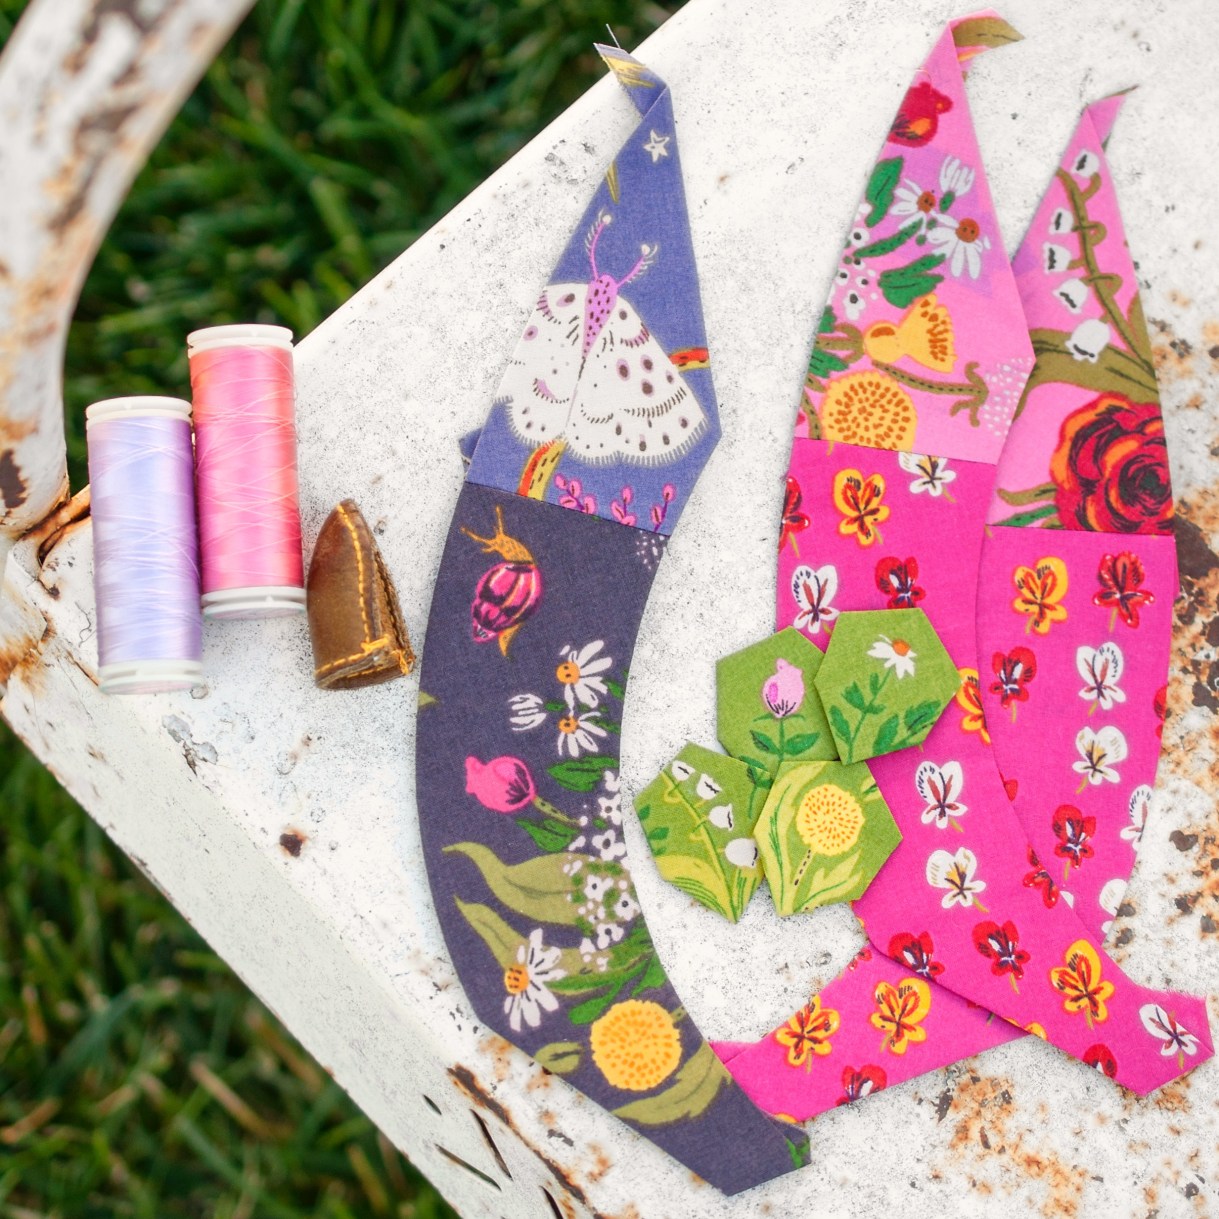
Last but not least, my favorite thread and my favorite thimble! Hands down, I love InvisaFil thread from WonderFil. It is 100wt polyester and virtually invisible. I do double the thread over and sew with two strands simply because I like a secure thread on my needle, rather than a loose tail, but it’s strong enough to be used as a single strand. I have tried 80wt cotton threads and they also work well, but I’m a tight puller and am much more likely to break the cotton thread, but I’ve never broken the InvisaFil. I match my thread to my lighter fabric when possible, but as you can see in my detail shots, it’s not too important since you can’t see the stitches!
My favorite thimble, which I cannot stitch without these days, is the Natural Fit Leather thimble shown above which is from Clover. It comes in three sizes and I wear a small on my middle finger, but I have pretty tiny hands 🙂
So, that’s all I got for now! I hope some of these little tips and resources have been helpful to you. I’ll be sure to share my finished Brimfield Meadows pillow once it’s complete, and you may very well see more blocks popping up because I am in love with this pattern (which you can find here if you’re interested)!
happy stitching!
~ nicole

I am honored to be of help! 💕💕💕💕 As always I love 💜 ur fabric selection. I have learned a little myself here. I need to use illustrator like you do!!!!! THX
LikeLike
Thank you for all of those tips! I just watched the flat back stitching tutorial and it IS a game changer! I’m definitely going to try that method. I’ve also found the Hugs n Kisses Applique Paper https://hugsnkisses.wequilt.com.au/hugsnkisses_applique_paper really helpful for EPP. You don’t need to remove the paper when you’re done. It’s partially water-soluble and easy to work with.
LikeLike